Our distant ancestors were engaged in weaving various household items. Willow twigs, grass and even plant roots were used for this. Today, the technique of this craft has remained virtually unchanged. New materials have just appeared, such as plastic. For those who like to create interesting designs from scrap materials, there is an opportunity to realize their imagination and skills in products woven from newspaper tubes.
Crafts from newspaper tubes for beginners step by step
What you will need
DIY crafts from newspaper tubes require a competent approach to choosing the material you will be dealing with. The lighter the paper, the better, as it is easier to weave with. Give your preference to unnecessary newspapers and non-glossy magazines.
We will also need:
- A sharp stationery knife with which we will obtain strips of paper.
- Using scissors we will trim the ends of the weave.
- A knitting needle onto which strips of newspaper are wrapped; the thinner it is, the better. Wooden or metal will do, as long as it is long.
- A short wooden stick, such as a skewer, to help thread the ends of the weave through each other.
- Two types of glue: PVA for preparing the material from which we will weave and “Moment” for more complex connections in a finished structure.
- The form in which you will paint (if necessary) your tubes. There can be one or several containers.
Coloring
There are two main methods of coloring: coloring the finished product and separately each paper twig. The choice is made by the master himself, depending on the color of the paper, its structure, as well as his own preferences. Suitable for coloring:
- wood stain;
- tint varnish;
- color diluted with primer or water;
- any paint on paper (acrylic, gouache);
- food colorings.
After painting, the finished product is opened with varnish. This will give it strength and resistance to wet cleaning.
Making straws
Next, we begin making the tubes, for which we take half a newspaper spread and, using a black marker, measure out the divisions at a distance of ten centimeters from each other. Using a knife or scissors, cut into strips and take one sheet and set the rest aside for now.
Looking at the photo of crafts made from newspaper tubes, you may not immediately notice, but a tighter twist is used for the base. To achieve this, place the knitting needle on the corner of the strip and start winding the paper at an angle of 45 degrees.
If you need a thinner tube, increase the angle to 60 degrees. When finished, coat the end of the paper with PVA glue, press and remove the knitting needle.
Materials
Old newspapers, glossy magazines, advertising brochures, in a word, everything that relates to single-use printed products are used.
Usually, after reading or leafing through a newspaper, they throw it away, or at best, hand it over to waste paper. And craftsmen and craftswomen practically have no concept of “waste”. Everything will be useful for business.
You will also need:
- PVA glue, moment glue;
- acrylic paints;
- varnish
Let's get started
There are a number of techniques that you need to know, since each of them allows you to achieve a unique and inimitable result for your work. Considering these techniques in isolation from practice will not give you anything. Therefore, we suggest moving from simple products to more complex ones, learning the basics of weaving.
Features of paper curling
Only at first glance, “twisting” is performed quickly and easily. Practice shows that you can master the technique taking into account several features.
- We cut strips of the same size from the press spreads in an approximate ratio of 1X3. To increase productivity, fold the paper into a stack and use a utility knife;
- hold the tool at an angle of 45° and tightly wind the tapes onto it. If you wind the paper at an angle of 30°, you will get a thick stick (it will be useful for “knitting needles”). And at 90° the stick will turn out to be very thin (it is used for edging);
- We fix the tail-kerchief with glue, and then remove the workpiece.
During the twisting process, they are spliced together by inserting the thin end coated with glue from one tube into the wide hollow hole of the other.
For panels, decorative rugs and frames, flat blanks are required.
Place the finished “twigs” on a flat, hard surface and roll them with a rolling pin. Look at the master class in the photo.
forest owl
For the owl, you need to prepare five dark tubes and two of any other color in advance.
- Form small spirals of a centimeter in length from two light tubes and, without cutting them, glue them to the base - the eyes are ready.
- Place the spirals next to each other so that the base of each of them is in different directions from each other.
- Bend one dark tube slightly into a semicircle and place it above your eyes, then take a second strip and glue its ends to the middle. You should get a kind of figure eight. Place it above the owl's head, next to the existing blanks.
- Slide another one under all the tubes so that its middle is located directly under the eyes and begin to wrap around each side. As a result, you should get wings, so make a couple of turns around them, do not do this anymore, concentrating only on the body.
- If desired, the owl can be decorated with a nose and slightly fluffed tassels in the head area.
Coloring
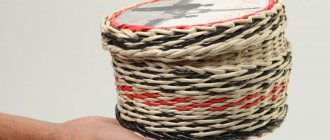
Rolled newspaper tubes contain printed elements. If you start weaving right away, the product will not have a beautiful finished look. Therefore, the working material should be painted beforehand.
You can also color the finished product. But painting the joints of layers and all the work from the inside is very inconvenient. It will take too long. It is much more rational to paint the working material in advance.
To do this, take a tray, pour a thin layer of paint, put a dozen or more tubes (a handful) at once and roll them over the surface of the paint. This must be done quickly so that the paper does not have time to get wet and lose its shape.
Dry the tubes horizontally on supports or in a vertical position by placing them in a container of suitable size (jar, glass, etc.).
- Cardboard crafts - 135 photos of useful and beautiful crafts for children and adults
Unusual crafts: we make cool and original things from scrap materials (120 photos and videos)
- Beautiful crafts: examples of very stylish and unusual options for homemade crafts (125 photos)
Photo frame
Crafts from newspaper tubes or a master class from them allow you to make not only various kinds of animals, but also something useful for your home, for example, a photo frame. For it you will need a dense rectangular base on which you need to glue a sheet of newsprint. When everything is dry, take the blanks and apply glue along the edge to form the sides.
Start placing newspaper tubes in each corner at a forty-five degree angle. Their number will depend on the size of the photograph or painting that you place in the frame.
When you're done with the corners, start forming the inner sides. Glue only the corners, leaving the sides free to pass through. The frame can also be decorated with various patterns to suit your taste.
Cutting blanks
The paper is cut into strips 5 to 10 cm wide. The wider your strip, the thicker the twisted tubes will be. It is clear that one product requires tubes of the same thickness.
The stripes are marked using a pencil and ruler. But this is a very long task. Since newsprint is thin, it is better to cut it in whole stacks at once in several layers.
Second bottom option
In the second case, we place an odd number of paired guides on the table and begin to braid them with two tubes, one of which is threaded from above, and the second from below.
Having reached the end, the tube is bent, and then the following guides are inserted into the edges. When inserting the guides, help yourself with scissors by cutting one of its ends.
Tools
- knitting needles, wooden sticks of different diameters;
- stationery knife;
- scissors;
- a simple pencil;
- ruler;
- clothespins;
- paper clips;
- brushes for glue, paints, varnish;
- boxes, plastic containers, cylindrical, spherical objects, etc. as a frame;
- finishing elements for decoration.
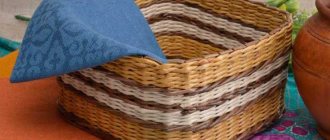
Weaving walls
Two tubes are inserted into the base of the basket and braided around the posts - one goes in the front and the other in the back. Cut the part you will be inserting diagonally to continue weaving.
Press the inner paper vine with your fingernail to help it bend better. Continue this until the basket reaches the required height. If necessary, increase the guides by extending them with additional tubes.
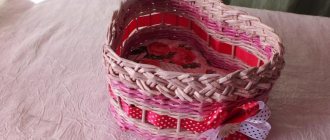
Edge decoration
The appearance of the craft largely depends on how the top edge looks.
First of all, you should remove the ends of the working tubes, carefully tucking them inside the intertwined tubes. It is convenient to use a crochet hook, knitting needle or skewers for this. The part is pressed tightly, the excess is cut off. You can also use glue for a strong fixation.
In order to hide the guide straws, it is easy to bend them too and hide them inside the braid. Or you can make an additional braided row along the top edge, intertwining vertical guides with each other. The tubes are bent one by one and pulled to the right, intertwining the two. They bend it and hide it down on the third twig. The tip is cut off and glued if necessary.
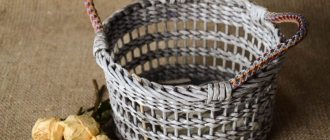
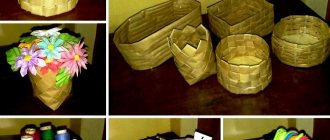
Round basket with handle
Weaving from newspaper tubes, namely crafts from them, can turn out better if you use a frame. Such a frame can be a round plate on which the bottom or the entire work will be formed.
Take eight guide posts and connect them together, intertwining them with each other. They should form a square and face perpendicular directions. Next, take two tubes and insert them into the resulting base and begin to weave in a circle, forming the bottom and moving down.
The handle is made of woven paper vine, on which several tubes are wound.
History of the craft
Weaving from plant stems was used already in Neolithic times. Archaeologists have found household items made in this way both in Africa and throughout Eurasia. It is assumed that people used thin tree roots and flexible vines for weaving.
Much later, the interlacing of long rods began to be used in construction. In the nineteenth century, many roofs were made using this technology. Ordinary people made fences near their houses, the rich could boast of wicker furniture.
Today, decorative wicker souvenirs can often be found at folk craft exhibitions. However, you don't have to stop at history alone. Using the weaving technique using newspaper tubes, real designer objects are created.
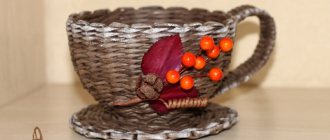
Photos of crafts made from newspaper tubes
Christmas decorations
On the eve of the winter holidays, when every home decorates a Christmas tree, New Year's crafts made from tubes will become a wonderful, affordable material for children's arts and crafts. Such products will become spectacular interior decorations and worthy exhibits at exhibitions and competitions in schools and kindergartens. For example, from pieces of tubes you can make a bright garland, a Christmas wreath or original Christmas tree decorations in the form of geometric shapes.