Putting together puzzles is a fun activity and a great workout for your brain. Making your own puzzle is even more fun! A homemade puzzle also makes a great thoughtful gift that you can create especially for someone. Depending on the tools you have at your disposal, you can make a traditional puzzle out of wood, or a simpler puzzle out of cardboard. Either way, family and friends will love putting together the puzzles you make.
Select an image for the puzzle
You can print the photo to use as an image for the puzzle. You can also draw a picture for the puzzle or use a postcard, poster, poster or any other printed image.
If you decide to go with a photograph, choose a high-resolution image. The size of the photo will depend on how large the puzzle you want to make. Having selected the desired image and its size, print it on a printer or contact a photo studio.
If you want to draw a picture for a puzzle, then use high-quality paper of the desired size. Then we make our drawing using our favorite drawing material directly on paper. You can also draw the puzzle image on your computer and then print it out like a photograph.
“Emotions burn brightly”: a brief forecast of the week from Vasilisa Volodina
Baluev explained why he considers his hero in “Gloomy River” to be a strong personality
TV presenter “Let's Get Married” Roza Syabitova told how to avoid divorce
How to make slime from water with your own hands
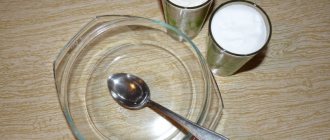
For production we will need:
sodium tetraborate or another name for “borax”. You need to use a 4% solution or powder.
It is sold at pharmacies and distributed without a prescription, so buying it is not difficult. Sodium tetraborate is also used in jewelry; PVA glue. Regular PVA glue, white and fresh - 100 g; brilliant green or other food coloring, such as gouache; water heated to room temperature, you will need a little more than a glass of water; a container in which you will mix all the components, and what you will mix with - wand.
Choose a puzzle base
The most durable and traditional version of the puzzle base is plywood. But you should only use it if you have a suitable saw and are comfortable with it. Carving a puzzle is a delicate job and requires experience. You can also use good quality cardboard for the puzzle. It will be much easier to work with and can be cut with scissors.
The ideal thickness for a puzzle base, whether cardboard or plywood, is 0.3 cm.
Look for a base that is as close in size to your puzzle image as possible. It's okay if the base is a little larger than the image. You can use cardboard from an old box, but make sure it's clean, intact, and flat. Thin cardboard, such as a cereal box, will work for a simple puzzle, but try to find something thicker.
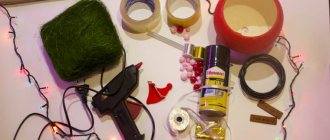
Gather the necessary tools
In addition to the image and the base for the puzzle, you will also need glue, spray varnish, a ruler and a pencil. For a cardboard puzzle, you will need sharp scissors or a craft knife. For a puzzle with a wooden base, you will need either a bow saw or an openwork saw.
The habit of drinking water from a glass next to the bed at night turned out to be harmful
Husband Wanted: A Single American Woman's Ad in a Newspaper, 1888
How to make tomatoes bear fruit: a recipe for fertilizing that increases yield
Liquid glue or spray adhesive work best for the puzzle because they are multi-purpose and won't damage the photo.
If you are using a photograph as an image for a puzzle, be sure to find a varnish that is safe for it.
How to make puzzles for little ones
Puzzles for very young children should be bright, large and consist of a very small number of elements. It is best to start with pictures cut in half horizontally, vertically or diagonally.
After some time, when this task becomes too easy for the child, these same pictures can be cut into two more parts.
For example, if the picture was cut horizontally, cut it vertically as well.
And vice versa. A picture cut diagonally is cut along another diagonal, etc.
The photo shows puzzles that I made for my daughter when she was not yet a year old (the picture with strawberries was originally cut only diagonally).
It is also very convenient for kids to assemble puzzles on flannelgraph, because...
the parts do not shift or move out. Pictures can be of any shape. I made ones for my daughter like the ones in this photo from the article about flannelgraph.
Attach the image to the base
Place the puzzle base on a sheet of wax or parchment paper to protect the surface underneath. Cover the surface of the base with glue and distribute it evenly. Place your picture on the base. Then use your fingers to move your image so that it is centered. Run a roller or old plastic card over the image to remove any excess air underneath.
Let the glue dry. Different types of glue have different drying times, but if possible, let your puzzle sit for a few hours.
Number the cubes on all sides
Once the top surface is level and sanded, write the same number on each die. Then turn each cube over to the new unsanded side and repeat the leveling and sanding process.
Repeat this step 5 more times for all 6 sides of the cubes.
Once you have completely polished the puzzle, put the cubes aside and go to the computer.
Cover the picture with varnish
Take your puzzle outside or to a well-ventilated area. Place it back on the parchment or wax paper, then apply an even coat of varnish to the image and let it dry.
The Englishwoman was laughed at for being overweight, but she pulled herself together and lost weight
Wet a Paper Towel: How to Chop Onions Without Tears
Unexpected confession: Anastasia Stotskaya has not lived with her husband for 2 years
Trim the excess
If your puzzle image is smaller than the base, start by trimming the edges. You can use scissors to cut the cardboard, or place your puzzle face up on a cutting mat and use a craft knife.
You can cut the wooden base of the puzzle using a saw so that the size of the base matches the size of the image. To do this, take a handsaw and place the larger puzzle piece on a hard, flat surface (like a table). The side you want to cut should hang over the edge. With one hand, firmly hold the part of the puzzle that lies on the surface, and with the other hand, hold the saw and cut off the excess part.
Create a mesh
Turn your puzzle face down. Use a ruler to draw a grid of 2cm (for a puzzle with more pieces) or 2.6cm (for a puzzle with fewer pieces) squares.
“I’m calm”: Fomenko’s secret daughter Darina forgave her father who abandoned her
I remember how on a memorable evening: let’s remember “The Blue Handkerchief” by Klavdia Shulzhenko (video)
Blazer with print: stylish looks with jeans for ladies over 50 from Instagram bloggers
Instead of drawing your own puzzle template, you can print one from online sites.
What are puzzles
Puzzle - (from the English puzzle - puzzle, rebus, riddle, difficulty) is a mosaic, a folding picture, a type of puzzle when the whole picture needs to be assembled from several parts.
Nowadays a large number of a wide variety of puzzles are sold, designed for people of different age categories: from one-year-old babies to adults.
The materials from which they are made are very different: wood, plastic, polymers, but the most common and well-known are cardboard puzzles. Also very popular are puzzles that can be played online on the Internet.
Draw the puzzle template
As you create the puzzle pieces, start adding concave and convex half-circles along the edges of the grid squares so that the pieces fit into each other when the puzzle is cut. You can also use upside down and raised triangles, squares or other shapes.
If you decide to simply find and print a ready-made puzzle template, simply glue it to the back of the puzzle and let the glue dry.
Cut the puzzle into pieces
To cut out the cardboard puzzle, simply follow the pattern drawn on the back and cut it into pieces using scissors. Or, if you are using a knife, place your puzzle face down on the cutting mat and carefully cut the puzzle into pieces. Puzzles with a wooden base are carefully cut with a saw, being careful not to cut yourself.
When you're done, use the eraser to remove any remaining pencil marks.
To make the task easier, do not cut the pieces individually. Cut entire strips at a time and then cut them into individual pieces.
The varnish will help protect the image from damage when you cut out the pieces, and this is especially important if you use a saw.
Tips and tricks
Here are some additional tips for making your own puzzle:
- The easiest way to cut round edges is to use a very precise craft knife. As a last resort, any small sharp blade will do, including kitchen and office knives. You can also use the eraser of a small, round object (such as a pencil or pen) to guide you.
- If your knife is dull and you end up with ragged edges when cutting a puzzle, you can lightly sand them with fine-grit sandpaper.
- Before cutting the puzzle with scissors, you can test them on a future puzzle base (for example, cardboard). If the cut is clean, then you can cut the entire puzzle with them. If the cut turns out to be uneven, then it is better to use a thinner base or a sharper knife.
- Be creative when choosing an image for your puzzle! You can make your puzzle the way you like.
- Your puzzle can be any shape you like. For example, you can experiment with puzzle shapes based on your image (for example, a cat puzzle in the shape of a cat's head).
- Young puzzle creators should ask their parents for help and not cut anything without supervision.
- Always use caution when using cutting tools and saws. Take proper precautions to protect yourself and others. Never put your fingers in front of the blade.
- If you don't have the skills or experience to cut your own puzzle, ask for help from someone who knows how.
Found a violation? Report content
How to make slime from starch
This method will only take you a couple of minutes, as they say, make a slime in a hurry and without the use of chemicals.
For this method we will need:
- water; glue; liquid starch; dye; bag.
Just like in the first preparation, mix water and PVA glue. Add 1/3 of liquid starch to the water and glue and pour it into a bag so that the slime does not spread and a couple more drops of dye.
Mix this whole mixture well, a little water will remain. Don't worry, this is how it should be. Then remove the slime from the bag and it will flow around.
These are the very simple ways to make slime that we looked at. Watch the video for more details:
Puzzles are a wonderful educational game for kids. Children never show indifference to such a toy, because it is so interesting to see what the next picture, which is still a lot of separate parts, will turn out to be. By creating figures of animals, fairy-tale characters, fruits and cars from pieces of paper, your baby develops imagination, thinking, sense of color and fine motor skills of the fingers. Types of puzzles Depending on the age of the children, the manufacturers of these educational sets offer puzzles consisting of tens, even hundreds and thousands small details.
The parts are usually made of durable cardboard so that they do not deform during repeated assemblies. The younger your child, the larger the components of the pictures should be, and the number of parts should be small. For the little ones, large puzzles on a soft base are suitable. There are also puzzles whose parts are made of wood and plastic.