Topiary “Herringbone” is a unique New Year’s souvenir that creates an elevated festive mood. This decorative tree can be decorated in accordance with the symbolism of the coming year, which will make the gift even more relevant.
A DIY Christmas tree topiary can be decorated with a variety of materials. Tangerines, sweets, Christmas tree decorations, sisal, and fir cones are suitable. There is the widest scope for imagination! You can use the technique of combining different materials in one composition, and it will only benefit from this. But for a beginner in this fascinating business, it still makes sense to follow the proposed step-by-step instructions.
Options for creating a topiary “Herringbone”
To understand how to make a topiary Christmas tree decorated with tangerines, you need to remember one rule: the diameter of the base (pot) must correspond to the diameter of the crown. In this case, you will get a stable and harmonious composition.
If it is not possible to find a suitable container (vase, jar, glass), you can make it yourself from plasticine and old newspapers using the papier-mâché method. The process is as follows: the shape of the container is molded from plasticine and covered with finely chopped pieces of newspaper. The more layers of pasting there are, the more durable the papier-mâché will be.
The simplest option for creating a topiary is as follows: place a fluffy Christmas tree branch in a container of suitable size and strengthen it there with the help of decorative stones or any other material that weighs down the base. You can also use a quickly hardening composition: gypsum, alabaster, plaster.
Such impromptu Christmas trees are decorated in accordance with the holiday style. Suitable items include tinsel, pine cones, candies, symbols of the year, miniature soft toys, and Christmas tree garlands. To create such a souvenir, you don’t need step-by-step instructions; your own imagination is enough.
The crown of an ornamental tree traditionally has the shape of a ball. In order to make the “Christmas Tree” topiary, the master class suggests using tennis balls, plastic or foam balls. You can make the base for the crown yourself. To do this, you need to take a piece of polystyrene foam or hardened polyurethane foam and cut out a ball of the required diameter from it. The base of the crown can also be made from a balloon: cover it with newspapers using the papier-mâché method, and upon completion of the work, release the air from the balloon and remove it.
Who should I give this beauty to?
Topiary is a multifunctional gift that will appeal most to mature adults. Children, of course, will probably be delighted with the bright toy, but they will quickly break it. Objects of art (even by unknown masters) must be stored properly. Then the likelihood that they will be pleasing to the eye for a long time increases significantly.
Topiary absolutely does not tolerate:
- Mechanical impact;
- Moisture and dampness;
- Exposure to chemicals.
Photo gallery
Natural materials for wood
Of course, you can buy ready-made material in the store. But why pay for something you can collect yourself in the forest or park? So take your kids or your other half with you and feel free to go into nature!
Without hesitation, select dry sticks, spruce branches and cones of different shapes and sizes. They will definitely come in handy to make crafts from tree branches with your own hands. Also, bark, sections of trunks, decorative pieces of roots, vines and clean sand can be useful for making the composition.
Even if you don’t know how you will use this or that find, take it with you anyway. Already at home you will understand how to use it. It's never too late to throw away unnecessary material. Tangerines, bunches of rowan or viburnum, and dried flowers will be useful in a New Year's tree. You can experiment with live indoor plants in pots.
Instructions for creating a topiary “Herringbone”
Materials and tools that will be required to create a topiary:
- thin cardboard (whatman paper);
- corrugated cardboard;
- wire with a cross section of 4-5 mm;
- scissors;
- compass;
- green sisal;
- green wool threads;
- leg-split;
- pencil;
- small pots;
- dry cement or gypsum mixture;
- glue gun or glue such as “Moment”, “Crystal”;
- old newspaper;
- decorative material: Christmas balls, bows, flowers, tinsel, rain, confetti.
Manufacturing process:
- Draw a semicircle on cardboard (whatman paper) using a compass. The radius should correspond to the desired height of the Christmas tree.
- Cut out a semicircle and roll it into a cone, fix it with glue or a stapler.
- Take a small piece of corrugated cardboard, place a cone on it and outline it.
- Cut out the resulting circle with scissors. It will serve as the base of the Christmas tree.
- A piece of wire is inserted into the cone and its upper part protruding from the top is twisted into a spiral.
- Crumple the newspaper into a ball and place it inside the cone.
- Glue the top of the Christmas tree to the wire.
- The circle and cone are wrapped with green woolen threads.
- A hole is cut in the center of the circle and the wire coming out of the cone is threaded into it.
- Insert the circle into the bottom of the cone and fix it with glue.
- The wire is wrapped in a spiral with twine. You will get a beautiful Christmas tree trunk.
- Cement or gypsum mixture is poured into the pots, diluted with water in the required proportion and a cone with a wire is placed in the container.
- The cone and the top of the wire are wrapped in a spiral with green sisal. The result was a spectacular New Year tree.
Next, they begin to decorate the flowerpot and cone in a holiday style. You can wrap the stand in beautiful paper napkins and stick rain and tinsel on them. The cone is wrapped in a spiral with a bright satin ribbon and Christmas tree decorations, candies, and decorative ornaments are attached to it. You can choose various options for spectacular decoration of the New Year tree. Decorative pins are used to secure the decor. A Christmas tree made of threads and sisal is an excellent decoration for the holiday.
Tools and materials Time: 3 hours • Difficulty: 4/10
- flower pot;
- alabaster or plaster;
- stick or unnecessary pencil;
- ball for base;
- decorative details for decoration;
- glue gun
The tree of happiness is also called topiary, so our New Year's tree of happiness can still be considered a New Year's topiary.
How to make a “Herringbone” topiary from coffee beans
New Year's coffee topiary is a spectacular and stylish decoration. To make it you will need:
- thick paper or cardboard of dark brown color;
- leg-split;
- coffee beans;
- wooden stick;
- glue gun;
- bronze gouache;
- satin ribbon bow;
- glass or plastic container that will serve as a stand;
- decor for decorating the crown (beads, Christmas tree decorations of a suitable size, garlands, tinsel);
- building gypsum;
- sponge;
- scotch.
The main difficulty in making this craft is gluing the coffee beans.
This painstaking work will require perseverance and accuracy from the master. If you glue the grains slowly and closely to each other, the Herringbone topiary will turn out incredibly beautiful. To make this task as easy as possible, use a glue gun.
The most enjoyable moment in making topiary is decorating its crown. Any New Year's decorations are suitable for its decoration: tinsel, rain, sweets, small fruits. The “Herringbone” topiary, made by yourself, can be decorated in the form of a New Year’s tangerine tree.
Stages of creating a decorative tree
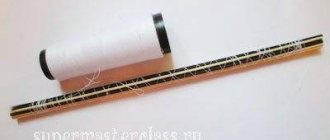
- A cone is made from brown cardboard, the lower edge of which is cut off evenly.
- Transparent tape is used to secure the edges of the paper.
- The cone is covered with coffee beans. To ensure that the cardboard does not show through between them, pasting is done in 2-3 layers.
- Bronze paint is applied to the sponge.
- Apply paint to the coffee beans using gentle movements.
- A satin ribbon bow is glued to the top of the Christmas tree.
- The crown of the tree is decorated with the selected decor.
The “Christmas Tree” topiary master class suggests decorating with a string of beads wrapped diagonally around the crown. The lower part of the cone can be covered with beads. Next, they begin to make the tree trunk. To do this, cut out a circle from cardboard of such a diameter that it can fit closely into the lower part of the cone. A hole is cut out in the middle of the circle into which a wooden stick is inserted.
The paper circle and the upper part of the barrel are coated with glue. After the crown is firmly glued to the wooden stick, it is placed in a pre-prepared container, which will act as a topiary stand. In order to strengthen the trunk in it, plaster is poured into a container and diluted with water. The Christmas tree in the stand is held in a vertical position until the binder hardens. Now it’s time to design the base of the topiary. The stand can be covered with Christmas tree needles, sisal, pine or fir cones, and confetti.
What branches are suitable for crafts?
It is best to collect branches in early spring or autumn. Pay attention to appearance. The sticks must be free of mold and signs of damage by bugs. As soon as you bring the twigs home, they should be processed before handicraft. If necessary, wash and then dry. Wet sticks are not recommended. Otherwise, a tree made with your own hands from tree branches will warp in the first month.
You need to dry it at room temperature for a couple of weeks. You can speed up the process (up to seven days) using a battery. The fastest way is to dry it in the oven for several hours. Just do this with the door ajar and on low heat so that the moisture evaporates. If you want to make a tree for more than one season, then be sure to treat the branches with any varnish.
DIY snow tree
From tree branches you can make a beautiful composition, wrapped in snow. To do this you will need the following materials.
The wood must already be processed: washed and dried. Gather the prepared branches into a bundle and tie with wire. Place in a basket or vase.
Cut the napkins into approximately four pieces. Fold the resulting strips in half along the long side. Now cut the foil. The width of the pieces should be half the width of the paper strips. Place the foil into the paper.
Cut the strips lengthwise a couple of centimeters to create a fringe, and then unfold. Glue the ends to the tops of the branches and begin to wind them in a spiral. Also camouflage the trunk. The craft is ready! Even a child can easily make a tree from branches with his own hands in this simple way.