Locked in multi-story hive offices, we often turn on the lamps even during the day, because the light from the windows has difficulty getting inside the large building. Meanwhile, the most free source of rays shines above our heads. Using it “smartly” is quite possible. We just need to give a new dimension to the concept of “natural light”.
The Canadian company SunCentral, which is preparing to enter the market with an original system of “artificial natural lighting,” is confident of this. The company was created last year to commercialize an interesting development from the University of British Columbia's Structured Surface Physics Laboratory (SSP).
The latter specializes in creating and testing new materials that can reflect, absorb and refract light in different ways. In other words, the laboratory’s specialty is light guides and mirrors, lenses exotic in composition and structure, as well as various technical devices based on such elements.
One of the most striking projects of the laboratory is the Solar Canopy system. At its core is a frame with a series of small, lightweight mirrors that, using tiny actuators (controlled by cheap electronic circuitry), deflect horizontally and vertically to track the sun.
These mirrors direct the light to two pairs of parabolic mirrors, which compress the light flux and throw it into the mouth of the light box, covered on the inside with a mirror film. The lower part of the box is equipped with a thin prismatic diffuser, which effectively directs the light traveling down the box into the room.
In the following video, a company representative explains how the system works using a scale model as an example.
Fluorescent lamps are also mounted inside the box for illumination at night or in cloudy weather. After all, the Solar Canopy system takes the place of traditional lamps on the office false ceiling. At the same time, the automation quickly adjusts the number of turned on “tubes” in inverse proportion to the natural light flux, maintaining the total illumination at the same level.
Canadian experts believe that such a seemingly complex solution may turn out to be more profitable than other methods of solving the problem. But the presence of servo drives and a mirror system seems to make the design more expensive. Maybe there are more attractive alternatives?
For relatively short distances to transport sunlight, a simple system like a “solar pipeline” can be useful. But if the beams need to be thrown 10 meters or more, you should think about other options.
Many companies from different countries already offer various types of “beam transporters” on the market, but all of them, along with obvious advantages, also have disadvantages. Some have questions regarding the limits of application, others are simply expensive, and others are not very effective.
But, it would seem, what could be simpler? Even people who are far from technology understand that the most banal system of mirrors can easily direct light into the house. But for some reason such installations never became widespread.
SunCentral explains what's going on here. Inexpensive materials used in such cases do not have the best reflectivity - 90-95%. This means that with each reflection, 10% of the light flux is lost. After several turns inside the system, the beam weakens very noticeably - the installation turns out to be ineffective.
The basis for Solar Canopy was the research of a Canadian laboratory in the field of coatings with a reflectivity of 99%, and the materials developed by SSP remained very inexpensive - this is an important condition for their use in fairly long light “pipes”.
| This is not the first time that scientists have come up with original ways to deliver natural light into the shadowed depths of offices. Thus, the glass walls of the New York Times Building skyscraper are equipped with myriads of snow-white ceramic tubes. On the one hand, they block direct sunlight, reducing air conditioning costs, and on the other, thanks to several reflections, they provide soft and diffused white light that penetrates very far from the windows. This reduces the cost of lighting the interior of the building. |
SSP built the first working prototype of the mirror trap on the territory of the so-called Great Northern Way Campus, a joint campus of three universities and one institute based in Vancouver. Including the University of British Columbia, the parent of Solar Canopy, and the British Columbia Institute of Technology (BCIT), a partner in this project.
And in 2008, SSP installed five of its light collection systems on the third floor of one of the BCIT buildings in Burnaby. The experiment showed that on a clear afternoon, the illumination from a “sun trap” in the depths of the room can be comparable to the degree of illumination from fully switched ceiling fluorescent lamps.
SunCentral is currently fine-tuning and polishing the technology. Plans for the near future include installing Solar Canopy on six more buildings. Moreover, these will be buildings of different designs. One of the objectives of the tests is to develop new modifications of the installation that allow it to be embedded less noticeably than in the case of BCIT, that is, into the thickness of the walls.
After such a large-scale check, it will be possible to think about starting mass production of trap modules and their wide sale. But the Canadians do not give any deadlines.
The lack of light in the premises is compensated in different ways - additional windows, devices, lamps and the like. One of the innovative solutions of recent times has been light guides for lighting. Small devices are installed on the roof or walls, accumulating and delivering rays inside.
History of light guide lighting
Home lighting using light guides
The first attempts to create a light guide for indoor lighting were made back in 1874. Russian electrical engineer Vladimir Chikolev made a pipe with a mirror surface inside, with the help of which he provided lighting into the dangerous production rooms of a gunpowder factory.
The modern method appeared on the market relatively recently. The first devices that conduct daylight appeared in 2005. The devices have gone through several stages of improvement. The final version was presented to consumers in 2011.
A light guide is a closed type mechanism for the directional transmission of daylight. Another name is optical waveguide. The devices are designed in such a way that they can have any directional curve, but at the same time deliver maximum illumination. Allows you to save on electricity and standard light bulbs.
How to make a light tunnel for a room without windows
If for some reason it is not possible to install a regular window in the room, then in this case the issue of natural lighting can be solved with the help of a light tunnel.
A light tunnel is a box of a certain length that is “built” into the roof (like a roof window) and conducts sunlight through reflective elements.
Pieces of mirror or foil can be used as reflective elements of the light tunnel. In the second case, the cost of construction will be lower.
In this review, the author shows how to make a light tunnel for a room without windows using improvised materials. At the same time, the light from one tunnel is almost the same as from a 300 W light bulb.
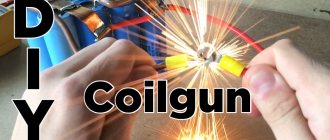
Light gun. For what, why and which one exactly?
When you decide to purchase such a rare piece of equipment as a light gun (or tracking spotlight), you know exactly what you want.
This type of equipment is in demand only if its customer has an idea about its further use.
The light gun itself is a spotlight that illuminates a specific location. This is to explain its purpose very superficially.
Only this is not quite a spotlight. The light gun is a product of modern technology and an example of a modern approach to stage design, and not only that.
The principle of operation is that the device, at a certain or given moment, focuses the attention of others on a specific object or area of the area by concentrating a light beam on it. The beam itself is created by passing a light source through a number of lenses focused in a given direction.
The operating principle is similar to that used in security camera equipment.
The use of a tracking light spotlight in the interior design of various buildings or stage areas began a long time ago. Over time, it became clear that light guns, due to their mobility and compactness, easily replace stationary lighting equipment, surpassing it in service life and service life.
Areas of application of tracking spotlights
- Decoration of places for public events.
Any modern stage or venue where a performance takes place cannot do without light guns.
Being located in appropriate places on the stage (and even outside it), at a certain moment they will highlight from the general cast of performers the one who, according to the director’s plan, should currently be in the spotlight.
This is especially true in a nightclub setting, as you can read about here. A light gun is used for the mirror ball, thereby creating stunning lighting effects.
The tracking spotlight (according to its function) will accompany the object as it moves.
Light gun for disco
- Part of the facility's security system.
No one can be surprised by security cameras. They are able to work in a wide variety of conditions. As a complement to them, light guns are increasingly used. Light guns duplicate the actions of conventional stationary searchlights, complementing them with the ability to accompany a moving object along the entire route.
- Home interior element.
Tracking spotlights play the role of your guide around your own apartment, turning on at the right time and turning off at the wrong time.
- Lighting of staircases.
This way of saving on general utilities is not the last. Many utilities find benefits in using light guns to save on overall energy consumption. Read about the rules for lighting housing and communal services here.
Tracking spotlight for illuminating the local area
Having decided on the question “why?”, move on to the question “for what?”. In terms of their functional purpose, light guns are approximately the same. The only differences are in the features of their application.
Purpose and main factors
This is any place for presentations, performances or competitions.
What is needed here are directional LED guns with the following functions: light changer (colorchanger), volumetric projection (creates an element of extraneous presence on the stage), projection (simply transmits the image to any plane).
Within this segment, guns are divided into so-called. "intelligent" or "non-intelligent". The division occurs depending on their ability to be controlled from the outside.
When designing a scene, you will not need the object tracking and automatic switching functions at all. Read about the rules of stage lighting in this article.
When concluding a purchase or rental agreement for the appropriate equipment, pay attention to the absence of these functions in the characteristics of the spotlight or demand its replacement with one that meets your requirements.
Stage lighting with light guns
- Office (area around).
Let's use a floodlight. Serves to provide visual contact with the illuminated area. Adapted to the electronic security system of the facility and serves for the convenience of external patrolling.
If a light gun is used for this purpose, it must be equipped with motion sensors.
The tracking spotlight performs the work of a light load regulator. It is able to provide maximum visibility when entering a house or entrance.
The installation comes with a built-in motion sensor. Using a light gun for its intended purpose in this case does not imply any additional assimilation into its design.
No tracking sensors, thermal imagers, etc. are needed.
What does the system consist of?
As a rule, such systems are sold as a set, which already includes everything necessary. But in addition to the main components, you can add additional elements that will help create an individual interior. This is, for example, special lighting using an LED strip or special lenses or crystals.
Fiber optic lighting includes the following components:
- Projector. Of the entire system, only it is connected to electricity. The amount of light emitted depends on the power of the device.
- Fibers. Thanks to these elements, you can also regulate the amount of light that is released and distribute it around the entire perimeter of the bath at your discretion. When choosing a harness, it is better to give preference to a glass model, since it is more resistant to temperature changes. There are two types of strands: side glow (creating light patterns using fiber weaves) and end glow (creating a starry sky).
- Lenses and lamps. With the help of such elements, fiber optic lighting acquires a directional glow. After all, it is precisely such lenses and crystals that regulate the dispersion and direction of the light flux.
When choosing the configuration of a fiber optic system, you should pay attention not only to the length and number of fibers, but also to what kind of lamp is used. Halogen and HID lamps require cooling, and since some cooling systems have noisy fans, this can ruin your holiday.
Scheme 1
A lighting device with a silver umbrella installed slightly to the right of the camera was used as a key light. We placed two lights with strip boxes on the sides and slightly behind the model.
To prevent the backlights from affecting the background, we installed white panels between the background and the lamps. The panels cut off excess light from the background and redirected it to the model, making the backlight more voluminous, and the background itself was illuminated only by the main key light.
The intensity of the background illumination in this scheme can be easily adjusted by the position of the key light. If you raise the lamp with the umbrella higher and tilt it more steeply towards the model, then the main light falls on the model, and only the light from the upper peripheral part of the octobox hits the background, the background in this case becomes darker.
If you lower the drawing lower and turn it more frontally, then in this case quite a lot of light from the main source will fall on the background, it will become whiter, but a shadow from the model may appear on the background.
KIA Spectra 2007, 101 l. With. - just
Cars for sale
Kia Spectra, 2006
Kia Spectra, 2008
Kia Spectra, 2011
Kia Spectra, 2008
Comments 56
Where can you buy them in Moscow?
Hello, can you tell me where I can buy light guides?
Hello, can you tell me where I can buy light guides?
Interesting and very useful post!
That's how I'll do the rear turn signals))))
Hello, honestly, I didn’t read everything, and maybe I missed it, but where did you buy such rods? give me your address and what is the price? Happy New Year!
I bought it at Obi, in the blinds department. But in December it was no longer there, I was in three Obi stores, they said they seemed to have stopped buying them because they were not in demand. Now I’m looking on the internet for where to buy one closer to home.
Thank you! Very useful post!
not bad... but I have a question, first of all, which diode should I use for illumination, everything is always good in the photos, but only when you put it on the car it turns out faded and “no way”, because even 1W? those that I took to experiment did not shine as brightly as I would like (I would like to have more intensity so that they would burn instead of the marker bulbs)…
secondly, how will this “plexiglass” behave over time, since, for example, the tapes that I used after six months peeled off, oxidized and had to be thrown away... so now I’m thinking about how to implement dimensional lighting...
True, one frame flashed here, he soldered “piranhas” into a chain and filled this with sealant into the body of the desired shape (he made angel eyes), as a result, a good “glow” was obtained, which is comparable to the standard analogues.
You need to take point diodes and not scattering ones, that is, if the diode is already in the housing, you need to file it so that it is not round but straight. PS If it’s not too difficult, PM me a link to the page where they do all this, I’m talking about a chain filled with sealant
not bad... but I have a question, first of all, which diode should I use for illumination, everything is always good in the photos, but only when you put it on the car it turns out faded and “no way”, because even 1W? those that I took to experiment did not shine as brightly as I would like (I would like to have more intensity so that they would burn instead of the marker bulbs)…
secondly, how will this “plexiglass” behave over time, since, for example, the tapes that I used after six months peeled off, oxidized and had to be thrown away... so now I’m thinking about how to implement dimensional lighting...
True, one frame flashed here, he soldered “piranhas” into a chain and filled this with sealant into the body of the desired shape (he made angel eyes), as a result, a good “glow” was obtained, which is comparable to the standard analogues.
When heated, the transparent sealant becomes dull and acquires a yellowish light... tested
This is the whole joke: if you take very bright LEDs, they will give off a blue light, and with a tarnished sealant there will be a pleasant white-yellow light, and in the matte sealant the light will dissipate and as a result the product will look very nice...
Source
LED lamp technology
Despite the advantages of LED lamps, they have one drawback - high price. A homemade LED lamp is a way out. This is a fairly simple and inexpensive process, even if the lamp is made from LED strip.
Let's look at it using the example of a common product for household use. When constructing a simple lamp, the following materials and parts are required: LEDs-3, driver-1, radiator and double-sided tape. It is recommended to take more powerful LEDs, since when working with them the labor intensity will be much lower; output LEDs are considered preferable. Recommended power: no more than 1 W. The next step is choosing a driver. The right choice will provide the LEDs with the required voltage and a long service life. In order to ensure long-term operation of the lamp, it is necessary to determine the material for the radiator. It should preferably be made of aluminum.
Output LEDs
Let's get started:
- First, a strip of 6-7 mm adhesive tape is cut;
- The bottoms of the LEDs and the radiator are degreased. For these purposes, it is recommended to use acetone so that the LED lens does not lose brightness;
- The radiator is marked by sticking tape;
- The LEDs are installed on tape and lightly pressed for better contact;
- Tin is applied to the LED terminals and the driver is soldered;
- When using LED strip, the protective film is removed and the sticky side is applied to the installation site.
After completing the assembly of the lamp, it is left on for 2-3 hours. After this period, the heating level of the radiator is determined - if it heats up, then the lamp is working. When constructing complex and more powerful models, other materials and parts will be required, but the principle of the device is the same. The created lamp can be designed in different styles, depending on the purpose for which it will be used.
KIA Spectra (BZ is no longer maintained) › Logbook › Light guides - part 1.
Good day to all. I am writing for those people who have questions “what is a light guide?”, “how, from what and for what?”. Personally, I would like to redo the LED dimensions by placing a light guide on top along the length of the headlight, and 3 LEDs in the lenses on the dimensions themselves.
1.
We buy the actual light guides - plexiglass sticks. I found 3 different diameters. “Front marker, turn signals and rear marker” immediately flashed through my head. I bought the smallest one for testing so far, since I’m going to slightly modernize the front dimensions. At home, the first thing I did was connect the LED and put a rod on it.
Sorry for the mess in the workplace