To prevent parents from getting bored, it has now become fashionable to assign homework not only at school, but also in kindergarten. It’s already clear to everyone who generates ideas for crafts and comes up with what material the child will create from this time. Every year the tasks become more difficult. And if earlier you needed to make a cute craft on the theme “my beloved parents” or draw your favorite dish, today you very often need to show your imagination. One of the current tasks for today is the “My Favorite Kindergarten” craft. We will consider ideas on this topic today.
Paper robot
In order to make a robot craft from paper and cardboard, draw up a diagram of the future product. You also cannot do without paper, scissors, a needle or awl and glue. In order for the structure to be stable, you will need cardboard.
To connect the elements, take rubber bands, and to decorate the robot, prepare felt-tip pens.
Walnut figurines
You can make cute ladybugs from walnut shells - just paint the halves with gouache.
You can also make turtles from the shell by making the legs, head and tail from plasticine.
Manufacturing technique
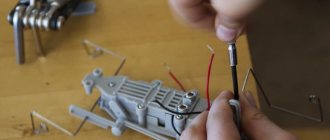
- When you use robot diagrams from the Internet, pay attention to the fact that solid lines indicate where to cut with scissors.
- The dotted lines are where the material bends.
- A needle is needed to make holes in the paper.
- To make the toy durable, glue the parts using PVA glue.
- So, all the stages of working with cardboard - print out the diagram from the Internet, then cut out the parts strictly according to the instructions, following the dotted lines, bend the elements, use PVA glue to connect the parts of the robot.
Light plasticine
Relatively recently, parents and children became acquainted with such a creative material as lightweight plasticine. It has bright colors, is very flexible, and does not stain clothes or surfaces.
And its most important advantage is that it freezes perfectly in the air and the figures retain their shape forever. Such toys can be kept as souvenirs, used to make refrigerator magnets, or create Christmas decorations.
Matchboxes as original material
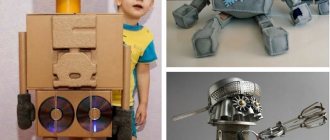
In the presented photo of the robot craft, you see a toy that is made of matchboxes. This robot craft is perfect as a competition project in kindergarten.
- You will need nine match boxes, paper of different colors, glue.
- First, take five boxes and cover each one with colored paper. This will be the body, head and arms of the robot.
- Using markers, draw a face on the head.
- Now glue the remaining four boxes and glue colored paper to the top of this structure.
- Collect the entire robot and decorate the product as you wish.
New Year costume
If you have large boxes, you can use them to make a fancy dress for your child. In this case, immediately glue the head box to the body box. Cut a square hole on the head so that the baby can look through it.
Make a hole inside for your son's head. And make the robot’s arms and legs from flexible ventilation pipes, choosing the desired diameter.
Craft for school
An excellent robot craft for school is a product made from plastic bottles. In order to make such a robot craft with your own hands, take plastic bottles up to a liter in volume, as well as materials you will use to decorate the craft and tape.
The craft will be especially original if you take bottles of different colors.
Feeders
Children can easily be taught to make bird feeders from plastic containers. Such crafts in the kindergarten areas will attract many birds and help them survive the winter cold.
To make a feeder, just cut a window in the side of the bottle into which the birds will climb to enjoy the treat. It is best to attach the feeder to a tree with wire or hang it on a thick jute rope.
Operating procedure
- Combine three bottles together by taping them together.
- Then take three more bottles and fasten them in the same way. Combine these blanks together and you get a square-shaped robot body.
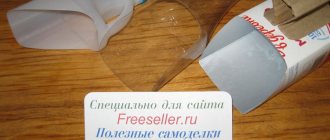
- Now make the head - for this you will need a bottle cut in half.
- Take the bottom part. Glue it to the main structure using a glue gun or tape.
- It’s time to make the robot’s legs; how stable the craft will be will depend on them. One leg is two plastic bottles held together with tape.
- Use a glue gun or tape to attach the legs to the robot.
- To make a hand, take a fragment of a bottle and cut the hand from a piece of plastic.
- Roll another piece of plastic, a larger one, into a tube and secure with tape. Attach the arms to the robot also using tape or glue.
- Move on to decorating the craft. Bottle caps can serve as the robot's eyes. You can draw the mouth with markers.
You can add other details, it all depends on your imagination.
Acorns
When making crafts from acorns, toothpicks are most often used to securely connect the parts and plasticine for decoration.
You can make a cute horse out of two acorns and matches - just connect the acorns with a match so that they resemble the head and body of the animal. Four more matches will depict the horse's legs. Eyes, ears and tail can be made from salt dough.
Using the same principle, you can make a figurine of a man in a beret.
Soft toy robot
A great gift for a child or for a children's craft competition.
Take fleece or felt and cut out square shapes:
- The first one is for the body - four and a half centimeters, three and a half centimeters - for sewing the robot's head, sew the legs from squares measuring two centimeters, one and a half centimeters - for the arms.
- Six squares are needed to make one body part.
- Each cut out element must be stitched so that a cubic-shaped part is obtained.
- Before you have stitched the part completely, fill it with cotton wool or padding polyester. Next, sew all the parts together to assemble the robot.
- You can make eyes by sewing on beads; you can also decorate the toy by sewing on a bow or embroidering eyelashes.
- If the toy is small, you can make it in the form of a magnet or keychain.
Applique robot
A very simple craft that even young children can easily make.
- You need to draw and then cut out the geometric shapes that will be necessary to create the image.
- These can be circles, rectangles, squares - whatever your child wants to draw.
- Then take a glue stick or PVA glue and glue the blanks onto the paper.
- You should get an original image of the robot.
- Draw in the background as desired and draw in the details of the image with a marker.
This exercise perfectly develops a child’s fine motor skills, as well as color perception, accuracy and imagination.
Origami umbrellas
Folding origami develops not only children's mental activity, but also fine motor skills. To work you will need:
- rectangle measuring 10 by 20 cm;
- square 20 by 20 cm;
- glue and scissors.
First you need to take a square and bend it from one corner to the other diagonally. The fold must be carefully smoothed. It won't be difficult for a child to do this. Next, you need to return the square to its “body” and similarly bend the second corner diagonally. It needs to be straightened out again. Now fold the square in half to make a rectangle.
You can see three triangles on the workpiece; the side ones should be bent inward.
The result should be something like this:
By connecting the edges of the triangle, you need to find the middle. Fold the side edges towards it. This must be done with all four corners. Immediately straighten each triangle. The part that protrudes must be bent first outward and then inward.
We get an umbrella hat.
Now you need to take the prepared rectangle, it is needed for the umbrella handle. It will turn out more beautiful if you take colors that go well together, for example, blue with pink, green with yellow, red with black or white, etc.
The picture shows which shades look best together (they are opposite each other on the Itten color wheel).
Roll a tube out of a rectangle (you can glue it if it falls apart) and fold the bottom edge. At the tip of the umbrella, you need to cut off the top to place the handle there.
Jewelry robot
If you love original jewelry, handmade earrings in the shape of robots are perfect for you.
- To do this, you will need a minimum of materials - only wire and large beads.
- First you need to cut the wire into several pieces.
- Twist the wire into spirals - they should be quite tight. To do this, wind the wire onto the rod.
- A wire, four spirals, and two beads are a set of elements from which you will form the robot's head.
- Thread the end of the wire into the bead and bend it to form handles. One hand is a pair of spirals, as well as four small beads.
- After you have folded the arms, move on to making the torso and legs. The tip of the wire is threaded into the bead.
- The leg is a pair of spirals and also a small bead. The second earring is done in the same way.
- So, stylish and unusual jewelry is ready!
By following all these tips, you can easily make many interesting crafts. Among them will be interior decorations, crafts for school or kindergarten, and even interesting designer earrings.
And most importantly, you will have the opportunity to organize joint leisure time for the whole family.