A car is not only a convenient means of transportation, but for active drivers it is also a place in which to spend the lion's share of their working day. For such owners, the fundamental, vital concept is comfort and coziness in the car, which forces them to improve and equip the interior with various “little things” that were not provided for by the car manufacturer, but which significantly simplify the life of the driver. One of these comfort elements is a cup holder, which few cars come with as part of the interior from the factory, but is considered by most drivers to be an integral device in the car. Cup holders for vehicles are actively offered in car markets, presented in a chic assortment, however, their cost cannot be considered affordable, and installation requires certain modifications and creative thinking of the driver. This forces car owners to look for other ways to solve the problem, like equipping the car with a cup holder. In this article we will talk about options for how to make and install a cup holder in a car with your own hands with minimal investment from scrap materials, and at the same time do it creatively so that its decorative design “fits” into the interior of the cabin.
Instructions for making a cup holder for a car.
How to make a cup holder for a car with your own hands
Those who first saw illuminated cup holders in cars may think that this is standard technology.
Some elite models actually have such decoration, which is not devoid of practicality. Moreover, most likely, it was from them that the fashion for such things began. But they are in no hurry to include this option in mass models, so many domestic motorists are willing to do it themselves. As an example, we will give a fairly simple algorithm for such tuning, as a result of which even an old VAZ will become indistinguishable from cars of class D and even higher. The effect does not require complete darkness - in cars with tinted windows, the illuminated cup holder will look beautiful and stylish even during the day.
To implement our idea, which came from the Internet (we in no way claim authorship), the only materials we need are plexiglass and, of course, LED strips.
Find a sheet of plexiglass 4 mm thick. - the problem is completely solvable, its dimensions are relatively small - you need a piece, slightly larger than the rubber mat located at the bottom of the cup holder - approximately 75x175 mm. It is necessary to cut a piece from this sheet that repeats the shape of this same rug, and then clean the cut area with sandpaper.
Buying an LED strip is also not a problem, and today the number of available colors can satisfy the tastes of any, even the most fastidious car owner. We glue the tape around the perimeter of the cup holder to the very bottom, and bring the terminal wires out through holes made with a suitable tool (for example, an awl).
To connect the car cup holder lighting to the power source, you can use the glove box lamp shade.
All dismantling/dismantling work is simple. The main thing is to do everything as carefully as possible, especially if the car is new, so as not to accidentally scratch anything.
To increase stability, you can make a longitudinal groove in the plexiglass insert; this is easiest to do with a grinding wheel. In this case, when placed on top of the LED strip, it will not be subject to increased pressure. We install a standard mat on top of the plexiglass, and since the shape of the cup holder is a gentle cone, due to the thickness of the sheet (4 mm) and the taper along the edges of the mat, there will be a small gap through which the light of the color you have chosen will break out.
As practice has shown, such illumination does not dazzle, it is not bright and therefore does not distract the driver from driving the car. At the same time, this light is enough to see in complete darkness everything that lies in the cup holder itself and around it and not look for it blindly.
Let's sum it up
Following the methods described in the article, each car owner, if necessary and willing, will be able to independently complete the interior of his vehicle with a universal cup holder of his own production, and improve its appearance with LED illumination. Don’t be afraid to experiment; often spontaneous solutions, combined with creative thinking and ingenuity, work wonders. Remember: tuning the interior is not only the lot of professionals; every car owner will be able to improve the interior of the cabin with the necessary elements, and personal modifications will be exclusive.
How to make a cup holder for a car with your own hands
The design is a cylindrical holder, which involves installing a glass, bottle or can of water into it. It is necessary primarily for people who spend most of their time driving: taxi drivers, couriers, public transport drivers. But it will not be a hindrance for citizens who prefer to travel a lot or who are forced to stand in traffic jams for several hours every day.
The cup holder allows you to safely transport liquids without the risk of spilling them during sudden maneuvers.
Options for homemade holders
Among the common methods of making a cup holder yourself is a product made from plywood. Production is very simple. Round holes are cut out in the center of two pieces of material.
Next, the plywood sheets are joined using epoxy glue or other durable fastening. The finished device can be decorated with pieces of fabric or leather to match the interior of the car.
A more complex, but no less attractive manufacturing method is from plexiglass. It is processed by making holes of the appropriate diameter. Next, they are placed in the machine, providing reliable support. Usually double-sided tape and a special holding bag are used.
A piece of pipe and a strong mesh is another option to make a holder. The cut is decorated using decorative elements and a mesh or bag is inserted into it, capable of holding a container with liquid. Next, a place is found for the device in the car and secured so that it does not dangle while driving.
Required Tools
The working devices you will need are a drill, pliers and scissors. Also stock up on cardboard, a marker for marking, sealant, and glue. We suggest making a cup holder from plastic connectors for sockets and connections of plumbing pipes with a cross-section of at least 80 mm.
Do not forget about inexhaustible imagination and accuracy so that the result of painstaking work will truly please you.
Step-by-step instruction
Installation will take place in the console provided for the gearbox. To make it convenient to work, it is removed from the panel.
- Marking. Using a felt-tip pen, even at the stage of removing the console, mark the places where the cup holders will be located.
- Remove the panel to make it easier to work with.
- Blueprints. On a piece of cardboard we mark a circle along the outer contour of the pipe section. You can attach the cut to the cardboard and simply trace it from the front side.
- Fitting. The cut out cardboard circles are applied to the console and outlined with a marker. Please note that the distance between the holders must be at least 2 cm for them to look beautiful.
- Drilling. Using tools, holes are made in the panel corresponding to the diameter of the pipe.
- Install pipe sections and rub the edges to seal the cup holder and hide defects in the connections.
- We remove the outer elements of the connectors and treat the surface with sandpaper.
- We treat the joints with sealant to increase the vibration resistance of the device.
- We install the console in place and remove visible defects with fine-grained paper.
Tools and necessary materials
Manufacturing a cup holder mounted in the gearbox console is a difficult task in terms of labor intensity and requires the performer to be careful so that the result is positive not only in terms of operational properties, but also in terms of aesthetics. If the car owner gets creative with his work, he can get a convenient and reliable holder of a unique type. To make a cup holder for a car with your own hands, the artist will need tools such as a drill, scissors and pliers. The materials you will need are plastic connectors for a socket and connections made of PVC pipes with a diameter of eighty millimeters, silicone sealant and glue, cardboard for making mock-ups, and a felt-tip pen for marking. After preparing all the materials necessary for the work, you can begin the actual production and installation of the cup holder.
How to make car cup holder lighting with your own hands, option No. 2
Here the set of necessary materials is approximately the same: frosted plexiglass, preferably white, 12-volt LED strip and glue. Of course, you can’t do without direct hands either.
So, the algorithm of actions:
- dismantle the cup holder, adhering to safety rules, carefully and accurately cut off the bottom, departing about 20 mm from the bottom;
- Now let's take on the plexiglass. You need to cut out a circle whose upper and lower diameters will be different. The outer one is determined by the diameter of the casing at the place where the cup holder is installed, the inner (lower) must correspond to the diameter of the bottom of the cup holder;
- Draw both circles using a compass and start cutting. This is the most difficult part of the operation. It is best to do this with a drill, making sure you have the required size bits. But the most accurate cut will be provided by a laser cutter. At worst, we can recommend a jigsaw, but it is unlikely that you will be able to cut accurately with it, even if you are a professional with this tool;
- Now you need to glue the plexiglass circle into the cup holder. After the glue has set, you need to carefully remove the excess (snot);
- measure the length of the LED strip (usually 10-15 LEDs) and cut it off, carefully place it on the bottom of the cup holder, not forgetting to solder the wires;
- so that the light of the LED sources does not scatter and effectively illuminates our insert, we wrap the lower part of the cup holder with ordinary kitchen foil;
- All that remains is to supply power, for example, from the headlights button (after all, the backlight is supposed to be used in the dark).
As you can see, no major difficulties are expected, but if such skills are absent, it is better not to take on such work.
Examples of ready-made sets
Often things that seem not vitally necessary begin to be constantly used. These include sets of cup holders for glasses. They begin to please the eye with their attractive appearance and functionality.
Classic glasses with cup holders are produced in sets. For example:
- Cossacks - the main material used for production is nickel; glass and cupronickel are added to it. Not subject to corrosion;
- Royal - the glass holder is made of cupronickel with silver plating, the glass is made of crystal, the set includes a spoon;
- Royal without a spoon - the only difference from the previous version is the absence of a spoon;
- Royal without a glass - only glass holders made of nickel silver plated with silver are available.
Instead of silver plating, the “Royal” set can use gold plating. The quality will not change, the appearance will become more attractive, luxurious, and a gift.
Royal - the cup holder is made of cupronickel with silver plating.Sets of coasters with glasses can be themed:
- For a fisherman - a frozen figure of a man in a boat holding a fishing rod in his hand;
The frozen figure of a man in a boat holding a fishing rod in his hand. - For the hunter - hunting scenes are depicted;
Hunting scenes are depicted. - Souvenir - in addition there is a gift case;
In addition there is a gift case. - Gift - a design corresponding to the holiday can be applied;
A design corresponding to the holiday can be applied. - Professional - a symbol is depicted that corresponds to the person’s specialty;
The symbol corresponding to the person’s specialty is depicted. - According to the zodiac - a drawing of Scorpio, Virgo, Cancer, Leo, etc.
Drawing of Scorpio, Virgo, Cancer, Leo and more.
The appearance of cup holders is diluted with the help of casting, stamping, and patterns. Less thermally conductive, cheaper material is used for handles.
Do-it-yourself cup holders: learning how to make them
DIY glass holders: a little secret of comfort in your home
DIY cup holders are a great way to add a little personality to your decor. Such trinkets look very cute and will decorate any kitchen, but the price for them is not so small.
Why overpay if you can make exactly the same wonderful cup holders, but with your own hands. We will tell you how to make a cute pig from readily available materials. And believe me, such a craft will cost much more. After all, this is not just a thing - these are priceless memories.
To work you will need:
- roll cork (sheet 14" x 21")
- pen
- scissors
Two pigs will protect the tablecloth from holes
Step 1: Unroll the roll plug and place something heavy on it to keep it from rolling up.
Roll stopper for big jobs
Step 2: Prepare the stencil by first drawing the outline of the pig on a piece of paper. If you are not very good at drawing, then it is better to print out a pig from the Internet in advance.
Dot, dot, stick - here is the pig stand
Step 3. Cut out the pig
Scissor dexterity and no cheating
Step 4. Trace the cut out pig along the contour
Step 5. Cut out the pig. If the cork still curls up a little, place something heavy on it for a few hours.
Little Cork Pig
We decorate it with a ribbon and pa-ram! You can keep the stand for yourself or give it to someone.
Great handmade gift
And don't throw away any remaining cork. It is perfect for the garden, since cork wood perfectly absorbs excess moisture.
Good helper for the garden
Manufacturing options
If we talk about homemade options, modern craftsmen offer several manufacturing methods.
Particularly handy carpenters can build an accessory from wood. To do this, use a jigsaw to cut out a ring with a diameter of about 78 mm. The product is attached using epoxy to the console between the seats.
You can make a spectacular glowing stand from plexiglass. To do this you need:
- Prepare a sheet of transparent material 8 mm thick and 120 x 100 mm in size and form a cup from it.
- Make a hole at the bottom of the glass for future wiring.
- Install the structure into the central deflector plug.
- Mount LED lighting on the bottom of the product.
- Connect the light elements to the switch using a 5.1 kOhm resistor. In this case, the light will not be as bright.
- Secure the LED contacts with hot glue. This will also help avoid short circuits.
- Paint over the installation areas of the light elements with a regular clerical touch.
If you don’t want to go through the hassle of installing LEDs, you can do the work a little easier.
We perform the following actions:
- We remove the gearbox console and cut 1-2 holes in it at a distance of 1.5 cm from each other using a ring drill. Before doing this, it is better to outline future cuts.
- We are preparing templates for future cup holders. To do this, simply apply cardboard to the holes and outline them with a felt-tip pen.
- We insert plastic pipes into the holes and adjust them to size.
- We sand the edges of the products using sandpaper.
- Using wire cutters or a file, cut off the side edges from the holes for the socket.
- We put the remaining parts of the pipes on top and fix them with superglue. Until the adhesive sets, it is necessary to squeeze the elements together.
- We cut off the protruding parts and sand all the irregularities.
- Lubricate the gaps between the cup holders and the console itself with silicone sealant. This is necessary so that the holders do not start making noise when the car is moving and are securely fixed.
- Remove excess sealant using a rag.
- Sand the joints again.
- Remove dust and debris with a damp cloth.
Do-it-yourself cup holder in a car
Step 1. First of all, it is necessary to modify the gearbox
. To do this, it is better to remove it and cut out two connectors for the cup holders on the working surface using a drill and an annular drill.
Before as
drill, be sure to mark the locations of the holes with a cardboard template.
Leave a small gap between the holes, about 1.5 cm. In addition, make templates yourself by attaching a pipe to the cardboard and tracing it in the outer circle with a marker. Step 2. Place the pipes into the holes and fit the connectors to them. Sand the cut edges with sandpaper. Step 3. Cut off the side edges from the plastic connectors for the socket with pliers. They will not be useful in this work. Place the remaining plastic circle on the back of the pipe. Secure these parts
together with superglue. Press them together until the glue sets. Cut off the parts of the base that support the pipe.
Be sure to sand the edges of the cuts. If you do not have suitable pliers, you can use a file for cutting. Stroke 4. So that the cup holders while moving
did not knock, lubricate them with silicone sealant from below.
Use it to process the gaps between the console and the gearbox cup
.
Thanks to the last stage, the cup holders will be stable. Step 5. Wipe off excess silicone sealant immediately. After drying is complete, sand the transition area again with sandpaper so that the cup holders look aesthetically pleasing. Step 6. Wipe the console, cup holders and
gearboxes with a wet rag, removing debris and work dust.
The cup holders for the car
are ready.
Auto Cup Holder
Entertaining entries
- 3D copy of a car key with your own hands
- Do-it-yourself electric bike
- Homemade magnetic key holder
- Installing a GPS navigator on a motorcycle
- Installing front door glass on a Citroen C5-1
- Car door trim
- polishing headlights and making eyelashes
the most interesting articles, selected just for you:
Contents of the article Non-specialized advice on selection The necessary tools for the job Non-specialized information about transmission oil When to change the oil? The process of changing the oil in a Priora box: Draining...
Contents of the article Materials and tools needed for the job Where is the box located? Frequency of oil changes Highlights of changing oil in a box Changing oil in new boxes Boxes…
Music... There is so much in this word. Now, dear readers, we will add this music to the domestic driver's destiny, install a radio tape recorder. Installing the radio with your own hands We won’t hide it,...
Contents of the article Polish for a car body at home Under what conditions is body polishing performed? Polishing equipment Existing polishing agents Preparation…
Contents of the article 1. Preparation of the car body 2. Treatment of body defects 3. Leveling of body defects 4. Cleaning of defective areas 5. protecting it and Pasting the body 6. Painting the car with your own…
Move 2. Then, the resulting segments are sawn along. Move 3. Then, at the ends of the workpieces, a cut is made at an angle of 30 degrees. Move 4. Now we warm up the edges a little and bend....
Car cup holder Wupp
Seller's reliability: excellent!
Delivery within Russia: free!
Customer reviews:
Review #1: Cool stuff. I missed her so much in Kalina. They said that if you lift the glass, they fly out, only if there is a half liter bottle, when the glass completely falls below the hook of the cup holder, under the weight the hook bends over the top of the glass and then it rises along with the glass. With the cups everything is clear and very convenient, you can move them all over the door. In short, I like it
Review #2: Delivery + - month! Usually packed in a bag! Soft plastic to the touch! Installed and testing. Overall, I give it a 5.
Review #3: Bought it at a discount. I waited 3 weeks before St. Petersburg. A necessary thing, and most importantly convenient. Looks great in a lifan. Thanks to the seller.
How to make it yourself
Making cup holders with your own hands is still popular among car enthusiasts. And here we are no longer talking about savings, but rather about the desire to give products an individual appearance.
Completely different materials are used: plywood, plexiglass, plastic pipes.
Rings with a diameter large enough to hold a glass or bottle are cut out of plywood using a jigsaw. Next they are glued together with epoxy glue. Next, the holders are covered with available materials (textiles, leather) and installed on the podium.
Plexiglas products are also cut out to the required diameter and secured with double-sided tape.
One of the simplest options for a homemade holder is a bag or synthetic mesh for a bottle, suspended under the steering wheel. Another popular way to make a cup holder for a car is to use a pipe ring also with mesh.
The most difficult way to make cup holders is to install PVC pipes into the console of the gear shift panels. In this option, which requires several types of equipment and materials, the pipes are installed using special glue. Next, the upper sections are sanded and the entire product is painted to match the panel.
What models are there: design features
Models of drink holders in cars differ:
- according to the method and location of attachment (between the front seat and the center console, to the air duct, to the doors, to the seat);
- by the number of compartments (single and multi-seat);
- according to the material from which the product is made (plastic, metal, silicone, wood, epoxy resin, textile);
- by design features (folding and stationary);
- according to the presence of additional functions (regular, backlit, heated bowl).
Installing cup holders in most cases requires additional manipulations: drilling holes (holes) for fastening in the selected location. But there are also models with the ability to be secured using plastic petals. If possible, you should give preference to products that do not require additional operations for fastening (extra holes on interior parts cannot be eliminated later).
In order to save space, it is better to choose folding models that can be transformed when the device is not needed. Products that can be used for several items at the same time (glass, jar, bottle, telephone, ashtray) or have adjustable holders are popular.
Among motorists who demand comfort and coziness in the vehicle interior, models with heated (cooled) bowls or lighting, which must be connected to a power source, are popular. Such devices are much more expensive and require special skills for installation.
Since not only adults, but also children like to drink drinks in the cabin, special car seats with built-in cup holders are also available for young passengers (models cost from 3,500 rubles).
Ready-made cup holders are often offered with special containers with a thermos function or simply allowing a container with a drink to be more firmly fixed.
Do-it-yourself cup holder in a car
Step 1. First of all, it is necessary to modify the gearbox
. To do this, it is better to remove it and cut out two connectors for the cup holders on the working surface using a drill and an annular drill.
Before as
drill, be sure to mark the locations of the holes with a cardboard template.
Leave a small gap between the holes, about 1.5 cm. In addition, make templates yourself by attaching a pipe to the cardboard and tracing it in the outer circle with a marker. Step 2. Place the pipes into the holes and fit the connectors to them. Sand the cut edges with sandpaper. Step 3. Cut off the side edges from the plastic connectors for the socket with pliers. They will not be useful in this work. Place the remaining plastic circle on the back of the pipe. Secure these parts
together with superglue. Press them together until the glue sets. Cut off the parts of the base that support the pipe.
Be sure to sand the edges of the cuts. If you do not have suitable pliers, you can use a file for cutting. Stroke 4. So that the cup holders while moving
did not knock, lubricate them with silicone sealant from below.
Use it to process the gaps between the console and the gearbox cup
.
Thanks to the last stage, the cup holders will be stable. Step 5. Wipe off excess silicone sealant immediately. After drying is complete, sand the transition area again with sandpaper so that the cup holders look aesthetically pleasing. Step 6. Wipe the console, cup holders and
gearboxes with a wet rag, removing debris and work dust.
The cup holders for the car
are ready.
Auto Cup Holder
Entertaining entries
- 3D copy of a car key with your own hands
- Do-it-yourself electric bike
- Homemade magnetic key holder
- Installing a GPS navigator on a motorcycle
- Installing front door glass on a Citroen C5-1
- Car door trim
- polishing headlights and making eyelashes
the most interesting articles, selected just for you:
Contents of the article Non-specialized advice on selection The necessary tools for the job Non-specialized information about transmission oil When to change the oil? The process of changing the oil in a Priora box: Draining...
Contents of the article Materials and tools needed for the job Where is the box located? Frequency of oil changes Highlights of changing oil in a box Changing oil in new boxes Boxes…
Music... There is so much in this word. Now, dear readers, we will add this music to the domestic driver's destiny, install a radio tape recorder. Installing the radio with your own hands We won’t hide it,...
Contents of the article Polish for a car body at home Under what conditions is body polishing performed? Polishing equipment Existing polishing agents Preparation…
Contents of the article 1. Preparation of the car body 2. Treatment of body defects 3. Leveling of body defects 4. Cleaning of defective areas 5. protecting it and Pasting the body 6. Painting the car with your own…
Move 2. Then, the resulting segments are sawn along. Move 3. Then, at the ends of the workpieces, a cut is made at an angle of 30 degrees. Move 4. Now we warm up the edges a little and bend....
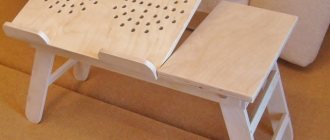
How to make a car stand with your own hands
Any driver can independently create a stand for small items from scrap materials stored in the garage. This is not difficult to do; special skills and tools are not required to complete the work.
What you will need
To create different organizers you will need:
- the hanging storage system is made of tough fabric and durable slings; they can be purchased at any sewing store;
- a box with several compartments installed on the seat can be conveniently made from cardboard;
- cardboard, tape and decorative paper will be needed to create a cup holder;
- in the trunk you can place an organizer bag, a box of small items, or simple straps and pockets to keep items in place.
Luggage pocket made of textile slings
All of the above items can easily be found in the garage. To assemble cardboard elements, you only need tape, and to create storage systems from fabric, you need a sewing machine. But small devices for holding items in the trunk are easy to stitch by hand.
Test of the Navitel TC500 thermal cup holder: should you warm it up or cool it down?
During long trips, many motorists stock up on various drinks for the road. But it is better to consume them at the right temperature. We are testing a heating and cooling cup holder from Navitel.
How to keep your coffee hot and your refreshing drink or mineral water cool throughout your trip. Just for these purposes, Navitel has released a very useful car accessory - a thermal cup holder. We decided to test the miracle technology from and share our impressions with you.
The very idea of creating a universal device for comfortable spending time behind the wheel is worth a lot. After all, most car enthusiasts spend a lot of time in the car and, of course, enjoy drinks. But it is precisely a certain temperature that provides them with the taste for which they are bought. The Navitel TC500 thermal cup holder is a kind of climate control for drinks.