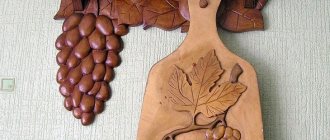
In kindergartens, they often make play models of buildings, playgrounds, and different areas for children. Such playgrounds for dolls help children learn the rules of behavior in public places, play role-playing games, learn the features of the natural areas of our country and much more. To make such models, construction elements, ready-made miniatures of objects and various available materials are used.
In this article, Natalia Kudinova will show you how to make elements of a play layout for a children's park - a tree and a bench.
Types of benches
There are many types of benches. The master brings something special and unusual to the appearance of this simple element for the garden. However, all models can be divided according to some common characteristics.
Benches without backrest
This type is considered the simplest, as it consists only of a seat and several supports. Only this can all be implemented in different ways.
- We have before us a reliable, but not very attractive solution. However, the creator of this design still provided for a certain asymmetry - one edge of the seat protrudes beyond the legs, and the other is level with them. The bench is made of thick integrated boards and laminated veneer lumber. Externally, the material is roughly processed. This bench is suitable for many rustic styles, such as American country.
Simple wooden bench without back
- This bench is made of wood and concrete was used for the supports. Such composite structures look good in many landscape design styles, for example, high-tech, minimalism or loft. Concrete parts have clear geometric shapes. Against their background, the varnished board contrasts perfectly and looks very advantageous. Such a bench will also be very stable, but extremely heavy - moving it to a new place will be difficult.
Concrete wooden bench legs
- The back of this model is purely symbolic, so we will assume that it does not exist at all. It is not clear whether it will be comfortable, but it definitely looks impressive. Frame type construction. The basis was steel strips, which were looped and sheathed with a narrow lath. For stability at the bottom, additional stops are welded from a steel corner.
Outdoor benches made of metal and wood
A common disadvantage of benches without a back is the inability to completely relax while resting. You have to either keep your back tense, or create support with your hands on the seat or legs.
Benches with wooden backs
These models have a complicated structure, but they are more pleasant to relax on.
- A master of his craft clearly put a lot of effort into this model. The building material used was wooden beams, unprocessed branches and boards, which were given a rounded shape. All lumber is treated to appear aged and untreated by man. The absence of right angles and straight lines hints at unity with nature. Even the seat itself is slightly rounded inward along a wide radius.
Wooden bench with backrest for 2 people
- To achieve an aged effect, the wood is brushed. All soft fibers are removed from the surface of the material. This reveals its internal structure. A beautiful relief remains, which is further emphasized when processed with paints and varnishes or during firing. On this bench there are brushed boards in a composition with raw cuts of the trunk.
A trunk cut was used for the backrest
- Such designs are not suitable for every garden. Some styles value lightness and grace. An example of such a shop is shown in the photo below. The bench is clearly of factory origin, but if you have the right tools, you can do something like this yourself. In the photo there is clearly a lack of flowering vegetation around the bench.
Lightweight bench made of treated lumber
Assembly of such benches is also not the most difficult. Next, drawings will be presented and methods for their implementation will be described.
Bench with table
Such seats are installed mainly on terraces (read the article about arranging a terrace in a dacha), verandas and gazebos. The combination of furniture pieces forms the finished dining area.
- The photo shows an option for children. The tabletop is mounted on trusses with widely spaced legs. Crossbars are installed across them, to which the suspended bench seats are attached. Such a bench does not require a lot of material; its design is quite simple. In this case, the parts are securely connected to each other.
Wooden garden tables and benches for children
- These benches will withstand more serious loads, since they are not transferred to the table body, as in the previous case - the base under the structure is loaded. In fact, we see three separate objects connected at the bottom by a common strap. This solution gives stability to the thin legs of the bench. The seats and table top are made in an interesting way - a neat frame is formed from the board, the inside of which is filled with flooring. It looks very neat and beautiful.
How to make a wooden bench with a table for 4 adults
- The next model is complicated by the fact that it has backrests. The seats are held in place by common jumpers. It will be awkward to sit down and leave such a table. And if you consider that a backrest has also been added, then the options for this are even more limited.
These wooden benches have comfortable backs
. In general, the inconvenience of placement is a drawback of all such structures. Different people have their own sizes, so hosting guests at such a table can be a bad decision. Also, these beautiful wooden benches require a large and flat area for installation, so they are rarely placed on the ground.
Bench-sofa
This is the same bench with a back, but there are design differences. Firstly, soft pillows are always laid on top of the seat and under the back, secondly, they are made lower and are not placed in front of the dining tables, and thirdly, the seat is made deeper so that you can literally lounge on it.
- Like the previous option, these benches, due to their large dimensions, are installed on spacious terraces. This sofa is made from sanded and varnished boards. The pillows are stuffed with several layers of foam rubber and have removable covers so they can be washed (read the article on how to make pillows for garden furniture).
Bench-sofa corner
- Such structures usually have angular shapes, so processed timber of the correct cross-section is used for their manufacture. They do not differ in elegant shapes, so assembly will not be difficult - it is enough to build a strong frame, which is then covered with boards. These sofas look good in new style gardens.
Sofa with closed sides
- Old pallets are suitable as the main material for such a sofa - their shape and design correspond to the style of similar structures. Furniture made from pallets is a godsend for a loft-style garden. This material is inexpensive and very durable.
Brooches
There are many crafts made from beads for beginners; many needlewomen are attracted to brooches. Today they are becoming increasingly popular accessories. You can buy ready-made kits for sale, which include everything you need to create a brooch. It is very convenient to buy them.
Suitable patterns are selected for the brooch. It is necessary to skillfully select all materials, including beads. It must meet all the parameters:
- Dimensions;
- Forms;
- Colors.
The design will turn out harmonious and attractive if you successfully combine all the elements in your work. Of course, careful execution also becomes important.
The design themes of beaded brooches are incredibly diverse. Using this technique, various insects, animals, birds, fish and much more are created. They turn out incredibly colorful and bright.
Materials for making benches
We have already seen what materials are used for garden benches, but there are no specifics yet. In this chapter we will analyze everything point by point.
| Material, photo: | Description: |
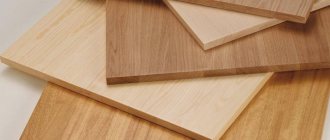
Treated lumber | Available in the form of slats, boards and beams. All this is used in structures of different sizes and complexity. Selecting the type of wood, the correct cross-section of parts and proper processing of materials allows you to create strong benches. Glued and bent wood is a separate category. This material is incredibly durable, moisture resistant, and does not deform due to changes in humidity. |
Benches for summer cottages made of metal and wood | Wood combines beautifully with metal, which is known for its durability. The frame of the structure is most often made of iron, which is covered with wood, but there is another option when only metal inserts are used as decoration of the product. The structures are assembled from various parts. Are used:
Benches with forged inserts look very nice (options of forged garden furniture are presented in our article). |
Block piece material | The base of the bench can be built of brick, or these hollow concrete blocks. The last option is considered the easiest to implement. In the photo on the left you can see that the blocks are simply folded into certain shapes, and the timber is inserted into the voids in them. To prevent the bench from being flimsy, it is better to tie the materials together. The brick base is placed on the mortar - it will be very reliable. This bench will be stationary. |
Hand-cut bench made from solid logs | Uncut wood is also often used for benches. These include driftwood, branches, and logs. Log models are extremely difficult to make, since you have to work with solid wood, precisely adjusting the gaps of the parts. It is difficult to do this without proper experience. Such benches are suitable for many national styles of Europe and Russia (you can see options for furniture made from logs at the link). |
Pallet bench | We included furniture made from pallets in a separate category, since they are used containers and are already put together according to a certain principle. On our website there is a separate article on garden furniture made from pallets, be sure to read it. |
The work can also use concrete, natural stone, metal mesh, hemp, logs and much, much more. Products made from other items look interesting. An example of this is shown in the following photo.
Bench supports from cart wheels
Why are beads so popular?
It’s easy to understand why needlework with beads has so many fans if you take a closer look at the advantages of this trend. These include a relatively low level of manufacturing complexity, especially when it comes to the simplest products chosen by beginners.
Schemes of crafts made from beads and detailed master classes, widely presented on the Internet, provide good help.
You just need to carefully study the information, follow all the recommendations, and carry out all the required actions step by step. On the Internet you can find works of a suitable level of complexity.
To make crafts, flowers from beads or other works, you need to show perseverance, painstakingly working with small material. Additionally, it is important to apply a lot of care and patience, and an excellent result will be achieved.
Do-it-yourself benches for a summer cottage made of wood
Now let's talk a little about making such pieces of furniture. Let's look at two options.
Wooden bench without backrest
Basic parts of a simple form.
For work you will need the following materials:
- 4 boards with a section of 80*30 mm, length 1500 mm
- One beam with a cross section of 70*40 mm of the same length.
- Two 40 cm pieces of 40*30 mm timber.
- Glued board measuring 1000*1000 mm or larger, 40 mm thick - shaped supports will be cut from it.
Finished drawing of a wooden bench
All parts will be fastened with self-tapping screws.
- To begin with, a template is made from a sheet of cardboard that follows the shape of the legs of the bench (you can develop your own design).
- The shield is marked on it - two identical parts are needed.
- The edges of the workpieces are sanded and rounded with a milling cutter to add beauty.
- Next, a rectangular hole with a cross section of 70*40 mm is made in them, and the corresponding beam is hammered into them. The parts fit tightly and can additionally be joined with PVA glue.
- A short block of wood is placed on top of the posts to create a wider support for the flooring.
- The boards for the seat are mounted with a certain indentation.
Wooden bench with backrest
Again, the complexity of the job will depend on the type of structure.
Drawing of a wooden bench with dimensions
Do-it-yourself wooden bench drawings
A very clear and fairly simple plan. It indicates the dimensions of all parts and shows their shape. Despite the fact that the structure has a curved appearance, it is assembled from a rectangular beam and slats. There is not enough information on the type of fastener, its dimensions and installation points, although all this can be modified yourself.
Bolted connections will hold the best quality. Options for dowels, grooves and ridges are also reliable, but without being a carpenter, you won’t be able to make them well. Also, feel free to use stainless steel self-tapping screws - they are durable and not subject to corrosion.
Curtains
Bringing original accents into the interior is not difficult at all. Interestingly designed thread curtains will help with this. For production you will need:
- Beads and threads are selected correctly in size.
- The beads are threaded into curtain threads. They should be well secured.
- Depending on the planned design and the size of the curtain itself, the appropriate number of beads will be required. It is necessary to skillfully select shades. They should be in harmony not only with the curtain, but also with the interior as a whole.
A curtain like this will look impressive in different places. It can decorate different rooms. Often it is located on one of the walls in the room. An interesting idea is to use curtains to divide the space into separate zones.
How to process wood
Since many tree species are not “friendly” with a humid environment that causes rot, products used outdoors must be carefully processed. Such protection will also protect against exposure to ultraviolet radiation, from which the material can fade and change its true color. Finishing is also done to transform the appearance of the wood. To do this, take the following compositions:
- Colored opaque paints that completely hide the wood texture. Various compositions are used, from which we want to highlight acrylic-based options. This material creates a durable and long-lasting coating. It comes in different colors. The material hardens in the form of a film.
Opaque paints
- This material looks like varnish, but it is not. In contrast, a vapor-proof film is not created on the surface - the wood still breathes. Azure saturates the wood with deep tones. It penetrates its structure and reliably protects it from moisture and ultraviolet radiation.
Azure
- Varnishes create a film on the surface and prevent water from getting under it. This material can be transparent or colored. For outdoor use, it is best to choose the option for yachts, as it will last a very long time and create an even, glossy finish that shines very beautifully in the sun. Clear varnishes are used in combination with various impregnations, for example, stain.
Wood varnish
- One of the oldest and best ways to protect wood is to coat it with oils. This material penetrates deep into the wood structure, giving it water-repellent properties and a beautiful deep shade. Oils are used to treat decking near swimming pools and even on piers, which indicates a high degree of protection (the choice of oil for garden furniture is discussed in the article).
Wood oil
Adviсe
You can complement the bench with forged twisted decorations. To do this, you will need thick wire with a diameter of 2-3 mm and acrylic paint to give it the desired effect. Using pliers, the wire is given the desired shape. The parts can be connected using tape, and then the “forged” parts can be covered with papier-mâché. This will also strengthen the frame of the product.
The paste with which pieces of newspaper are smeared can be prepared from boiled water and flour in the proportion of 3 tablespoons of flour per 500 ml of water, adding a little glue there. The resulting mass needs to be cooled and only then used to glue the wire. Please note that you will need not one or even two layers, but about 3-4, so that the papier-mâché turns out dense and does not fall apart in the future.
The next step will be to eliminate all the resulting irregularities. To do this, use sandpaper, first medium, and then fine grain. After this, the element is covered with self-hardening plastic, which is sold in small packs and hardens quite quickly, then the procedure for removing irregularities is repeated. However, you don’t have to try too hard here, because roughness may be appropriate to reproduce the “antique” effect and simply a more natural look of the bench.
The frame must have monograms, which are also made using plastic. Using a knife you can make them more expressive and deep, and also give the entire frame greater precision and “detail.” The last step will be painting. Everything is clear with black paint, but how to give the bench a metallic effect? Here you will need silver paint. It should be applied with a dishwashing sponge. Then we let the part dry, cover it with acrylic varnish and attach it to other elements.
Additional functionality – awnings over benches
If there are no shady areas on the site, then an additional canopy can be provided for protection from the sun. Let's look at several options for its implementation.
The canopy can be installed separately or made part of the structure, as in the presented photo. Here we see 4 racks made of timber, on which the top trim is made. The roof is formed by boards installed on edge - the classic form of a pergola. Lath trellises were added to the sides of the structure. All this will become a reliable basis for climbing plants, which after a while will provide beautiful and cool shade.
Pergola canopy
Installing a large canopy can be made from a simple bench into a swing. This functionality will be appreciated by both adults and children.
Bench with a wooden canopy in the form of a swing
Original headboards
Branch headboard
Do you like decorative things? See an example of how to make a headboard and decorate it with ordinary branches. Based on an Ikea bed, you need to assemble the headboard, eliminating the three central spindles. Another thing to do is to flip the top horizontal piece so that the groove and holes are facing up. Do the same for the bottom, turning it over so the holes are facing down. These holes are used to mount spindles that we do not use. Rotating the holes away from the center will prevent the branches from sticking to the headboard. Read the detailed instructions on the website, everything is very simple, you just need to follow the correct sequence.
Photo source: www.instructables.com/id/Ikea-Hack-Painted-Branch-Bed-Frame/
Creative headboard
Time for creativity. DIY a bohemian-style headboard using unexpected materials. You will need a 120 x 180cm sheet of plywood 15mm thick, 400 wooden clothespins, chalk acrylic paint in different shades and Rit Dye fabric dye in sunny orange, apple green and golden yellow. Chalk acrylic paint in pink and calm blue tones. Also a sander, jigsaw and wood glue. First, disassemble the clothespins, that is, simply remove the springs. Prepare liquid dye in a large bowl of hot water and soak 300 clothespins for 30 minutes. Paint the remaining 100 clothespins with Yellow Rit liquid dye. Place the clothespins on newspaper and let them dry. Mark the center of the plywood. Make the shape of the headboard from sheets of newspaper, lay it on the plywood and cut and sand the edges. Paint the headboard in the colors you have chosen. Arrange the colored clothespins according to your intended design. Align and adjust until you get it right
Carefully glue each piece using wood glue and let dry
Photo source: www.instructables.com/id/Boho-Headboard/
Headboard with an unusual design
You will surely love this original rope headboard. To make it you will need a couple of thick wooden planks and at least two types of rope of different colors. A few other supplies such as glue, screws and a handsaw. What you need to do is simply cut the slats to make the frame and then decide what kind of design you want to depict with the rope. This is the perfect headboard for teenagers because they love creative things, and then kids can make it themselves, it's not difficult at all.
Headboard made from indoor plants
If your bedroom is quite spacious with high ceilings, you may want to come up with something to fill the space without darkening it. The author had an idea to create a “living” wall, but so much soil and water overhead seemed like a bad idea. Instead, the idea came to hang the plants above the bed on a wooden crossbar, which is what you see in the photo. The most time you will need, an hour or so, is to hang everything correctly. The rod must be screwed tightly into the studs and aligned so that you can reach it, this may take some time. Place small pieces of painter's tape on each leg along the sides of the wall to see where the crossbar will come from. Then install the rod brackets. Use masking tape and a level to make sure the brackets are level. Drill small holes for screws and hang the brackets, then tighten the bottom screws. Remember, pots filled with soil are heavy, and wet plants are even heavier. And, given that they will be above your head, fix the brackets very securely.
Photo source: www.instructables.com/id/Hanging-Plant-Headboard/
Pegboard for headboard
Pegboard for headboard? Why not? This is a great headboard project for teens because it provides the perfect place to store everything. You can add baskets for mobile phones and other gadgets, and generally decorate the headboard the way you like. You will need four pegs, and hardware to hang directly on the wall. Also add hooks, baskets, or anything else you want so you can attach photos or store favorite items right above your head.
You will need a pegboard, wall screws, clear spacers, and regular installation tools.
Then you need to firmly fix the pegboard to the wall and add everything you need.
Very beautiful and modern.
Anyone can make a headboard like this.
Photo source: sugarandcloth.com/diy-pegboard-headboard/
Preparing for assembly
Before you start working on making a bench. We need to check the availability of tools. You should always have at hand: a hacksaw, a drill. It would be nice if you have a screwdriver. You definitely need a tape measure, a pencil, a square, a hacksaw, wrenches, a brush, and sandpaper.
If you decide to build a wooden bench, then you need to purchase materials:
Boards. Having dimensions of 100X40mm and 100X25 mm, you will need furniture screws with 8 - 10 mm threads, nuts, and self-tapping screws. Wood putty will also come in handy.
Be sure to purchase antibacterial protective impregnation. Once you have chosen the location of the bench, you need to draw up a work plan for its installation.
Select the size of the bench, decide how the back will be attached, plan the placement and fastening of the legs. Dig holes of the required size in the ground, place the legs in them, level them and fill them with cement mortar.
We draw up a drawing of the drawing, indicate the dimensions on it, and get to work.