For more than 40 years I have been fishing on the bream lake (length 3 km, width -1, depth up to 10 m). This hobby requires a good punt. During this time I tried various of its designs.
In the article I tell you how to make a boat out of wood with your own hands, I attach drawings and photos of the main parts with simple pictures. I try to show how to make them in several ways, so that the novice craftsman has the opportunity to choose the most appropriate option.
What qualities should a fisherman’s wooden boat have that need to be ensured?
Let me immediately note that fishing is not the only purpose of having a punt on hand. In warm summer weather, you can simply drive into the middle of the lake, jump into the water, swim, cool off, and climb back over the stern.
With the onset of the mushroom season, a quiet hunt begins on the islands. And this is a hobby for the whole family: we got together, went and received a lot of positive emotions.
Even just sitting down at the oars, rowing for half an hour or an hour in calm water and fresh air is a pleasant walk, good for health. Children and adults enjoy these trips so much that they become a regular ritual.
However, for all these purposes the boat must meet the following requirements:
- be durable and reliably withstand physical stress when transporting various categories of people, especially children and the elderly who cannot swim;
- have good stability during strong rolling, when you have to row along a large side wave created by a strong autumn wind;
- do not leak from cracks and joints between boards;
- have good buoyancy, ease of movement, requiring low muscular effort when covering long distances;
- combine the ability to install a simple outboard motor and rowing with oars;
- maintain the listed performance characteristics for a long time for at least 10 years.
I explain further in the text how to optimally implement all these six conditions with your own hands.
Preparation
The prepared wood is brought into a dry room and laid on a flat surface. Then a small weight is placed on top to avoid distortions. The board will remain in this position for a year.
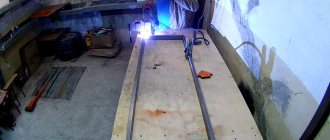
Boat hull sheathing with sheet metal
After waiting the allotted time to prepare the material when building the boat, we proceed to the following stages of preparation:
- We measure the length of the sides, leaving a small margin, and file them down, maintaining an angle of 45 degrees. The location of the cut will be the bow of the boat. Next, take a plane and plan the board along the entire length on both sides; chamfer is removed at the cut points in order to fit the parts tightly to each other. After the preparatory work, it is necessary to cover all cut areas with an antiseptic.
- Next, you need to make a triangular block to fasten the bow of the vessel. The length of the workpiece should be one and a half times the width of the side. The block is planed and coated with an antiseptic.
- To make the back part, you will need a wider board, preferably fifty. Don't forget about small reserves after sawing.
View this post on Instagram
Evgeniy Bronov
auto RU
Posted by Natalia (@numline) Oct 24, 2022 at 10:12 PDT
How to easily resin a boat hull
Impregnation of wood with resin protects it from premature rotting and at the same time seals all joints. In northern countries, fishermen constantly treat new wooden boats with a solution of resin in gasoline.
Its consistency is brought to the level of liquid sour cream, and processing is carried out with a regular brush. The protection lasts for a long time, it replaces more expensive oil paint, but at first it gets very dirty.
When I first tried this method, I had to constantly put newspapers on the benches. The paper protected clothes from the resin.
Therefore, seats and places with which people come into contact are not treated in this way, but simply painted. However, nothing prevents the use of other industrial impregnation compositions or conventional oil processing.
The resin is taken from bitumen. It is used in construction as a waterproofing layer and comes in various grades, differing in hardness, viscosity and fluidity.
We usually come across an unknown variety for processing a boat. It must be checked, prepared, brought to the state of chewing gum. To do this, the resin is heated over a fire in a bucket until it boils, oil is added to it, and the viscosity is assessed on a cooled piece.
The resin should stick well to the wood, but not break under load, but stretch. The composition of the oil proportion is determined experimentally.
The place for the fire is prepared in advance at a distance from fire hazardous objects. Two posts are driven into the ground, and a crossbar for a bucket is hung on them.
It is convenient to take the molten resin out of the bucket using a jar with an elongated handle, and process it by rubbing the surface of the boards with a kvoch: a rag wrapped on a stick.
When pouring heated resin into the cracks, use a regular stick with a wedge-pointed end. The varnish that has penetrated into the joints seals the space well and prevents leaks.
To distribute the resin evenly over the surface of the wood, it is additionally heated with a blowtorch flame. The resulting drips are dispersed with a hammer and a wooden wedge. The liquid resin should fill all the cracks.
It is more convenient to work together. Please note that molten resin and open flame from a torch can be harmful to health. Use boots, closed clothing, glasses, work gloves. The consequences of accidentally splashing boiling resin on your body are much easier to prevent than to treat.
Safety precautions are never superfluous.
Homemade plywood boat (master class, 50 photos, step by step)
Homemade plywood boat (master class, photo, step by step)
So we finally got around to fulfilling our old dream and started building a boat. For the first time I chose an easy project, so to speak for training. I went to the production of similar boats in Cherepovets and there I spied something and bought the missing materials, for which special thanks to the owner of the shipyard. This is what the boat should look like:
Today I cut out sheets of plywood and began the most important and difficult process, in my opinion, which is cutting and gluing sheets of plywood. Because If the length of the boat exceeds the length of standard sheets of plywood, then they have to be spliced; there are many ways to do this, but I chose the most technically complex, but also more aesthetic option of miter gluing. Let's mark it.
We process the plywood sheets first with a plane and then with a sander. This is what it looks like during processing.
This is how the sheets should fit and stick together.
After adjusting the parts, I glued them together and placed them under the press.
That's all the preparatory work on the boat for now; after the sheets are glued together, I'll start marking and cutting out the parts. At first I practiced the miter connection on scraps of plywood and it was scary to look at, but experience came from working on the “finish” version. I hope I can continue to master everything.
That's about the boat. Basic data: Maximum length…………….2.64 m Maximum width………….1.28 m Side height……………………..0.38 m Hull weight……………… ……30 kg Load capacity………………180 kg Crew……………………………..2 people. Permissible power p/motor...2.5 hp Today was a day of fruitful work and great progress. I pulled out the sheets from under the press and removed the strips between which they were sandwiched. The joint turned out to be smooth and very strong (then we tried to break the scraps from the bottom, but it did not break at the joint of the sheets). In this way we obtained blanks of the required length for making the boat.
I start marking by marking the center line, from which all the dimensions will then go.
Here I drew the bottom of the boat, it looks like it turned out beautifully: I start cutting. It is advisable to use a jigsaw at high speeds, and use files for shaped cutting of plywood so as not to tear the edges of the sheets.
We follow the markings strictly. Half of the bottom is ready.
Here's the whole bottom
We mark one side, then we put two blanks on top of each other and fasten them with clamps, after which we cut out both sides at once.
I mark and cut out the transom.
At the joints of the plywood sheets, we remove the chamfer with a grinder and begin sewing the boat with copper wire clips.
We carry out work from stern to bow. You can't do this without an assistant. I also try hard to sew everything beautifully.
These are the seams you get.
Here the boat is ready
Trying on for yourself
And upside down.
Today I really made progress towards the final stage of completing the project. The first thing I did was pull all the staples tighter. I checked the geometry of the boat. Then I used a chisel to edge the brackets at the internal joints of the sides. After all this, I cut out temporary spacers and secured them in the places where the frames were installed.
While doing these things in the new room, I constantly felt eyes on me. By the way, here is a view of the straightened boat from the stern. To make the seams more even, I decided to fill the lines with masking tape, it turned out beautifully.
I decided to glue it in the evening, but in the meantime I drew out the frame templates and began assembling them.
Here are the finished frames, assembled using epoxy glue and self-tapping screws.
I finally started gluing the internal seams; I didn’t think it would be such a painstaking job. For the first time, everything seemed to work out great. The resin has saturated the fiberglass fabric normally, there are no bubbles anywhere.
This is how the seam turns out, smooth and transparent. The photo shows that the structure of the wood is visible through three layers of glass tape, which means everything is normal.
Here's what was done last time: the frames were adjusted and the fenders were screwed on.
Today I installed the frames in place and secured them with glue and screws, and cut out reinforcing linings for the transom.
After that, I turned the boat over, removed all the staples from the wire and began rounding the seam joints.
And now that everything was prepared, I started gluing the external seams.
Nose.
The seams turned out smooth and well saturated, even I like it myself.
Seams on the transom.
Today I finished shaping the boat’s hull, next time I’ll install the benches and start preparing for painting. The sides are fastened not only with glue, but also reinforced with three layers of glass tape on each side, this turns out to be fiberglass. The self-tapping screws from the frames can be completely removed; after gluing, they will no longer be needed. By the way, some people do just that. Such a boat can be assembled without a single screw in the hull. Today I went to make a boat only in the evening, because... I waited for the glue to set well. I checked the external seams, I really liked how it was done, it turned out to be strong fiberglass. After that I decided to make slats for the benches. I also cut out and fitted the stem to the bow of the boat. Here are the slats of the front bench attached.
Here is the middle bench.
I also cut slats for the rear bench, but it’s too early to install them. Apparently prolonging the pleasure of the process, or maybe out of a desire to do everything efficiently, I am making the boat slowly and little by little. Today I bought glue, screws and high-quality lumber without knots. All this was intended to install the keel and outer stringers. These necessary elements will give greater strength to the bottom, as well as protect the boat while mooring to the shore, and protect the paintwork from scratches. I cut out the slats, sanded them and installed them in place using glue and screws.
Also today I installed a stem and a bow eye bolt for tying a rope or anchor rope.
Work had to be stopped for today because... the whole thing should be firmly grasped; for this I used additional weights.
By the way, the bench blanks have already been cut out, but they will be installed after painting the inside of the boat.
Download:
My first boats.pdf
Based on materials from the site www.fishing35.ru
Second gluing
Or rather, gluing the seams between the bottom, sides and transom in order not only to secure the parts, but also to ensure moisture resistance. A strip of fiberglass is carefully laid on the seam and carefully coated with moisture-resistant glue. In this case, one layer is not enough. You will need at least three. And if the first layer of fiberglass is approximately 100 mm, that is, 50 on each side, then the second and third layers should be wider. 125-135 mm. it will be just right, only each subsequent layer needs to be shifted a little - one towards the bottom, the other, on the contrary, towards the side. This is done so that the fiberglass comes into contact and sticks directly to the plywood. After the glue dries properly, this folding gasket will turn into almost real plastic, and this will guarantee that the boat is moisture resistant.
Let's start drawing
Marking the contours of the boat directly on a plywood sheet would be rather reckless. A small mistake and the vessel will yaw to the side or tilt to one side. Therefore, it is better to first draw a diagram or sketch on graph paper in full size. Moreover, the word diagram is not very appropriate here, because it is necessary to strictly maintain the dimensions.
The algorithm of actions is as follows:
- A center line is drawn dividing the bottom of the boat lengthwise.
- At one end, a transom line is drawn perpendicularly to size.
- The installation points of the frames are marked on the center line itself.
- At these points, perpendiculars are drawn to suit the size of the frames.
- Using patterns, the bottom itself is drawn.
- The resulting diagram is folded in half along the center line to check symmetry.
Patterns for the sides, frames and transom are made in the same way, taking into account their sizes and configurations. But the drawing doesn't end there. Now, after the symmetry of the bottom and the sameness of the sides have been carefully checked, the stage of transferring the drawing onto a cardboard template begins. The graph paper is too thin, but it will be much easier to transfer the drawing onto plywood from a cardboard template without errors.
Frame
The boat frame made of PVC pipe is the basis of the basics. The integrity of the structure will depend on its strength. You can learn how to build a frame correctly in the videos provided.
If you approach this issue irresponsibly, the constructed structure will fall apart the first time you try to launch it into the open water.
After detailed development and verification of the drawing, practical work on creating the frame can begin. You can secure the frame using the methods already suggested above, or you can use a soldering iron for plastic products.
Working with such tools is not difficult. Even a person who has no experience in this field can cope with these works. Soldering irons come with instructions that describe the entire procedure in detail.
It is not recommended to buy this tool for a one-time job to weld a frame, justifying it as economically unprofitable.
It is better to use a rented device to attach a frame made of plastic pipes. This service is offered by stores that sell soldering irons.
A frame made from blanks soldered with a soldering iron will last a long time. In this case, each joint of the frame will be highly durable. This way you can make a very durable structure with your own hands.
If any difficulties arise during work, video materials will help you solve the problem of how to properly make a frame from PVC pipes.
History of small wooden shipbuilding
The history of wooden boats goes back several thousand years. The first wooden watercraft were canoes dug out of tree trunks. In Russia, they were found from 1878 to 1967 off the shores of Lake Ladoga, Desna and Southern Bug. Primitive boats were oak trunks hollowed out from the inside, and their age ranged from 2000 to 5000 years.
Subsequently, man began to build a boat from wood, consisting of several parts: a base (keel and frames), crossbars (cans) and outer skin. Over time, the design was repeatedly improved and eventually became classic for all modern types of these small ships.
Materials and tools
When creating a floating craft, you cannot do without the following materials and tools:
- screwdriver;
- manual milling machine;
- grinding machine (manual type);
- clamps;
- jigsaw;
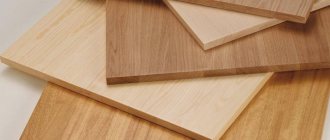
- waterproof plywood with a thickness of 5 mm (2.5 by 1.25);
- waterproof plywood with a thickness of 6 mm (1.5 sheets);
- planed boards (at least 25 mm thick);
- slats (wood);
- nails (brass);
- wood screws;
- epoxy resin;
- varnish (waterproof type);
- fiberglass;
- timber (50 by 3400);
- timber (40 by 20 by 4000).
Parts of a future boat cut from plywood
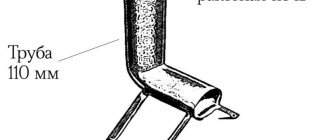
Making the keel
A homemade keel for a boat from a plastic pipe is easy to do. All the material that goes into work is durable, light weight and low cost. This keel is ideal for a punt.
For production, a four-part plastic profile is taken, which is used in assembling windows and window sills. It is covered with two foam rubber sleeves, which are used to insulate pipe materials.
Next, the keel is wrapped in packaging film, which is laid in several layers. In the areas where the keel is attached, wide tape is wound.
For convenience, the keel is cut in half and, when connected, a PVC pipe (approximately 0.5 m in size) is inserted into the middle of the tetrahedron.
A keel made of such materials does not get wet, does not emit toxic substances, and is not destroyed by exposure to the rays of the sun.
You can also make a homemade floor (slan) for flat-bottomed boat structures. For work you will need four boards, approximately 0.9 cm thick.
The width of all pieces should be equal to the distance from the side parts of the structure. All these pieces are held together with tightening plastic clamps.
PAINTING THE MODEL
Since the model is made of wood, before painting it must be thoroughly soaked in boiled oil - drying oil. After this, the model must be sanded. The glass sandpaper will smooth out all the protruding irregularities, and if they still remain, then they need to be filled in! putty.
Make putty from chalk powder, mixing it with drying oil until it becomes a thickly kneaded dough.
Don’t expect to fill large flaws with putty - it won’t stick and will fall off at the first blow. Wooden barrels with glue should be inserted into such places. The surface of the body should be puttied in a thin layer to fill minor processing flaws. Sand the dried putty with fine sandpaper. Then move on to painting with oil paints. The hull and superstructures with all details should be painted. Paint the underwater part, rudders and propeller red, or dark green, or black; the surface part and all above-deck structures - gray or, as sailors call it, “ball”; the inside of the “light” case can be in any color.
To obtain a better, smooth surface, it is recommended that after the first and second painting, sand the body with fine or, in extreme cases, medium glass sandpaper and after that paint it clean one or two more times. The load waterline - a narrow white stripe dividing the underwater and surface parts - is applied to the upper edge of the lower part of the hull. The windows and openings in the deck in the upper part of the hull are made black. Color the running and distinctive lights as indicated above.
A BRIEF DESCRIPTION OF
A submarine is a warship designed to sail both on the surface and underwater.
The purpose of submarines is to provide security, conduct reconnaissance, conduct patrols, and participate in various combat operations.
Armament, power of mechanisms, equipment depend on the size of the submarine and its displacement.
Based on the hull design, modern submarines are divided into single-hull, one-and-a-half-hull and double-hull.
Single-hull ones have only one durable body. Their ballast tanks are located inside a durable hull. These are small displacement boats.
One-and-a-half-hull boats have a strong hull that is partially covered by a light one, while double-hull boats have two hulls: the inner one is strong and the outer one is light.
Between the durable and lightweight hulls they house ballast tanks and liquid fuel tanks. Boats of this type have a large displacement.
At sea, a submarine can be in three positions: surface, or cruising, positional, and submerged (underwater).
Its displacement in all these positions is different and is equal to the volume and weight of water displaced by the submarine’s hull.
In the first case, the submarine has a reserve of buoyancy due to unfilled ballast tanks.
When the ballast tanks are partially filled, it sinks to the deck.
In this position, called positional, the effect of artillery is ensured, but the time for complete immersion is reduced.
During a sudden dive, the ballast tanks are filled and the boat quickly goes into a submerged position. But it can be difficult to accept the amount of ballast that, together with the weight of the hull, would be equal to the weight of the displaced water. In this case, three cases are possible. The first is when the boat still takes on water ballast in an amount equal to the weight of the boat; then in a submerged position it will obey the steering wheel and be controlled. Second, when the weight of the hull with ballast is greater than the weight of the displaced water, then the boat will tend to sink even deeper (fall to depth). And third, when the weight of the hull with ballast is less than the weight of the displaced water, then the boat will tend to float to the surface of the water.
Based on the tasks, submarines are built of different sizes - from 300-600 tons with a displacement to 1,200-1,500 and even up to 4,300 tons. Currently, there are submarines with a displacement of 20-30 tons - small ones. The length of modern submarines ranges from 22 to 120 m. Their cruising range reaches 20 thousand nautical miles. The surface speed reaches 21, and the underwater speed reaches 12 knots, or 12 nautical miles per hour.
Until now, submarines are equipped with two engines. To move underwater, electric motors powered by powerful batteries are used. Charging is done from an internal combustion engine, under which the boat moves in the surface position. Their disadvantage is that for the next charging the submarine must float to the surface.
Modern submarines have radios that allow two-way communications over very long distances, up to approximately 3,000 nautical miles.
Final imparting moisture resistance
This completes the construction of the boat. What remains is the interior and exterior finishing, which serves not only for aesthetics, but also to ensure that the boat does not leak. Ordinary wooden boats will be tarred, but what to impregnate a plywood boat with - there is a very specific answer to this question. On the outside, all seams and the entire body are treated with fiberglass and glue, in the same way as was done when gluing the parts. Before this operation, the protruding wire should be removed or cut off. The inside of the plywood boat is impregnated with hot drying oil.
When covering a boat with fiberglass, you must carefully ensure that there are no bubbles.
Keel
A PVC boat pipe keel serves to provide the craft with increased stability. Most often, the keel is installed on options using an outboard boat engine.
The keel is installed so that its working part is located in the bow area of the craft. From amidships to the stern the keel goes to "no".
Another advantage of installing a keel is that it partially raises the bow of the structure. And this, in turn, prevents splashes from entering the boat during large waves.
Where to start construction?
The first step to building a wooden boat with your own hands should be to draw up a drawing indicating the exact dimensions of the future watercraft - length, width and draft.
This article will discuss the process of building a punt boat designed for one or two people. Such a boat must be stable, strong and serve as a reliable watercraft on any body of water.
The drawing must contain all the constituent elements of the boat's structure: the keel - the base of the hull, the frames - the transverse ribs of the hull, the stringers - the longitudinal strength ribs, as well as bench seats for the rower and passenger.