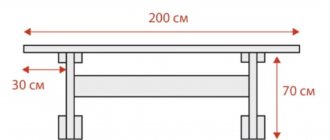
How to glue a wooden tabletop?
The first rule when purchasing a finished slab or placing an individual order is high-quality drying. Humidity – no higher than 12%. Must not be:
A high-quality tabletop is made from moisture-resistant wood (larch, oak, beech, spruce, birch), or wood with water-repellent impregnation in the factory. Fans of the exotic can pay attention to wenge (rosewood) or iroko (African oak).
Aesthetes choose solid wood, paying 2-3 times more. Experts say that solid slabs dry out and become deformed after several years of use. The best option is a lid glued together from lamellas under the influence of steam. The connection is flexible and elastic, increasing resistance to external influences. For greater effect, lamellas from different types of wood, differing in structure and color, are combined into one product.
An equally important issue is the thickness of the working surface. The absolute minimum is 25 mm, the standard is 38 mm. If the board is thinner, you cannot place pots and pans on it. Oak, cherry, walnut, and cherry are characterized by increased resistance to impacts, high and low temperatures.
How to choose a countertop: advice from professionals
In order not to count scratches in a year or two, and not to “admire” the swollen slab, when purchasing you should take into account a number of tips and recommendations:
- preference - natural wood. A significant part of manufacturers offer chipboard with veneer veneer. This option looks good, but for the first year. Restoration of veneered chipboard is questionable; curved cutting is impossible. Wood can be sanded, polished, and renewed endlessly;
- Oak and larch are the leaders in terms of wear resistance. These types of wood do not decompose, do not rot, and can withstand contact with hot dishes. Due to the presence of gum, mold never forms on the surface of larch;
- In terms of price/quality ratio, the leaders are beech, birch, ash and walnut. Pine and spruce look good, but are characterized by low density, which leads to the rapid appearance of cracks, cuts and scratches;
- impregnation is oil-based. Manufacturers supply wooden countertops in unfinished form. The buyer himself decides whether to varnish or wax and oil. The disadvantage of a varnished surface is that repairs are limited. When choosing an oil impregnation, the damaged area is sanded, then a fresh layer is applied. Oil, unlike varnish, does not crack, does not darken, and retains the original structure of the wood;
- preference for light surfaces. On dark ones, water stains, dust, and stains from a rag are more clearly visible;
- in L or U-shaped countertops, the joints are masked using an aluminum profile. You can tighten it from the inside with dowels, and seal the cracks with putty.
The most important advice. Even with impregnation, wood cannot withstand constant contact with water. It is better to cover the space around the sink with metal or artificial stone to match.
How to make a wooden tabletop with your own hands
If store-bought slabs are not satisfactory in appearance or price, you can make it yourself from boards, furniture panels, solid wood or planken. To work you will need:
- manual or electric plane;
- hacksaw or jigsaw;
- screwdriver for installation;
- thicknesser;
- grinder and grinding wheels;
- files, sandpaper for grinding and polishing;
- wood cutters;
- squares, tape measure, chalk, pencils for marking.
For finishing you will need stain (color chosen at your discretion), antiseptic, varnish (wax and oil), glue.
Table top made of boards, boards or straight planks
- boards or planks are sawn into pieces of the required size;
- the front side is processed with a plane, then with a jointer;
- Using a jigsaw, grooves are cut on the sides. Width and depth for thick boards are 10-12 mm, for thin boards - 6-8 mm;
- slats are cut out of plywood or unsanded boards, matching the thickness of the grooves;
- the bars are coated with glue and placed in the grooves. On each board - on one side;
- individual pieces of the tabletop are connected into a single sheet and crimped with clamps;
- as soon as the glue dries, you can proceed to milling edges, forming holes for sinks, pipes, etc.;
- stain and antiseptic are successively applied to all uncovered parts. After fixing in place, the structure is coated with varnish or beeswax mixed with oil.
If a furniture panel is chosen as the base, slats or wooden blocks are attached to the inner surface to prevent deformation and deflection. Chipboard panels cannot be sawed with a hacksaw due to the risk of damaging the melamine film. For the same reason, you should not use an angle grinder. The best option is a circular saw, manual or electric jigsaw.
First, markings are applied to the shield, then a cut is made with a construction knife with a depth of 2-3 mm. Only after this can you pick up a file with oblique teeth.
Making the cover
The ends of furniture need protection from mechanical damage. A simple and popular method is to frame it with wooden blocks. The connection is made using a tongue-and-groove system. Clamps and glue will provide additional strength. Finishing - together with the main fabric.
An important requirement for the lining is that wood of harder species (birch, oak, beech) is used than the base. The cracks are covered with a mixture of glue and wood dust. The corners of the trim are connected to each other with self-tapping screws. The heads are completely recessed into the wood.
Tabletop installation
Initially, lockers are installed. Between the wall and the edge of the canvas - up to a centimeter of free space to compensate for expansion when heated. It is then covered with a decorative plinth.
Installation is carried out in the following order:
- the ends of the lower storage sections are covered with furniture glue;
- the lid is placed taking into account the holes for the sink and hob;
- Self-tapping screws, dowels, fixing systems, and metal corners are used for fixation.
Tips for caring for wood countertops
Treatment with stain and varnish does not guarantee decades of trouble-free operation if you do not follow simple rules:
- hot cups and plates are placed only on stands. The same applies to a microwave, electric kettle, grill, coffee machine;
- water, fat, juices, detergents are removed immediately with microfiber cloths;
- Strong compounds containing acids and alkalis are not used for cleaning. Solvent-based products lead to bleaching of wood;
- oil treatment is carried out once a year. If the headset is new - every month. You can tell when it’s time to polish with a drop of water. If it is absorbed, you can take out the oil. It is enough to update the varnish once every two years;
- There is a waterproofing membrane between the dishwasher and the work surface.
Selection of material (board or solid pine)
Lumber is inspected and selected without knots. A tree with a wormhole, a longitudinal core cut, and non-parallel fibrous wood is rejected. Planed beams and boards bent by the drying process, moving away from the planned parameters into any of the planes, are not suitable for the tabletop.
Natural wood
Available wood, its properties:
Substitutes
Improved properties have led to the creation of wood boards without strong torsion in a humid environment, protected by plastic (laminate), and therefore moisture-resistant, with a wide range of decorative properties, ease of processing, and low specific gravity. Widely used materials:
- plywood,
- Chipboard, laminated chipboard,
- cement bonded particle board,
- OSB (oriented strand board),
- with the addition of cement and gypsum - DSP, GSP,
- MDF, fiberboard – medium and fine fiber.
Most pressed boards contain phenolic resins and are therefore relatively safe. Natural wood smells of phytoncides - it’s useful.
How to make a wooden tabletop with your own hands?
From our article you will learn how to make a wooden tabletop with your own hands, what board material to choose, as well as how to glue and level it.
Wooden countertops are in demand among lovers of classic style, eco, art decor and other trends that involve the use of natural materials. They are not as practical as marble countertops, but with the right approach to manufacturing and operation they last more than 10 years.
Types of furniture made from slabs
In addition to tabletops, completely unexpected pieces of furniture can be made from wooden blanks.
- The benches will look original, especially in a large hall or in the local area.
- An impressively sized table with an original tabletop will fit perfectly into the living room.
- Coffee tables with irregular geometry diversify the room and fit into almost any style.
- Kitchen furniture with horizontal surfaces made of slabs will fit perfectly into the Loft, Provence or Country style.
- A slab desktop diversifies the usual geometry of space.
Make a tabletop from boards with your own hands: what material to choose?
To make a work surface yourself, you can use different wood blanks:
- Floorboards with profiled ribs.
- The bars are the same size.
- Longitudinal section of the array. Suitable for making a narrow table, bar counter.
Weaknesses of wood that must be taken into account when choosing it as a material for making countertops:
- Susceptible to linear expansion due to moisture.
- Tendency to rot.
- Low degree of resistance to scratches, dents, and chips.
Countertops made of natural and artificial stone, which can also be decorated to look like wood, do not have these shortcomings.
Whatever type of blanks are used to assemble a do-it-yourself wooden countertop for the kitchen, it is important to properly prepare the material.
First of all, boards, bars or saw cuts must be dried and treated with an antiseptic. Moisture, as you know, is the main enemy of wood. Impregnation cannot be the only means of protection. Subsequently, the tabletop must be coated with a hard layer of protective varnish or epoxy resin. In some cases, durable furniture glass is placed on the work surface.
Not every wood is suitable for a table, especially a kitchen table. Preference should be given to oak, beech, hazel, and ash. You should know: a hand-made pine tabletop is aesthetically pleasing, but is prone to resin release, and its strength is relatively low. Reliable protection with epoxy or glass will be required; varnishing may not last long.
A little about forms and parameters
The first step is to decide what shape the table will be made. This will largely determine what shape of saw cut will need to be found, and how the work itself will be carried out. So, as for the countertop, it can be:
- round , which will require quite a lot of space around the table. But this furniture looks great. However, it is important to take into account that to make such a table you will need to find either a very large saw cut in diameter, or you will need a lot of end cuts of more modest parameters. These tables look best in spacious rooms;
Coffee table made of natural wood
- oval , which is perfect for use in a large family. It is comfortable to sit at the oval tabletop, and due to its large size, you can place a lot of things on it;
- rectangular , which means the table will fit perfectly against the wall and take up less space than a round one. But in this case, the cuts will have to be taken not end-wise, but longitudinally. Although you can make such a tabletop from many small cuts, choosing the optimal shape. The same can be said about square tables.
Wooden coffee table
On a note! It is not necessary to make a large dining table from sawn wood. You can limit yourself to a small magazine or coffee one. It all depends on the desires and capabilities of the person who will make the furniture and then use it.
Also, immediately “on the shore” you need to think about the number of legs. So, round, square and rectangular tables usually have 4 supports. But there are variations using three legs located at a certain angle, or even one support, but with a wide, stable base. Whatever one may say, the most stable option will still be a table with 4 legs.
Cross-cut oak table
How to make a wooden tabletop with your own hands?
The longitudinal cut of the trunk used for the table top should be treated quite well: level the surface with a jigsaw, carefully sand it, level or edge the ends, coat it with an antiseptic and varnish it in several layers with intermediate polishing for perfect gloss. After this, the tabletop is placed on a support or legs.
How to make a countertop from bars with your own hands? The plank and typesetting surface of the table is made using the same principle.
The bars or boards can have a straight or profile edge for interlocking. Regardless of this, the elements are connected using wood glue.
How to glue a wooden tabletop with your own hands?
Bonding is the most important stage of the “operation”.
- The first guide block is fixed to carpentry clamps. Its end is coated with glue and the second element is brought in, carefully pressing the bars, and fixed with a clamp. In order for bars and boards without a profiled edge to be joined end-to-end, they should be laid on 2 guides of the same width, laid out strictly horizontally.
- The mutual adjustment of the boards with the profile should also be carried out from the corner by tapping with a non-metallic hammer for the ideal installation of the lock and the formation of a surface without cracks.
- Each subsequent attached board or block must be pressed tightly and fixed to the main element. The finished structure must be compressed with clamps or other similar devices. And so that the bars do not tend to turn upward, they must be fixed with even planks or timber along their length.
Important . To prevent the shield from bending during operation, it is recommended when gluing to alternate bars with different cutting directions - longitudinal/transverse, radial/tangential.
When the glue has dried, holes are cut out in the shield using a jigsaw for the sink or stove (if provided).
How to level a wooden tabletop?
You will need a plane for leveling. They pass along all the main bumps and edges. Next, the treatment areas need to be sanded with sandpaper from coarse to fine, and then polished with a grinder.
Is it necessary to degrease surfaces and what is the best way to do this?
When gluing wood to wood, there is no need to degrease the surfaces. Although in some cases, for example, when working with oily rocks, this will not be superfluous. In this case, it is advisable to degrease the wood before gluing with white spirit.
When gluing dissimilar elements: wood with plastic, glass and other materials with low adhesive properties, the degreasing process is more important. Degrease only one of the surfaces, wiping it with white spirit.
How to make and install a wooden tabletop with your own hands, when there are oak or walnut options
A wooden countertop is a stylish and original element that can add an interesting and functional accent to your kitchen interior.
Today, a huge number of different natural and artificial materials are used to make countertops, including stone, plastic, plastic and, of course, wood.
It is the latter material, as well as related woodworking waste, such as plywood and chipboard, that allows you to make the top of the table yourself at home.
How wood is glued - technology and subtleties
Making furniture with your own hands is becoming increasingly popular both due to the high cost of finished products and due to the large number of raw materials that have become freely available. At home, with a minimum set of appropriate tools, it is possible to assemble viable furniture that will serve well and delight you with its appearance. One of the most popular methods of joining wood is gluing, which allows you to obtain durable, monolithic parts. Bonding can be used as an independent fastener or as a backup when using external elements such as dowels, dowels or screws.
Breed options
As mentioned above, regardless of the type of structure being installed, to create it you must initially select the right wood. In order for the table you create to be as durable as possible and resistant to external influences, preference should be given to hardwood - the best option in this regard would be:
cherry;- teak;
- nut;
- oak.
It is these tree species that have the most optimal strength characteristics and are able to effectively withstand the changes in humidity and temperature that are common in kitchen spaces.
Wood selection
Often, the manufacture of furniture involves prefabricated wooden tabletops and made from millwork. Solid wood tabletops are very beautiful, strong and durable, and therefore quite expensive, which is why they are used for assembling premium furniture. However, for work at home and without special skills, solid pieces of wood are not suitable, since they are very difficult to process.
Regardless of the type of construction you plan to do, you must first choose the right wood. The table should be durable and resistant to mechanical stress, especially when it comes to kitchen furniture. If you want the countertop to serve you for many years, preference should be given to hardwoods: oak, cherry, cherry, teak or walnut. These are the most suitable trees for creating tables. There are also harder species, but they take a long time and are difficult to process, and the cost of some exceeds the price of ready-made factory furniture. In addition, wood that is too hard can dry out or swell due to changes in temperature and humidity. The types of trees listed earlier not only have sufficient strength, but are also able to effectively withstand various external influences.
Tools and materials
Depending on how you will make the tabletop, you will need different tools. So, if you are making a tabletop from a wood panel, you will have to acquire a jointer - a long plane, which is used to finish (smooth) the surface. The panel method allows you to make strong and durable furniture of large sizes.
The best option for a self-taught craftsman is a jointing machine. You can rent it, or if you do not have the skills to work with such equipment, ask a specialist to process the workpiece in a workshop.
So, what do you need to make a wooden tabletop:
- automatic or manual cutter (if you plan to make a table for your garden that will stand outdoors);
- jointer;
- hacksaw, hammer drill;
- set of drills;
- hammer;
- fasteners (nails, screws);
- pliers;
- sandpaper of different grits (from No. 3 to No. 0);
- thicknesser;
- clamps;
- wood (boards);
- wood glue;
- stain (if you will be tinting the wood);
- antiseptic impregnation (to protect the tree from pests);
- varnish or paint;
- flat brush.
Helpful tip: Choose boards of the same thickness if you want a durable tabletop. Before assembly, all wooden elements must be dried, otherwise the tabletop will deform over time.
Before starting work, select the type of connection of the elements of the future countertop. In some cases, you may need additional wood slats and fasteners.
Drawing
When choosing dimensions for a future countertop, you first need to focus on the dimensions of the kitchen space itself. At the future table it should be comfortable to both stand and sit, as well as use the furniture installed above its surface. In this regard, the most optimal parameters are considered to be:
- length ranging from 850 to 900 mm;
- width ranging from 600 to 800 mm.
Accordingly, the length of the table will depend on the initial parameters described above, which may vary depending on the height of the user and the dimensions of the room.
In addition, it is important to decide on the shape - it can be round, oval or rectangular.
Making your own table
After purchasing a slab, you need to prepare it for work. In the absence of special equipment, you can use a manual milling cutter mounted in a movable platform. After processing with a milling machine, small irregularities can be removed using a grinding machine.
It is extremely important to remove bark and minor defects on the workpiece. Further work depends on what kind of countertop you plan to create in the end.
The slab can be sawn lengthwise to create two parts of the future tabletop. The resulting halves must be placed on a flat surface. The workpieces need to be based, and the space from below must be sealed with a smooth board.
- Next, you need to choose the appropriate color of epoxy resin. It has no color, but it is easy to give it a tint by adding color.
- Resin must be poured into all cavities on the workpieces. It is advisable to warm it up before use.
- Filled cavities can be further decorated by filling them with pebbles, branches or even insects.
- But, it is necessary to take into account that objects will float up, so they need to be sunk.
- A hardener must be added to the solution. When the resin has hardened, you need to cover the boards with a layer of resin or varnish.
Tools
To make a wooden tabletop, a novice user will need the following tools :
- electric or manual plane;
- electric jigsaw or wood saw;
- drill;
- Bulgarian;
- thicknesser;
- tape measure and square;
- sandpaper.
In addition, for subsequent assembly and finishing of the product, the craftsman may need stain, various antiseptics against pests, wood glue, paint or varnish and, of course, an application tool such as a paint brush.
How to clean a surface from dried glue?
It makes sense to remove excess glue from the surface of the wood either while it is completely fresh or when it has completely hardened. If you rush to sand a damp area of wood, you will most likely end up with an even greater aesthetic defect when the fibers deformed by sanding dry. The hardened glue is cleaned by hand sanding (along the fibers) or cut with a chisel.
Before applying decorative finishing, check to see if there are any stained areas on the product. Otherwise, traces of dried glue will appear under the finishing compound. To more effectively detect defects, wipe the surface of the wood with a cloth soaked in white spirit.
How to do it?
The countertop manufacturing technology varies depending on the source material used in the work. If a board or straight plank is used, the sequence of work will be as follows:
The required number of boards must be cut according to the specified length.- Process the surface of the cut material using a plane.
- Cut grooves in the side ends using a jigsaw.
- Cut slats from the same material as the future tabletop. In this case, the thickness of one rail is similar to the width of the groove.
- Insert the made slats into the groove on one side and glue them with wood glue.
- Connect all the prepared boards in such a way that each batten fits into the free groove of the adjacent board. Fill the joints with the same wood glue.
- Compress the boards connected to each other by installing clamps or other devices that compress the already assembled canvas.
How to make from furniture board?
When a furniture panel is used in the manufacture of a tabletop, the work is performed as follows:
- The furniture panel is given the required dimensions.
- The inner side of the furniture panel is reinforced with wooden blocks or slats - thus ensuring maximum structural strength.
- If it is necessary to install the legs, the mounting elements are installed, as well as the installation of the necessary fasteners.
Plastic covering
Regardless of the countertop manufacturing technology used, as well as the type of wood material used, its surface can be coated with plastic - this will significantly improve the performance characteristics of the surface.
At the same time, plastic can be used not only in the manufacture of a table, but also if its working surface is damaged during operation.
Today, there are a huge number of different types of plastic, which differ both in size and in their performance characteristics, as well as in appearance. In order to decorate the surface with this material, the plastic must be cut according to the size of the table and glued using liquid nails or special glue for mastic.
Cover
If wooden boards were used during assembly, then during the manufacturing process of the whole canvas, in order to hide their ends, a special covering is made, which acts as a protective edge.
It is made from wooden blocks and installed around the entire perimeter of the tabletop.
The lining is attached to the canvas in accordance with the “edge-groove” principle. In this case, finishing of the lining (grinding, polishing, painting) is carried out simultaneously with fastening.
If a furniture panel is used to make the tabletop, the same principle of edge finishing is used.
Pros of wooden countertops
- Hygienic: Wooden countertops are natural and hygienic because they have natural protection against bacteria.
- Easy Repair: Unlike other materials, if wood countertops are ever damaged, simply sand away any unwanted marks or dents to smooth out the surface.
- Adaptability: The rustic look of the wood allows wood surfaces to blend in with any kitchen style.
- Price: Since the wood countertop will be manufactured exclusively by you, you will only pay for the materials. Depending on the size, design and type of countertop, it can cost 2 to 7 thousand rubles.
- Moisture Control: Wood countertops are porous and naturally susceptible to water damage, but if they lose too much moisture, they dry out quickly. Therefore, it is important to have a quality finish to preserve the natural moisture content of the wood.
Installation
Installation of the kitchen countertop is carried out as follows:
- The finished tabletop is laid on the kitchen cabinets and secured using fasteners or with the help of special tires located on the bottom of the canvas, which must be installed in the holes in the upper ends of the cabinets.
- When installing the tabletop, you must ensure that the distance between the canvas and the wall is maintained, as well as between the side edges of the table and the adjacent furniture.
- Special pads are put on the ends of the canvas , which are secured with self-tapping screws.
- Next, the sink is installed . The places where it connects to the canvas must be treated with sealant. This will protect the tree from swelling.
- The siphon are being .
Log sawing
Dissolution is a labor-intensive procedure, but it can be implemented without large-sized equipment and lifting machines, carried out using mobile sawmills.
It will not be possible to organize large-scale production in this way, but creating slabs yourself in this way is a completely feasible thing.
How to paint?
Painting is a fairly important stage in creating a countertop, since a layer of paint in this case will act as additional protection for the canvas from external damage.
Experts unanimously say that for furniture that will be used indoors, water-dispersed acrylic paints . They are completely non-toxic, easy to apply and dry fairly quickly.
Before painting, the entire surface of the tabletop is treated with sandpaper, and any existing defects in the canvas are primed.
Kitchen countertop manufacturing process
When making a drawing of the future product, it is necessary to take into account that in thin places (h = 10 mm) the wooden product splits from impacts. The tabletop should be uniformly massive (especially at the edges and in places of through cuts), with a board thickness equal to/higher than h=15 mm. The video below will tell you how to make a dining table with your own hands.
Preparation of materials and tools
- steel hammer,
- epoxy hammer,
- 4 clamps,
- PVA glue (or any carpentry glue),
- copper (bronze) nails,
- awl, punch, square,
- drill with drills diameter 1 and 5 mm,
- backing pieces of plywood,
- wooden conical nails (diameter 3–5 mm), as an option - Japanese sticks are filed.
Assembly
The first board (laminated timber) is fastened with clamps on the guide crossbars - the same for both methods.
- When making boards, coat the transverse lining with glue, fix it without finishing the nails along the mark made with an awl. The next board is tongue-tied to the previous one, driven from the corner, lightly tapping with an epoxy hammer. The nails are not finished off and then the heads can be bitten off, drowned, or removed completely;
- The solid beams are compressed with glue one by one, allowing each gluing to dry for 24 hours; compression is done using clamps. Other options:
- Using studs L = 80 cm and wing nuts,
- Compressive band on the comb beam,
- On a timber sawn along the width of the table top and sealed with wedges.
The last option is quite primitive, because the jammed bars tend upward. Only a limit bar screwed on top can resist the parts tearing upward.
Assembling the array in one step is possible with a sufficiently large number of clamps (for every 40 cm of the length of the tabletop - a pair).
Covering - manufacturing nuances
Nailing a “sagging” flanged profile bar with nails (bronze, wood) is a simple task. For strength, they are mounted on glue.
Workshop conditions allow the use of a profile cutter on a machine or a guided hand router along a block fixed to the table. Using a shaped cutter attachment, they create a decorative profile, as well as ridges and grooves of the edge of the shield with opposite formations on the flange. Deciduous wood is used for frames: alder, pear, cherry, apple. The edge, protected by a flange, protects your hands from burrs and gives the tabletop a solid, massive look. On glued typesetting panels, the decorative edging is cut out on the solid wood itself, tracing the contour with a milling cutter.
Processing: product coating
The finished tabletop is sanded and varnished. The best varnishes are tsapon, oil, oil-acrylic, acrylic, alkyd.
The first one smells sharp, but dries quickly. A multi-layer coating with sanding (glass yellow, but not graphite gray) sandpaper is acceptable. Tinted acrylic stains are less suitable because they do not form a thick protective layer. Tsapon is applied with a soft natural rag tied to a block with natural twine. With quick movements, dip the rag into the metal container until it reaches the level of the bar. The remaining varnishes are applied with a brush or spray paint device in 2-3 layers with a mandatory interval for complete drying of each. The thinner the first layer, the more evenly the next one covers.
Combined option with plastic
HPL/CPL (high/low pressure) plastics are glued with compounds recommended by manufacturers onto a perfectly flat, clean, grease-free surface.
- the plastic sheet is cut with an allowance,
- degrease both surfaces to be bonded,
- cover the tabletop with plastic, placing temporary guides made of PVC plastic to prevent instant setting,
- press the plastic with an anti-tabletop, removing the PVC strips (with a plate of the same size) using many clamps along the contour (at least every 20 cm),
- excess plastic is cut off with a circular hand saw along the guide rail through the pressing board (all 3 layers - table top + plastic + pressing board - are cut simultaneously).
Due to the fact that an anti-tabletop is needed, it is better to make 2 pieces. simultaneously. Plastic is not placed on a prefabricated panel - only on a polished solid.
How to glue boards into a furniture panel with your own hands
Beginners in furniture making often do not know where to buy furniture panels that suit them. Samples sold in stores are not always suitable for the planned design. But experienced craftsmen always have wooden boards on hand. With their help, you can easily create a furniture panel yourself if you know the manufacturing technology.
To do this you will need glue, a lot of tools and knowledge of step-by-step instructions.
Manufacturing of carpentry panels
We select dry boards of the same thickness
Making a carpentry panel is the arrangement of pre-prepared elements. The main parts of the carpentry panel are wooden boards. But first they need to be specially processed.
Cut the boards to the required size
We process the surfaces of all boards using a plane and jointer
Use a plane to level the surface of the board material. Using sandpaper, carefully sand the surface. After grinding, the prepared material must be treated with an antiseptic.
Sand with sandpaper or a sander
Construction stores have a huge selection of them, but please note that you need a solution for interior work. The antiseptic will protect the wood from excess moisture, which is available in abundance in the kitchen, and will prevent the appearance of mold and insects.
How to glue wooden boards into a board
To properly glue furniture panels , you should first acquire special equipment:
- Planing machine;
- Circular Saw;
- Hammer;
- Thicknesser for drawing marking lines;
- Long ruler, tape measure and pencil;
- Clamps or homemade tools for tightening boards;
- Surface and belt sanders for stripping wood. Instead, you can use sandpaper, screwing the wood onto the block, but cleaning will take more time;
- Electric planer;
- Wooden boards.
- Glue.
To successfully glue boards, it is important to choose high-quality and reliable glue:
- Isofix G818. Professional wood glue made on the basis of polyvinyl acetate. It does not contain solvents, is characterized by high moisture resistance and powerful fixation, used for interior and exterior work, gluing any type of wood. Becomes transparent after drying. Product cost: 232 rubles per 500 ml package.
- Joiner or Super PVA Moment. Heat-resistant, quick-setting and high-strength adhesive designed for gluing all types of wood, chipboard, MTF, DVM, veneer, plywood, fittings and laminate. After drying it becomes transparent. Cost: 330 rubles per 750 ml package.
Instructions - how to glue a shield without clamps and clamps
Once you have all the equipment, tools and suitable glue ready, start gluing the shield. This process consists of several stages.
Preparing the boards
The wood for making shields must be of the same type.
Types of wood that are used to make furniture panels:
The wood must be dry, smooth and free of knots. It is best to buy ready-made timber and cut it at right angles into pieces of the required size. If there are any unevenness on the bars, use a planer.
The thickness of the boards should be several millimeters greater than the final parameters of the shield, since after gluing and drying they will need to be refined by sanding. To do this, select a workpiece with a width to thickness ratio of 3:1. The boards should be no wider than 15 centimeters so that excessive stress does not arise in them during drying.
Preparation for gluing
Before connecting all the boards, they must first be adjusted so that you get a beautiful shield:
- Build a flat surface so that it is convenient to glue the board from the boards. For this, it is best to use a chipboard sheet;
- Attach the strips to the two edges of the chipboard, adjust their height in accordance with the height of the workpieces;
- Place the boards between the planks so that they fit snugly together. If there are gaps, remove them with a jointer. Carefully examine the wood grain of each specimen. The lines of adjacent blanks should connect smoothly and then the shield will turn out beautiful. To adjust the lines, move the boards along the length;
- After placing the blanks on the chipboard sheet, mark them or mark them with figures so that you can quickly put the board back together.
Gluing process
Once you have adjusted the boards, glue them together one by one.
- Cover the surface to be glued completely with glue. It is important not to apply too much glue, otherwise it will cover the seams. But do not neglect the glue - its deficiency will negatively affect the strength of the shield;
- Press the greased boards firmly one to the other;
- Attach two more planks perpendicularly to the two planks located on both sides of the chipboard and secure them with self-tapping screws. This will avoid bending of the furniture board when gluing;
- To increase the adhesion of the bars, use wedges. Press the boards until the first drops of glue appear on their surface;
- Let the shield dry for about an hour. Then remove it from the surface of the chipboard sheet. Do not touch the material for another day.
VIDEO INSTRUCTION
Final stage
As soon as the homemade furniture board dries, the wood must be sanded, planed and traces of glue removed.
This will give you a smooth and even surface:
- Place coarse sandpaper in the sander to pre-sand;
- Then treat the surface of the shield with a surface grinder;
- If you notice lint, you can get rid of it with a small amount of water. Pour it onto the surface of the furniture board and wait until it dries. After this, the fluff will rise and can be easily removed with sanding equipment.
By following these instructions, you will create a high-quality furniture board that will become an excellent basis for the construction of bedside tables, tables, shelves and many other items for your home.
Where can I get the saw?
Having decided on the basic parameters of the future table, you need to prepare the necessary materials. And the most important material that will play a decisive role in the process is a good quality cut of wood that fits the size. It seems that everything is simple here - I went into the forest, took the first log I came across and sawed off a round piece from it. But in reality everything is much more complicated.
Safety precautions when working with a chainsaw
Preparing saw cuts is not entirely easy. First, you need to find a good tree of the required diameter as well as quality. Secondly, mistakes should not be made during sawing. The slightest mistake - and you will have to look for a new tree and do all the work over again.
Wooden cuts
For the manufacture of tabletops, saw cuts with cracks are almost unsuitable (except in certain cases). Also, the wood must be treated before use. The easiest way is to buy ready-made saw cuts - it turns out that they are sold, but finding a supplier is not so easy.
Table made of saw cuts and epoxy resin
If you prepare saw cuts yourself, then you need to look for one that will have a beautiful wood color, will not be cracked, and will have a beautiful pattern. If several cuts will be used for the tabletop, then it is important to ensure that the pattern is similar, or at least use cuts from the same type of wood.
Important! The pattern of the tree on the saw cut is the highlight of the future table. And therefore, the selection of wood patterns must be treated with utmost care.
Tree cuts
It is best to use saw cuts that are already dry to make a table; moreover, they should be made from a type of wood that is less susceptible to moisture than others. It is better to choose those that do not have knots and other defects that can break off over time and ruin the product. The cuts must be of sufficient thickness and not too thin or too thick.
Thus, only at the stage of preparing the cuts can you stall. But it’s worth it - a unique table made from sawn wood, created by yourself, can become the highlight of the interior. In addition, as a rule, such tables are very durable and can serve for many years without complaints.
Coffee table made from cut wood
