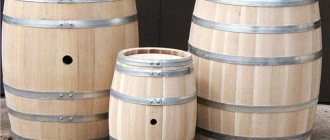
You can buy almost everything today. But it’s quite difficult to find a wooden barrel that’s really high-quality and solid, and it’s also expensive. There is one more point that not everyone takes into account - it is not a fact that the finished barrel will be suitable for a specific purpose. The reason is the mismatch of wood species. The conclusion is clear - make the barrel yourself. And if you understand the drawings and nuances of the work in detail, then it will not turn out to be in any way complicated or impossible to do with your own hands.
Cooperation craft - how to become a master
If you are in a decisive mood, have skills in woodworking, and your hands are always growing, why not try to realize the idea of becoming a home cooper (cooper)? Cooperation is a difficult craft that comes from ancient times. Nowadays there are very few masters of this craft, and there are only a few highly qualified craftsmen. Therefore, cooperage products are rare on the market, and even if you can find them, either the price or quality does not please the buyer.
Barrel assembly process
About waxing
If the product with moonshine is left in a warm place, then intense evaporation of the distillate will occur through the walls. To prevent this, you need to wax a hand-made oak barrel. To do this, place beeswax in a water bath and gradually melt it, while filling it with linseed oil and mixing thoroughly. Next, using a soft and wide brush, the composition is applied to the surface of the barrel. In order for the wax to spread evenly and better saturate the wood, it needs to be slightly heated with a hair dryer. If you don’t have this tool, then you can limit yourself to a regular hairdryer.
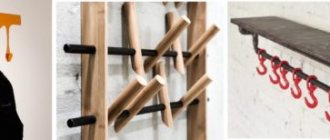
What tools are needed to assemble barrels?
Having decided to make your first barrel, keg or tub, you need to equip your workplace and stock up on the necessary tools, fixtures, and available materials. In addition to the usual carpentry kit, you will need to stock up on special cooperage equipment, fixtures and tools. This:
- carpentry workbench equipped for cooperage;
- cooper's long jointer, circular humpback plane;
- a device for planing the edges of the boards from which the product is assembled);
- devices for tightening rivets (frame machine-gate, chain tie, post gate);
- plow, stapler, stapler;
- hand-made patterns and templates;
- metal or wooden clamps for assembling the barrel frame;
- morning maker (a device for cutting a morning groove into which the bottom of the product is inserted);
- heels (metal, wood, combined), tension for hoop;
- cooper's bracket.
Fixtures and measuring instruments
It should be taken into account that coopers make a significant part of the devices and tools themselves, “to suit themselves”, ensuring that the handles of the tools are held in the palm like a glove, and that the machines and workbenches are of the same height.
On the left is a two-handed, on the right is a one-handed morning drill and how to work with it
What you need to know to make cooperage products
A distinctive feature of cooper's ware is that it is assembled from wooden planks prepared in a special way, called rivets (otherwise known as frets). The shape and dimensions of the product are completely determined by the configuration of the planks, which are pre-made by the cooper. And the consumer qualities of wooden containers depend on the type of wood used.
Therefore, it is not enough for a cooper to simply be able to master the tools perfectly. He must feel the “soul” of the tree and know the properties of each type of wood from which he plans to make this or that household item.
Staves are the main element for making a barrel
An experienced cooper will not make an oak barrel for storing honey - when stored in it, the honey will darken and acquire an unusual aroma. But oak barrels are indispensable for aging wine and other alcoholic beverages: oak wood gives them new aromas and flavor shades.
The second element, without which cooperage products are unthinkable, is a hoop that holds the elements, tightens them tightly, thanks to which wooden barrels do not leak. Hoops are made of metal and wood. There is an opinion that metal hoops are stronger, and the hassle of making them is much less than with wooden ones. However, some craftsmen think differently and make the most beautiful products using wooden hoops.
Planter on wooden hoops
The advantage of modern production
The production of wooden barrels can be manual or industrial. In the first case, the master creates blanks with his own hands, and in the second, using special equipment.
But how are wooden barrels most often made? The choice of the optimal option depends on the scale of production, purpose and volume of containers. The important thing is that with the help of modern equipment it is possible to create fairly high-quality rivets, so this technology will not in any way impair the performance properties of the finished product.
If you want to select and purchase high-quality oak barrels, go to the website. The assortment includes many products created in strict accordance with technology.
As an advertisement
What unites people with the names Bocharov, Bondarenko, Cooper, Tonnelier, Fassbinder, Kadar? That's right, their ancestors were owners of the ancient and very respected profession of cooper (cooper). The barrel is firmly rooted in human culture.
From the names of the barrel came the designations for volume and mass - barrel and ton. Which pickles, herring or beer are the best? Well, of course, barrel ones! The design of the barrel is not that complicated, but it is fantastically difficult to make it correctly.
Cooperage is a broader concept than a barrel.
It includes tubs for pickling cabbage, wooden buckets, gangs, and now fashionable fonts for different types of baths. And everywhere we are talking about a certain vessel, the walls of which are assembled from separate wooden planks, tied with hoops. But the barrel clearly stands out from this series both because of the complexity of its manufacture and its special properties.
Let's start with the fact that it cannot be called a 100% carpentry product. The carpenter's job is to prepare the wood pieces to the required dimensions and then join them together using metal fasteners, tenons or glue. In a barrel, prepared wooden parts (they are called rivets) cannot simply be connected.
The rivets not only connect to each other, but also bend with great force under the influence of high temperature, which softens the wood fibers. So, in a certain sense, the barrel is made of wood. By the way, the technology of bending wooden parts under the influence of heat or steam was first developed in ancient times during the construction of wooden boats and, apparently, was later borrowed by coopers.
The first wooden vessels (like the first wooden ships) were dugouts. Under the influence of air and moisture, the hollowed out vessels dried out and cracked, and perhaps it was then that our ancestors came up with the idea of assembling a vessel from segments with the correct direction of the fibers. 1.
Preparation of rivets. Different types of wood are suitable for making barrels, but dense wood is preferred for wine barrels. The churak (a fragment of a tree trunk) is initially cut into four segments by a cleaver, and rivets are made from them.
Main details and manufacturing principle
It may seem that the task of becoming an amateur cooper is too difficult, and one can only quietly dream about how to make a barrel out of wood. But if you're serious about making your dream come true, it's time to roll up your sleeves.
First of all, you need to choose the type of product that will become your first-born. With all their diversity, there are three types: with a conical, parabolic and cylindrical frame. As already mentioned, the shape of a cooper's product is completely determined by the configuration of the staves from which it is assembled - the more complex the shape, the more difficult it is to make the treasured wooden barrel.
Impact of configuration on product type
The figure above shows the types of cooperage utensils and the corresponding types of staves:
- Grooved, made in the form of a quadrangle, the long sides of which have the form of parabolic curves. Used in the manufacture of cooperage utensils with convex sides: barrels, kegs. Such rivets are the most difficult to make, which determines the complexity of making barrels in general.
- The base of the container is a cylinder. They are easy to manufacture because they are rectangular grooved boards. It is easy to make such frets, but it is difficult to connect them with hoops with a constant diameter. When the wood dries out, the hoops no longer hold the rivets. Therefore, cylindrical cooperage products are practically never found.
- Utensils are made from straight grooved frets in the shape of an elongated trapezoid, the frame of which is a truncated cone. When the hoop is stuffed onto the wide part of such containers, a very strong tightening of the rivets is achieved. This feature has found application in the manufacture of various tubs, tubs, and jugs.
A mini-bath is built using the same principle.
For the first experiment, it is advisable to choose the manufacture of a small tub, commonly called a barrel.
Using bog oak
In order to create products from bog oak, it must be properly dried and stored. International and state standards for ordinary wood are not suitable for bog oak. Special requirements affect its cost. Properly soaked and dried bog oak is expensive, which reduces the demand for it. Unfortunately, illiterate miners of this value, neglecting all the rules, throw the trunks in the sun or leave them in open-air areas for the winter, store them on barges, etc. As a result, most of the material becomes unusable and is used for firewood, and the remainder, which can be used elsewhere, is sold at a low price.
In the 90s, there were many cases when hundreds of cubic meters of bog oak were lifted from the water, sent wet abroad by wagons, and as a result it went into the furnace, because... upon arrival was not suitable for manufacturing products. Because of this, Western investors have lost interest in running such a business for a long time. Sometimes some of the raised trunks were thrown back into the reservoir. It is extremely difficult to return such material to normal condition when re-lifted.
Even in our time, there are very few specialists who can properly process wood. But if no mistakes are made, products made from bog oak truly become masterpieces of art in the hands of skilled craftsmen. For centuries, stunning and unique things were created from it - a variety of furniture, boxes, caskets and figurines - and was called “black gold”. Wealthy people could even afford parquet flooring for exorbitant amounts of money. Carving on bog oak was trusted only to trusted “blacksmiths”. Oak sets adorned the best houses, and men walked pompously with pipes made from this tree. Making it into veneer or covering it with varnishes, plastics and synthetic resins is absurd.
Bog oak is a valuable material that cannot be replenished, like any fossil. Hundreds of years must pass for new specimens to appear. But they will no longer be environmentally friendly due to environmental pollution. A thoughtless, superficial attitude towards the material leads to a reduction in stocks, but for now there is time to purchase products from centuries-old trees. They will serve more than one generation and will inspire awe among true connoisseurs of the natural beauty that nature has created.
How to make a country tub for pickles
A tub is the simplest cooperage product with a conical frame. Having achieved success in building a tub, you can try on how to make a more complex barrel at home. The creation process consists of three large stages:
- production of blanks (components) of the product;
- assembly of the structure;
- finishing.
Planter for beginners
Independent preparation of rivets for the tub
The reliability and durability of a wooden barrel depends on how carefully the rivets are prepared. The most suitable are considered to be blanks chopped with an ax from logs and logs of sawn wood. Only the lower part of old tree trunks is suitable for this.
Oak wood, most often used to make barrels, is very durable. But oak logs (blocks) are quite easily split with an ax in the radial direction. In general, the process of preparing staves from different trees is approximately the same. There are single-row and double-row pruning methods. The single-row one is suitable for splitting thin logs, the two-row one is suitable for massive logs.
Double-row punching of blanks
The procedure for cutting rivets from a ridge:
- Split the ridge into 2 parts so that the split line passes exactly through its center.
- Also split each block in half - you get quadruples.
- Split the quadruples into 2 parts, obtaining octagons. For a thin block of wood, the pricking process usually ends here. It is the eighth part that will serve as a rough blank for future riveting. This is a single-row prick.
- If the ridge is thick, make a two-row split: split each octagon in half along the annual ring (perpendicular to the medullary rays). The resulting logs are called gnatinniki.
- Split each gnatinnik in the radial direction. In this case, you will get 1-2 riveted blanks from the smaller one and 2-5 blanks from the larger one.
- Perform a small processing of the workpieces: cut off the wedge-shaped protrusions from the core side and the sapwood (frail young wood from the bark side).
- Send the workpieces to dry. In summer, they need to be dried in the open air for at least 3 months or resort to artificial drying.
Sequence of making rivets
Mighty beaded oak master class, photo, video
Beaded oak is just the thing for creative needlewomen to complement their collection or create as a gift. For beginning craftswomen, weaving oak will bring pleasure and additional skills. The technique is very simple - looping. The training master class has prepared step-by-step instructions for you with photos and videos.
A powerful and beautiful beaded oak can be woven from mixed glass beads of green shades, but for the first time we will use green beads of the same color. But many craftswomen like to fantasize, using different shades of green, and also weave acorn fruits, creating a realistic look.
Preparatory stage
To bead lush oak, you will need the following materials with fittings.
|
Step-by-step master class oak made of beads
- Without cutting the wire from the spool, we collect beads up to about one meter.
- You need to step back about 10-15 cm from the tip of the wire and make a loop out of 12 beads, twisting up to three times.
- We make subsequent loops from twisting, retreating 0.5 mm. Cut the wire after the woven loops. There should be 15 loops on one branch.
- To form a beautiful twig, grab the edge of the first loop with one hand, and the last leaf with the other hand, and carefully and slowly rotate the twig in a circle until a bunch of loops is formed. The wire is twisted at the end.
- It is necessary to weave 37 branches.
- We take a twig, apply it to a piece of thick wire and twist the rod. Then we wrap the tape around the trunk. Using this method, it is necessary to wrap all the branches for further work.
The sequence of formation of a mighty tree from branches
Before proceeding with the next steps, try to connect the branches together not evenly, lower the branches down a little with each fastening. We make them in this sequence, connect the branches together and secure them with tape.
We leave three branches one at a time.
We make branched branches - two out of two and two out of three; three out of seven and one out of five.
We collect the tree from small branches, wrapping it tightly with tape and beautifully bending the resulting clusters.
Upon completion of assembly, we separate the wire to the sides for stability.
Decoration and planting of a tree on a stand
Mix a mixture of gypsum and water (1:1). We lay it on the surface of the stone and fasten the tree (within half an hour the plaster will set).
We will need a mixture of plaster, PVA glue and some water to process the trunk and branches. We give it a day to completely harden.
We wait for the craft to dry, paint it with gouache, then carefully wipe the treated parts with a damp foam sponge.
We also paint the tree roots with chestnut color, but not completely. We decorate the surface in green, imitating grass, and sprinkle with a little beads.
At the end of everything, when the paint dries, you need to open the trunk and branches with colorless varnish.
Tips for needlewomen
- You can cover the wire with the buds with foil before putting on the base.
- Bend the branches as the shape of the tree allows.
- It is possible to make a powerful, thickened trunk using masking tape.
- If you want to depict creeping roots, then dip the cut pieces of bandage in a gypsum solution and wrap them around the tree trunk, and then treat the surface with plaster again.
- In order to create the appearance of an old tree, twisted and wrinkled, scratch the surface of the trunk with a fork onto the mixture that has not yet hardened.
Decorating elements can include stones (glued), decorative moss. In the example photo, see how tree pallets are decorated. The beaded oak tree will now become a gift for someone or a decoration for your interior. We wish you new creations and achievements in your plans!
Video review of oak weaving
podelkiruchkami.ru
Making rivets from blanks
Before making rivets, it is necessary to make templates and patterns in accordance with the shape and dimensions of a particular product.
To make rivets for a tub or barrel, you need:
- Make markings.
- Perform rough processing of each riveted blank: slightly round the outer surface and bevel the edges with an ax.
- Start finishing the outer surface with a straight plow or planer, controlling the process with a template.
- Plan the inner side with a fillet or humpback staple.
- Use an ax to trim the narrow edges of the frets, checking the accuracy with a template.
- Level the surface of the edges with a jointer.
To determine the required number of rivets, you need to find the largest perimeter of the tub: multiply the diameter by 3.14. This value will be equal to the sum of the widths of all elements. For simplicity, so as not to have to measure the width of each part (and it can vary), you can lay out a straight line segment on a flat surface equal to the largest perimeter of the barrel. Lay the finished rivets across the line until it is closed.
Sheet metal hoop
Do-it-yourself beaded oak (step-by-step master class + photos)
How beautiful and majestic does an oak tree look? I think many of us would like to make beaded oak for our home or as a gift to loved ones with our own hands!
Majestic oak
Step-by-step master class: do-it-yourself beaded oak
Good afternoon, dear visitors of the site handlive.ru! Today we are pleased to present you a master class from one of the most active participants in the social network for handicrafts Handlife – Busiki-Bantiki. The master class is a step-by-step guide to creating beaded oak with your own hands.
Beaded oak
Stage No. 1. Set of beads on wire.
We collect beads onto the wire, and then twist a loop (first seven, then eight, nine... twelve beads - different quantities for different branches). We make a leg from wire.
Stage No. 2. Making branches of our future beaded oak
We make the required number of loops every three to four millimeters (at first five, six, seven... fifteen - for different branches there is a different number of loops.
Next, you need to twist two branches together.
Then we fold one of the branches in half.
The next step is to twist the three wires together.
Next, fold the second branch in half and twist the four wires together.
This way we get a finished small branch.
….. Finished large branch.
All branches of different calibers and sizes for one oak tree.
The process of making oak from beads...
Stage No. 3. We make a trunk with branches and leaves.
At the next stage, we cut the wire about one centimeter thick into pieces-twigs of various lengths from five to fifteen centimeters. Next, you should wind a small branch with leaves onto a thick wire so that a small piece of thin wire remains.
Next, we wrap the wire with tape or thread so that the wound thin wire is not visible.
We grab the second branch, retreating approximately one to one and a half centimeters.
Just like the first, we hide the second wire under the tape.
This is how we got our first branch.
Branch - bottom view...
Stage No. 4. Making a large beaded branch.
Next we make another branch.
Twist two branches together...
We hide the connection of branches of tape tapes or threads.
Connected branches - bottom view...
Stage No. 5. Making several large oak branches.
In exactly the same way, we add more twigs to the large branch of our future oak.
Next, we make several large branches of the future oak tree.
Stage No. 6. Connection of oak branches.
Connecting large branches.
At the next stage of making beaded oak, you should wrap the trunk with masking tape, thereby forming bends.
We wrap the masking tape with a thin 0.18 wire to create roughness so that the plaster adheres better.
Fill the base of the tree with the bent ends of the wire with future roots - a mixture of gypsum and PVA glue. Next you should dry it for a whole day.
We painted the trunk and stand for our beaded oak tree black and then dried it.
This is how we got our own finished beaded oak. Good luck and success in your creativity!
Video master class: beaded oak
Beaded tree. Option
Bead tree. Option
Beaded tree. Option
Do you want to be the first to receive the best master classes?
handlive.ru
Making metal hoops for tubs
The cooper has to deal with both wood and metal, because the hoops that hold the dishes together have to be made independently from a metal sheet. But it’s easier to make hoops from hot-rolled steel strip. To do this you need:
- Determine the perimeter of the tub at the location of the hoop, add double the width of the strip to it.
- Using a hammer, bend the strip into a ring, placing the ends of the strip overlapping. Drill or punch 2 holes with a diameter of 4-5 mm, install steel rivets.
- Flare one edge of the hoop from the inside with hammer blows.
Frame Assembly Steps
To make a small barrel at home, two hoops are enough, corresponding to the perimeters of its upper and lower parts.
Stages of assembling the frame of the tub
Side rivets, tightened with hoops, form the skeleton of a wooden barrel. The skeleton should be assembled like this:
- Attach 3 support rivets to the small hoop with clamps at approximately equal distances from each other, which will allow you to install the structure vertically.
- Inserting the frets one by one, fill the sector between the two support rivets, fill the space around the entire perimeter of the small hoop.
- Using a hammer and heel, press down on the small hoop so that the parts fit securely together.
- Place the lower hoop on the frame and also attach it with a heel.
- File the ends of the frame along the line drawn with a thicknesser.
- Use a scraper to remove any irregularities inside the frame.
- Plan the ends with a humpback plane.
- Using a straight plow, chamfer the inside of the frame from the ends. This will prevent them from chipping and make it easier to insert the bottom.
- Using a morning tool, cut a groove (morter) into which the bottom will be inserted.
Cleaning up irregularities with a scraper
Assembling and installing the bottom of the tub
The fewer joints there are in the bottom, the higher its reliability. Therefore, for the bottom you need to select the widest and thickest blanks. The procedure for making the bottom of a wooden barrel with your own hands is as follows:
- Sand the edges of the boards and temporarily seal them together on a workbench.
- To determine the radius of the bottom, place the legs of the compass in the groove. Using the trial method, select a compass solution that divides the perimeter of the chimney into 6 equal parts.
- On the solid rivets, draw a circle with the resulting compass solution.
- Within the circle, make marks at the locations of the studs.
- Release the planks. Drill holes in the edges at the marked locations and drive in wooden or metal pins.
- Place the planks tightly together on the studs.
- Plan the bottom on both sides.
- From the center, again draw a circle of the same radius as before.
- Use a circular saw to cut out the bottom, leaving a small margin outside the circle.
- Use a straight plow to chamfer both sides so that the thickness of the wood at a distance from the edge equal to the depth of the chimney remains equal to its width.
- Knock down a large hoop with a heel, loosening the fastening of the rivets. Insert the bottom into the morning.
- Carefully turn the tub upside down and place a large hoop on it.
Now the homemade tub is almost ready. All that remains is to make the lid and circle. This will not be difficult - you can focus on making the bottom. After checking the barrel for leaks, you can begin preparing pickles in it.
You may also find it helpful to watch a training video.
Video: How to make a wooden tub
Using the techniques described, you can make tubs for indoor plants or flowerbeds for landscape design.
Flowerbed tubs will decorate the garden landscape
Beaded oak in a step-by-step master class with photos and diagrams
Let's continue the beading theme. In this article we will learn how to weave oak from beads, and will also pay a lot of attention to the formation and design of the stem part of the product. With the help of a training master class, you can make a beautiful and neat craft with your own hands.
Beaded oak in a step-by-step photo master class
Here is the following list of materials that will be needed during the work process:
- copper wire;
- green and yellow-brown beads;
- ribbon for floristry or floss threads;
- masking tape and scissors;
- wire cutters with pliers and a file;
- plaster solution and PVA glue, dark acrylic paint, varnish with a brush, stand and decorative material for decorating the craft.
Before you start beading, you must mentally reproduce this tree for yourself in your head or transfer the sketch to paper in order to understand what you want from this craft. So, cut the wire and put green beads on it to weave foliage. These blanks are easy to make using the loop technique. The first buttonhole should consist of 5 beads, and the next one should already have fourteen elements. Start weaving from the top leaf. Sometimes among these blanks there should be a brown bead that will imitate an acorn. For a lush crown you will need to make about two hundred branches with your own hands. Connect the finished elements in pairs, and twist the resulting branches in three or five pieces together. At the end, each design should be wrapped with floral tape or floss threads.
Now you will need a wire slightly thicker in diameter than the previous material. You should cut it in an amount that matches the finished branches. Using adhesive tape or tape, attach the bead blanks to the made sections the way you want or as your imagination tells you. Now you should have a real oak crown, which we will form step by step. In the photo you can see how it should look.
Choose the best twig as it will become the core of the trunk. Next, we begin to attach the remaining pieces, simultaneously wrapping them with tape. To make the oak look more natural, you should bend each element a little at your discretion or according to a pre-prepared sketch.
Glue the structure to the stand with glue. Check how firmly it is attached. Now cover all visible gaps with tape again, and you can say that the tree is ready for plaster and the weaving is finished.
Dilute the plaster with water and glue so that the solution has the consistency of liquid sour cream. Take a soft brush and apply a thin first layer to the entire stem surface, as well as to the branches. Let the product dry after this. Then thicken the solution and take a wide, stiff brush. Apply the solution again and immediately use a knife to make irregularities in the bark. The dried product must be processed with a file. The next stage of the master class is painting. You can use only one color of paint for this or combine several colors to make the oak look more natural. Apply broad strokes very carefully and in a dense layer so as not to leave visible gaps anywhere. When the first coat dries, you need to apply several more of the same. Finish the job with silver paint as shown in the photo.
The bead craft will be completely ready when you make a decorative decoration with pebbles and cover everything with varnish.
Video: Do-it-yourself oak tree made of beads
Beaded oak weaving pattern
handmadefrom.ru
Selection of material and production of rivets
The material for the body of wine barrels is exclusively oak wood. The rivets for them are prepared in the same way as for the tubs, that is, split rivets are used. For an experiment, you can make a wooden barrel from boards (oak, of course). In this case, the barrel will last less than one made from chopped frets. It must be taken into account that the boards for riveted blanks should only be straight-layered, otherwise the walls will crack.
Selection of boards for riveted blanks: a) such boards are unsuitable; b) these boards are suitable
Frets for the barrel have a complex configuration. Each of them is thinner in the middle than at the ends, the outer surface is convex, the inner is grooved. And the side edges look like gentle parabolas. Accordingly, it is more difficult to make barrel frets than tub frets.
Stages of making barrel frets
First of all, you need to make a template, a pattern. Stages of making staves for a barrel:
- Rough hewing with an ax with a semicircular blade until it is shaped into a prism. Reducing the thickness of the middle part by 15-20%.
- Beveling the side edges with an ax. Rounding of the outer edge (control with a template). Using a template, measure the width of the stave in the middle, determine its dimensions at the ends, and apply marks.
- Beveling the workpiece towards the ends along a slightly curved arc. Chamfering the side edges with a template check.
- Planing the outer plate with a plane or straight scraper.
- Processing the inner surface with a humpback plane or humpback scraper.
- Joining of edges.
In the belly of wood
Take a look at the giant cargo ship, on the deck of which metal containers with various goods are displayed several floors high. The barrel became the first sea container in history that could be stacked in the holds in the same multi-story stacks. No tub can withstand this, but a barrel can easily: thanks to its design, it can withstand very high pressure from the outside.
The dome-shaped shape of the side walls ensures that the point load is transferred to the entire body of the vessel. It is also convenient to roll the barrel, and due to the small “contact patch” with the surface, you can change the direction of movement without much effort. It would be much more difficult to “steer” a vessel of the correct cylindrical shape.
2.
Socket assembly. Rough hoops are used to assemble the barrel frame. Due to their shape (wider in the middle, narrower at the ends), the rivets connected in a circle form a structure that vaguely resembles a flower with diverging petals.
Particular importance is attached to the contact of the contents of the barrel with its wooden walls during the aging process. Not only well-known types of alcoholic drinks such as wine, cognac, whiskey, Calvados, but also balsamic vinegar, as well as salted cayenne pepper puree, which after fermentation and aging becomes the basis for Tabasco sauce, are matured in barrels to the required organoleptic conditions.
Initially, cooperage production was entirely based on manual labor. Nowadays, craftsmen have machines at their disposal, with the help of which rivets are shaped, rosettes are tightened, and hoops are set. However, some operations are still performed manually, and for this they use tools that have existed for many centuries.
Even in Soviet times, a lot of barrels were made in our country - they were the main container for fish, meat, and pickles. Nowadays plastic containers are used much more often, and the barrel has become, as they say, a niche product. To understand the technology of modern cooperage production, PM visited the production site of the St. Petersburg enterprise Vinstandart, which produces tubs, fonts and other wooden delights, as well as barrels for aging wine, the production of which has special requirements.
3.
Stretching and heat treatment. The rivets are tightened to obtain the characteristic “pot-bellied” shape using a loop of metal cable. To relieve stress in the wood, the frame is heated several times with steam and fire.
“For a wine barrel, you need dense wood,” explains the company’s general director, Vladimir Sysoev.
— The lower the density, the more permeable the barrel is to the environment, the more intense the gas exchange, and this can lead to premature spoilage of the wine. The ideal raw material available in our country is Caucasian oak. This tree grows in difficult rocky conditions, takes deep roots and has very little annual growth.”
The width of the growth ring for the wood from which the wine barrel will be made should be no more than 2 mm. But there is one more subtlety: so-called modular rays go from the core to the outside of the trunk. These are channels through which tree sap moves, and if such a channel crosses the wooden wall of the barrel from the inside to the outside, then over time the barrel may leak - in any case, the permeability of the wall to gases will increase, which is undesirable.
The newly assembled skeletons of the barrels still look rather rough. Only after final processing (scraping, wax impregnation) will these cooperage products take on a truly noble appearance.
Therefore, as blanks for rivets, not sawn wood material is taken, but chopped wood. It is prepared so that the channels do not intersect the thickness of the planks, but remain predominantly inside them. The split planks are kept in air for three to five years for high-quality natural drying - however, in our fast-paced times there are ways to significantly speed up the drying of raw materials.
Making a wooden barrel with your own hands will allow you not only to save money, but also to get a high-quality elegant product. Wooden barrels were used by our ancestors for pickles, making alcoholic beverages and storing water, which proved their versatility.
Therefore, they are still successfully used to this day. How to make a wooden barrel so that it is durable and does not leak? What tools and skills are required to make a barrel at home?