The floating cup is a type of topiary, a tree of happiness and prosperity. Creating a floating cup with your own hands is a creative, very exciting and low-cost process, and its result will delight you!)
The flying bowl looks very attractive and will add additional coziness and comfort to any home or office interior. Can be a wonderful gift for your loved ones and colleagues! Making a floating mug will not be difficult, the main thing is to know the basic principle of its manufacture and pay special attention to details and colors.
Master - Ovchinnikova Yaroslava
Materials
1) tea or coffee pair (cup and saucer)
2) glue for connecting the “flowing” structure with the bowl and saucer. It is better to use the universal Moment gel adhesive for ceramics, plastic or glass. An alternative can be any other adhesive designed to work with smooth surfaces. A glue gun is also used, but it is intended mainly for working with rough surfaces. There is a possibility that the cup will come off in the near future after gluing.
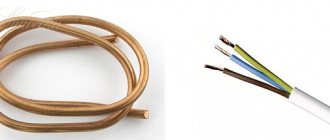
3) thick wire or triple wires. You can use other flexible items, such as old aluminum forks or spoons, or a metal hanger.
4) polymorphus ( superplastic ) – self-hardening thermoplastic. When heated, it becomes plastic and convenient for giving it the desired shape. When cooled, it becomes hard, elastic and durable.
5) masking tape - it can replace superplastic
6) modeling mass , can also replace polymorphus. It resembles plasticine, but unlike it, it hardens well in air. Contains natural ingredients (dough made from cereal flour), so it is absolutely safe for children.
7) decoration items : coins, flowers, pine cones, feathers, candies, beads, buttons, ribbons and much, much more.
The main thing is the right ingredients
For your product to be original, it is desirable that the grains be of different sizes. Therefore, it is better to buy them in specialized stores in bulk and in the desired shade.
As a base for the panel, you can use burlap or a piece of thick wallpaper, and for decoration - buttons, pebbles, plants, hay, herbs, cinnamon, nut shells.
A glue gun is used for gluing, but it can be replaced with Moment glue.
Cup assembly process
The process of creating a floating mug is not at all complicated, but there are several important nuances that need to be taken into account when creating it.
The main secret in creating a flying bowl is to choose the right tea pair. The cup and saucer should not be too heavy. If you take this condition into account, it will be easier to create a flying bowl!
We construct the base of the floating cup; this is the element that connects the saucer to the cup. To do this, take a wire of the required length. It is important to note that the distance between the bowl and saucer should be approximately two cups. With these parameters, the flying cup will look most balanced.
Inside the bowl we form a loop from the wire, the diameter of which should be 2-4 cm. This will help to achieve better fixation of the wire in the cup. We twist the second end of the wire into a flat spiral in two or three turns. This way we will get a kind of stand, which we will fix in the saucer.
The tilt radius of the resulting structure should not exceed 45 degrees, otherwise the structure will be unstable!
Next we work with the resulting wire structure.
Polymorphus is the best material when making a flying cup.
Take a piece of polymorphus and immerse it in hot water for 20 seconds. During this time, the material is converted into soft plastic.
We stick the resulting plastic, like plasticine, around the base, giving it the desired shape. If the plastic hardens before you finish the job, simply dip it back into hot water. The prepared base will completely harden within 15 minutes.
If you don’t have this material on hand, you can use modeling compound. An alternative to these two materials is masking tape, which is simply wrapped around the wire base. Or you can wrap the wire with felt or other fabric, after coating it with glue.
An important aspect is to constantly try on the base on a saucer with a cup in order to spot any flaws in time!
You should pay special attention to the edge of your cup in the place where the structure will be attached!
In this place it is necessary to make a kind of step in the form of a support. This way the structure will hold much more securely.
When the base is ready, you can begin fixing it on the cup. Lubricate with glue all surfaces of the base in contact with the saucer and cup. Press firmly and hold for 3-5 minutes. Don't forget to glue a step to support the cup!
We fix the flying cup on soft objects in the desired direction and leave it in this position for 5 hours. During this time, the glue will dry well and securely fix the resulting floating bowl.
When the floating cup is well glued, you need to check how stable it is.
If the saucer is not able to hold the cup, then it is necessary to reduce the radius of the structure until it becomes stable.
Next, we prepare materials for decoration. What the cup will pour out depends only on your imagination and available materials.
The last stage of making a flying bowl is the most interesting and creative. Decorating a spill cup! Apply adhesive gel to the decorative elements and glue them.
It is better to glue the large elements first, and glue the smaller ones last. This will hide small visible defects and gaps between elements.
After all the decorations are glued, you need to let the cup stand for 5 hours so that the glue dries.
The process of assembling a flying bowl is discussed in detail in the Hand-made master class from the Masterclassy website:
Craft painting made from coffee
For beginning needlewomen and crafters, creating a picture from coffee beans will be a great way to spend time. It will not only become a wonderful piece of furniture that will fit into almost any stop in your abode, but will also be a good gift for loved ones. The subject of a “coffee” painting can be very different: from a traditional steaming cup of coffee to a grandiose artistic canvas.
The plot is limited only by your imagination.
The most common theme of “coffee” paintings is coffee itself.
For a painting made from coffee beans you will need:
- thick cardboard
- a piece of fabric (preferably light and smooth, but if coarse burlap fits into the concept of your masterpiece, feel free to use it)
- glue
- coffee beans
- leg-split
- stencils
- picture frame
- decorative beads, ribbons or even dried leaves
- clear varnish
If the coffee beans are not dark enough, they can be fried in a frying pan.
The process of making a picture is not labor-intensive and requires only accuracy and creativity. By following the step-by-step guide, you can easily recreate your intended image from coffee beans:
- Cover a thick sheet of cardboard with fabric, securing it with glue on the opposite side 2. Think over the plot of the picture and use stencils to draw the image (if there are no stencils, then a simple device will replace them: print the picture onto a thin sheet of paper and, outlining it with cosmetic shadows or blush, transfer the drawing onto canvas ) 3. After this, carefully glue the coffee beans 5. Decorate the outline of the picture with twine, attaching it to the picture with glue 6. The finishing touch: cover the coffee beans with colorless varnish, and after drying, insert the picture into the frame
To make the task easier, coffee beans can be glued directly onto the drawing.
In order for the picture and frame to be in the same style and color composition, it is better to choose a dark brown frame. This way the painting will create the impression of completeness and will please the eye with its aesthetics.
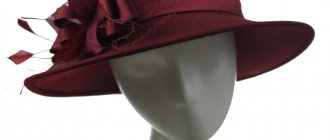
Flying mug of flowers
Flowers are the most popular decoration when decorating a floating cup with your own hands!
A cup decorated with paper flowers and monograms will look elegant. Pearls will add additional charm to this composition.
Creamy rose buds and white jasmine will help create such an airy, delicate cup.
Airy chiffon, snow-white lace, satin roses and pearl thread will perfectly decorate such a candle stand.
Using an old watering can and basin, you can create a summer flower bed with sunflowers. Breathe new life into old things!
The sunflower is a bright yellow flower that symbolizes wealth and prosperity. With its help, you can create such a sunny floating cup that attracts wealth into your home!)
Master - Svetlana
Surely many people have a teapot from an old set that sits idle and gathering dust. Create a vintage DIY piece in the form of a floating teapot pouring out a floral drink!
Or a floating jug with flowers:
Daisies made using the kanzashi technique from satin ribbons will become a simple, but no less elegant decoration for a flying cup
Flowers made from polymer clay will also perfectly color a floating cup with a bright floral abundance.
Master - Alena Putyrskaya
A terry flying teapot watering a flowerbed with flowers! When creating it, you can simply knit terry cloth for an old teapot or cover the teapot with pom-poms made of thread.
Nata Liana tells how to make a floating cup “Summer Mood”:
How to make a topiary mug
The coffee tree is the most unpretentious plant. You don’t need to water it, take care of it, you just need to love it and occasionally wipe it from dust.
It will never wither, will stand for a very long time and additionally serve as an air flavoring agent, emitting pleasant natural odors into the space around it.
It takes two to four hours to make a classic coffee topiary in a mug.
Materials you will need:
- a foam or plastic ball - for the crown;
- thick wire, stick, tree branch - for the trunk;
- any mug - as a stand for the barrel;
- leg-split;
- hot glue;
- gypsum.
Cover the ball with grains. It is better to do this in two layers so that the base does not show through. The first layer of grains is placed arbitrarily, and the second can be laid out beautifully:
- in a spiral
- different sides of the grains,
- paint some of them with gold or white spray paint and lay out patterns,
- place the grains on edge - the crown of the tree will turn out fluffy.
We insert the barrel into the hole previously made in the ball, secure the topiary in the mug using diluted gypsum powder, and let it dry. The trunk and container can be wrapped with twine if desired.
Floating cup made of coffee beans
Coffee beans are still one of the most popular materials used in decoration. It’s very easy to create such a floating mug, but there are a few secrets .
1. When creating a flying bowl, it is better to wrap the base with masking tape. Next, the resulting “slide” must be painted in the color of coffee with acrylic paint so that the base does not show through between the grains.
2. Another option is to wrap the base with brown fabric.
After this, you can start gluing the coffee beans. There is also one important nuance here.
If you use hot glue, it is better to apply it to the grains themselves, and not to the base. This way, glue smudges will not be visible.
Coffee beans can be complemented with decorative elements such as cinnamon sticks, dried citrus fruits, and clove flowers.
Satin flowers using the Kanzashi technique will perfectly decorate your steaming coffee cup:
Master - Vera Litvinova
The tea pair can be decorated with simple twine. Twine can be used in either natural color or dyed or bleached.
An appetizing cake will perfectly complement your cup. The cake can be “made” from modeling mass by painting it with acrylic paint and pasting it with coconut shavings. Be careful, there is a high probability of not being distinguishable from the real thing!)
Kanzashi Needlework Video tutorials will clearly show how you can make a floating bowl with coffee decor:
Craft a coffee heart
You can please your other half by presenting her with a heart made of coffee beans. It's easy to do and doesn't require much time. For the heart you need:
- coffee beans
- A4 paper
- cardboard
- scissors
- cotton wool or cotton pads
- glue gun or regular glue
- leg-split
- brown paint
- decorative decorations: beads, lace, ribbons, bows
Making a coffee heart is quick and easy, and most importantly, it requires a minimum of materials.
First, you need to cut out the blanks. Perhaps you will be able to purchase a ready-made heart made from foam plastic at a handicraft store, then your work will be much easier. If you want to create a masterpiece entirely on your own, then you should start by creating a paper heart.
You need to cut out a symmetrical heart. You can buy a ready-made heart made of polystyrene foam in a craft store.
Sequence of work:
- Fold the A4 sheet in half and draw half a heart, so that when you turn the sheet you get a whole symmetrical heart
- Attach the heart to a piece of cardboard and redraw it
- Glue a layer of cotton wool to the resulting heart or lay out cotton pads with balls, increasing the volume of the figure 4. After this, the heart is encircled with twine in a free order in all directions to form relief 5. Next, the heart is painted: a foam sponge is suitable for this, which is used to apply the paint with blotting movements 6. After the paint has dried, glue the coffee beans to the heart: spread each bean with glue and place tightly to each other 7. The final stage is painting the craft with colorless varnish
The finished work can be decorated to your taste
Flying mug of fruits and berries
With the help of plastic fruits, berries, and mushrooms, you can create such an abundance of fruits and berries pouring out of a cup. Butterflies will perfectly complement your fruit and berry cornucopia.
A floating cup can be decorated with bright gifts of autumn. Dried leaves and flowers can also be used. The mug can be replaced with a wooden barrel made from simple ice cream sticks.
Flowers and fruits are harmoniously combined in a floating stream. Butterflies, dragonflies, and ladybugs will be a wonderful “live” addition.
The step-by-step process of making panels
The simplest product is frames for decorating your favorite photo or interesting painting. Choose a suitable cardboard frame, apply glue with a brush and glue the grains to the surface at your discretion.
To make panels, we make markings on the base. Moreover, the burlap can be decorated in different ways: using a piece of cardboard, fold it over to the back side and glue it, or you can “ruffle” the edges and give the panel a piece of “boho” style.
Then, using a simple pencil or a bar of soap, apply the design of your choice. Now you can get creative directly.
Floating money mug
A floating mug made of coins and coffee beans looks very stylish. The design technique of using an unfastening zipper will also add originality to your mug. Keys, bells, old small toys - everything can be used as decorative elements for your mug.
With coins you can also use imitation bills in which we pack candies.
The secrets of creating a money mug can be found in the Sveta DIY video tutorial:
The money tap is created using the same principle as the flying mug. Instead of a mug, we use a plastic tap, and a small chest or casket can replace the saucer. Coins will look more impressive if they are coated with gold spray paint or varnish.
Master - Anastasia Spitsyna
Cash flows can be depicted using paper bills.
Master - Oksana Ankudinova
You can see how to create a money tap in the DIY Gifts master class:
Panel "Sheep"
An easy craft to make in the form of a cheerful sheep.
To create a craft you will need:
- sheet of cardboard,
- leg-split,
- coffee beans,
- PVA glue,
- acrylic paints,
- eyes that can be purchased ready-made.
Operating procedure.
- To create a panel you will need parts of the sheep's body. You can draw them yourself or copy the image you like.
- Transfer the drawing to cardboard, cut out the parts and paint them with dark brown paint.
- Starting from the middle of the animal’s face, glue the prepared twine in a spiral and attach the eyes on top.
- Make legs from twine, and make hooves from grains, gluing them to the twine.
- Attach the legs to the body with glue.
- Decorate the body with coffee beans.
- Glue the head.
Using this master class on coffee crafts, you can create images of other funny animals: a horse, a mouse, a hedgehog or a bear cub.
Flying mug with birds
The bird is a symbol of lightness and freedom; it is very often found in interior solutions in various styles and variations. This motif is also reflected in the decoration of the floating mug.
A floating mug can become a wonderful house for a nest of birds. The nest resembles a home and an idyll in it.
A cup with daisies and a bird with a nest looks like a real symbol of family, love and fidelity.
A bird with delicate roses, fluttering butterflies and other decorative elements will help create a summer soaring composition.
Universal raw materials
Coffee can rightfully be called a universal raw material, since it can be used not only for preparing a wide variety of drinks, including cocktails, but also in cooking, for preparing desserts and other delights. In addition to food use, coffee is in great demand among cosmetologists and cosmetics manufacturers. So, based on grains or grounds, you can independently prepare unique cleansing scrubs, masks and additives. For those who want to enjoy the aroma of coffee every day, there is even a separate direction - soap making, during which you can prepare soap at home with a charming aroma that tones and improves your mood. Well, for those who are not ready to work their own magic on homemade cosmetics, leading cosmetic brands offer entire series that contain coffee. There are creams, masks, shower gels and even coffee-based shampoos.
Another area in which coffee as a raw material is used quite often is medicine, or rather, pharmacology. This is not surprising, given the unique properties of the main ingredient of the beans, caffeine, and its effects on humans, it would be unwise not to use it. So, there are dozens of different medications that contain this substance. It must be admitted that they are in great demand among consumers, as they have not only a tonic effect, but also pain relievers.
In addition to its traditional functions, coffee can also be used as a magical tool. We are, of course, talking about fortune telling on coffee grounds, which since its appearance (presumably in Italy in the 18th century) has not only replaced fortune telling by tea leaves, but has also become the most popular among modern lovers of looking into the future. For those who do not take coffee fortune-telling seriously, this procedure has become an entertaining pastime, during which you can while away the time and enjoy aromatic espresso.
By the way, it is precisely because of its thick, rich, very refined aroma that coffee is popular among perfumers. True, in order to slightly weaken the rather exile aroma, other softer components are added to the “coffee” perfume. For example, the aroma of coffee goes very well with citrus notes or spicy aromas.
By the way, in order to fill a room with the aroma of coffee, it is not at all necessary to pour expensive perfume into the room; it is enough to add to the interior some decorative element decorated with coffee beans, which you can make with your own hands.
Return to content
Pasta Spill Cup
You can decorate the flying cup with simple pasta. It’s better to take bow-shaped pasta, paint it with acrylic paint, and decorate the middle with pearls. We decorate the mug with them and the waterfall of bows is ready!
This mug looks elegant both in pastel colors and in classic colors - black and white.
Black and white pasta in a floating cup
Coffee heart
Prepare cardboard, paper, cotton wool, glue, twine, dark paint, grains.
Fold a piece of paper in half, draw half a heart, then cut out the shape along the outline. When finished you will have a whole heart.
Trace the shape of a heart on cardboard and stick cotton wool on it. Cover the heart with twine to create a relief surface.
Mix paint with glue and paint over the heart shape. Stick on the grains. Decorate the craft as desired.
Flying mug made of beads
Pearls are the most noble decorative element that will add festiveness and pomp to any craft! A simple white tea pair can be transformed into such a pearl miracle!
A very delicate floating bowl will be made from soft pink satin flowers and matching pearls. A white dove will perfectly complement the composition).
Beads of different colors will also help create a unique spill cup. Flowers and ribbons of the same shade as the mug will perfectly decorate and complete the image of your cup.
Master - Irina Khokhlova
Plasticine - there is only one warrior in the field
A child can easily make a plasticine “mushrooms” craft without the help of an adult. This material is so versatile that nothing else is needed to make any mushroom.
To create a porcini mushroom, you need to roll out a cylinder - this will be the leg, make a cap from brown plasticine, add white plasticine to the bottom of the cap.
We connect the stem and the top of the mushroom. You can make a green leaf and put it on the hat. Repeat the craft and make another mushroom a little smaller.
Sea floating mug
Marine themes have found application in this type of creativity. Surely many people have shells at home that they brought from vacation. Using shells, beads, crystals, you can create a creative cup with seafood...
…. flying shell, replete with chic black pearls.
Broken shells, painted ceramic shards - you can safely use all this to decorate your designer mug. Create your own sea harmony.
Candle with coffee beans
With some creativity, you can create a unique piece of furniture using a candle, a glass vessel and coffee beans.
In this case, the candle is fixed at the bottom of a glass container and surrounded by coffee beans.
The size of the glass vessel should match the size of the candle.
A small decorative candle can be placed in a large transparent glass, but a large candle will require a large container.
New Year's flying cup
A floating cup in New Year's style will become an original decoration of the New Year's interior. Snow made of cotton wool or padding polyester, a Christmas tree made of a pine cone or a cypress branch, a small figurine - what could be easier to create a winter New Year's entourage!
Christmas trees can also be made from New Year's green tinsel. White paint or a simple note corrector can imitate snow on them. You can determine the characters yourself when creating your New Year's story in a floating bowl!
A candle will add warmth and light to your cup
Winter cup with snow sparks
Multi-colored garland
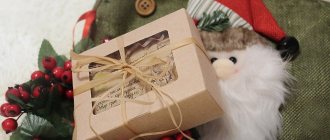
You can create decorative elements for a cup with your own hands from almost nothing; for example, making such small gift boxes will not be difficult. You can leave a note with your wishes in the form of a small envelope.
A flying cup decorated with Christmas-style candles, flowers and New Year's balls will give you a festive Christmas mood.
Reveals the secrets of creating a festive New Year's flying bowl in his master class by Nika Shvetsov:
Panel “Cup of Coffee”
The image of a cup of invigorating morning coffee will serve as a classic addition to the interior of a kitchen or small cafe.
It is not difficult to make it with your own hands; the work does not require prior experience in creating similar interior elements.
For the panel you will need:
- thick cardboard A4,
- a piece of burlap, the size of which is slightly larger than A4,
- fresh coffee beans,
- glue (PVA or stationery),
- image template.
Operating procedure.
- Steam a piece of burlap with an iron and secure it to a cardboard base. You can use glue or tape for fastening.
- Stepping back 2 cm from the edge, mark the frame on the front side.
- Transfer the image to burlap.
- Glue coffee beans on the lines of the drawing and decorate the frame with them.
- The panel can be additionally decorated with other elements.
Using a similar technique, it is easy to apply any image to a canvas or cardboard base.
Easter flying mug
The bright holiday of Easter can be decorated with such a cute mug with yellow chicks in a nest with eggs. The nest can be woven from thin twigs, sisal or jute.
Plastic eggs and hatched chicks look cute on their own:
Artificial flowers will make your Easter composition more lush and elegant:
Handicraft masterpieces cover in their master class how to make an Easter floating bowl:
DelkiRu talks about another type of Easter composition in his master class:
Coffee house
Prepare thick cardboard, glue, coffee beans.
Cut out five rectangles from cardboard - these will be the walls and floor of the house. Glue them together so that they form the frame of the house. Apply glue to one wall and place the grains on it. Cover all remaining sides this way.
The roof can also be cut out of cardboard and either painted to look like wood/tiles/straw, or sprinkled with ground coffee or beans.
Unusual flying cups
Instead of a flying cup, you can make a flying teapot. This composition will look very original on your kitchen table. When performing such a craft, it is better to choose a teapot of small size and weight so as not to overload the structure. It is better to make a “stream” from a teapot from thin, strong wire (for example, knitting needles) and superplastic.
Hanging flying cups with flowers can become an original decoration! The main thing is to securely fasten them.
A floating cup can be imagined as a mountain waterfall. Moss made from natural sponge or sisal, pebbles and a bear will complete this mountain landscape in miniature)
With the help of LEDs, the bowl can be used as a lamp
Happy creativity and inspiration! Author of the article: Tatyana Babikova
SHARE! "Cross" will not give bad advice! 
Let's imagine with children
There is another simple and charming option for a coffee panel - zebra. Even your kids can handle this kind of work.
And girls will especially like the cute kitten - and they will be able to use their abilities in decorating such a Vaska or Murka. You can use buttons or foamiran as eyes.
Coffee crafts seem complicated only at first glance, but they are not. Many needlewomen encourage people not to be afraid to experiment - try, fantasize, don’t repeat other people’s works, but create your own, unique ones.
The panel One World, One Family, One Coffee, made in 2011, measures 25 square meters. meters and weighing 140 kg from a million aromatic grains by the Albanian master Samira Strati, perhaps the most grandiose canvas in the world. So go for it, skillful hands!