Not a single house, including a private one, can do without an address sign. This small information sign not only plays a practical role, but is often also a decorative addition to the exterior of the house. Modern homeowners select address signs to match the color of the brick and finishing of the building, so the overall picture is quite harmonious.
There are several types of address signs, on which the price of the product mainly depends. Let's talk more about this in the article: we'll find out what types of address signs there are, how much these products cost today, and how to make a sign with your own hands.
A little history
According to historical information, address signs were not used in Russia until the 17th century. This essential attribute appeared only during the reign of Catherine II, who, by her own decree, introduced them into mandatory use.
As for the numbering of houses, at first the signs were of little use, since many Russian streets in the 18th and early 19th centuries were a chaotic jumble of buildings without any plan. To cope with the problem, it was decided to number the houses in ascending order, dividing the street into even and odd sides. This is the numbering method we still use today.
Self-production technology methods
Making a sign for your house with your own hands is quite possible if you know the intricacies of the technology. Financially, it will be much cheaper, and you will be able to proudly show your creation to people.
Applications
Before you start making an address sign, you need to think about its design, shape and color. The process looks like this.
- You need to order the cutting of vinyl film in advance from specialists, unless, of course, you have the appropriate equipment, then there will be no problems at all.
- Using mounting film, the sheet with the applique is transferred to the base and glued to it with double-sided tape. The substrate can be made of PVC, galvanized iron, etc., the main thing is that it is even, smooth and clean.
- Excess parts of the film are removed with any sharp object, and useful parts remain on the base, thereby displaying the required information.
- The mounting film is removed.
- If PVC is chosen as the base, then the excess parts are cut off using a stationery knife, thereby giving the desired shape to the future sign.
Painting through a stencil
Compared to the previous method, this one is more labor-intensive and will take longer. To work, you need to prepare the following materials and tools:
- base for the sign;
- primer;
- acrylic paint white or any other color of your choice;
- a stencil made of PVC film, which must first be cut on a plotter;
- squeegee;
- tweezers;
- roller
The base of the sign of the required size and shape must be thoroughly cleaned and degreased with acetone. A layer of primer is applied to the prepared surface for better adhesion to the paint. After the primer has completely dried, color paint is applied completely to the entire surface with a roller and left to dry. Using mounting film, a stencil is transferred to the dry surface, from which excess elements are removed. Next, white paint is applied over the stencil and left to dry. The stencil is removed and you get a finished sign with the address and house number.
Functions
The importance of address signs in our lives cannot be overestimated. Their presence helps you easily find the building you need , and their appearance can say a lot about the status, financial situation and even taste of the owner of the house.
Many owners of reputable office buildings located in private mansions even order the design of signs from famous designers, realizing that the overall impression of the company will largely depend on this detail.
For the residential sector, these are, first of all, signs and landmarks: for guests, passers-by, postmen, deliveries, ambulances and other categories of citizens.
Where to order?
Many specialists are engaged in the production of standard inscriptions, among whom there are narrow-profile ones who produce address boards. This field of activity is also common in printing houses, stationery stores, etc. But truly non-standard ideas can be ordered from interior designers. They create unique signature creations that definitely cannot be found on the average building. Often, wood, metal (including forging), plexiglass, and acrylic are used for manufacturing.
You can make panels yourself or order ready-made ones
Note! The cost of a designer board will be quite high - it all depends on the qualifications and popularity of the author of the creation, the materials used, technology and the size of the product.
Types and features
So, currently you can purchase ready-made address signs from the following materials:
Stainless steel
In this case, the sign turns out to be reliable, practical, but not too decorative for the appearance of the house. Its purpose is purely unitary, there is no particular decorative effect here.
PVC
Such modern material as polyvinyl chloride is used in the production of many things necessary in everyday life. The result is a neat, modern product that is weather-resistant and durable. Such address signs are often attached to high-rise buildings ; in private construction, more individualized options are used.
Such options are inexpensive, which sets them apart from the crowd of expensive forged and carved analogues.
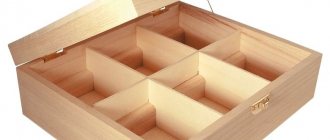
Tree
It is best to attach a wooden address sign to a wooden house - the overall appearance of the building will be more harmonious. It should be noted that in this case the product must be treated with moisture-repellent and antibacterial impregnation: otherwise it will not last long.
Metal
- Brass . This sign has a pleasant soft yellowish tint, is durable, and is suitable for brick buildings.
- Copper . A wonderful choice for respectable homeowners. A copper plate can serve for a very long time without losing its technical characteristics: this is, as they say, “a choice “for centuries”.
- Bronze. A luxurious choice for a mansion in a classic style. A bronze address plaque indicates the material wealth and high status of the building's owners. Most often, bronze models are forged.
Find out what a dry stream looks like in landscape design by following this link.
Acrylic
Address signs made from this modern material are reliable, strong, durable, and have a neat, stylish appearance. More suitable for houses in a modern style.
Organic glass
Also an interesting option: beautiful, super durable and unusual.
In addition to differences in material, models can also differ in shape.
So, this form could be:
- round;
- oval;
- square;
- rectangular;
- multifaceted.
What plastic tiles for paths in a dacha are is described in this material.
How effective solar-powered street lights are for a summer residence can be found out from the contents of this article.
It will also be interesting to see what the cap on a pole with a lantern looks like.
You can find out how the photo relay is connected to the lantern by reading this information:
Design ideas
Number carved on a concrete slab
Creative people offer creative ideas for creating signs. Solutions may vary:
- Decoupage. The idea is atypical, but at the same time simple to implement. Moreover, you can use anything as a base: plywood, ceramics, plastic. The decor options are also huge, and you won’t be able to find two identical ones using this technique, which designers successfully use when creating such creations.
- Mosaic is another solution that will help you stand out from others. It is more diverse than decoupage. And the benefit for the customer is that the author uses almost waste materials, which means he won’t have to overpay for it. Although it all depends on the intricacy of the idea. Options for raw materials for creating mosaics include ceramic tiles, plastic bottle caps, and even old CDs.
Decoration with mosaics will highlight your individuality
Option of small tiles and colored glass
Such inscriptions are perfect for modern design.
Luxury wrought iron gates
It’s not difficult to make even such a trivial thing as a sign with a house number original. All you need is to use your imagination and spend a little time!
Surely you have noticed that all houses have signs indicating the address and number. This is not just a decorative element, but an indispensable attribute of building identification. Don't want to use standard notations like everyone else? Make a sign for your house with your own hands, which will stand out from the rest in its originality and show your imagination. There is nothing complicated in this process, you just need to know the basic nuances of the work and have a little patience.
How to make a sign
Let's consider several options for making address signs with your own hands.
Made of plastic
To write the street name and house number on the plastic, you need to use paint or engrave. But since engraving requires expensive special tools, it is not done at home. Instead, a special Oracal film is used . This film for signs is sold as a set, including all the necessary accessories for operation.
You can find all the information about street lamp posts here.
Work process
The vinyl film must be glued to a base made of plastic, wood or metal. After gluing, you need to carefully and thoroughly level the film, remove all roughness and air pockets. After this, you need to remove the top mounting layer from the film and remove unnecessary fragments in the voids between the letters, inside the numbers.
Made of wood
This option is available to those who know how to cut wood. If you are one of these lucky ones, then the work process will consist of the following simple steps.
First of all, select a wooden blank of the required length, width, thickness and other parameters. Sand the workpiece to the required level of smoothness. Using special tools, cut out the street name and house number.
Next to the sign, a street clock for a dacha will look very unusual.
After cutting, you can paint the sign, or treat it with stain or varnish . Very often the plate itself is painted dark, and the inscription and numbers are made white, sometimes vice versa. After painting, be sure to varnish the product to extend its service life.
If you don’t have the ability to carve, you can get by by simply applying letters and numbers with paint on wood. This is also a good option: it looks quite decent and looks beautiful.
To add a touch of sophistication to your yard, you can install a decorative garden cart.
Made of metal
Making an address sign from metal yourself is perhaps the most difficult option. But if previously only galvanized iron was used for this, now homeowners have an excellent opportunity to make a copper, brass or even bronze product.
In this case, the inscription and numbers can be engraved, applied with paint, or even forged . The last option is the most labor-intensive and is not feasible at home.
Process
Before starting work, you need to decide on the style and appearance of the future product. To do this, you can look at the corresponding website on the Internet, look at historical photos (if you need a retro style), and use other sources of information.
You should mark and then cut out a life-size template for the future sign from cardboard. Transfer the template to a metal piece and secure it.
You need to cut out the metal along the contour of the template using a grinder. Use a diamond blade for more precise and accurate work. File the edges, remove all protruding elements, smooth the sharp edges.
Cover the future sign with paint with moisture-resistant properties, then let the paint dry.
Apply oil paint on top using rough strokes for a retro texture . Immediately coat the top with another layer of moisture-resistant paint. Make the final coat of paint thick to enhance the retro feel.
After drying, write the house number and street name with white paint. Work according to the cardboard template. Dry and coat the top with varnish.
It is possible that you will find the material about LED street lights useful.
DIY creation
Making your own address board
The appearance of a hand-made product will depend only on the available skills, materials and time spent on work.
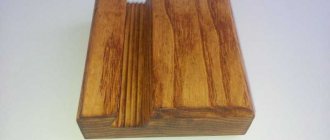
Tree
If you have the skills to work with wood and a suitable species, optimally oak, then you can start creating. On the blank you need to cut out the house number and street name. It is optimal to do this using a prepared layout. After cutting, sand and sand.
Hole for cutting out letters with a jigsaw
Wooden blanks must be sanded
Advice! Lettering highlighted in a contrasting color looks impressive.
Before hanging a board made of natural materials, you should coat it with the necessary composition:
- Impregnations against beetles and mold.
- Fire retardants - they will prevent it from catching fire.
- Varnish – protection from UV rays and precipitation. It is better to apply several such layers. In this case, it is necessary to use varnish for external use, it provides more reliable protection.
Manufacturers and prices
As for the manufacturers of address signs, in our country these are mainly regional companies that manufacture these products in a specific city. There are practically no federal-level companies engaged in such production business. Therefore, let us dwell in more detail on the products themselves and their costs.
So, a metal plate, decorated with an elegant decorative inscription in a vintage or any other style, made of copper or brass using forging will cost from 6 to 8 thousand rubles, on average.
A cast aluminum sign will cost from 3 thousand rubles. It is also a completely reliable and durable product, more modern than previous ones. But if this aluminum product is treated with a special compound to give it an aged texture, and the inscription and numbers are cast according to an individual design, then the final cost can rise to 18 thousand rubles.
Regular PVC options that have a standard appearance (blue symbols on a white background) cost around 550 rubles per unit . Models made of PVC or acrylic, tempered glass of standard design, but with decorative elements will cost about 1500-1800 rubles.
Manufacturers, in addition to standard options, also offer an individual approach. So, every owner of a private house can easily contact the appropriate company in his city and order an option based on his own project. The price of such a product, of course, will be more expensive, however, it will also be more pleasing to the homeowner’s eye and decorate the building.
Read about how to make a tree house here.
Original but standard
This is exactly what can be said about the address. It seems that the shape, size and appearance can vary, and this is true. But you won’t be able to accelerate in terms of dimensions, because you only need to specify two key positions:
Important! In some cases, only numbers are used, without indicating the street.
According to GOST, a product of this type made of metal must be at least 0.8 mm thick, with mandatory flanging, which strengthens it and makes the structure more reliable - its edges do not wrap, it does not get torn off by the wind. If it is made of another material, then it must withstand temperature changes and exposure to precipitation and sun.
Video
The video shows how to make a wooden sign:
We looked at the features of address signs for private homes. As you can see, the variety of these products today is really great: you can easily choose a sign to suit any style of home and shade of its material. And even if you haven’t found a sign to your liking on the open market, there is always the opportunity to make it yourself, thereby giving the exterior of your home an original and exclusive look.
You might also be interested in reading about solar street lights.
Hammering nails
We hammer in the nails following the printed template. The nails should protrude from the board by about 2 centimeters. The distance between the nails should be such that there are no gaps, but also so that the heads do not overlap each other.
“Emotions burn brightly”: a brief forecast of the week from Vasilisa Volodina
How to decorate oval nails: 10 trendy design ideas for every taste
Sense of community, success and more: how TV affects children's development
Check the work from the side occasionally to make sure the nail heads are at the same height.
Alternative ideas
If desired, you can use any objects as material for signs; everything is limited only by your imagination. Solutions may vary:
- Mosaic is a bright way to create a unique product. You can express all your creative potential in a mosaic sign, and you won’t have to spend much on purchasing materials. Broken ceramic tiles, dishes, mirrors and even old CDs can be used. All that remains is to glue them in the required order onto the plywood base, and then apply grout for the joints
- Planters and flower pots are an option for those who value versatility, as they are also suitable for indicating a house number
- Shells and pebbles are a great solution for coastal homes or for those who want to preserve warm vacation memories
- Ceramic tiles are another way where you can show your artistic abilities, and the result will give your home a cozy feel.
Concrete - fans of minimalism and loft style will like figures made of concrete, but for this you need to have the skill of working with cement Regardless of the chosen design and execution technique, the main thing is to approach the matter diligently and creatively in order to end up with a real design work that will surely be appreciated neighbours.
Question 6 - Where and at what height should the address sign be installed?
License plates can be placed locally:
- on the front facade - in the wall on the right side of the facade;
- on streets with one-way traffic - on the side of the facade closest to the direction of traffic;
- at the arch or main entrance - on the right side or above the opening;
- on the courtyard facades - in the partition on the side of the intra-block passage;
- if the length of the facade is more than 100 m - on its opposite sides;
- on fences and buildings of industrial enterprises - to the right of the main entrance, entrance.
In general, everything is the same everywhere - house number signs are installed on the facade of the building at the beginning (and) or at the end of the building. As a rule, the sign is installed at a height of 2.5 - 3.5 meters (in areas of modern construction - up to 5 m) ... and at a distance of 0.5 - 1.5 meters from the corner of the building. Some laws say that for private houses “... on the left side of the façade on houses with even numbers, and on the right side of the façade on houses with odd numbers.”
There are also restrictions on the location of installation of signs prescribed by law:
- placement on a section of the facade free from protruding architectural details
- absence of external obstructing objects (trees, buildings).
- Placing protruding signs, consoles, or ground objects next to the license plate that impede its perception is prohibited.
- Placing address signs on areas of the building façade that are poorly visible from vehicle and pedestrian traffic, near protruding façade elements or on recessed areas of the façade, on decorative elements of the building, on cornices, or on gates is not permitted.
The law also has requirements for the use of address signs:
- control over the presence and technical condition of signs;
- timely replacement of signs (in case of toponymy changes);
- installation and replacement of lighting fixtures;
- maintaining appearance, periodically cleaning signs;
- removal and preservation of signs during repair work on the facades of buildings and structures;
- regulation of sign visibility conditions (height of green spaces).
Changing Document Margins
Useful tricks for everyday life: 60 cool life hacks for the home and kitchen
Sometimes the steps described above cannot be performed. This case applies to tables with a large number of columns. In situations like this, increasing the width of one column can have a negative impact on another because it becomes smaller.
As a result, parts of the pictures may disappear there. Moreover, all the text may shift and look ugly. In such situations, it is recommended to reduce the margin sizes. Thanks to this, the table will have more space, since it can be extended to the new sheet border.
You can move the boundaries using a ruler. For this it is enough:
- Place the cursor over the border between white and gray.
- Pull it to the left.
- The result will be as follows.
It is also not uncommon for a table to run out of vertical space (top or bottom) and move to the next page. This case is not critical if the object occupies most of the next sheet. But if there is only one line there, then it looks ugly.
In such situations, you can use the ruler to raise the upper border of the workspace or select ready-made field formats. This is done as follows:
- Open the “Layout” section in the menu.
- Click on the "Fields" tool.
- Select any appropriate option.
History[edit
| Official release of Java Edition | ||
| Dinnerbone posted the first image of the frame. | ||
| They used a different texture. | ||
| 1.4.2 | 12w34a | The frame has been added to the game. |
| 12w34b | An issue with frame placement in multiplayer has been fixed. | |
| 12w38a | The frame no longer disappears when a player moves 20 blocks away. | |
| 1.7.2 | 13w36a | Frames can be renamed at the anvil. |
| 13w41a | If a card is placed in a frame, the entire side of the block will turn into a card. | |
| 1.8 | 14w04a | Blocks and objects placed in a frame can now be rotated 45° instead of 90°. They also give a comparator signal depending on the position of the object or block. |
| 14w10a | You can no longer place more than one frame on one side of a block. | |
| 1.9 | 15w41a | The frame is now generated in the treasure room on the End ships, which is protected by a shulker. She holds elytra. |
| 15w49a | The frame can no longer be destroyed by lightning. | |
| 15w50a | Added sounds for the frame: , , , and . | |
| 1.11 | 16w32a | Entity ID has been renamed from to . |
| 1.13 | 17w47a | Before Compression, the item's numeric ID was 389. |
| 17w50a | Frames can now be placed on the ceiling and floor. | |
| 1.16 | 20w10a | Added two new tags for frames: - makes the frame invisible (the item inside the frame remains visible), and - prevents the frame from breaking and does not remove the inside item (this does not prevent the item from rotating). |
| 0.14.0 | build 1 | The frame has been added to the game. |
| Use the block entity class. | ||
| 1.0 | build 1 | Frames can now be found in End ships. |
| Official release of Bedrock Edition | ||
| 1.13 | beta 1.13.0.9 | Frames can now be placed on the floor and ceiling. |
| Legacy Console Edition | ||
| The frame has been added to the game. | ||
| The maximum possible number of frames in the world has been increased. A message about this now appears when the maximum number of frames has been reached. | ||
| Blocks and objects placed in a frame can now be rotated 45° instead of 90°. They also give a comparator signal depending on the position of the object or block. | ||
| Added sounds for frames. | ||
| The item name given by the anvil is now displayed in a frame. | ||
| New Nintendo 3DS Edition | ||
| 0.1.0 | The frame has been added to the game. |
Selecting the material
The material of the sign is not only a guarantee of strength and durability, but also a visual decoration; it complements the design of this product. The material is also important for applying various patterns or changing the shape of the product.
For example, you can cut a beautiful design out of wood, or make a sheet of any shape out of metal and apply paint to it. In general, in Russia signs are most often made from the following materials:
- stainless steel;
- PVC;
- pieces of wood;
- more valuable metals;
- durable glass.
Stainless steel is considered the key to durability, as it is resistant to weather conditions. As a rule, this material is standard if you order a sign from companies that mass produce them.
As for imagination and DIY, various patterns are most often made from stainless steel, then paint and inscriptions are applied to them. If you want to make something like forged products, then in this case it is better to use iron rather than steel.
PVC is considered the material that is more prone to creativity. Mostly in the West, signs are made from PVC, as they even add a little solidity to the building.
In Western countries, wood is quite expensive, and you don’t want to hang a banal metal sign on your private house, especially since in such countries they often live in houses and you need to somehow stand out against the backdrop of a huge residential area.
If you want to seem even more special, you can take pieces of wood and turn them into real handicrafts. For example, cutting a piece of log, decorating it and putting marks on it is something that can rarely be found anywhere. It turns out that ordinary wooden signs can be made even more beautiful!
The idea of creating a metal house sign is not limited to stainless steel. You can raise a little money and make a real masterpiece from brass, copper or bronze, but this will require additional skills and the right tools.
Yellow forged products have recently become increasingly popular; many people want to have something similar in their home. But if you do not have knowledge and experience in working with these metals, it will be easier to order such a plate.
One of the most impressive and beautiful, and most importantly, widespread materials is durable or organic glass. Thanks to its transparent properties, you can make a sign in the “high-tech” style, completely different from the mass of other “rustic” materials.
A transparent sign of various shapes with a dark inscription is something that will adequately decorate the facade of any home. Working with glass is not difficult - you just need to buy a regular glass cutter.
Amount of expenses
So, how much does a novice businessman need to invest in getting started?
The cost of the equipment will be approximately ten thousand rubles.
The cost of materials for the sign will be two hundred to two hundred fifty rubles per unit (for the customer, the cost of producing such a sign will be five hundred to eight hundred rubles). The net profit from the production of one sign will be three hundred to five hundred rubles (including couriers’ salaries and transportation costs). The most important thing is to be able to find two hundred to two hundred fifty clients a month and it is quite possible to receive an income of one hundred thousand rubles. However, this is provided that you will carry out the work on making the signs yourself.
It should also be mentioned that a house sign is the simplest form of advertising message. That is, you can subsequently open your own mini-advertising agency - an institution for promoting goods and services.
Alternative ideas
If desired, you can use any objects as material for signs; everything is limited only by your imagination. Solutions may vary:
Mosaic is a bright way to create a unique product. You can express all your creative potential in a mosaic sign, and you won’t have to spend much on purchasing materials. Broken ceramic tiles, dishes, mirrors and even old CDs can be used. All that remains is to glue them in the required order onto the plywood base, and then apply grout for the joints
Planters and flower pots are an option for those who value versatility, as they are also suitable for indicating a house number
Shells and pebbles are a great solution for coastal homes or for those who want to preserve warm vacation memories
Ceramic tiles are another way where you can show your artistic abilities, and the result will give your home a cozy feel.
Concrete – fans of minimalism and loft style will like figures made of concrete, but for this you need to have the skill of working with cement
Regardless of the chosen design and execution technique, the main thing is to approach the matter diligently and creatively in order to end up with a real design work that your neighbors will surely appreciate.
Filontsev Viktor Nikolaevich
Financial calculations
Start-up capital
The business does not require large financial investments, because there is no office rent, expensive equipment and staff. All money will be used to purchase work equipment and consumables:
- equipment and consumables – 10-15 thousand rubles;
- legalization of business (if desired) – 800 rubles;
- advertising in any form (Internet, leaflets, paper advertisements) – from 1000 rubles.
The total amount is 15,000-20,000 rubles. If some of the equipment is available at the start, then the figure will be less. More expensive units, such as a plotter, can be purchased in the near future.
Monthly expenses
Every month, money will only be spent on purchasing damaged instruments or a lack of consumables. Since no personnel are required for this type of activity, money will be saved. Over time, it will be possible to hire a person to do the work, and you just look for customers. But that will happen over time, but for now the monthly costs will be approximately 5-10 thousand rubles.
Earnings and payback
How much can you earn from signs? The question is very vague, theoretically the ceiling is 100 thousand rubles. It all depends on what material the signs are made of. If it is plastic, then the cost of one copy is 60-100 rubles, the market price is 300 rubles. If the plate is made of metal, the cost will be approximately 200-250 rubles, and the selling price will be 600-800 rubles. You can easily produce from 20 copies daily. But to provide yourself with work of this volume, you need to find many clients. Entrepreneurs in this niche earn an average of 20 thousand rubles monthly. That is, payback is achieved in the first month of operation.
Make a choice
To apply the technologies described above, special equipment is required - expensive, voluminous and energy-intensive. Therefore, laser cutting, coloring in a powder chamber or the use of modern color printing methods is possible only in an industrial environment, but not in a small private workshop. So, when choosing a house sign, we recommend giving preference to those products that are made industrially on modern automated machines, completely or maximally eliminating the human factor in the production process.
An example of high-quality work is the products of the company domoye-tablichki.rf.
Where to start searching for customers?
One of the most effective methods is to go around towns and the private sector in your city. You can hand out business cards or put flyers in mailboxes. You can take several copies of the finished product with you.
In a couple of hours of such a walk, you can collect up to twenty orders. Instead of going there yourself, you can hire a courier who will be interested in finding a client willing to place and pay for the order.
Order fulfillment time is five to seven days. It is better not to ask for advance payment, as this may alienate the client.
It is better to do such rounds in the evenings on weekdays or on weekends - this way you can catch the owners of the house. If you don’t find anyone at home, you can leave a business card or leaflet. Advertising on the Internet. You can also design your own website. Placement of advertising in the city on billboards or small banners.
Appeal to possible collective customers - administrations of cottage villages. In this case, you will have to register an individual entrepreneur and open a current account.
Editing a table frame
8 options for decorating with branches for the home
You can change the appearance of this element in various ways. Let's take a closer look at them.
How to add new rows and columns
This can be done using the following steps:
- Open the “Layout” section in the menu.
- Select the desired tool:
- insert from above;
- insert from below;
- insert left;
- insert on the right.
You need to be very careful when adding new columns
It is important to calculate whether there is enough space. Because if the table is already large (it occupies the entire distance between the sheet boundaries), then for new elements part of the space is transferred from existing ones
As a result, appearance may be distorted. This way you can lose your beautiful table. Therefore, be very careful.
The same manipulations can be performed using the context menu.
- Right click on any cell.
- Select "Insert".
- Then you will see exactly the same identical options for adding new elements.
Removing Rows and Columns
If in the process of filling out the table you see that you have empty or unnecessary cells, you can always get rid of them. To do this you need:
- Go to the right place.
- Open the "Layout" tab.
- Click on the “Delete” icon.
- Then you will be able to remove:
- current cell;
- the column you are in;
- the line in which the active cell is located;
- the entire table.
As a rule, Microsoft developers like to duplicate various functions on the toolbar and in the context menu. And this case is no exception.
If you right-click on any cell, you will see a context menu. In it you will need to select the “Delete cells” item.
Then you will need to indicate what and how exactly needs to be deleted:
- with a shift to the left;
- with a shift to the right;
- the entire line;
- the entire column.
Merging cells
Merging cells is quite simple.
- Select the desired range of elements.
- Right-click on the indicated area.
- Select the specified item from the context menu.
- Thanks to this, you were able to connect the selected cells.
The same actions can be done using the toolbar. In this case, the course of action will be as follows:
- Select the required cells.
- Open the “Layout” section in the menu.
- Click on the “Merge” icon.
- Click on the “Merge Cells” option.
The result will be exactly the same. You can use what is most convenient for you.
How to split cells
We learned how to merge cells. Now let's figure out how to break them into several components.
In this case, you are required to take the following actions.
- Right-click on the cell we worked with earlier.
- Select "Split Cells".
- Then you need to enter the desired number of rows and columns.
- To continue, click on the “OK” button.
- The result will be as follows.
We have already said that in the Word editor many functions are duplicated in different menus. It's the same here. Some people find the toolbar much easier to use than the context menu.
In this case, the instructions look like this:
- Select another cell.
- Open the Layout tab.
- Click on the Union tool.
- Click on the “Split Cells” button.
- Then you need to specify the required number of columns and rows. You can change values using arrows or manually.
- To save, click on “OK”.
- As a result, you will see the following.
Convert text to table
I propose to consider the possibility of forming signs from already written text. Let's consider this function using the text with the biography of Elon Musk that is already familiar to us.
So, select the desired text and go to the “Table” command, select “Convert” and “text to table”.
The menu we are already familiar with will open. Enter the required values for the number of rows and columns. In this method, you need to specify where each column should begin. Separator characters are used for this. The delimiter can be a paragraph mark, a tab, a semicolon, or any other.
The quality of the created sign will depend on the correctness of the set parameters. I left the default ones and this is what I got:
I suggest you play with the settings yourself to understand what parameters are needed specifically for you and your text.