How to make a real papier-mâché balloon with your own hands so that it can then fly? What is required for such a craft, how complicated is the process? In reality, most products of this type do not require a long time or special knowledge.
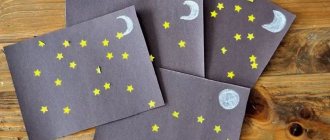
Thanks to the detailed master class, any beginner can handle it. But the finished craft will amaze everyone around you. You can make bright colorful balls, put them in baskets or paint them to make laughing faces. Whatever you want, you are limited only by your imagination.
Step-by-step master class
To make a papier-mâché ball into an inflatable balloon, you will need the following materials:
- a stack of unnecessary newspapers;
- liquid paste;
- ordinary rubber ball;
- several brushes.
Detailed instructions:
- Prepare the paste by diluting it in some unnecessary container of decent size.
- Tear the newspaper sheets into strips 2.5 cm wide each.
- Inflate the balloon, making sure that it does not exceed the dimensions of the finished craft.
- Carefully cover the finished ball with paper strips previously soaked in paste.
- Important: after wetting the paper, immediately remove all excess liquid by rubbing it with your fingers. This should be done in advance, before gluing.
- When gluing the strips, carefully straighten the folds with your fingertips. It is more convenient to do this with a brush. Proceed step by step, then the toy ball will turn out beautiful and smooth.
- When finished, leave the product to dry. Now carefully pierce the ball inside the newspaper strips and remove it through the small remaining hole at the bottom (this must be left in advance, even before gluing the newspaper).
If you need a white ball, simply paint the dried workpiece with paint of the required color.
Frame wrapping for decorative wood
The base of the crown of 8 out of 10 topiaries - the backing - performs 2 functions: improves the gluing of materials
, and is also a base decorative layer that masks the color of the ball.
Pre-winding or painting the base prevents the material from burning when gluing the decor with a hot glue gun.
Substrate manufacturing methods:
- Sisal wrapping.
- Twine.
- Wrapping with knitting or sewing threads.
- Gauze or fabric covering.
- Painting a topiary ball (required when gluing coffee beans).
- Apricot kernel base.
1. Wrapping with sisal 2. Wrapping with twine or yarn 3. Wrapping with thread 4. Covering with gauze 5. Painting the base 6. Backing with apricot kernels
Of course, a ready-made foam ball is the best choice for a base for a tree of happiness, with virtually no disadvantages. However, do not neglect free methods:
We recommend using a topiary ball made from newspapers - the best option, also without flaws and, moreover, with minimal costs!
Globe or moon made of papier-mâché
How to make a ball - a planet from papier-mâché? I want to create something special. For example, planet Earth or the Moon. Here the basic principle of making a ball will remain unchanged.
Step-by-step instruction:
- Make a newspaper ball, trying to make it as smooth as possible (without wrinkles) and medium in size. Inflate a regular rubber ball, then gradually cover it with strips of newspaper soaked in glue. Wait until the product is dry, then deflate the balloon. The preparatory part is finished.
- Now for the example you will need a real globe. It is more convenient than flat pictures. To make the globe look as realistic as possible, you need to redraw the outlines of the continents, individual islands and oceans of the Earth onto the finished paper ball. To do this, arm yourself with acrylic paints.
- Is it convenient to color a newspaper or is it worth additionally covering the top of the ball with white paper? You can paint it first with white paint and then apply the outline of the Earth onto it. Or cover it with A4 paper, cutting it into strips as well. The technology seems more complicated, but in practice everyone can cope, even beginners.
INTERESTING: We decorate the house with voluminous paper garlands.
In this way, you can create any planet from the solar system and then hang them together, creating a composition. It is important to maintain the dimensions, remembering that Jupiter is large, Mars is small, and Earth is medium.
Execution technique for beginners
There are many different techniques for making crafts. The simplest of these is to cover the mold with pieces of newspaper. This technique is also the most suitable for beginners.
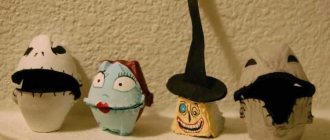
For example, if you don’t know how to make a ghost rider mask, then first of all you need to take soft, thin paper that will absorb water well. The most accessible material is considered to be old, unwanted newspapers. They need to be torn into small pieces, after which they are used to paste over the finished form of a cool mask, plate, vase or ball. However, novice craftsmen are recommended to select the simplest ready-made models. After all, after final pasting and drying, you will have to cut the shell to remove the shape from it. It will be very difficult to remove the surface layer from more complex figures. After removal, it will need to be carefully glued, painted and varnished.
It is worth noting that the first layer of newspaper, which will first be soaked in water, should simply be applied to the model . All subsequent layers must be glued with PVA glue or paste. Before gluing the next layer, the previous one must be dried. The finished craft is painted with acrylic-based paints, as they are considered more durable. To preserve the product for as long as possible, it is recommended to varnish the top. Beginner needleworkers are advised to work with simple things, but gradually complicate the technique and use various complex shapes as they gain experience.
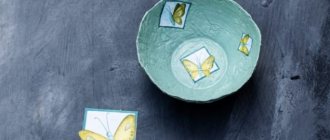
Making a plate
Any finished craft can be used to decorate the interior and be a wonderful gift for loved ones and acquaintances. To make a plate based on paper pulp, you will need the following materials:
- Small pieces of newspaper.
- PVA glue.
- Saucer with water.
- Any plate.
Step-by-step manufacturing instructions:
- The plate must be wrapped in soft plastic film so that after the end of the whole process the fake can be removed quite easily.
- Pieces of newspaper must be moistened with water, and then placed in such a way that they repeat the exact shape of the plate. The inner part is not glued over. You should also not bend the edges.
- If air bubbles appear, they must be removed; to do this, they must be brought to the edge of a piece of newspaper.
- After the first layer is ready, it must be coated with glue. Pieces of newspaper no longer need to be wetted if the glue is first diluted in equal proportions with water.
- After every three layers the product must be dried. The layers must be carefully smoothed with your fingers, which must first be soaked in glue, to get rid of all air bubbles.
- If air bubbles are found in previously glued layers, they must be pierced with a needle, pressed and covered with glue.
- After this, you can apply the next layers. The more layers there are, the stronger the future plate will become.
- When the product is completely ready, it must be carefully dried, the edges trimmed and the mold removed.
- It is recommended to lubricate the top layer with wood mastic, and then cover it with whitewash for easy application of any paint.
Balloon with basket - master class
Here you can choose the manufacturing technique.
Option number 1. Beautiful ball. If you need to create a craft quickly, then look for a beautiful small colored ball. Preferably round in shape. Weave it from a thick thread or take a ready-made mesh. Make sure that the ball fits comfortably inside and that the edges of the mesh remain free. Trim carefully if necessary.
Creating a cart. You can cut it from a regular plastic cup and paste it on the outside. Or glue it from a sheet of cardboard. If you have a ready-made basket, even better. Tie it using the loose ends of the threads to the ball. Ready.
Option No. 2. Volumetric balloon with a fabric basket. A great New Year's surprise that even a child can make if given some prompting.
Required:
- unnecessary newspapers;
- ordinary rubber ball;
- diluted paste;
- brush;
- pieces of multi-colored fabric (preferably one type);
- cardboard;
- a ball of rope or braid.
Step-by-step instructions:
This papier-mâché balloon will turn out beautiful, large, and can then be hung from the ceiling.
- Making a paper (newspaper) ball. Following the instructions described above, inflate the ball, then sequentially cover it with thin strips of newspaper, dipping them into the paste. Do not tape the space below, around the tail. Leave a hole.
- While the workpiece is drying, you can make a basket. To do this, take cardboard and glue a small basket step by step, focusing on the ball.
- Carefully make 4 small identical holes in the top of the finished basket. Make sure they are symmetrical.
- Decoupage ball. It has dried, now deflate and remove the rubber base (inflated ball). Cover it with strips of fabric/colored paper (whichever is preferable). Carefully make 2 holes on top, placing them close. The papier-mâché ball is ready.
- Measure 2 pieces of rope. You take one, put the tip through one of those holes at the top of the ball, then pull it out through the second. Center so that two identical ends hang down. Tie them by securing them in two opposite holes in the basket. Do the same with the second remaining rope. Tie the ends alternately to two of the four holes (see picture).
- At the top of the children's toy you can make an additional loop through which it can then be hung from the ceiling.
INTERESTING: Swan using modular origami technique
The creativity will be completed with a small doll or man with Lego, ready to fly.
What you need for work
Work table . You need enough free space for a container with glue, water, paper blanks and the product itself.
Oilcloth, newspapers or plastic film to protect the workplace from splashes of glue and water.
An apron and gloves to protect your clothes and hands from glue.
Paper or cardboard - depending on the chosen method of work.
Glue . The ideal option is PVA. You can use wallpaper glue - you need to dilute it according to the instructions on the package. If you don’t have either one or the other at hand, make a paste. Mix a glass of flour thoroughly with two glasses of water and a teaspoon of salt, put on fire, bring to a boil, stirring regularly and cook for 10 minutes. Cool and the glue is ready.
Form . You will need it if you create the product using the first method - by gluing paper onto the form. Most often, balloons, plates, jars or plasticine blanks are used if the molds at hand are not suitable.
Mixer . You will need it if you have chosen the method of working with paper pulp.
Sand or cookie molds, a knife, a fork are the minimum sculptor’s kit for shaping products made from paper pulp.
Scissors, a punch, a paper cutter, heavy objects - if you are gluing the product under pressure.
Primer for preparing the surface of a product for painting.
Sandpaper for sanding the surface of the product.
Paints and varnish - for coloring the product. Acrylic and oil paints do not necessarily require varnish, but it will add shine to your craft. If you are using unstable watercolors or gouache for coloring, varnish is necessary to protect the color.
A glue gun, fabric glue or epoxy glue is useful for attaching decorative elements to the surface of the product.
Decorations . The product can be decorated with beads, foil, gold leaf, coins, buttons, plant seeds, cereals or coffee beans.
Balloon - Smesharik made of papier mache
It's easy to do. To create a cute Smesharik you will need:
- dye;
- several brushes;
- sheet of cardboard;
- scissors;
- finished picture.
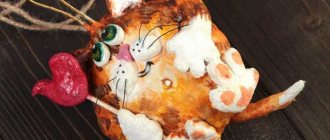
The first step is to make a regular paper ball, pasting it with newspaper strips. Then, when it dries, decorate the product by painting it like a Smesharik. Draw a smiling face in front, and attach the missing parts such as ears, arms and legs separately.
Cut them out of a sheet of cardboard or “blind” them using a napkin soaked in glue. Some people take plasticine. The paper ball is quite dense, so you can attach various parts without fear of its destruction.
Cooking methods
In order to make a mass of newspapers with your own hands, you can use several methods:
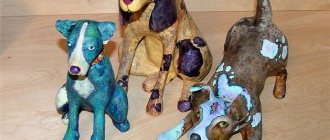
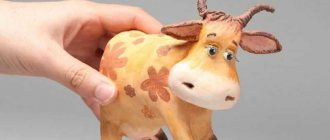
- The first method is to use layer-by-layer technology. To do this, pieces of paper or small strips are glued onto a previously prepared plaster or clay base, for example, onto a figure of a duckling, cow or girl. Pieces of paper should be glued in a chaotic manner on top of each other so that they create up to 100 layers. It is important to note that the parts must be coated with glue on both sides so that the craft is very durable. After each glued several layers, the product must be dried without fail.
- The second manufacturing method involves the use of newspapers. The mass for the product is made on the basis of paper pulp. Paper or newspaper is torn into small pieces and filled with hot water for 10 hours. After this time, the resulting paper is heated again until the fibers are completely destroyed. The water is drained through a colander, and the resulting paper mass is beaten using a mixer until smooth. You need to add an adhesive mass to the resulting mixture; for this you can use paste or PVA glue. All ingredients are thoroughly mixed, after which you should get a plastic material that will be very easy to work with.
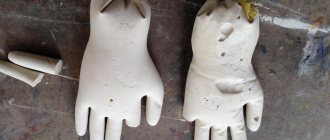
- The third manufacturing method is most often used in industrial settings. To do this, cardboard sheets must be coated with glue, placed on top of each other and pressed tightly. After this, the product is cut out, sanded, and paint is applied on top. This technology is used to make durable elements, for example, for a mannequin.
Ball glued according to the finished pattern
For this project you will need the following:
- Paper
- Scissors
- Glue
- Ball diagram (you can download it here)
Print and cut out the diagram along the contour lines, including labels for gluing its fragments together. Glue all the strips together one by one, moving clockwise. When the ball body is ready, let it dry, then apply glue to the round “lid” and carefully press it onto the ball.
Another version of the diagram is presented here: download in pdf format.
As you can see, here gluing occurs in parallel on both sides. Each template from this file must be printed 6 times, cut out the blanks and glue them together.
Link and open
Step 1
Now all we have to do is tie all the layers of paper together. To begin, take the cardboard templates that we created at the very beginning
Carefully glue one cardboard semicircle to one side of the stack of paper semicircles and another cardboard semicircle to the other side
Step 2
Thread a needle and pierce the top corner of the cardboard semicircle. The loop must be loose to form a ball. Tie a knot and repeat the same from the other end of the cardboard semicircle. Here, do not cut the thread, but leave a decent tail so that you can hang the ball from it. To do this, you can choose a thicker thread.
Step 4
After opening the ball, glue the cardboard semicircles to each other. If you want to save it until the next New Year, the semicircles can not be glued, but secured, for example, with paper clips. Having removed them, the ball can be folded and put aside until the next New Year.
If you want to create honeycomb balls without glitter, the instructions can be slightly modified. To do this, you can cut rectangular strips that will be larger than semicircles and glue them together. Once the tissue paper is glued together, cut the strips into a semi-circle shape to form a ball. Then you won't have to be careful when placing the paper when gluing all the layers. Plus, you can cut out different shapes from cardboard, then the honeycombs will have different patterns.
How to make a paper pompom
Everyone loves bright jewelry. Many people want to transform the interior of their own home and create creative decor for the holiday. We will tell you how to make paper pompoms with your own hands.
Take 6-8 sheets of corrugated paper of the same shade. It is better to start with single-color products, and once you understand the principle of their manufacture, you can vary the color shades, making them more complex and exclusive. Fold each one like an accordion
Mark the middle and carefully fasten it with thread and wire. Please note that the finished decoration will have a diameter that is equal to the width of the selected paper sheet. Reducing this value is simple: cut figuratively along the edges to the desired size. The unfolding process will captivate not only adults, but also children
Show how to carefully and slowly fluff each layer like a fan so that your child can repeat it. A real miracle will be born literally before the eyes of those who decide to make pom-poms with their own hands.
If you are afraid of ruining the paper with silence, then practice on ordinary table napkins. Although they do not hold their shape well, they will be indispensable as educational material. Having honed your skills, you can start decorating the baby’s room, the room where the festive celebration is planned. Amazingly beautiful paper pompoms will create the mood and emphasize the solemnity of each event.