In addition to clothes, an important element in creating a puppet character is, of course, a hat. Small or large, satin or paper, chic or modest - they can literally immediately transform your doll. In addition, recently it has become very fashionable to use this toy accessory on its own as a brooch or hairpin. Our master classes with detailed photos will help you make a hat for a doll with your own hands.
Lesson number 1. A simple hat - cap
A headdress can only be made if there are materials for it. For one of them you need: a leaf from an album (2 pieces), accuracy and patience.
- You need to place one sheet on a flat surface and cover it with a second leaf on top. The sheets must be in a horizontal position.
- You need to bend the top edges of the sheets approximately 2.5 centimeters.
- Then we bend the upper corners of the leaves so that their edges touch in the middle. This is done in the same way as when folding a paper airplane.
- You need to fold up the bottom strip on the top sheet.
- The corners of the strip need to be folded and secured.
- The same needs to be done with the bottom leaf.
- All that remains is to smooth out the resulting hat.
- If the edges of the cap are sufficiently well secured, then the headdress will be durable and will not fall apart for quite a long time.
A paper cap is an excellent way, for example, to protect your head from dirt and dust during repairs. The cap in this case is part of the clothing.
Umbrella for a doll
To make an umbrella for a doll, take:
cocktail umbrella,
white lace,
dark blue satin ribbon,
bead,
scissors and a gun with hot silicone.
How to make an umbrella for a doll - master class:
Take a cocktail umbrella and use scissors to cut off the entire paper base of the umbrella, leaving only the knitting needles and handle.
Cut out a circle from lace with a small hole in the center. We attach the lace to the base of the umbrella using a gun with hot silicone. We decorate our umbrella with a small blue bow with a bead. It is better to cut off the sharp edge of the handle so that the child does not get hurt.
This is the umbrella we got for the doll:
Lesson number 2. Everyone's favorite cylinder
It is quite possible that you will need to make a cylinder hat. This may be required for school work, to spend a weekend or to attend some fashionable and successful corporate event.
Making a cylinder is actually not that difficult if you follow the step-by-step “recipes”.
A wonderful cylinder can be made from ordinary cardboard. To do this you will need 2 sheets of colored cardboard. They must be proportionate to the product.
You also need to stock up on decorative ribbon to make a bow. You can also use a flower, such as papier-mâché.
You will also need scissors and a pencil, as well as a fairly large compass, an eraser, and, of course, glue. The glue must be suitable for all components of the hat.
- To begin with, you can look at photos or other pictures of real cylinders.
- Using a compass you need to draw a circle on a sheet of cardboard. He will be the main one. Diameter – Suitable for the required hat. You need to draw another circle from the center - it should be larger.
- The first sheet needs to be cut along the drawn circle.
- Next, up to the outline of the main circle, you should make strips with scissors, like a fringe.
- The strips need to be folded. This will be the first preparation.
- The second leaf needs to be cut along a large contour.
- Then a circle of small diameter should be made from it.
- Before the start of the main circle (inside), you need to cut strips in the form of a fringe, as in the first case.
- Then the stripes should be folded. This will be the second blank.
- You need to make a strip (cut) out of cardboard; its width should be equal to the height of the cylinder we are making. The length should be a little longer than the main circumference.
- Then we wrap the strip into a cylinder. There must be an overlap for gluing. Then we glue the cylinder so that its circumference is equal to the main circle.
- Then we coat the fringe with glue in the second workpiece.
- The fringe is glued to the inside of the cylindrical part.
- You should coat the first piece with glue, or rather its fringe.
- You need to glue the fringe to the inside of the cylindrical part on the other side.
This will do the bulk of the work. Now you can safely design the resulting cylinder. You can cover it with decorations, you can make a ribbon with a bow, you can refresh it with decorative flowers.
Straw hat made of threads
You can create original hats for dolls with your own hands if you use floss thread. These hats look like straw hats and can be used as brooches and hairpins. A distinctive feature of such a hat is the method of its manufacture using a pre-made blank. The blank is made from a bottle cap and a cardboard circle placed on it. And since the threads are glued to the blank, it is first wrapped with tape. The floss thread is braided, which is twisted and glued around the blank, starting from the top of the crown plug. After the threads have dried, the doll's hat is carefully removed from the blank and decorated at the discretion of the craftsman.
INTERESTING: How to make school supplies for dolls
See similar master classes: Making a gypsy costume.
Lesson number 3 – top hat for a doll
Sometimes a child asks to make “clothes” for a doll. If the doll is a male character, you can make a fashionable and beautiful cylinder (cap) for him. It's pretty easy to make.
For all the preparation you will need plastic cups, as well as containers for cottage cheese or yogurt. You will need baking dishes, as well as a pencil, compass, scissors, tape, cardboard, fabric, and decor.
- You need to take a plastic cup and cut it so that only the cone remains. The volume should correspond to the doll's head.
- Using a compass you need to draw a circle on the cardboard. It should be 3 times the diameter of the cone. Then you should cut out a circle from cardboard.
- You need to place a cone in the center of the cut out circle, outlining it with a pencil.
- You need to cut out the inner circle.
- The cone from the cup must be connected to the cardboard ring using tape.
- You need to cover the craft with the chosen fabric. You can not glue it, but sew it.
- A cylinder hat can be decorated with rhinestones, beads, ribbons, etc.
Note that such a hat can be made for a child, you just need to choose the right materials and monitor the size.
Paper hat
You can make hats for your dolls using beautiful paper and glue, the most important thing is to correctly draw and cut out the brim and crown, using cuts for gluing. The parts are attached with glue and decorated with ribbons, braid, linen threads and other suitable accessories.
Lesson number 4. Hat for an adult
You need to take a cardboard box, a brush with paints, a compass, scissors, and tape.
- The box is disassembled. A circle is drawn with a compass on one of the square or rectangular parts. You need to cut the material along it. This will be the first round.
- A rectangle is cut out of the box, bent, and bent around the circumference of a small circle (for the head).
- The middle is cut out from the first circle. It will form the height of the hat.
- The parts are held together with tape.
- The resulting headdress can be painted in any color using paints, or you can use spray paints from a spray can.
- This hat can also be decorated with various decorative details.
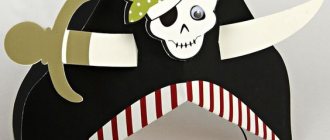
DIY top hat. An additional touch to the leprechaun look
The easiest headdress to make for a small doll is a top hat.
The materials that will be needed for its manufacture are cardboard, tape, fabric, wire, acrylic paint, epoxy glue. From all of the above, the basis of a cylinder hat made by yourself will, of course, be formed by cardboard cut from a sheet in the following shapes: the brim of the hat, the top of the hat, the cylinder of the hat itself (for now in the form of a strip, the width of which determines the height of the hat) . The diameter of the inner hole of the blank for the brim, the diameter of the blank for the top and the length of the blank for the cylindrical surface are determined by the size of the doll's headdress.
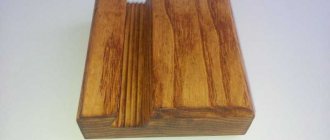
Making a cylinder hat with your own hands begins directly with the cylinder itself, when a blank in the form of a strip is taken and wrapped around some round object with a circle diameter corresponding to the size of the doll’s head. In this case, it is a cigar case.
The ends of the strip are fastened with PVA glue, and the strip itself is also wrapped with tape, which performs two functions in this situation - it saves us from having to hold the adhesive joint with our hands and gives the workpiece strength in the future.
To prevent the edges of the tape from sticking to the frame (cigar case), the place where the cylinder is formed should be wrapped with some thin paper.
While the glue seam of the cylinder dries, we wrap the blanks for the brim and top of the hat on both sides with tape and cut off the excess tape from the edges.
After the adhesive seam on the cylinder has dried, remove the workpiece from the frame and remove all excess (adhesive tape around the edges and thin paper underneath).
Now all that remains is to connect the three parts of the hat together with your own hands. To do this, first put the cylinder on the frame, and then the brim of the hat. Having achieved their tight contact with each other, we apply a thin layer of epoxy glue along the contact line of the two workpieces.
After this, again in a thin layer, apply a layer of epoxy resin to the upper cut of the cylinder and carefully secure the top of the hat to it.
After the epoxy glue has hardened, remove the finished hat from the frame.
Now it should be painted and decorated with a strip of fabric and a wire buckle. The fabric is glued using PVA, the buckle is glued using epoxy glue (in fact, all the steps are similar to making a leprechaun belt from the basic course). Now the top hat is ready.
Using the same technology, you can make cone hats with your own hands (like Blind Pew’s, for example), only a strip of cardboard should be wrapped around the cone frame, and the shape of this strip should be determined according to geometric laws, based on the difference in diameters. Although you can wrap a piece of obviously larger cardboard around a conical frame, glue the edges, and then form the upper and lower sections of the workpiece using cutting tools. The choice is yours.
Good luck to you and stylish hats to your dolls!
When using this article on another resource, an active link to the “KAMYSHI Workshop” website is required!
Source
Lesson number 5. Crochet hat
This idea will be good, especially if you already know how to knit. You can make a hat this way if you refer to the image of any lesson. This is a good idea. Many people want to stand out from the crowd.
Such a knitted hat will be very good for summer, especially if you combine it with knitted handbags or gloves.
- Take a hook and thread. The yarn should be quite thick.
- First, a ring of 4 loops is knitted. Then we knit 6 single crochets.
- Then there is knitting in a spiral. In the 2nd row there should be a doubling of loops, in the 3rd row - 1 and 2 loops in each loop of the previous row. In the 4th row you can make 3 loops in each previous loop (of the previous row).
- This way the upper part of the hat is knitted in the form of a circle. It is necessary to determine in advance how many centimeters the diameter will be (according to the size of the head).
- Next, a rectangle is knitted, which must be knitted without doubling the loops, forming a height (crown). It is knitted simply, repeating the stitches of the previous row.
- To make the brim of the hat, you need to continue knitting what started out as a crown, adding loops.
The hat is ready! It will be very useful by summer.
There is a large selection of master classes on the Internet. A good hat can be made of any type: for dolls, sombrero, children's, cowboy, and so on. Patterns may vary. The main thing is that it turns out neat and does not fall into pieces.
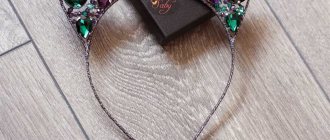
Exquisite hat made of fabric, lace, ribbons and beads. Master Class
For the master class you will need the following:
- two pieces of dublin and one piece of cloth;
- lace and satin ribbons of different colors;
- 3 or 4 beads;
- sewing supplies (threads, needles, scissors, sewing machine).
- Fold two pieces of dublin together, place them on the right side of a piece of fabric and draw a circle of the required size.
- Sew the fabric and dublin together according to the marked markings.
- Cut the fabric at a distance of 3-5 mm from the edge of the circle.
- Make a cut in the middle of the circle on the dublin side with scissors and turn the fabric right side up through it. Carefully straighten the edges of the future hat and iron the entire part. The dublirin will stick together and the cap will take a rigid shape.
- Sew a piece of lace ribbon onto the top fabric part so that the stitches are not visible from the bottom side.
- Sew the satin ribbon with a basting stitch, placing beads on a needle 2 cm apart. Pull the thread and attach the ribbon to the hat with a few stitches.
- Without breaking the thread, sew a second lace ribbon of a different texture.
- Bend another satin ribbon lengthwise and sew it in the form of a piping. After gathering the ribbon, sew it into the middle of the hat.
- On top of the hat you can sew an additional piece of matching fabric, glue beads, a feather or fur.
INTERESTING: We create furniture for dolls: armchair, fireplace, ottoman
The elegant hat is ready!
Using this master class, you can make hats for a wide variety of dolls with your own hands. Due to their luxurious appearance, they are especially suitable for tryapiens dolls.
Photos of homemade original and fashionable hats
Doll bag
To make a handbag for a doll, take:
velor dark blue,
satin ribbons,
threads,
igloo,
scissors.
Handbag for a doll - job description
Cut a circle with a diameter of 10 cm from dark blue velor.
Baste in a circle, retreating 0.5 cm from the edge, and pull together. That's all! The doll's bag is ready! All that remains is to decorate it with roses made of white and dark blue satin ribbon and sew on a handle made of dark blue ribbon.
Another option is a knitted doll bag.
Nataly Druzenko specially for the site Favorite doll
Previous article: How to sew a dress for a Barbie doll? Next article: Coloring book for girls: Bratz Lea