If you want to sew yourself, but don’t have the material or sufficient experience for this, try making soft toys for beginners step by step yourself. Leftover fabric or some unnecessary things are also suitable for sewing. This way you will not only get a cute toy, but also give life to old things! We have selected simple patterns for soft toys.
Cheerful teddy bear made of soft fleece
If you want to please your baby with a soft friend, a bear is well suited for this role!
You will need:
- fleece;
- needlework supplies;
- two beads for eyes;
- a piece of leather for the nose;
- cotton wool
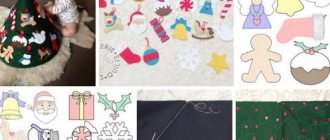
1. Print out the finished teddy bear patterns and draw them onto a newspaper at the desired scale. Cut it out.
2. Cut out of fabric, taking into account the seam allowance: 2 blanks for the body, 4 for the legs, 2 more for the eyes, and one circle of leather for the nose.
3. Pin the eyes to the body and sew by hand (or using a sewing machine).
4. Do the same work with the paws: fasten them together, connect them, leaving the bottom unsewn. Turn it inside out.
5. Secure the front sides of the bear’s body with pins and place the paws between them.
6. Sew the toy, stepping back half a centimeter from the edge. But be sure to leave room to turn it inside out. Distribute the filler inside it, then sew up the hole.
7. Run a stitch along the circle of black leather and pull the thread together to form a ball. Stuff it with cotton wool and secure it to the face.
8. Hook the beads in place of the intended eyes. If you want to make a mouth, go through stitches with black thread.
Your DIY fabric toy is ready!
Soft cars for little men
Delight your little man by sewing a whole fleet of vehicles for him from bright felt or fleece. Small machines will be used as pendants for a mobile on a crib or for the subsequent production of keychains for keys or a backpack. Larger cars will become an original full-fledged soft toy, a decorative sofa pillow or a kind of bean bag chair for a children's room.
To make a soft car you will need:
— Multi-colored felt (for making small cars) or fleece (for making larger cars); — Sewing threads to match the fabric; — Multi-colored floss or Iris threads; — Sewing needles, as well as special needles for embroidery; — Sintepon, padding polyester, holofiber or silicone balls for filling machines; — Paper for drawing patterns; — A simple pencil, a tailor’s tree and/or a special marker for marking the fabric; - Tailor's pins; - Scissors; — Ribbons or decorative cords for hanging cars, chains and carabiners or rings for making keychains (optional).
Draw the patterns of all the necessary parts of the machine onto paper, enlarging the patterns to the size you need, then cut out each part clearly along the contour. Place the paper parts on the wrong side of the multi-colored fabrics you have chosen and, using a tailor's chalk or a special marker, trace each part along the contour, then cut out the fabric parts, just as clearly along the contour.
Place small parts (side windows and wheels) on large parts of the car body, secure them with tailor's pins and sew them on using contrasting color threads and cute decorative stitches. Then align the long roof piece with the wrong sides facing each other with one of the two side body parts, secure them with tailor's pins and sew along the edge with an overlock stitch (the joint of the long roof piece should be placed on the bottom of your machine). After this, place the remaining small parts (windshield and rear glass, headlights and bumper) on the roof parts, secure them with tailor's pins and sew them with a decorative seam.
Align the second side body piece with the long roof piece, wrong sides together, secure them with tailor's pins and sew along the edge. Through the joint of the long part that is left unstitched, fill the machine tightly and evenly with synthetic down or synthetic padding, then carefully sew the joint with a decorative seam. Carefully attach a ribbon or cord to the roof of the car to hang the car from the mobile, or attach a chain with a carabiner or key ring.
Volumetric hippo
Another adorable character who won the hearts of all the kids! We often see these toys in themed clothing: a hippo policeman, a hippo fashionista.
Instructions:
- fur, suede, or soft fleecy fabric (you can take fabric in a contrasting color for the tummy);
- needles, threads, pins;
- beads, buttons.
1. Decide on the size. If you want a little cutie for the palm of your hand, the pattern should be miniature in the area of 7-10 cm along the back of the body. If you want it to be the size of a pillow, take this into account when cutting.
2. Place the parts of the legs right sides together, sew them at a distance of 0.5 -1 cm from the edge, leaving the bases of the legs unsewn. Iron the seams, turn them inside out and stuff them with filling.
3. Assemble the head. We fold the ears right sides together, stitch them, turn them inside out, and stuff them. Sew the head part along the darts to create a voluminous face. Sew the resulting blank into the front part of the head. Place both parts of the head right sides together, not forgetting the ears. Sew, leaving the base unsewn. Turn it out and stuff it evenly.
4. We sew the tummy detail into the body.
5. We connect all the parts, distributing the stuffing well.
How to choose a sewing machine
The desire to make money pushes manufacturers to reduce the cost of production and produce low-quality and easily broken parts. It's not so easy to find a good machine for little money. Here are some tips for choosing:
- The presence of a controlled pedal, sensitive to even the slightest pressure;
- No tightening stitch;
- Presence of a perfectly straight line;
- Simple and inexpensive repairs and all components;
- Possibility of zigzag stitching;
- Availability of a sleeve platform;
- Ruler on the needle plate;
Finished dress pattern
Turtle
The turtle pattern is quite simple and is suitable for all beginning needlewomen. This is how you can make a toy without a sewing machine!
The materials are the same. Choose the fabric to your taste.
The basis of the body pattern is one circle of your favorite size. 8 identical leg parts, two for each; one smaller circle for the head.
- We cut out a circle from the fabric and, stepping back from the edge, sew along the edges. Gently tightens, adding cotton wool inside.
- We sew the parts of the legs together in pairs, turn them inside out, and fill them.
- We tighten the head around the perimeter to form a ball. We sew it to the body, just like the paws.
- Beads instead of eyes.
- You can make a design on the shell of black threads.
Craft for kindergarten “Dad fixes the car”
Cover the base (a candy box or an old cutting board) with green paint, and draw a road in the middle with gray paint.
We make a car out of cardboard with our own hands. We need 2 identical side parts of a passenger car, and one rectangular part with teeth on both sides, with which we will glue all three parts.
Let's paint the rectangle and side parts with paint, and highlight the doors with a marker. Let's spread good glue on all the teeth, and placing the rectangle in the middle, bending it in the right places, glue it along the silhouette of the side parts.
We will also glue on four pre-painted wheels. We use white paint to mark the windows in the car.
You can make a dad out of plasticine or take a Lego man figurine.
Let's draw and cut out some trees. Using two squares bent in half, glue them to the base.
In the remaining empty spaces, crumble green threads, cut into small pieces, having previously coated the surface with PVA glue. The garden craft is ready!
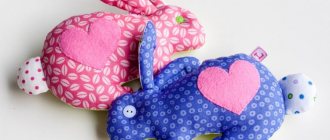
Cats in love
How many wonderful feelings a child will experience from cats! Such a souvenir will be pleasant even to a friend, husband, or parents.
The work is extremely simple, only 4 identical parts, the main thing is imagination in decorating these fluffies.
It is better to take thick material and two colors: a separate one for each cat.
- We transfer the pattern to the fabric using our method. There are two mirror parts from each color.
- We sew in pairs, turn them inside out, stuff them, fill the holes.
- Decorates the face: add eyes, mouth, bows, etc.
Where to start for beginners
You need to prepare all the materials and tools for the process and try to sew:
- A simple pillow or pillowcase for it;
- Sleep mask;
- Minimalist skirt;
- Turtleneck;
- Loose dress;
- Duvet cover.
You might be interested in How to make a rose from foamiran using a finished pattern
Attending master classes can be very useful
After completing simple work, you can begin making more complex products; of course, all the previous ones turn out well.
Products for the home are the simplest thing you can do yourself at the initial stage
Birdie
Previously, this toy was considered amulets for children. Such things were made with their own hands from the simplest materials found at home. Make your own amulet of happiness!
Take any square piece of beautiful fabric, filler, and monochrome thread.
- Fold the piece diagonally and form a beak at the tip of one of the sharp corners, wrap it with thread 2 times, secure without breaking the thread.
- Unfold the folded piece and stuff cotton wool into the dimple near the key; this will be the head.
- Fold it diagonally again, wrap it 2 times (that’s the magic), secure it. Cut the thread, leaving 30-40 cm.
- Thread the thread into the needle and stitch along the diagonal fold, not reaching the very edge 5-7 cm. Pull and see what happens - these are the wings of the tail! Fasten in a way convenient for you, decorate your amulet to your taste.
The bird can be placed in the interior of the house or hung above the crib!
Master class “Square racer”
Glue a box of the appropriate size onto 2 parallel toilet paper rolls; if necessary, you can glue a box of cardboard and tape.
On the front part draw the eyes of the headlights, on the side doors.
You can make many of these cars and build a mini city for them with houses, trees and garages.
How to make a garage for cars with your own hands? Yes, just cover the stool with a thick cloth, and that’s the garage.
How to make trees? Rent a couple or three indoor flowers from your grandmother, and here are the trees. School? Garden? Get creative with the furniture you have.
Teddy bears
These are all kids' favorites! Everyone knows, everyone wants! We are sewing a surprise for the kids.
It's so nice to sew this soft toy with your own hands. Below you will find toy patterns.
Traditionally, plush fabric or faux fur is used for these cubs.
- We already know how to transfer patterns onto fabric, go ahead!
- If you take fur into work, it is advisable to cut it at the allowances.
- We connect the parts of the upper legs and sew in the palms.
- We sew together the parts of the legs, leaving the sole open, where we sew in the heels and soles.
- By analogy, we make a tail and assemble the head. When assembling the body, leave the hole for the neck open.
- We stuff the Teddy in the lower sitting part more tightly for stability. The head is not too much, so as not to overweight.
- Let's mark the fingers with stitches made from floss or woolen thread. Embroider a mouth and nose on the face. The eyes are traditionally large with crosses.
- There is one secret to keeping your head stable. Take one empty wooden spool of thread and wrap a piece of your fabric around the middle. Insert into the hole for the neck and attach to it in circles using a hand stitch, first the body and then the head.
If desired, tie a ribbon around your neck and sew a small vest or panties.
How to learn to cut clothes from scratch
When you request such information on the Internet, many courses are instantly offered on a paid basis, but not all of them are effective. Lessons written in text can seem long and boring. Isn't there an alternative? Eat. You can sew without having any skills at all. All you need is fabric, tools or a machine and the desire to learn. Using a simple pattern, even a person who has never picked up a needle can make his own product.
Simple dress cut
The most popular option to start with is a straight skirt. It’s easy to cut, and you can create a pattern yourself or use a ready-made one for your size. When drawing your own drawings, it is important to take into account the size of your body and its parameters.
Sundress pattern
Leopold the cat
During all the problems and crises, I always want to sing: “We are going through this trouble!” And to make this happen easier and faster, we can sew a toy with our own hands.
- Trace the templates, not forgetting the seam allowances.
- Let's start with the legs. We have 4 identical parts. We sew, turn, stuff. Leave the bottom open to connect to the body.
- We also separately assemble the tail and ears, which we sew into two folded parts of the head.
- To assemble the lower part of the cat, place one body piece face up. On the lower part we attach the finished legs and tail with pins, towards the center. Place the second piece on top and sew with one seam, without sewing up the neck.
- We insert the filler very well and tightly into the body and head of our textile toy.
- We connect them together with hidden, hand stitches in the neck area. We tie a bow, like in the cartoon, to cover the seam.
- All that remains is to design the face and Leopold is ready! It was such a pleasure to sew it.
You can also sew on an old sewing machine.
Almost any thing can be sewn on an old machine, if it is working and well-established. This will allow you not only to get acquainted with the history, with the machine on which your mother or grandmother once sewed, but also with the basics of controlling these mechanisms. After this course, it will be easier to switch to modern typewriters.
You might be interested in this: The procedure for sewing a tablecloth yourself
Important! Using an old machine, it is quite possible to make clothes from denim or leather, but there is one drawback: such devices can often only make straight stitches. For zigzag, you need to turn to later and more advanced examples of technology.
Zigzag stitching is an important feature of any modern sewing machine.
If sewing has already become an integral part of life, then you should think about buying a modern unit with many functions and supported modes. Today there are many solutions on the market at an attractive price. You can learn how to sew on such devices using the user manual or by finding the necessary information on the Internet. Here you can find the setup procedure and operating rules. If the initial practice was mastered on an old home machine, then there will be no problems with a modern one.
Operating a machine requires certain knowledge
Goby
And now the time has come to find out: how to sew a toy, the symbol of this year! We offer a pillow bull pattern for beginners.
- Scale this toy pattern for yourself.
- Transfer to fabric.
- We decorate the upper decorative part of our pillow. We sew all the elements on top of one upper part of the body: muzzle, spots, tail, paws with a decorative seam or stitch. It is advisable to use fabric for all small parts that does not require additional processing.
- Separately sew and stuff the ears, leaving the bases open.
- We connect the two main parts of our pillow toy, not forgetting to sew ready-made ears near the head. We turn it inside out, steam the seams, and close the holes for stuffing with hidden seams.
DIY car ideas for school-aged children
With a first-grader, doing simple appliqué will no longer work; ready-made color schemes of cars will come to the rescue.
First, you will have to show the boy how to make a paper car with his own hands, and then the diligent and purposeful child will construct the equipment himself.
A distinctive feature of such models is their 100% similarity to the original. Finding a diagram on the Internet is not difficult; they are completely free and do not require any special programs to download.
Other animal patterns for download
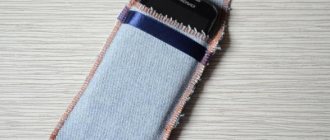
Cases-bags
Such protection will not hurt, and as a device for transportation it is absolutely irreplaceable! Sewing a cover for a Janome Juno 1715 sewing machine, for example, is very simple.
To work you need:
- Flannel fabric - with a width of 90 cm, you will need 115 cm.
- Non-woven fabric for gluing.
- Rigid wide braid for handles.
The dimensions of this machine are: length (C+A) - 35 cm, height B - 26 cm and width A - 14 cm.
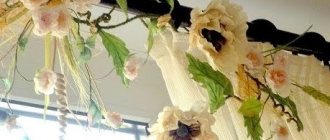
Next, we cut out 2 sets of parts - non-woven and flannel, not forgetting about seam allowances.
Place interlining on the flannel from the inside out and quilt it in a diagonal direction. Maintain an interval of about three to four centimeters.
Now sew all the prepared parts together, turn the cover inside out and sew the edges with a hem seam or edge it with a ribbon. Make handles from the same braid and sew them in the right places.