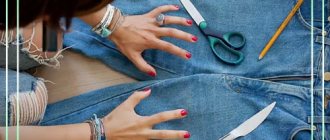
When you start working with leather, you have ideas in your head about what you want to do, but soon everything you have in mind is done. Then you do things that you don't really need. At this point, your leatherworking skills are developed enough to start making things for friends or family members. It's good if they pay you for the cost of materials. Hone your skills and soon you will be able to charge money not only for materials, but also for the time spent. I have just reached this point now. When I received a request from a customer to make a briefcase, I jumped at it. This briefcase is probably the biggest thing I've sold.
In this master class I will show you how to make a leather briefcase with an accordion side with your own hands.
I've made a portfolio like this before, but I didn't photograph much of anything. Now I have drawn a beautiful, clear pattern, taken several hundred photos, and present to your attention a master class on sewing a leather briefcase.
When I was in university, my professor told me that the photographs and images in a report are much better and more informative than the title. I took this advice to heart and will tell you that this photography workshop is all there is to it. Under each photo block I give my explanations of why I do it this way or that way. There are a lot of myths surrounding the leather craft and many people don't even think about why they do things a certain way. To summarize, I want to say that you need to do what is good for you and not worry about whether you are doing the “right” thing.
I took a look at the design of this briefcase from the Westminster 3 model briefcase from the manufacturer Swaine Adeney Brigg.
The price for this is 1895 pounds sterling, or 2932 US dollars. Wow! A huge amount, and yet their briefcase is not even hand-sewn! For much less money, you can buy all the necessary tools and leather and make such a briefcase yourself. Of course, I’m exaggerating, because you also need skills in working with leather, which are not sold anywhere. But with a year or two of practice, you can make the same portfolio, or even better.
Tools and materials.
►►Tools for leatherworking◄◄
Materials:
- 3-3.2mm saddle cloth of vegetable tanned leather for the main part
- 1-1.2mm vegetable tanned leather collar for side panel
- lock,
- three 25mm buckles,
- 4 20mm half rings,
- two 25mm carbines,
- 4 belt screws 10mm,
- brass rivets 8*2mm,
- metal strip,
- leather paint,
- threads,
- protective skin cream,
- glue.
Tools:
- 4mm line punch,
- mallet,
- awl,
- needles,
- pliers,
- small nails,
- saddler,
- scissors,
- beeswax,
- knife,
- round knife,
- sanding knife,
- edge cutter,
- strip cutter,
- ruler 1m,
- square,
- clamp,
- stationery clips,
- wax paper,
- compass,
- sandpaper(80,180,400,1000,3000),
- dremel,
- polishing paste and disc,
- hammer,
- tweezers.
We paint and protect.
I tried different methods of applying paint to leather and came to the conclusion that the most convenient and fastest are Mototow markers. They sell a 250ml bottle that can be attached with a 50mm wide applicator. This marker paints very well, it cannot be compared with a brush or a fluffy brush - from which the paint splatters in all directions.
Whichever method you choose, painting such a large piece of leather will take a fair amount of time. In addition, you need to give several layers. I tried dividing a large piece into sections and painting one at a time. Unlike fluffy, you can't paint with a marker in a circular motion. They need to be moved back and forth, up and down, or diagonally.
As you can see, there is a big difference in paint shade between the main piece and the side piece. I think once the paint dries the colors will even out, although that doesn't matter to me. All I have to do is add a second coat of paint to the main piece. Keep in mind that even if you use the same dye, the end result will not necessarily be the same on different skin types. It took me about 500 ml of paint to paint. I know that many people prefer to paint with fieblings professional dye, but after trying both, I prefer “ROC leather dye”. It turned out very fortunately that in my country it is impossible to buy professional leather paint (I had to order it from the USA, which was very expensive).
After the leather has dried, I remove excess paint from it with a piece of rag, and at the same time rub it, adding shine. This process takes me about 5 minutes per main piece. Then I apply a protective compound. It consists of Vaseline, bone oil, beeswax and resin. I apply it with a cloth and leave it to soak for several hours. The skin will absorb most of the composition. I wipe off the remains with a clean rag.
I also paint the inner part of leather straps, since sometimes it will be visible. I do not use a protective composition.
While painting and drying the leather, the edges of the piece curl up a little. To avoid this, I take a slightly larger piece of leather. Also, the leather can stretch or shrink while painting, so I paint first and then cut out the pieces. On small pieces this is not so noticeable, but the size of a large one may change.
I paint with a combination of colors: 80% ROC Yellow brown, 15% ROC Red brown, 5% ROC Tan.
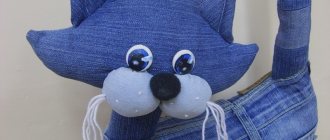
Child model
Kids love little bags stylized as animals. It’s not difficult to cut out funny ears or glue button eyes, and the baby will choke with delight.
Experienced craftswomen recommend making sure to narrow the top in relation to the bottom on the base pattern. It is desirable that the backpack has a triangular cross-section in diameter. The bottom is calculated according to the pattern. It is better to make it from 2 parts, like a ladder, securing the edges of the steps with a strong ribbon.
The upper part of the backpack is conveniently tightened with a cord. To ensure the safety of stored items, you can make a folding valve. The decor in the form of a pompom looks good on children's accessories.
If the child is a schoolchild, then it is appropriate to sew a removable lining with compartments for notebooks and textbooks. Each compartment can have a separate clasp. The material is thin, durable and non-marking.
Sidewall.
The good news about the sidewall is that making it is much easier than it seems. Don't worry about creases. They don't have to be super neat; damp skin is quite forgiving.
I cut a piece of leather for the sides a little larger. The piece was a little warped after painting, so I had to trim a little to get the sides even. My ruler is 1 meter long and it’s not enough to cut it in one pass. The trick I used is quite simple - I moved the ruler along the corner, see photo.
When I made the side panel on the previous bag, I cut grooves in the side panel to make them easier to fold. But this time I won’t make grooves, the skin is quite thin, there won’t be any problems with bending.
I pre-bend along all the necessary lines, this way it will be easier to get the final shape. Now I bend the edges at an angle of 90 degrees and press out the folds at the bottom of the bag. It's not an exact science, so try it your way and it will work out.
I decided not to wet the folds with water. This is necessary if you want to make tight folds. I only wet the triangles. This makes it easier to bend the skin.
The corners around the folds should be such that the sidewall can be stitched around the perimeter. I leave some loose skin for the seam.
When the leather is dry, I cut the side to the required length, bend the narrow ends and sew it together. Before bending, I moisten the skin with water, this makes bending easier.
Partition.
The width of the partition should be slightly less than the width of the briefcase. I have 42.5 cm. The height can be the full height of the briefcase or slightly shorter. I made it shorter. I trim the corners of the partition at the bottom so that they do not interfere with the folds of the sidewall. I process the upper end - chamfer it and polish it. To add functionality to the briefcase, I sew a pocket and a pen holder to the partition. I cut out the pocket exactly according to the pattern and process the ends. Since the pocket is made of thin leather, it is impossible to remove the chamfer, but it is enough to rub with sandpaper.
Now I mark the holes for the seam at a distance of 4.5mm from the edge. Next time I'll do 3.5mm.
Since the pocket does not have right angles, I use a corner to align it with the edges of the partition. This shape of the pocket allows it to bend on its own.
To secure the pocket to the partition, I nail it with small nails. Because studs are round, they leave round holes. Next time I will give them a diamond shape with a Dremel, because my punch is diamond-shaped and round holes for thread can ruin the entire appearance of the seam.
I sew the pen holder in two steps - first I press it to the pocket, sew it on, then insert the pen into it and sew it on again.
How to sew a backpack bag from scratch yourself
The cut of this product consists of rectangles. Its bar with eyelets can be cut together with the front panels or separately: there is no difference. You will also need a seam allowance so that the backpack does not shrink after sewing.
Appearance of the “package”
It is worth noting that the “faces” of panels can be duplicated with adhesive bands, either entirely with hatching or unhatched. Once the duplication is complete, you can make the pocket. To do this, the hem is ironed and the entrance to the future pocket is secured with a stitch. The pocket is placed and sewn along the markings and ironed well.
The front panels are edged separately, and all the sides are folded and ironed. After this, the handle in the form of a rope is threaded into the pre-prepared holes and lines. After threading, the rope is sewn by hand.
Children's backpack pattern
I sew the partition to the side panel.
In all projects there are moments that you don’t want to do. Sewing the partition to the sidewall is one of these moments. The last time I did this, things didn't go as planned. It was very difficult to keep the baffle in the right place on the sidewall. In some places the partition was not sewn on and I had to rip it out and sew it again.
Learning from my mistakes, I invented a bulletproof method. Probably... The ingredients for success are a lot of glue, two strips of wax paper and 4 paper clips.
I think I was greedy with the glue last time. This time I poured the glue from my heart. I rubbed a strip of leather with sandpaper at a distance of about 7mm from the edge. I also coated the folds of the sidewall with glue.
To prevent the sides of the partition from sticking to the side panel prematurely, I covered them with wax paper. Now I insert the partition into the sidewall and it fits neatly into place.
Then I remove the clamps on one side and pull out the paper a few centimeters. Immediately I press the sidewall against the partition. And so on until I remove all the paper.
I leave the glue to dry for several hours so that it no longer sticks. Best for a day. I draw lines under the seam and start sewing, starting from the bottom of the briefcase. So, as it turned out, I had no reason to worry about sewing on the septum.
Belts.
First of all, I process the ends of the straps - I chamfer, polish and paint. I secure the strips to the table using a clamp. I chamfer in one pass. Long belts are a good chance to practice your edge polishing skills.
I punch holes for buckles and carabiners. Then I paint the holes so that they are not noticeable.
I mark the holes for the seam.
I thin the leather from the end of the belt by about 4cm and paint along the fold. I paint it black, but you can paint it with the same paint as the whole bag. Now you can wet the folds with water, insert the buckles and let the leather dry.
I cut the belt loops from leather with a thickness of 3.5mm and polish them to 2.5mm thickness. I don't have a sanding machine, so I had to make some primitive semblance. Of course, for large volumes of work it will be inconvenient to use such an installation, but for several passes it works quite well. Look at the photo to see how I assembled my setup. Be careful when using.
I cut the ends of the belts into a trapezoid. I also punch holes in the belts. The distance between the holes is 25mm.
Sew.
I sew the straps with a saddle stitch. In the first stitch I overlap the thread twice through the end. Then I sew on a fixed belt loop on one side. Then I stretch the thread to the other side and sew the belt to the end. I first sew the movable belt loop, then thread it into the belt.
Many master classes advise to pierce the holes with an awl from the front side, but when I do this, the seam turns out uneven. So I punch holes from the back. This way the seams on both sides look smooth and beautiful.
Top.
Before making the handle, you should make the upper fastenings, because the size of the handle depends on them. I couldn't find a 20mm half ring, but I had the appropriate buckle and wire cutters and the problem was solved.
Using an iron strip, I marked the top holes on the leather strip. And then, using a compass, I marked the “bottom” holes. When punching holes, make sure they go through the center of the leather strip, otherwise the edges won't line up. To avoid cracking of the leather on the folds, they must first be moistened with water and then folded.
To prevent the strip of leather from unbending during drying, it can be secured with a screw.
I additionally polish the belt screws, since their appearance from the factory leaves much to be desired.
"Torba"
Easy to make, comfortable, stylish and original - a sack backpack. It looks like a simple bag with a shaped round bottom. Instead of straps, it often has simple thick textured ropes sewn on it, and it is “closed” with a lace (pulled together), but this does not take away from its elegance.
You can sew it with or without a flap, pockets, lining, from any available materials. The pattern is simple, you don’t even have to make it out of paper, just mark it on the fabric.
Such a model made using the patchwork technique will look no less original.
Imagine, “play” with materials, and most importantly, work with pleasure. And you will succeed in any model, even the most complex one.
I'm making a pen.
I make the handle from a leather insert, which I wrap in a piece of leather.
I glue strips of leather 15mm by 140mm wide together with glue to make a block about 1cm thick. After the glue dries, I give this bar the desired shape. How I do this, look at the photo.
The insert was a little longer than needed, so I cut it to size.
I cut out a piece of leather for the handle according to the pattern, cut out semicircular recesses in it and sand the edges. I cut grooves along which I will bend the skin. Before inserting the half rings into place, I process the ends.
I soak the skin in water and insert the half rings into their places. I put the insert in place and shape the handle with my fingers. I don't have smooth jaw tongs, so I wrapped leather around the ones I had. Using pliers, I squeeze the leather along the edges so that I get a smooth edge for sewing. At the same time, I bend the handle, thus giving it the desired shape.
Now you can apply glue to the handle and glue it together. Next time I'll wait until the skin is dry.
After the handle is completely dry, I stitch it, trim the ends, sand it, chamfer it, and polish it.
I made two handles. One turned out to be too thick and long and was not comfortable.
How to make a briefcase from genuine leather - part 1
Translated by SaorY for mozgochiny.ru
Good day, brainiacs! When you look at a piece of undyed leather, it’s hard to even imagine what it can turn into. With the right tools and skills, you can create quite a lot from it, and each such “transformation” amazes me time after time.
The brain craft in this article is called a music briefcase, because it is used to store music notebooks. I don’t know if this is the best option for such purposes, but this model has that name. Of course, you can use such a homemade product for its intended purpose, but if you are a “rebel”, then no one forbids you to wear whatever you like in it.
My briefcase, with its unusual method of closing, consisting of a metal rod hooked onto the handle, compares favorably with other brain briefcases. It looks very elegant and is easy to close and open.
Step 1: Tools and Materials
I approach the search for suitable material responsibly. For this homemade product, I took a piece of leather from a shoulder blade for testing, which I ordered from a large leather supplier, since the samples received from them were very good, and quickly satisfied all my requests.
When the order arrived, the skin looked great, although I expected it to have fewer stretch marks than it turned out to have. But when choosing the skin of the shoulder blades, such stretch marks cannot be avoided, so next time I may order skin from the back, which usually has fewer stretch marks.
Materials and tools:
- leather piece 2.5-3 mm
- leather 1.5-2mm
- brass ball with a diameter of 12 mm with an already cut M4 thread - 2 pcs
- brass rod with a diameter of 8mm and a length of 21cm
- thread size 432 (0.63mm)
- leather dye
- conditioner for natural leather
- glue
- wax for natural leather
- leatherworking tool
- lathe
- M4 thread cutting die
- brass polish
Step 2: Pattern
The cutting scheme is quite simple, you just need to take into account that the length of the insert is difficult to determine.
music_bag_pattern
Step 3: Coloring
After dyeing, the leather tends to curl as the dye dries, and to prevent this, I covered it with a cutting mat. In the last photo you can see that the skin is flat over the entire surface. The insert was especially susceptible to twisting, but now it is as smooth as it was before painting.
For more information on coloring and restoring skin, I advise you to read my other brain guide.
Step 4: Back and Front
The back and front parts of the homemade product are very easy to make:
- pieces are cut to the required size
- the corners of these pieces are rounded
- then the corners are cleaned
- the edges are beveled
- the edge of the front part is burned from the front side
- the convertible top is burned on the back (I didn't do that in this article, but I should have). See how firing is done here.
Step 5: Paste
When making custom bags, cutting is usually done during the brain process itself. One of the parts I always have difficulty with is the insert, or rather its length. In theory, this is not difficult, you just need to calculate the total length of the three sides of the front part, to which the insert will be sewn. In this case, it is 82cm, and the length of the insert should in theory be the same, but in reality this is not the case. It must be because of the corners. Perhaps when gluing, the skin stretches slightly or the edges do not align equally, but in the end there is excess material left. This is what happened in my case. How much extra material do you think I have accumulated? 2mm? 5mm? No... a whole 8 extra millimeters! This is too much, and the only way to cut off the excess. Next time I will do as Al Shtolman advises in his book. Namely, before cutting the insert to length, you should glue it using rubber glue and mark the edges. Homemade parts glued together with this glue can then be separated.
I sew the front part and the insert with one thread, and it is recommended to use a thread 4 times longer than the length of the seam. In this case, it should be 3.2 m long. The advantage of this method is that it allows you to avoid double stitches resulting from replacing the thread. But I will no longer sew such long seams with one thread, since working with such a long thread is very troublesome.
While stitching the back and insert, I wet the corners to make it easier to stick them together. To be continued…
(Az Source)
mozgochiny.ru
I sew on the belt holders.
Before sewing on the belt holders, you need to determine where to sew them. To do this, I put the belts on the front panel and mark where their center line is. Then I place the belt holders along this line so that they are located 4 cm from the bottom and 6 cm from the edge.
To make sewing easier, I secure the holders with nails. I sew on one side first, then insert the belt and mark where to sew on the other side.
Required Parts
In order to sew a stylish leather backpack with your own hands, you will need:
- The strip that will be used to edge the backpack flap. It should be 1.5 cm wide. It is cut from leather.
- A strip for edging a pocket flap, 1.5 cm wide. Cut out of leather without additional allowances.
- Thick dark fabric for lining.
- A strip of the main material 4 cm high. This strip should be used to decorate the top of the lining, then the back of the backpack will look neat. And this is more practical when installing eyelets.
- 2 half rings, 2 metal length adjusters and a button for the front pocket. You will also need metal eyelets and a cord to tighten the backpack. The cord can be replaced with a leather strap made from the main material.
You can make the job easier and just carefully stitch the flap of the backpack and pockets. Although with the edging it turns out more neatly. You can also make the edging and cord from leather in a contrasting color. If desired, the finished product is decorated with fringe, rivets or appliqué.
I sew the side panel to the front panel.
Before stitching the front panel and side panels, they need to be glued together. What I do is place the front panel on the table and cover it with wax paper. This way the sidewall will not stick to the front panel in the wrong place. I start gluing the side panel from the top end. I reach the center and continue from the opposite upper end. Make sure that everything sticks evenly, without distortions.
The main reason for gluing the front panel of the bag first is that if the side panel is not long enough or is longer than necessary, the side panel can be stretched to the desired size or compressed so that there is no excess sticking out.
After the glue has dried, I sand the ends and mark the seam line at a distance of 5mm from the edge.
I start sewing from the top edge of the sidewall, the same one from where I started gluing. I sew with two threads, because one will be too long and it will be inconvenient to operate.
It took me about an hour and a half to mark the holes and flash the firmware. After finishing the firmware, I process the ends.
DIY leather briefcase
Translated by alexlevchenko92 for mozgochiny.ru
Leather is an amazing material, especially if that leather has been vegetable tanned. It has been used for centuries, millennia, even eons...
I like to make backpacks and briefcases out of leather. It is a beautiful and renewable resource. Leather needs to be taken care of and will last you a very long time. In addition, this material is environmentally friendly. The same cannot be said about faux leather or any other artificial materials you might use to make a briefcase.
The article presents one of the options for making a leather bag with your own hands. In addition, this homemade product has a secret compartment.
The original source contains a lot of photographs of the portfolio making process, which will make it easier to understand the text description.
Step 1: Tools and Materials
If you want to work with leather, a few basic tools will suffice. Alternatively, you can make some tools yourself from old screwdrivers, kitchen knives, etc. If you enjoy doing this kind of craft, then little by little you will be able to expand your workshop.
A good, reliable workbench is something you can’t do without.
Basic (what is not shown in the first picture)
- Sandpaper of various grain sizes;
- Piece of canvas;
- Sponge;
- Water bowl;
- Cutting board;
- Grindstone;
- For working on the table: a towel, a piece of plywood, to protect against the possible consequences of your work.
Additional (photo 2 and 3)
I had many tools that are not shown in the photos. Let's just say that they are not very significant, plus I had a Juki DNU-1541 sewing machine.
Materials:
- A piece of leather with a thickness of 2.8-3.6 cm and an area of about 8 square meters. m (the area is given together with waste).
- Leather lining;
- 4 pieces of D-rings measuring 2.5 cm (for handles and belts);
- 2 pcs. carbine (for attaching the shoulder strap);
- 2.5 cm buckle;
- 2 metal latches;
- A bunch of rivets;
- Leather dye;
- Beeswax.
Step 2: Design
Take a piece of paper and sketch out a sketch. Along the way, look on the Internet for a picture of the bag you would like to make.
Once you have an idea of the shape and style, you need to decide on the sizes. This can be done by collecting all the necessary things and putting them in a hastily formed rectangle. Take measurements of its sides. These will be your internal dimensions plus a couple of centimeters for “maneuverability”. Add to this the thickness of the leather and start drawing your future bag on paper. You may need to draw several sketches to finalize your design.
Step 3: Working with a roll of leather
We use powder paint, which should be mixed with water. Follow the manufacturer's instructions strictly. In order for everything to work out well, you must first soak the skin to ensure maximum saturation. Wear gloves when working! After the paint has dried, polish it with a cloth to remove any excess dye that remains on the surface of the leather.
We choose the best looking area of the leather to use on the front and top of the lid. We use steel angles for drawing straight lines and patterns for curved bends. Make sure your knife is perpendicular to the surface you are working on. This is easy to achieve on straight sections, but on curves the blade may tilt slightly to the side. The main thing is to take your time.
Step 4: Making a handle
There are dozens of styles that can be translated into a pen. Some of them are too complex and time consuming for a beginner to do. Therefore, I propose a combination between a simple belt and a handle made of a piece of leather wrapped around it.
Step 5: Attach the handle
All external parts must be attached before you can begin assembling the bag.
Step 6: Add Straps and Holders
We fasten the straps and holders, which should first be positioned on the same line. Make sure to leave a little extra length so you can trim everything flush later.
Step 7: Shaping the Bottom and Sides
We cut grooves on the inner parts from the bottom and sides. After this, we soak the skin and begin to form the sides. Let's add shoulder strap mounts on the sides.
Step 8: Add Fasteners and Lining
At this stage we will form the lining of the bag. First, I recommend aligning all the elements to achieve the ideal shape before installing the metal clips that will close the bag.
Step 9: Secure the back wall, bottom, sides
Let's connect all the parts together, except for the front panel. Let's make sure everything is on the same level.
Step 10: Install the Clamps
Metal latches consist of two main parts. Let's attach the plug to the valve where they should be, after making sure that everything is set correctly. I had to cut the lining off the inside of the flap because the leather was too thick. We will hide the rivet between the layers to ensure reliable fastening of the belts while driving.
After that, glue everything together with glue.
Step 11: Attach the Front
Once everything is properly attached, we can attach the front to the sides and sew.
Step 12: Let's make a double bottom
The double bottom can be made from durable cardboard or fiberboard.
Let's measure the internal dimensions of the bag at the bottom, taking into account the thickness of the leather lining on all sides.
Follow the photos. Then we will make a simple box without a lid, which will be turned upside down. This is a double bottom. Let's check its fit before continuing. Now we will make a hatch in the bottom, after which we will wrap everything in leather.
Step 13: Making a Belt
Let's cut the belt to fit the buckle. Mine was 2.5 cm wide. I do not recommend using belts that are 4 cm wide. They tend to slip off the shoulder.
Step 14: Finishing
Now all you need to do is process the bag. We use mink oil or high-quality natural wax for shoes. Apply a small amount to a clean cloth and wipe the surface of the skin. Let it dry, then polish it with another clean cloth.
That's it! Thank you for your attention!
(Az Source)
mozgochiny.ru
Back panel.
Just in case, I cut a piece of leather for the back panel 2-5cm longer. For my previous briefcase, I was missing a couple of centimeters on the front panel, so now I cut the leather with a margin.
I cut the corners of the briefcase flap so that the curved edge smoothly turns into a straight one. If you get this step wrong, the bag will look “homemade” in the bad sense of the word. But first, mark the space for the lock mate so that the lock is in the center of the valve. While the valve is not cut, it is more convenient to do this.
After trimming the corners, you can machine the ends of the valve. We will process the remaining ends of the back panel after we sew the side panel. Then we round the corners on the bottom and sew on the strap holders. Everything is exactly the same as they did on the front part.
To determine the length of the back of the briefcase, close the flap and leave enough space for a situation where the briefcase is completely full. Then trim off the excess.
To calculate the length of the leather, first measure the distance from the lock hole to the edge - 17cm. Then the distance to the bottom of the back is 54cm. Now we need to divide the distance from point B to point D in half to find point C.
from B to D = 54-17 = 37cm
from B to C – 37/2=18.5cm
from C to E = 17 + 18.5 = 35.5 cm.
This means that the distance from the bottom rear edge of the bag to the top point is 35.5cm. Now we can determine the location for the top strip of leather to attach the handle. I made a big mistake when marking the place for attaching the handle. I drew a line across the entire width of the briefcase, thinking that I would then cover it with a handle mount, but I was wrong, damn it!
First I attach the pen holders without the metal strip. Otherwise, you will not be able to pierce the skin with an awl. First I sew it on, then I put on a metal strip and secure it with belt screws. I drip Loctite onto the threads of the screws to prevent the threads from coming loose.
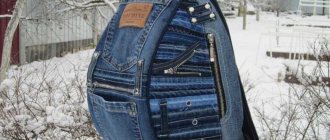
Making a denim backpack
Below we will discuss how to sew a backpack from old jeans. To work, you should stock up on unnecessary denim pants, a piece of lining fabric, thread and a sewing machine.
To sew a backpack, you need:
- Rip out the inseam and back seam of old jeans.
- Open the front seam down to the codpiece.
- Fold the parts in a certain way and baste with a basting stitch.
- Sew the front stitch.
- On the inside out, remove excess fabric with scissors and stitch the back seam.
- Connect the front and back pieces and stitch along the bottom.
- Fold the sides of the workpiece into corners, forming a bottom. Sew on a machine.
- Make straps from denim fabric. Insert them at the bottom of the side seams and stitch.
- Cut out the lining, focusing on the dimensions of the backpack. Sew side and bottom seams. Finish the bottom by stitching the corners.
- Insert the lining inside, tucking the top edges. Machine stitch into the waistband seam.
- Open the valve.
- Fold both valve elements and trim the edges with trim. Sew a pocket onto it.
- Cut out the shoulder parts of the straps. Line them with insulation and sew them together. Attach buckles so you can adjust the length.
- To connect the shoulder strap and the flap from the bag, cut off the back of the pants. Sew up according to the chosen pattern.
- Cut a lace from the lining material. Pull it along the drawstring, making entry holes. Decorate the ends with denim stoppers. Sew the same limiters at the bottom of the straps.
- Sew on the second fastener piece. This stylish backpack is ready for use!
Making your own backpack is quite possible. The main thing is to make the pattern correctly and strictly follow the instructions for the chosen model.
I sew on the top strip.
Before sewing on the handle fastenings, you need to paint the lower part of the leather, so it will be visible. I poke holes in the cork backing. Sewing the top strips of leather is similar to sewing belts.
The leather covering the metal strip is a simple piece of leather with processed unpainted ends. Once the handle holders have been sewn on, you can sew on the strip of leather covering the metal strip. Don't forget to put it back in place and seal the screws with Loctite. I glued the metal strip and sewed it up.
Main details
If desired, the bottom part of the leather backpack can be further strengthened with your own hands using a backing. Construction isolon will be an unexpected but durable option. From this material, cut out a part similar to the bottom of the backpack and attach it to the main part around the perimeter.
Sew the lower parts of the belt loops to the bottom of the backpack. For strength, you can make several lines.
Next you need to sew pockets to the main parts of the backpack. This is an important stage, the pockets should look even, and the paired ones should be positioned strictly symmetrically.
After this, sew together the main parts of the backpack. You should get a leather bag, to which handles are sewn on top, and on top of them - the backpack flap.
Very carefully insert the bottom with the belt loops pre-sewn to it. Next you need to insert the assembled backpack lining. You will get a kind of bag in a bag.
Shoulder pad.
The shoulder pad is very easy to make. I punch holes for the shoulder strap, glue it with another similar piece of leather, sew it together and finish the ends. The only thing you should not forget about is not to apply glue to the places where the shoulder strap will pass. The top layer of the shoulder pad is made of the same leather as the entire bag. The bottom layer is made of sidewall leather, it is turned with the inner part outward. This is necessary to ensure that the pad does not slip on clothing.
Small parts
It is better to start work with the manufacture of small parts and installation of fittings. First you need to sew the parts of the belt loops and immediately install metal fittings on them.
Place the upper part of the button fastener on the lower part of the valve. Connect the valve parts and sew them together. Turn inside out and sew a finishing stitch along the top or sew on a strip for edging.
Next, you need to assemble the leather backpack lining with your own hands. After all the seams have been completed, you should end up with a bag of thick fabric. On top you need to sew a cut out leather strip 4 cm high - a border. Apply a securing stitch over the junction of the lining and the border.
Nominal cliché.
At work I have access to a 3D printer and a rack press. My customer wanted his initials on the flap and his name on the shoulder strap.
First I stamped the name on the belt. I moisten it with water and make an impression, but you can do without water. The print turned out to be a little crooked relative to the edge of the strap, but this is not a problem, since it will be covered by the second end of the shoulder strap.
The initials on the shoulder pad cannot be hidden and mistakes cannot be made when embossing. I placed the block very carefully so that it was symmetrical with the edges of the overlay. My hands were shaking, but everything turned out smoothly!
Sew.
Sewing a briefcase takes a lot of time. The seam on this bag is saddle and it plays an important role in the appearance. It is extremely important that every stitch is smooth and beautiful. I prefer not to cut a groove for the thread; I like the seam better that way.
I pierce the already marked holes with an awl. At the exit of the awl, I place a piece of cork so that the leather does not move. As an alternative, you can pierce holes on the table, again using a cork.
The key to making holes with an awl is to make the holes at a 45 degree angle. Of course, this only matters if you are working with a diamond awl. To keep the awl always in the same position, I put a mark on it with a marker. The label should be on top. Someone pierces holes with a round awl or drills with a thin drill. I can't imagine myself ever doing that.
Look at the photo to see what I'm talking about. Glue sometimes sticks to the awl. To prevent this from happening, you can buy a new one or dilute the one you have. I prefer to buy a new one.
Backpack patterns
If you are new to needlework and have no idea how to sew a backpack with your own hands, you cannot do without a pattern. She is an invaluable assistant to beginning craftsmen. There are ready-made patterns for backpacks, on which all sizes are indicated. The simplest option consists of a template for the main part of the backpack, a flap and a pocket.
To create a pattern yourself, you need to prepare:
- a sheet of paper (tracing paper will do; you can also use a newspaper page);
- a simple pencil;
- centimeter;
- ruler and square.
You can make the template needed for rounding the corners yourself. For this purpose, you should draw a circle with a radius of 18–20 cm on a piece of cardboard and cut out a segment equal to 1/3.
As for the measurements, to sew a shoulder bag you only need two of them:
- shoulder width;
- height of the back from the waist.
It is necessary to sketch a rectangle on the prepared sheet, with a width less than the width of the shoulders. It is worth paying attention that the backpack does not go below the lower back - this will be extremely uncomfortable.
The second action should be to draw a vertical line through the center of the rectangle. Then you need to bend the sheet along the drawn axis and draw the contours of the box. It is necessary to cut strictly according to them - this is a guarantee of symmetry. If there are auxiliary elements in the plan (pockets, lids, sliding bottom), they should be marked according to the basic pattern, matching the sizes.
Polishing the ends.
This briefcase has so many ends that need polishing. So I decided to show you how I do it.
- I wet the end with water
- polish with a piece of cloth
- I apply a ligature (hardener) for the skin
- dries in a couple of hours
- sand with 80 or 180 grit sandpaper
- I paint the end
- I wet the end
- I polish with a cloth.
I repeat the last three steps until the end is smooth. To get a super smooth finish, you can use 400 or 1000 grit sandpaper.
Sometimes I treat the ends with beeswax and polish with a cloth. This method gives the ends a “fat” feel to the touch. It happens that I soak a rag with hardener and run it over the end (this is for a very smooth end).
I polish the same way as many other masters. I use a Dremel with a homemade hardwood attachment. You can use a bone stick or even a pen. An inquisitive reader will ask why you don’t polish before painting? Good question. If the end is polished first and then painted, it will be difficult for the paint to penetrate the leather. This is why I always sand the ends with sandpaper.
And the last point I want to mention. I sand with sandpaper after polishing with a cloth. This is not common practice. I just like to do it that way. I believe that after this treatment the end is smoother.
Afterword.
Looking back at the process of making the briefcase, I can say that it was not as difficult as you might think. The secret is simple: spend enough time working, don’t forget about the little things, measure seven times, cut once - and everything will be fine.
As I already wrote, I do not recommend taking this portfolio as your first project. First you need to do something smaller, gain the necessary experience, and gain skills in working with leather. I would suggest starting with a phone case, this project has all the steps I used to make my briefcase.
As for the amount of time spent on making the portfolio. It took me about 60-100 hours over two months. Although, if you ask my wife, she will say that it was much longer.
Author of the master class Andersenleather
Translation: LeatherThoughts
History, types
The word “backpack” is of Germanic origin; it appeared much later than the object itself; it literally means back + bag. A shoulder bag was first called this way in the 17th century, although it appeared and began to be actively used almost 5,000 years ago. Sacks similar to modern ones were found by climbers in the glaciers of the Tyrolean Alps.
Representatives of different nations used backpacks. In Rus' these were knapsacks, bags with straps made of woven materials or birch bark. The French wove them from wicker, and the Asians made them from animal skin. The original version is an Indian shoulder bag in the form of a bale, located on the back, with a strap that fits over the head.
Modern backpacks are radically different from the ancient ones. They are comfortable, ergonomic, roomy and, even if made by hand, look attractive, but they are based on a prototype pattern invented a long time ago.
They are classified according to design features - frame and frameless, easel. By purpose:
- army;
- tourist;
- expeditionary;
- sports (bicycle);
- urban;
- children's;
- school.
In addition, shoulder bags are available for men and women.
Refined and structurally complex models appeared in the middle of the 20th century. They were sewn to order by private craftsmen. The copies were piecemeal and were expensive. Later, such workshops turned into large factories for sewing branded models. Mass production also developed in parallel.