In a house where there is an animal, especially a cat, furniture is often damaged by the sharp claws of pets. Torn sofas and armchairs are a common occurrence. But it is not possible to wean an animal from the habit and need to sharpen its claws, because this is its natural instinct.
The predator thus cleanses itself of the keratinized parts of its claws and marks its territory. Outdoor cats use trees in such cases, while indoor cats have a choice between furniture upholstery, carpets and wallpaper. And so that you don’t need to replace damaged furniture, you just need to get a scratching post.
It’s even better to make a scratching post for cats with your own hands - it’s much more economical. In this article we offer detailed instructions on how to make a scratching post for a cat with your own hands.
What to consider when making
Before choosing a scheme and method for making a scratching post, you need to take into account, calculate, decide in advance on the size of the product, shape, what material to choose, place for placement and the further possibility of repairing the scratching post.
Size matters
The principle here is that the more, the better. The design should not be smaller than a cat. Even if you do a fight for a kitten, it should still be high, because the baby will soon grow up. A cat will simply not be interested in or comfortable with a small scratcher, because she likes to reach higher and further away.
If a floor structure is planned, the animal must fit completely on it (with front and hind legs). If it’s a vertical post or wall, make such a calculation so that the cat can accurately reach with its front paws and still have a little space left.
Base material
When choosing a material, it is better to give preference to natural wood or cardboard. These are soft enough materials that your pet won’t be able to injure their claws when sharpening. But it is permissible to use chipboard, fiberboard, and plastic sewer pipes, especially when it comes to the construction of an entire play complex.
Coating and winding material
For covering scratching posts, carpet and carpet fabric have the best qualities. It is recommended to purchase carpet for home use only. Office ones, as well as very cheap ones, are made on a rubber basis, can smell unpleasant, and be unsafe for the animal.
It is better not to use artificial fur or fabric, as they are short-lived, and fur tends to accumulate static electricity. The cat will be afraid of this design.
Jute (hemp) rope is made from industrial hemp, so it is safe for your pet even if swallowed.
Also, its advantages are that it is cheap, soft, and a good option for kittens. Disadvantages - when used, debris flies from jute, as it peels off into fibers. I'll have to clean more often.
Sisal rope is also made from a plant base (agave) and is not harmful to the animal. It is strong, but, like jute, it leaves behind debris. Another disadvantage of sisal is that during use by a cat, the scratching post can sag and become wet.
Cotton rope is also used to make scratching posts. It is reliable, safe, and due to the white color of the rope it gives the product more aesthetics.
Which of the presented options is better, each owner decides for himself.
Installation type and shape
Determined based on the size of the apartment and the availability of free space. Because you can make a nail sharpener in the form of a column or a floor-mounted horizontal one, or you can mount it on the corner of a wall.
Form – the simpler the better. The fewer corners and protrusions, the less the risk that the cat will damage its claws. This design is easier to repair when the coating fails.
How to discourage a cat from sharpening its claws in a “forbidden” place
In order for your pet to quickly switch to the scratching post, it is necessary to create unpleasant conditions for him in his favorite place for scratching. First of all, a certain smell will help. Animals have a more highly developed sense of smell and some aromas are categorically unpleasant to them. The smell of alcohol, for example, or perfume. Cats don't like the smell of all citrus fruits. You can purchase a special spray based on aromatic oils at the pet store. Surfaces should be treated with it until the pet completely gives up the desire to scratch them.
Beaphar Stop It Cat Spray for repelling cats from furniture
You can speed up the weaning process by throwing a slipper next to the wrong object at the moment when the cat tries to scratch it. Usually animals quickly abandon places where they are supposed to be in danger. A loud bang, a stern hail, and wrapping furniture in cellophane are also effective.
Many people recommend “water procedures” from a spray bottle, but this is possible if a cat is somewhere nearby trying to sharpen its claws, and the owner is sitting fully armed, waiting for her. Everyone can invent a way to dare an animal themselves, knowing all its pros and cons.
Assault is strictly unacceptable, because cats are easily stressed and such “education” will not lead to the desired result.
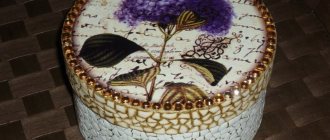
Cardboard rectangular scratching post
With a rectangular or square option, the operating principle is the same:
- Cut cardboard strips of the same width and length depending on the desired size of the future scratching post.
- Make the base also from cardboard or use a ready-made box, then adjust the strips to its size.
- Glue each strip using a heat gun or other reliable glue, then lay tightly in a row next to the other until the box is completely filled.
- This design can be placed on the floor or fixed to the wall using double-sided tape. To do this, wide strips of tape are glued to the bottom of the box at the top and bottom, then the structure is attached to the desired location.
You can sprinkle catnip on the bottom (under the cardboard strips) or put a piece of fabric soaked in it.
Pillars
The scratching post is often used by cat lovers due to its versatility. A cat can sharpen its claws on both horizontal and vertical surfaces, climb up, and chase a toy attached to a post. If you fix a horizontal platform on top of the post, then the issue with the bed will also be resolved.
Simple scratching post
Scratching post with toy
Floor-standing scratching post with horizontal scratching post
Sometimes cats tear up furniture legs, most often table legs. Here you can improvise - wrap it with twine and you will get a ready-made claw blade.
How to make a scratching post
To make a scratching post, any available material is suitable - a board or plywood for support, a small block or a piece of plastic pipe for a post. Having screwed the beam to the base using self-tapping screws or secured with metal corners, you need to tightly wrap the beam with twine or sisal rope (can be bought at Leroy Merlin) using a glue gun for fastening.
We wind the rope tightly around the scratching post bar of the post
Advantages of sisal rope: high strength, durability, natural material
The base can be painted, sealed with a piece of thick fabric, carpet, or the same rope can be laid in a spiral, glued for strength. The main requirement for such a structure is stability. It is necessary to carefully calculate the proportions of the height of the column and the area of the base, or “peep” the dimensions of finished products in pet stores.
Wooden scratching post
Essentially, a cat scratching post is a piece of carpet attached to a wooden or cardboard post. Therefore, making it at home is not difficult.
You will need:
- A piece of carpet or carpet to cover a wooden post and base.
- Wooden pillar.
- Drill.
- Glue or staple gun.
- Hammer.
- Screws – 2 pcs. 7-8 cm in length.
- Paper knife or scissors.
Wooden products can be purchased at a hardware store.
It is better to choose a pole longer than the cat; the width of each side, if it is square, is at least 10 cm. The base (round, square, rectangular platform) must be heavy enough so that the animal does not tip over the structure. It is better to use a carpet without loop pile - it will quickly fail. Step by step manufacturing steps:
- The structure will be held in place by 2 screws that will go through the platform and into the post. Mark marks for the holes in the wooden beam with a pencil. Then place marks on the base at the same distance. It turns out that if the holes for the screws on the block are at a distance of 5 cm, then they should be at the same distance on the base.
- Drill 2 holes in the base for screws.
- Glue or staple the carpet to the post. Gluing is more difficult, as the carpet will jump off and not lie flat. When working with a stapler, you need to take into account when the post will stand vertically so that the staples are also positioned vertically. This way there is less risk that the cat will damage the claw.
- Then wrap the other side with carpet and also secure with a stapler. The post needs to be wrapped as tightly as possible. Trim off the excess with a knife and secure with staples. Be sure to hit the staples with a hammer to make them flatter. The scratching post area can be covered with carpet, but if it is well sanded and free of splinters, it can be left as is.
- Screw the screws into the base, place the post on them and continue screwing until the head rests on the wood.
Device
Cat on a bed
To tear through the cat’s claws, at worst, a simple post or board will suffice, pos. 1 in Fig. However, it is better to complement it with a bed, pos. 2. Firstly, in nature, cat markers are not equivalent. One of them, with an elevated bench for relaxation and an observation deck above it, is the main one, the capital, so to speak. It is not necessarily in the center, it can be on the periphery. The cat's territory in the home is limited. You can do without boundary (contour) markers, but the main one will give the cat dignity, which, in turn, can well decorate the interior, see fig. on right.
Scratching posts for cats with a bed
But to combine a scratching post with a house, and even installed below, as in pos. 3, should not. In natural conditions, the cat's den is never combined with the main marker, for safety reasons. Some exceptions are cats of Asian origin: Siamese, Bengal, Abyssinian, etc., the territory of whose ancestors in the jungle is limited to an area of just one tree. But then the house must be elevated and equipped with 2 exits: a spare one perpendicular to the main one and opens onto an additional platform, pos. 4.
It is best if the scratching post with a bed and viewing platform is not a straight column, but a branched one, somewhat reminiscent of a tree, pos. 5. This can be built from cardboard pipes, see below. And on to the next. rice. – drawings of scratching posts with a climbing frame and platforms: on the left for energetic and jumping cats, and on the right for phlegmatic and sedate cats.
Drawings of scratching posts with beds and climbing frames
About the sites
Houses, toys, climbing frames and beds for cats are actually a different topic. In relation to scratching posts with platforms, it would be appropriate to say that the bed and the “observatory” do not need to be covered: cats have soft fur of their own. If you want to visually ennoble the product, then you don’t need to fasten the fabric like furniture, with nails or staples: metal can tear off a claw if it gets caught, and it conducts electricity too well for cats.
Cat areas are lined with PVA glue: when dried, it is odorless and is harmless and indifferent to cats. Step-by-step instructions for covering a cat bed with fabric are as follows:
- We cut with an allowance for the edge thickness plus 25-30 mm;
- We cut out the base (plywood or board 16 mm thick) with rounded corners so that the folds on them are small or can be completely dispersed;
- Apply glue to the upper part in rays and along the contour, see fig. on right. It is better to do this with a brush to immediately disperse the glue in a thin layer;
- Immediately, before the glue begins to set, we apply the fabric;
- We coat the edge with glue and, together with it, under the platform along the contour by 35-40 mm;
- We fold the fabric over the edge and tuck it under;
- From the bottom we pull the tight-fitting thread with a needle, zigzag along and across;
- Straighten the folds at the corners;
- We dry it for a day, there is no need to apply pressure;
- We cut off the excess fabric at the bottom along with the threads;
- Instead of overcasting, we impregnate the fold of the fabric on the underside with the same PVA, diluted by half with water.
Carpet scratch board
You can quickly and easily make your own carpet scratching post. To do this you will need:
- Wooden board or piece of chipboard.
- A piece of carpet or old carpet.
- Nails.
- Hammer.
The size of the wooden canvas is selected based on the size of the cat, because the structure made can be used as a bed and as a claw sharpener.
How to make a nail clipper:
- Place the rug with the wrong side up.
- Stepping back from the edge of the carpet, place the board.
- Wrap part of the carpet over the board and secure with nails along the entire edge.
- Carry out the same actions with the second part of the carpet. If the two layers overlap, they can be cut off with a knife or left as this will create an extra springy feel for the cat.
For the cat to start using the scratching post, just turn it over to the other side. If a fairly heavy tree is chosen for the scratcher, then it may not be secured, and the cat will still not turn it over.
Make or buy?
A good, “correct” scratching post costs about 600 rubles. It will have to be changed 2-3 times a year. It seems like God knows what kind of expense it is, but mass-produced products are designed for average representatives of certain breeds, and cats, as you know, are animals with character. Therefore, the optimal solution, since there is a fluffy in the house, is to make him a scratching post with your own hands, after first observing the pet and choosing the right one for him . Which one and how – this is the material of this article.
Scratching post with sisal
Another simple way to make a scratching post from wood, a piece of rope and carpet.
To make a cat scratching post, you will need:
- Square base made of wood or chipboard.
- Wooden pillar.
- A piece of old carpet or rug.
- Sisal rope.
- Carpet adhesive or stapler, staples.
- Screwdriver, drill, saw.
Sequencing:
- Prepare the base. To do this you will need a saw to get the required dimensions. Sand the edges so that no sharp parts stick out.
- Do the same with the post - if necessary, shorten it with a saw and sand it.
- In the center of the base, determine 2 or 4 points where the screws will be inserted. It's simple: draw 2 lines from one corner to the opposite. At the place where they intersect, install a pillar and trace its diameter with a simple pencil. Mark 2 (4) points for drilling in the center of the circle.
- Drill holes in the base for further insertion of screws.
- Then the holes need to be drilled in the post. In order not to accurately measure with a ruler, you can do it simpler: turn the post over, firmly place the base on it (you will need the help of a second person for this) and drill along the existing holes.
- Glue the carpet to the base. After the glue has dried, turn the base over and use a cardboard cutter to trim off any excess carpet.
- The next step is to wrap the post with sisal. You need to start from the bottom, gradually rising to the top. The beginning of the rope will need to be secured with glue. Then wrap the rope tightly around the post and periodically fix it with glue for a tighter fit. Apply glue at the very top and also lay the rope in a circle. Cut off the tip, glue tightly in src=”https://68koshek.ru/wp-content/uploads/2021/02/namatyvanie-verevki-na-stolb.jpg” class=”aligncenter” width=”580″ height=” 413″[/img]
- Connect the base and the post by screwing in the screws with a screwdriver.
- For better stability, so that the screws do not protrude onto the side that is in contact with the floor, glue a rubberized backing and cut a piece in the area of the screws so that they do not come into contact with the floor.
You can also attach pompoms to this setup with a strong thread. The kitty will be able not only to sharpen her claws, but also to play. As the rope wears out, it is easy to carry out repairs and re-install a new one.
If there is not enough space in the apartment, the easiest option is to wrap a rope, jute cord, sisal around a table leg or part of some other furniture.
Wall-mounted scratching post for upholstered furniture
This model is especially for a cat who does not want to change his favorite sofa for anything else.
You will need 3 wooden boards. One is for wrapping with sisal rope, the second is slightly wider in size than the sofa armrest, the third will hang from the inside of the sofa as a retainer. In general terms, the design resembles the letter G and is hung on the side back of the sofa.
Should I have an onychectomy?
Finally, we should remind you about the operation permitted in some countries to remove the claws of domestic animals - onychectomy. Yes, this procedure will save the owners from a lot of trouble and preserve the furniture, but is it really harmless to the animal itself? After all, along with the claws, the front phalanges of the fingers are removed, which affects the functioning of the entire musculoskeletal system.
A cat is a fairly mobile animal and without claws it is doomed to endless injuries - there is nothing to cling to. She will not be able to climb onto a low surface; it will be difficult for her to maintain balance. After the operation, you may suffer from pain for the rest of your life, which is shortened by almost three times due to the disruption of your usual life. In addition, having lost its claws, the animal becomes more aggressive and tries to solve all its problems with the help of its teeth.
Corner scratching post
The simplest option for a corner claw is to cover the corner of a doorway or wall with a piece of carpet.
Another option is to build 2 flat poles of the same size and attach them to the corner on both sides.
Would need:
- Jute rope
- 2 boards identical in width, thickness, length. Wooden boards, chipboards, and wall panels are suitable.
- Drill.
- Screws.
- Glue.
Mark holes for screws in each board. Then wrap it tightly with a rope secured with glue and screw the boards at the desired height into the chosen location.
A more thorough approach to making a corner fight in a video story
Is it worth purchasing used items?
Some owners make just such a decision in the hope of saving money. But this is a fundamentally wrong approach, because objects may smell like other people’s animals, which will most likely only scare away yours. And no one can guarantee the health and hygiene of the previous user of the accessory, thereby you risk infecting your cat with unpleasant diseases.
For creative people, creating a scratching post for your pet will only be a joy. You can completely rely on your imagination and come up with its design yourself. A creative approach to work will help you create an interesting and original household item that will adequately and harmoniously decorate the interior of the room.
Travel scratching post
If you often have to travel somewhere with your cat, it is advisable to take her favorite accessory for entertainment and exercise on the road. In addition, such a mobile hanging scratching post can also be used at home on an ongoing basis.
You will need:
- A rectangular board or sheet of plywood.
- Rope (rope, jute, sisal).
- Glue.
- Drill.
- Scissors.
Make 2 holes in the board, into which then thread a rope for hanging.
Wrap the board tightly with rope, gluing it periodically. Also fix the ends with glue.
How to draw a cat's attention to a scratching post
Placing a scratching post in a certain place is not enough for the cat to pay attention to it. Your cat may need to be trained to use a scratching machine.
Some tips:
- Observe where the cat most often settled down to sharpen its claws and, if possible, install a scratching post nearby.
- Show him the “right” behavior. To do this, bring the cat to the scratching post, place its front paws on it, lightly pressing on the center so that the cat releases its claws.
- Be sure to praise your pet. Give a treat, but never scold.
To attract a kitten or adult cat to the scratching machine, you can use catnip. The product is sold in pharmacies and pet stores in the form of dry herbs, sprays, and infusions. Some furry owners use valerian, but it is better not to use this method. Since valerian can have completely unexpected effects on cats.
The most common models of claw sharpeners
There are two main types of scratchers: floor and wall. And each of them has its own varieties. Floor accessories can be flat (placed horizontally or at a certain angle), in the form of vertical columns, with additional elements: houses, ladders, etc.
According to most owners, vertical posts are the most convenient to use. They are often equipped with play accessories, this is especially true for kittens. The structure itself can be installed on any surface: floor, walls and even ceiling.