A soft, pliable material characterized by a noble shine - this is what distinguishes homemade foil flowers from other crafts made from scrap materials. Crafts combine the basic principles of hand-made work, which are borrowed from various techniques.
In the process of work, it is easy to see that much is familiar from weaving souvenirs from newspaper tubes, crocheting roses and making beaded lilies. By mastering simple techniques step by step, you can easily create entire flower arrangements using foil.
Material properties
This thinnest aluminum plate has several useful properties:
- Aluminum does not suffer from excess or lack of moisture, too high or low temperatures, sun and dirt.
- This metal is lightweight and environmentally friendly.
- It perfectly holds its given shape, is plastic and pliable.
In addition to aluminum foil, you can also buy tin, steel, gold-plated and silver-plated foil in craft stores. There are also sets of foil in various colors and shades.
Flower
Another example of the use of flagella is a flower. It will require 6 - 8 pieces. Petals are made by folding strands in a certain way. The stem is also made from twisted foil.
To the end where the bud will be, you need to attach a ball rolled from a thin metal sheet. You need to insert the previously made petals into it. For greater effect, you can make leaves and stamens.
Note!
- Corrugated paper flowers: TOP 100 photos of ready-made options + instructions on how to make them yourself
- DIY family tree: instructions for creating a family tree + DIY design ideas
- Do-it-yourself sun lounger: photos with instructions for creating sun loungers + detailed diagrams of the stages of work
Tools for creating foil flower arrangements
When working with this material you may need:
- Wooden chopsticks (for example, for sushi),
- Wire,
- Glue,
- Threads and ruler.
The choice of tools depends on what flowers you plan to make.
little man
Here are the instructions for making a figurine of a man:
- Cut the metallized paper into strips measuring 100*400 mm.
- Roll each into cylinders.
- Bend the resulting blanks in half.
- Make a man's head at the bend point.
- Bend the ends of the cylinder, maintaining symmetry - these will be the handles.
- Twist the loose ends into a body, then separate them again and make legs.
Construction
Making a flower from foil step by step:
- Several strips, two or three centimeters wide, are cut from a sheet of foil.
- These strips are twisted into thin tubes. At the end of the strip it is necessary to leave an untwisted edge for assembling the parts.
- If the foil breaks while rolling, it is easy to put it back together.
- You will need quite a lot of such elements. This activity develops fine motor skills well. Therefore, this type of creativity is perfect even for children.
- To make the frame of the petals you will need three pieces of thin wire of the required length. These sections are wrapped in foil.
- At one end, the ends of the wire are connected and wrapped with thread. For strength, you can use PVA glue. These will be veins in the shape of a trident.
- Next, starting from the place of fastening, the space between the wire is filled with pre-prepared tubes from foil sheets.
- To do this, you need to secure the tube and start weaving in a checkerboard pattern.
- When one tube runs out, a second one is attached to its end, and so on.
- As the work progresses, you need to ensure that the gaps widen towards the middle and narrow towards the end of the wires, creating an oval shape.
- The number of blanks depends on the type of flower. Typically, about six are required.
- The leaves of the future flower are created using the same principle. They should look much narrower than the petals and smaller in size.
- All that remains is to make the stamens. Their number can be any, at the request of the master. For this you will need a toothpick.
- A thin strip of foil is wound around it, after which the spring is carefully removed and slightly stretched.
- The stamens are attached to the end of a wooden skewer or sushi stick using threads.
- After this, the petals and leaves are fixed. All joints are tightly braided with threads and glued.
- Finally, use your hands to give the plant the desired shape.
Fish
"Fish" is ideal for introducing children to the things that can be made from foil. To create the feeling of waves, the paper base needs to be painted blue, and then sprinkled with blue paint and sprinkled with salt.
You can use another sheet for the sky. It should be decorated in blue tones. It is recommended to rub the not dried paint with a paper napkin to make it more realistic. You need to slip a grid under the foil - when you run a stick over it, patterns similar to scales will appear.
Note!
DIY feeder - step-by-step instructions for creating a feeder + detailed diagrams with photo reviewsDo-it-yourself rugs - TOP 120 simple patterns with master classes on how to make them yourself + photo reviews of finished rugs
Do-it-yourself dolls: a master class on making a beautiful doll. Simple instructions with photo examples of ready-made options
The fish can be colored with a marker. When choosing a shade, you should use your imagination. Next, the figure needs to be cut out and glued onto a piece of paper with the sea, adding a picture of the sky to the composition.
Bouquet of roses
Elegant foil roses will enchant you with the noble shine of the metal. Thanks to the pliability of the foil, the rose petals look like real ones. Even an inexperienced craftsman can make such a bouquet.
Also, you can add other elements to the bouquet, guided only by your own imagination. Then the finished product will definitely be exclusive.
To work you will need:
- Colored or food grade foil.
- Long ruler.
- Thin wire.
- PVA
- Inspiration.
Stages of work:
- From a roll of foil, using a ruler and scissors, cut strips fifty centimeters in length.
- The finished strip is folded by one quarter. Matte side inside. Then, on one side, fold the edge one centimeter wide.
- Fold the remaining single piece to form a flower. It doesn't have to be rolled straight. Roses twisted in a spiral look original.
- You need to make as many of these preparations as there are flowers in the bud.
- Products made from foil can be easily painted with spray paint.
- The paint is applied from a short distance to the outer surface of the buds.
Snail
A snail is a clear example of a simple foil craft for children. It does not require special diligence to make, so it is suitable as a task for kindergarten-age children.
Since the product is simple, the result can be achieved on the first try, which is important for any child. Another advantage of this craft is that there is no need to use glue.
Prepare:
- metallized sheet;
- a Pepsi bottle cap;
- two pieces of wire.
Then follow the following instructions:
- Wrap the lid with foil.
- Fold another piece of foil into a strip. Its length should exceed the diameter of the lid by 3 times.
- Attach the parts to each other and insert the wire horns.
A snail made in this way will be an excellent decoration for a shelf with children's books.
fragile lilies
To work you will need:
- Sheets of foil.
- Scotch.
- Scissors.
- Thin wooden stick.
Stages of work:
- One lily will consist of three petals. To create one petal, you need to prepare strips of foil three centimeters wide, the length is arbitrary.
- In total, there should be nine such strips. Each strip is rolled into a thin rope.
- The resulting flagella are folded in half, and one is bent several times and serves as the base.
- Four flagella are placed on the base on each side. To create a petal, the ends of the strips are joined together and wrapped with a piece of foil.
- Two more petals are made using the same principle.
- To make it look more like a real plant, you need to add stamens to the image. Four or five thin flagella are made from foil.
- At the tip of each of them you need to roll a small ball.
- Next, the wooden stick is wrapped in foil. The prepared parts are attached to it using transparent tape and pressed well at the fastening points.
- You can make several of these lilies and assemble them into a lush bouquet.
In the photo of homemade foil flowers you can see other plants. With a little imagination, the most original and incredibly beautiful compositions are created.
Handmade decorative flowers are a unique and inexpensive decoration for any interior.
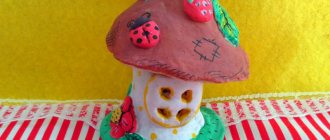
Fungus
A similar technology is used to create mushrooms. The basis for the hat can be a coat button, a semicircular cap, 1/2 an egg from Kinder-surprise. The element needs to be placed in the center of a piece of foil, wrapped in it, simultaneously twisting it into a mushroom stalk.
To make the craft more stable, it is better to make the lower part of the leg thicker. And for greater naturalness, you should dent the hat a little.
Photo of foil flowers
Snowflakes
If everything turns out right for the child, then we advise you to start creating New Year’s crafts from foil - snowflakes. They can be made either according to a sample or using your own imagination.
An interesting idea is applique - for this you need to glue rolled balls to the snowflake you have made.
Question answer
No, the balls are formed from a stick, that is, the stamen itself. The foil is rolled with your fingers to a spherical state quite simply. Now about the balls. Sometimes they use peas, select the right size, wrap them in foil, and glue them into the middle of some types of flowers.
It is more convenient to use food foil for sticks. It is thin and wrinkles well. For petals, a more rigid foil is used - technical or sheet. It is often used for packaging products.
Sources:
https://womanadvice.ru/kak-sdelat-rozu-iz-folgi https://www.liveinternet.ru/users/svetlyachokk/post284697300/ https://tvojdizajn.ru/cvety-iz-folgi
Easter decor
You can also make an Easter decoration from the baking sheet protector. More precisely, you can use it to decorate boiled eggs.
The egg needs to be wrapped in a round piece of foil, press it tightly and smooth the surface with your fingernail or the handle of a spoon or knife.
The elegant egg can be left silver or additionally decorated with paints.
If you put a chilled egg in foil, it will not only become festive, but will also stay fresh for much longer.
Plaster protection
If you have a cast on your arm or leg, the foil will keep it from getting wet when it rains. Just wrap it in plaster and you can safely walk in any weather.
In the same way, the material protects anything from moisture. For example, a folder with documents that has nowhere to put it.
Preparation
Before you start making your favorite figurine, you need to carefully prepare. This stage includes the procurement of the required amount of materials, as well as additional elements that will be used in the structure.
Particular attention should be paid to preparing a work plan; it is advisable to draw up a table with a list of parts and their sizes, this will greatly facilitate the assembly process. What you will need:
- Foil
- Glue
- Scissors
- Pencil
- Paper
- Copper wire
Spider
Children will definitely want to create such a spider at home; adults can also join in and help. It looks shiny and quite nice in appearance.
If you tie a fishing line, you can even play with it, which will bring a charge of positive emotions and serve as a kind of horror story.
- You only need foil material, creating a spider will not require any effort, it is quick and easy to make.
- To create it you need to have a large sheet of foil; chocolate wrappers are also used.
Painting
The paintings created from foil are distinguished by their beauty and create a brilliant effect. When you look at them, an association with antiquity arises. It will fit perfectly into your home and decorate one of its walls, and most importantly, a minimum of effort and time is put into its creation.
This painting will also serve as a worthy decoration for a box or cabinet. All you need: a printed picture, thick cardboard, foil, glue and shoe polish.
Shiny metal ball
This craft came to us from Japan. For it, in addition to baking foil, you need:
- Hammer;
- Sandpaper;
- Wet wipes.
From a metal sheet you need to fold a dense ball of the required size.
Next, this ball must be carefully tapped with a heavy hammer from all sides. Literally before your eyes it will become smooth and shiny.
To make the ball perfectly smooth, sand it to a mirror finish using sandpaper.
The finished ball can be used for decorative purposes or as an anti-stress toy.
Chain
A chain is made from the above mentioned bundles. It is a simple option for using these blanks. Take the bundles and bend them into rings, twisting the ends.
The advantage of foil is definitely its plasticity, so everything will hold up well. Starting with 4-5 links, lengthen the craft. It’s also not scary to make the links uneven.
Volumetric drawings
This craft involves the process of extruding foil. It is better to use a regular coin for these purposes.
- To make the foil itself light and safe, you will need a cotton swab dipped in water to help.
To make a drawing, follow the following step by step process:
- To create a design, first draw a sketch on paper and outline it with glue. If the craft is done together with a child, an adult can make the blank in advance.
- When the glue has completely hardened, put foil on top of the design and press it in with a cotton swab, you can also use a napkin, but know that it should not be a simple one, but a fabric one.
- Finished plastic designs are used as a substrate.
LiveInternetLiveInternet
—Categories
- cooking (1259)
- cakes (179)
- pies-pies-sweet buns (157)
- vegetables (154)
- appetizer salads (104)
- meat (96)
- cookies (77)
- savory pastries (76)
- desserts (70)
- fish (67)
- bird (64)
- blanks (62)
- post (38)
- baked goods with cottage cheese (29)
- sauces (28)
- decorations (26)
- cakes (26)
- bread (21)
- liver (21)
- eggs (20)
- soups (18)
- multicooker (16)
- seafood (16)
- drinks (13)
- dairy products (13)
- Easter (10)
- mushrooms (8)
- cookbooks (1)
- knitting (761)
- pullovers-jackets-cardigans (175)
- knitting for children (151)
- blouse tops (86)
- accessories (54)
- motifs-patterns (49)
- sundress dresses (45)
- scarves-shawls (41)
- knitting magazines (40)
- beret hats (36)
- men (28)
- master classes (28)
- vests (19)
- short skirts (19)
- socks-slippers-boots (10)
- for the home with your own hands (123)
- toys (34)
- knitting in the interior (31)
- decoupage (27)
- napkins (5)
- foil weaving (2)
- dacha (120)
- vegetable garden (40)
- flower garden (33)
- advisor (10)
- pests (9)
- fertilizers (9)
- design (9)
- berry picker (8)
- alpine slide (5)
- garden (2)
- beauty salon advice AUDREY (102)
- be beautiful (39)
- hair care (13)
- skin care (11)
- makeup (10)
- manicure (6)
- soap making (88)
- soap from scratch - recipes (28)
- packaging (21)
- bombs (5)
- embroidery (66)
- music (51)
- health (44)
- useful utilities (37)
- parents (3)
- harmful hazards (3)
- useful links (30)
- video (24)
- housekeeping tips (23)
- Orthodoxy (21)
- ribbon embroidery (19)
- for beginners (18)
- felting (15)
- losing weight (13)
- beading (11)
- psychology (11)
- art (10)
- this is interesting to know (10)
- planet earth (9)
- humor (8)
- games (5)
- cinema (5)
- cream making (5)
- photo (5)
- sewing (4)
- painting (3)
Children's toy
Kids always have many items that have lost their original appearance.
An old toy can be turned into a new product by wrapping it in colored foil. The toy will retain its shape, but will sparkle with new colors.