Home stores offer a huge range of different textile items for the kitchen: towels, aprons, potholders, napkins, seat cushions. All these little things are practical, decorate the interior, and can add comfort and charm to even a faceless room.
This is not to say that finished products are very expensive, but why not save on something that you can do yourself and without any additional costs? It is best to start sewing experiments with basic things.
For example, first, study the question of how to sew oven mitts for the kitchen, and then begin to implement it. The simplest ones in shape - round or square - do not require any special sewing skills, or even a sewing machine!
Where to begin
Before you start working, you need to understand why you need a potholder. If it performs only a decorative function, then the composition of the fabric does not matter. For items used for their intended purpose, it is necessary to select only natural fabrics.
Help: you can use old clothes, including denim, unnecessary sheets, and towels. They will serve as free consumables and will receive a “second life.”
Then you need to select a filler. It is needed so that the product reliably protects your hands from burns. Suitable for laying inside:
- batting;
- felt;
- felt;
- terry or waffle towel.
If it is necessary for the finished potholder to hold its shape well, then you will additionally need adhesive interlining.
You also need to think about decorations and a loop holder at the idea stage. By the way, you can involve children in the implementation of your plans; they will definitely come up with something unexpected and original. For example, make an oven mitt that resembles their favorite T-shirt or toy. However, for the first experience it is better to choose a simple form.
The simplest potholder is square. First you can try to sew it. The standard size is 20x20 cm, but each housewife selects the optimal parameters for herself.
Santa Maria crashed
Artist D. Vanderlin. Columbus's landing in America
On Christmas Eve 1492, a three-masted carrack crashed into a coral reef on the northern coast of Hispaniola, near modern-day Cap-Haïtien, Haiti. The ship's crew had a hell of a Christmas saving the Santa Maria's cargo. Columbus returned to Spain aboard the Niña, leaving about 40 crew members at the site of the wreck, where the first European settlement in the Americas, La Navidad, was subsequently founded. When Columbus returned to the settlement almost a year later, none of the crew members were found alive.
Classic square potholder
For such a product you need to prepare: 2 pieces of main fabric, material for laying inside, braid, scissors, threads and needles.
How to sew a square potholder:
- wash and iron the selected main fabric;
- make a template out of paper to determine the size and avoid defects when cutting the product;
- attach the templates to the fabric and trace them, adding 1 cm for allowances on each side;
- cut two squares from the main fabric;
- transfer the templates to the cushioning material, folded in half;
- cut a square without taking into account allowances;
- fold the squares of the main fabric facing each other, put insulation on top;
- sew three sides either on a machine or by hand using a needle or chain stitch;
- Turn the product inside out, iron it, fold the free edges inward, insert a loop of braid into the corner, and sew everything together.
Beginning needlewomen are afraid that when turning the product inside out, the corners will lose their shape or the laid batting will be deformed. Another way will suit them: repeat the first six steps from the previous description.
The seventh step will be the following: put insulation on the wrong side of the first main square, cover it with the second main square, right side up. Sew all sides, departing 0.7-1 cm from the edge. In order to decorate the cuts, you will need bias tape.
To make binding, lines are drawn diagonally at a distance of 5-6 cm on a suitable or contrasting fabric, cut, folded in half, and smoothed. The resulting tape can be used to edge the edge of any product. It’s better to start from the corner where the loop will be. It is formed at the final stage of finishing from the “tail” of the trim.
If desired, you can quilt the potholder, trim it with braid around the perimeter, sew an applique on it, or decorate it in some other way. It is important to remember only one thing: rhinestones, beads, and synthetic lace are not suitable for decorating kitchen accessories that will come into contact with hot objects.
Tip: if you don’t have a hot stand, then a potholder can successfully replace it.
How to decorate
It is important to know that only the upper part of the item is decorated - the lower part, which is in direct contact with the hot air, should not be textured, for the sake of ease of use for its intended purpose.
How to design a finished potholder:
- embroidery - cross stitch, goat stitch, satin stitch, rococo pattern, etc. You can depict a whole plot picture;
- braid - usually the contours of the product are decorated with it, less often three-dimensional elements are created on the top of the object;
- beaded - potholders embroidered with beads, rhinestones, decorated with sequins, look beautiful, luxurious, expensive;
- applique - this is the simplest geometric pattern or a more complex, multi-color, multi-layered image.
For different styles, different decor is suitable - cross-embroidered, lots of lace “grabs” will decorate the baroque, checkered ones – country, smooth ones, in steel tones – hi-tech, linen ones, in natural colors – an ecological interior.
Other classic potholders
Among the many shapes, square, round and mitten-shaped potholders are considered classic.
Round
It is made similarly to the square one. If desired, you can make a whole set of identical potholders of different sizes. For example, in order to remove a hot lid with a metal handle from a pan, a small-diameter oven mitt is suitable, but in order to remove a frying pan from the oven, it is better to take a larger oven mitt.
Important: every home has a stencil for a pattern - an ordinary plate for second courses has the ideal diameter for making a template for a small potholder.
Mitten
It is good because it protects not only the back of the hand, but also the outer side. Using a oven mitt is convenient for removing the baking sheet from the oven; it is indispensable when working near a wood-burning kebab grill.
To sew a pot mitten, you will need a pattern. You can find it on the Internet or make your own. To do this, place your hand on a sheet of paper, circle it, and duplicate the resulting line at a distance of 3 cm.
Important: for easy putting on, the bottom of the product should have the same width as the middle part.
After the pattern is ready, it must be transferred to the fabric. Unlike a square potholder, a mitten has 2 parts cut from the main fabric, 2 from fabric for interior decoration and 2 from insulation.
Technology:
- fold like a cake: the main part for interior decoration face down, insulation, the main part face up;
- sew along the perimeter, lay additional seams across, along or diagonally so that the mitten does not lose its shape during use;
- make a second similar part;
- fold both blanks, sew, leaving the bottom open;
- turn it inside out, trim the edge with braid, trim, and attach a loop for hanging.
Variety of shapes
The functionality of potholders depends on the cut and design features. When working with hot dishes, there are two options - to grasp or grab, so there are different types:
- Mitten - similar to a loose mitten that you put on your hand to remove hot pans from the oven;
- Square - used to remove pots or lids or multicooker bowls from the stove;
- Butterfly - is made of two identical elements that are stitched together. Used for handling utensils without handles;
- Unusual options - suns, hearts, flowers, cats, owls. They are used not only for their intended purpose, but also as a decorative element.
Modern options for potholders
Not long ago, silicone potholders in the shape of a duck beak, a dog's mouth, and a frog's face appeared on sale. They consist of two halves: one for the thumb, the second for the other four fingers. With the help of such an oven mitt it is convenient to remove baking dishes from a hot stove.
Is it possible to sew something like this? Certainly! The main difference between this potholder and the others is three parts: one large and two smaller. As a training sample, you can sew an oval or rectangular potholder.
Manufacturing technology:
- Draw a 25x20 cm rectangle on a sheet of paper;
- transfer it to the main fabric folded in half, cut it out to make 2 parts;
- using this template, make parts from cushioning material;
- fold so that the filling is between the wrong sides of the base, sew;
- repeat steps 1-3, but cut each part into two identical parts;
- Sew two blanks from the resulting halves and finish the outer sections with braid or trim;
- place two small ones with processed cuts facing each other onto a large workpiece to create pocket-flaps facing each other;
- sew around the perimeter, decorate the seams, sew on a loop.
Now you can roll up the pot holder to check the fit.
Tip: An oven mitt with flaps can be used as a cutlery pocket for table settings.
Using this pattern, you can sew an oven mitt, which can be used to conveniently hold a saucepan or ceramic pot. It looks like a scarf with pockets on the edges. The length of the largest piece is calculated based on the size of the largest pan used. It is necessary to measure the diameter and add 20 cm. Width – 20 cm. For two small parts, cut out rectangles 15x20 cm.
Do-it-yourself model of a Russian hut
To do such a thing, take:
Take a box and cover the bottom part with self-adhesive wood-like film to create a floor like this. Wallpaper should be glued to the walls inside.
To make a model of the Russian hut further, parents or children will draw on the back side with their own hands where the windows will be located.
But the parents will cut it out with a breadboard knife. You can make 3 windows, one on each wall. Glue ceiling tiles on top to make this part of the house beautiful. For such work, you need to take a special glue that will fix this material well.
Draw the shutters first with a pencil and then paint them.
Also make a crib out of ceiling tiles. To make its elements as strong as the house, cover it with a bandage.
Very soon we will have a model of a Russian hut. First, paint the bed brown. Then cut out the parts of the stove and glue them together. Don't forget to make a compartment for cooking and storing firewood.
Also cover the outside of the stove with a bandage and then paint it with white paint. In the corners this whitewash seemed to have fallen off a little. Show this by painting here in brown. When the paint is dry, paint around the firebox with black. Take tree branches that need to be cut into 4 parts. The grip is made from a wooden skewer, and its upper part is made from wire, which can be covered with fabric and glued here. The rug can be crocheted in the round. Make a bench on which you place a ribbon with a folk pattern. Make a cradle.
Place a figurine of the hostess inside and hang tulle curtains on the windows. Sew small pillows for the crib. Place the cat on a toy stool. You can also sew it yourself.
Glue a small icon on a paper base into the corner, make a cradle, attach it to the top and place it inside the toy baby.
You can add some of your own items to the hut layout.
Here's another model of a Russian hut you can make.
Children love to look at such objects. They will definitely ask questions about what and how of these items were used in the old days. You will tell them and thereby broaden the children’s horizons.
The third master class with step-by-step photos will also demonstrate how to make a model of a hut. To make it, take:
Before making a model of the hut, prepare the base for the floor with your own hands. To do this, glue a sheet of cardboard here, painted with stain. Then it will seem like a plank floor. Using the same technology you will make a table and a bed. Use glue to connect the parts of the cardboard bed, after covering them with stain. Do the same with the table. Cover it with a cloth; you can first sew lace to the tablecloth. A bed cover is also made. Make pillows for her.
Roll up these blanks from strips of cardboard that will look like logs. They will need to be glued together using a hot gun. Where there will be a window, use shorter parts. Glue it here, having previously cut it out of cardboard and decorated it with gouache. Make beautiful curtains from lace.
Glue the icon into the corner, also decorating it with lace and beautiful fabric. Place a rug on the floor.
To make a tub, twist strips of newspaper sheets onto a wooden skewer. Paint them and glue them together. Wrap a piece of wire in paper of the same color and use it to make a handle for this bucket.
The stove is made in a very interesting way. But you will see the tricks of its creation in the next master class.
What to do if there is not enough fabric
This problem often arises when unnecessary things are used as material for tacks. Sometimes it is impossible to cut out the required number of identical parts from them. There may be several solutions:
- cut each piece from a different fabric;
- First, “assemble” each part from several rectangles, squares, triangles, iron it, and then start sewing the finished product.
Related materials
Ladi, Lado, Ladushki... It is traditionally believed that “ladushki” is a distorted “palm”. Actually, the simple game that accompanies the nursery rhyme actually seems to involve the palms, so everything is logical. However, the word “palm” in the Russian language is relatively new; previously it was pronounced differently - “dolon” (compare with the famous Old Russian “Hand”). Maslenitsa 2014 Why was there confusion in the dates of the traditional Russian holidays “Maslenitsa” and “Komoeditsa”, ancient Slavic new years? The fact is that in Rus' there were several calendar systems, and most were divided into solar and lunisolar, each of which had its own characteristics. Day of the Strech of Dazhbog Today, May 6, on the Day of Strech of Dazhbog, it’s time to remember the native Slavic Gods and the great Dazhbog himself, who, with his divine work, as our Slavic ancestors told us, ensures this familiar world order.
Options for using oven mitts for the kitchen
The main and main purpose is to protect your hands while cooking. But its possibilities are wider: home decor, implementation of creative ideas, teaching sewing skills to small children, gifts.
Potholders made using the patchwork technique are an excellent souvenir that you won’t be ashamed to give to colleagues, friends and relatives for any occasion. A New Year's potholder can be sewn from fabric with a themed print or in the shape of a Christmas tree, snowman, or symbol of the year.
Making potholders with your own hands is a creative process that brings pleasure, and, importantly, can distract us and our children from endless sitting in front of gadgets. Perhaps the first potholder you made yourself will be a step towards diversifying or completely changing the interior of your kitchen.
The sacred meaning of the grip handle
The aspen stake is considered the most powerful and effective weapon for fighting vampires, ghouls, and at the same time ghouls.
“The sorcerer and the witch in the coffin are pierced with a stake through the chest so that they do not walk around like a ghoul; a common belief of all Slavic tribes,” writes historian Vladimir Dal.
In the old days, there was a real custom behind these words: a stake made of aspen was driven into the grave of a sorcerer, witch, or someone who was considered such. So that the “unclean enemy force” cannot harm honest people in the area. Evil seemed to be “nailed” to the ground.
The belief that an aspen stake is capable of “neutralizing evil spirits” comes from the ancient belief that Judas Iscariot hanged himself on an aspen tree, and she, trying to shake off the memory of the traitor, continuously shakes her leaves. A version related to the story of Christ is also popular (although aspen is not mentioned in the New Testament): aspen is the only tree that “did not recognize Jesus” during his flight to Egypt. One thing is not clear - where did aspen come from in the homeland of Christ, in the Middle East?
In the Russian tradition, aspen is associated with the subtle world, the ability to withstand any conditions, ward off death, illness, “spoilage,” treat, heal.
Aspen - grows in the north of Eurasia in coniferous and deciduous forests, along the slopes of ravines. It reaches over 30 meters in height and lives up to 80-100 years. It is considered a truly Russian tree, producing satiny white, pure wood. Aspen exudes pronounced energy and mystical properties of “taking away and removing negativity.”
Original kitchen design
A tack of modest colors will not attract attention, but a bright model will become an object of admiration, a “highlight” of the design. Crafts in the form of watermelon or orange slices, pink-cheeked apples, bright strawberries or cherries will match the kitchen theme and whet the appetite of the household.
The design of the kitchen will look stylish and elegant if all interior items match in color. The fabric for the accessory can be chosen to match the dishes or curtains, you can sew an apron from the same material, or line boxes for various kitchen items.
From the same fabric as potholders, make hot mats and napkins.
Herringbone
The Christmas tree is needed for cooking dishes directly on the fire.
Suspended in a tandoor on a crossbar. It is convenient, made in the form of a deep plate or cauldron made of durable alloy and a shelf equipped with metal sticks. Various products are laid out on it, for example meat, vegetables. In order for each of the used products to be completely cooked, they are cut and fixed to the crossbars. When choosing an accessory for a tandoor, it is recommended to start from the size of the Christmas tree. There are big ones, there are smaller ones. They must fit completely into the free space of the device in order to fully undergo the heat treatment process.
The composition of the alloy is also important. Usually they start from the weight of the accessory for tandir - if the Christmas tree is light, it will probably not be strong, gradually the pot or plate will become covered with lumps or pits, and the top layer with which the product is processed may peel off completely. A heavy pot made of durable, thick metal or cast iron will do.
A high-quality Christmas tree with a frying pan or large pot will cost about 2,000 rubles.
How to make a Christmas tree with your own hands? You will need:
- a thick pot with a flat bottom;
- trimmed skewers for racks;
- welding machine.
A pin is welded to the center of the boiler, and other pins are welded to it. To make it easier to get the attribute, you need to place a hook at the top.
Crochet
When knitting, it is easy to realize any picture - just change the threads at the right time, and for abstraction use a thread with a gradient. Most often, knitted potholders are made in the shape of a circle or square, starting from the center and moving towards the edges. If you don’t know how to tie a potholder, use the diagram:
Once you have knitted one side, you can sew it onto felt and edge it. The potholder is ready.
If you want the potholder to look knitted on both sides:
- Trace the outline of the knitted part on the interlayer and cut it out.
- Fold all the blanks in the desired order and sew them along the edges.
- Sew on a loop.
Once you master this simple technique, you will be able to create any shape. For decoration, some elements can be sewn on top, making three-dimensional pictures.
Warfare
There are documented facts in history when soldiers of the Russian army, who went out to fight the French in 1812, used grips. This is not a classic kitchen option that is more familiar to the average person, but a slightly modified device.
It looked like a slingshot with sharp teeth at the ends. With its help, it was possible to immobilize the enemy without engaging him in close combat. In addition, such a spear was often used by women who stayed in the villages with the elderly and children.
What is a “grip”? This is not just a special device for pulling hot pots out of the oven, but an item of great historical and cultural value. Without it, it is impossible to imagine a real Russian hut, the campaigns of the men who participated in the fight against Napoleon’s troops, as well as ordinary Russian women who are capable of “both a galloping horse and a burning hut.”
Source
Stands
A useful, beautiful, durable accessory is a tandoor stand. Designed to protect the device from moisture, dirt and premature deterioration, especially in humid weather and after rain.
The tandoor stand should be made of steel - it is strong, durable, looks massive, and beautiful. A good stand costs an average of 2,500 rubles.
To make your own tandoor stand, you will need:
- metal tape;
- welding machine;
- steel curls - sold in garden stores.
How to do:
- the lower part of the tandoor (base) is measured;
- a circle is made from the tape, the ends are fixed together with a welding machine;
- curls are welded to the base so that the attribute is firmly held on the ground (accuracy is important to reduce the likelihood of imbalances).
Lattices
Wire racks are needed to bake food as quickly as possible. Available in single, double and triple tier options. Sometimes there are larger models, but they are relevant for use in large tandoors. All tiers are interconnected by a solid body made of durable rods, which rise beyond the device when placed in it. Using hooks it is possible to remove the grates.
You can choose between several tiers. It is recommended to go with the two-tier option. Such a tandoor device will last a long time if it is made entirely of durable heavy metal. On average, tandoor grates cost 2,200 rubles.
To make your own grating, you will need:
- several steel rods to create a frame;
- skewers to create a lattice;
- metal knife;
- welding machine.
All elements are cut to the required dimensions of the tandoor’s internal cavity and fastened together by welding.
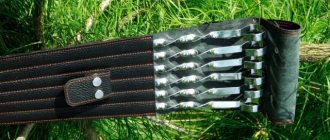
Skewers
Tandoor skewers are needed for threading meat and vegetables. With the help of skewers, it is possible to quickly and evenly thermally process all pieces of food.
Choose durable, steel skewers, preferably on a stand. They will last longer because they are unlikely to end up in water or on land, which means they will rust less. In general, the steel surface is easy to clean from dirt. A tandoor skewer with a holder is the most convenient device, because when heated, its entire surface becomes hot, but the holder does not. A set of good skewers with a holder costs an average of 900 rubles.
You can make a skewer from stainless steel or steel wire with a diameter of 6-8 mm. The length of the skewers should be approximately 70 cm. They should be cut with a chopper at an angle of 40 degrees.
After heating the wire over a fire, it is beaten with a large hammer until it is flat. Using any metal bobbins, you can form hooks from one edge.
Steel is more difficult to work with. For this you need a metal sheet 3 mm thick. It is cut with a grinder, a file, and the edge is bent with pliers. It is better to use a sharpening machine to process the entire plane so that no one gets hurt on uneven areas.
Cases
The main purpose is protection from precipitation, dust, and dirt. Helps to store the tandoor for a long time while not in use.
The cover for the tandoor should be thick, comfortable, durable, slightly loose (slightly larger in size than the device itself). Usually they choose dense polyester, slightly rough, dark in color, but even light colors are easy to wash. The average price is 1500 rubles.
To make a cover for a tandoor, you will need:
- synthetic fabric (the same as for sewing shades, for example polyester);
- strong threads;
- paper for pattern.
You can make the pattern yourself, based on the size of the tandoor. The finished bag, not counting the seams, should be 20 centimeters higher. The bottom of the pattern is made rounded.
Dishes
Saj is the main utensil. Typically produced using hand forging techniques. The difference is that it allows ready-made dishes to remain warm for as long as possible. A lid for the tandoor is usually included in the kit.
Choose the complete set. The dishes should not be very heavy, shiny, the lid will completely cover all the gaps around the circumference. The kit may include a base, a container for coals and food, steel tongs and a wooden spatula.
When choosing a material, choose stainless steel - it is strong and durable. The price usually starts from 1200 rubles.
Making steel cookware yourself is not easy, and other materials are unlikely to be suitable and generally will not last long. You can independently assemble a set of household utensils - a metal base, a steel lid, a wooden spatula and a ladle.
A delicious and simplest recipe for a side dish stewed in a cast iron pot.
This is a way to get a very tasty and healthy side dish from almost nothing. Imagine an ordinary situation - you bought meat for frying or baking. And in the process, you've created a decent amount of sauce from the juices that flow out. This most often happens with chicken and pork. It smells delicious, you can’t throw it away, and you still can’t drink it in its pure form, especially among fans of a healthy lifestyle. Pour into a cast iron pot, add a little boiling water and pearl barley. Yes, yes, the most common cheap pearl barley, which every housewife has in stock for mushroom soup or pickle soup. Mix. Heat it up (literally a minute or two from the liquid boiling at the bottom). Mix again. Let it simmer in a warm place. Once ready, stir again. However, household members will come running to the smell earlier, and they will mix it up. If you have time to save, sprinkle with fresh finely chopped dill.
Using materials prepared by Andrey Kisly
Source