As children, girls always loved to play with dolls, dress them up, and decorate them with various accessories. But, unfortunately, store shelves don’t always have what you need. There is a way out - to make jewelry with your own hands. This is quite a fun and not troublesome activity. This article will show you how to make glasses for a doll with your own hands. This accessory gives a smart and respectable look not only to people, but also to toys. Moreover, glasses can be made from those scrap materials that in most cases every person has at home. A little patience and free time - and the doll becomes a real fashionista!
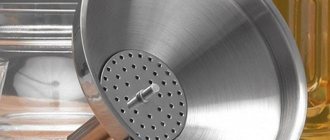
Who should spend money on a gadget with holes?
Is this unique exercise machine suitable for you? It is advisable to use it in such cases:
- if your work involves high eye strain;
- if your children devote a lot of time to watching TV shows, video games, that is, they do not take their eyes off the screen or monitor for hours;
- glasses effectively relieve accommodation spasms in farsightedness;
- can be used to correct astigmatism;
- suitable for correcting age-related farsightedness (significantly reducing its degree);
- can be used to restore impaired color perception;
- give a good effect in eliminating asthenopia (eye fatigue);
- help get rid of the feeling of sand, burning, stinging in the eyes;
- in patients with anisotropy, they help reduce the difference in optical power by 3-5 diopters;
- suitable for patients with cataracts, as they stop the development of this disease;
- can be used to restore vision in the postoperative period;
- the use of lensless glasses is indicated for patients with glaucoma;
- as a prophylactic agent to prevent the progression of eye diseases;
- if there is a hereditary predisposition to the development of eye diseases.
Round glasses made of wire: master class
If we make an accessory for a toy, then its size should, of course, be the same as for a doll. Making glasses from wire is very simple.
We cover long pieces of wire with corrugated paper. These will be two blanks for the frame. We do the same with a short wire. This part will connect the blanks for the frame, that is, it will be a “bridge” for the bridge of the doll’s nose.
When the glue dries, we make the frame. We take a long wire, apply it in the middle to the selected object (for example, a bottle of nail polish) and form the desired shape. If there was a round object, then you should get a circle and two pieces of wire extending from it. We twist them together. This will be the bow. We cover it with corrugated paper. We do the same with the second long wire.
Before making glasses for the doll, wait for the glue to dry. We make a “bridge” over the bridge of the nose using another form (for example, a lighter). We cut off all excess wire with wire cutters.
Coat the ends of the “bridge” with glue. We attach the frame frame to the parts. We are waiting for the glue to dry. To hide its traces, we cover the joints with corrugated paper.
Now let's give the glasses a realistic look. To do this, the tip of each arch must be bent back. Remove excess wire using wire cutters. The glasses are ready. Now they can be decorated with sparkles, rhinestones and other decorative elements.
How to make glasses from a paper clip for a doll: master class
The first step is to straighten the paper clips with your hands or using pliers. Next, we bend one end of the paper clip to the future “bridge” of the glasses and form part of the frame frame. We focus on the size of the doll's head. We do the same with the other tip of the paper clip. You should end up with a glasses base with two identical “connectors” for the lenses.
Using wire cutters, remove excess wire, if any. If there is no suitable tool, then we use what we have, that is, our hands. We twist the remaining tail of the paper clip in different directions until it falls off.
Let's move on to the temples of the glasses. We take another paperclip, straighten it, and then divide it into two equal parts with our hands or using wire cutters. Using pliers, we form as small ears as possible on the ends of each half.
We attach the ear arms to the frame frame and press them firmly using pliers. The optical accessory is ready!
Everything is very quick and simple, you just need to prepare the necessary materials before making glasses for the doll. “Monster High”, by the way, such an accessory is also suitable. If you want more glamorous glasses, take colored paper clips, glitter and nail polish (suitable for hair or nails)
Sketch of the shape of glasses, decor
The appearance of the glasses and their finish should first be drawn on paper according to the required size. You can choose a suitable template on the Internet.
Advice! The easiest way is to bend the parts along the frame of the finished glasses. To avoid scratching the lenses, they are protected by gluing pieces of tape.
The main thing is to think through the decorative treatment down to the smallest detail, because in addition to external beauty, its main function is to strengthen the entire structure
from wire: necessary materials
- Pieces of wire (one short and two longer).
- Wire cutters.
- Pieces of corrugated paper.
- Glue.
- Items for shaping glasses. For a “bridge” under the bridge of the nose, a lighter or something else oval or rectangular is suitable. Depending on the size of the glasses and the desired shape of the frame (round, square, rectangular), select the appropriate item. This could be a bottle of nail polish or perfume, a writing pen, a tube of mascara, and so on.
- Fantasy and some free time.
Glasses design
The main element of any glasses is lenses made of glass or plastic. The lenses are inserted into a frame, to which using hinges . The hinge has a fixed part, fixed in the frame, and a movable part, welded to the metal core of the earhook and fixed in its plastic part. Some models use a headband or elastic band instead of temples.
The bridge between the two lenses is called a “bridge,” or nose bridge, and the plastic or silicone pads that protect the bridge of the nose from the strong pressure of the frame are called nose pads, which, like the temples, are attached to the glasses using hinges. The presence of nose pads is more typical for heavy metal glasses, while plastic glasses are quite light and do not put such pressure on the nose.
Any structural element of glasses can break, but the “bridge” and the junction of the frame with the temples (and nose pads, if any) are especially prone to breakage.
Fun cardboard glasses
Original glasses can be made from colored cardboard . To do this, you will need to make the appropriate patterns, then assemble them using glue . To make them comfortable to wear, simply sew an elastic band onto the edges, as is provided on numerous carnival masks.
What to do if your glasses fog up when wearing a mask
During the pandemic, a protective mask has become an integral part of our daily lives. And if you wear glasses, you have already encountered a problem: the lenses fog up. This can be very uncomfortable, especially for those who have to wear a mask for a long time.
It's hard to concentrate on a specific task when you have to clean your glasses every now and then. In connection with the coronavirus infection, the situation has worsened even more: according to the urgent recommendation of the WHO, it is not advisable for people to touch their faces. Now it is impossible to simply take off your glasses, wipe them and put them back on without the risk of catching the virus. So what should those who wear them do?
Our editors have prepared several ways to prevent lenses from fogging.
Glasses - a toy for children
An attractive toy - glasses in the shape of pineapples. The baby will definitely like it. Yes, and you can make it together, since it is also very simple.
For work use:
- colored and white paper;
- pencils;
- glue;
- scissors.
Patterns
For the pattern, use strips with a width of 4 cm and a length of up to 15 cm . It is necessary to prepare 5 such strips, make one for the bridge between the circles, and it will be shorter in length.
Assembly
Initially, twist thinner ribbons with a side of about 1 cm from wide strips . Glue for fixation with glue. Twist the yellow strips into rings and connect them with glue. You should get two rings. Make the jumper and parts longer for the ears.
Cut out 4 identical Christmas tree figures from green paper Glue two at a time and insert into small slots on the rings. All that remains is to connect the ears and the bridge of the glasses in a similar way.
Necessary materials for glasses frames
Before you start work, you need to think through everything thoroughly and prepare. No soldering or complicated tools are needed. To get started you will need :
- a sheet of thick paper;
- pencil;
- stationery scissors;
- ruler;
- scotch;
- metal scissors;
- three coils of wire of different thicknesses: 1.2 mm, 0.8 mm, 0.3 mm (0.2 mm).
Materials for glasses
So, to make them you will need the following materials:
Ready template. You can find this template using the Internet by printing it. You can also use video materials and redraw it.
Colored markers, or better yet, markers. They will be needed to color the lenses. Tip, use blue and red colors because they best convey the quality of the picture.
Stationery scissors, PVA glue, pencil, pen and other office supplies.
Glass lenses. You can take them from unnecessary glasses, or pre-purchase them from a specialized store. It is important that their shape is slightly rounded and smooth.
Required materials and tools
Both experienced and novice craftsmen should have a set of tools that are required for paper crafts.
Required tools include:
- scissors (large and small with sharp ends);
- ruler;
- pencil;
- compass;
- board for cutting paper;
- stationery or construction knife with replaceable blades;
- stapler;
Also, to work with paper you need adhesive and decorative materials:
- PVA glue, office glue;
- glue gun with silicone rod;
- colored paper;
- decorative paper ribbons, braid;
- elements for decoration from different materials (metalized, wooden, plastic, glass);
- markers, felt-tip pens, paints, glitters.
Paper glasses on a stick for the holiday
Very cute glasses models can be made for the holiday . And in addition to them, various figures you like. Such preparation will not pass without a trace, and after such a fun party, the child’s memories will remain for a long time.
For work use:
- a stick without sharp ends with a diameter of approximately 0.5 cm;
- white cardboard;
- colored paper of different colors;
- scissors;
- transparent glue pencil;
- pencil.
Pattern
Draw two details of the proposed patterns on white cardboard. Draw one of these on colored paper, and then reduce all sides by 0.5 cm. Just draw a line next to it that will repeat the pattern.
Compound
Cut out the pieces and you can start gluing. First, glue two pieces of cardboard with the white side facing out, then glue colored paper. All that remains is to attach the wand. It's better to use gun glue .
Variations of children's glasses
Everything is done so quickly that you want to tinker a little more. In this case, cardboard glasses can be decorated with designs or patterns made from multi-colored paper. Or you can use your imagination and create something incredible.
Glasses-inscription
Ordinary eyepieces in glasses can be replaced with the letters “O” and made into a template in the form of a word. Draw two letters “O” side by side, connecting with a bridge for the bridge of the nose. Draw some more letters on the right and left. In fact, there are few word variants: BOOOZ, BOOR, LOOS, MOOR, ROOM. These are the names of outstanding, but not very famous people. But you can come up with your own options.
If you want to use another word with more letters, you can write it over the regular glasses template and cut it out. With these glasses, the inscription will be on top of the forehead, and this will not interfere with your view.
Next, we proceed according to the above scheme: cut it out, glue it together, attach the arms and decorate it as desired.
Carnival glasses
Pince-nez glasses are suitable for New Year's or other carnivals. Instead of arms, you will need a stick with non-sharp edges, which can be glued to the cardboard blank with gun glue.
Since we are preparing for the carnival, the glasses can be made in the form of a mask of any animal or cartoon character. You will also have to work on the decoration to make the glasses bright, colorful and attractive.
Pineapple glasses
This voluminous craft can be made when you are tired of flat models of glasses. Cut two strips of yellow paper 4 cm wide and 15 cm long. Another strip of the same width, but no more than 2 cm in length, will be needed for the bridge of the nose. And from white cardboard you can cut out the arms according to the template. Four blanks resembling pineapple leaves should be cut out of green paper.
Fold the yellow strips so that their width becomes 1 cm, and then twist them into rings and glue them. Connect the rings together with a nose bridge. Attach pineapple leaves to each ring on the right and left, after gluing the pieces together, two at a time, with the green color facing out. Now all that remains is to attach the arms with a stapler and decorate our pineapples as desired.
To keep the glasses in front of your child and not fall off, attach an elastic band to the back of the temples.
How to make glasses out of paper with your own hands
Making something out of paper is always very interesting. But there is not only a flat craft; glasses can be made from colored cardboard. If you plan to play masquerade, then it is advisable to also use a special stick-handle. Four new models with very different presentations and a short but very clear description for each model.
How to replace a lost screw?
Temporary hinge repair
You can make temporary repairs to the hinge, which will allow you to wait for a trip to a specialist, using a toothpick, wire, pin or nylon fishing line.
The frame and temple of the glasses are aligned relative to each other so that a hole is formed in the hinge into which a toothpick is inserted (or whatever comes to hand from the list presented). The excess part of the toothpick must be cut off, the wire must be twisted, and the nylon fishing line must be melted in the flame of a lighter or match.
Repair of a hinge with a flex mechanism
The flex mechanism is used to fix the temples of the glasses in a certain position - very convenient for those who have a non-standard head size! Unfortunately, such a wonderful device has a serious drawback: a screw that has fallen out of such a hinge is very difficult to put back in place.
The fact is that between the two parts of the hinge there is a movable bar, which, when the screw falls out, is pulled into the arch. To pull out the bar , you need to fix the bow (for example, using a vice) and, holding the frame and the bar pulled out with a needle or screwdriver with one hand, screw the screw into the hinge. It may not work out the first time, but don't give up! A few tries and you're done.
A simple homemade utilitarian frame for special glasses
Here we look at how to make a reliable homemade frame for technical safety glasses for lampwork. The technology can be used as the basis for making frames for brutal biker sunglasses or in a steampunk style. Decorative cutting with a (jewelry) jigsaw and decorative etching will work well here. Vision-correcting glasses require an order of magnitude more attention when designing and manufacturing; making frames for them yourself can only be done by carefully studying the theoretical part and being fully aware of the consequences.
A bespectacled person is a friend, comrade, and spare glasses for a bespectacled person!
Glasses with the frame described below were required for special neodymium reflector glasses with a thickness of 3 mm. These are safety glasses for glassblowing that protect your eyes from harmful radiation and make your work much more convenient. Neodymium (didimium) glasses are generally an interesting thing, but in this application what is important is that -
“Magenta, violet and gray-green glass with a mixture of neodymium and praseodymium (ACE and Green ACE glass) is used in the lenses of didymium glasses for glassblowers, lampworkers and welders: it absorbs narrow-spectrum emission radiation from sodium atoms when working with glass torches . The bright flame almost disappears through such glasses, does not irritate the eyes and does not interfere with seeing the heated glass. Sometimes these lenses are coated with a mirror layer that reflects heat rays harmful to the eyes;"
The cost of ready-made glasses of this kind is quite high, so an attempt was made to make something that you can do yourself. Two blanks were purchased - circles ø60 mm made of neodymium glass 3 mm thick.
These glasses are significantly thicker and heavier than ordinary spectacle lenses; inserting them into cheap soft frames is risky, and irrational into expensive ones (it would have been easier to buy ready-made glasses).
Special “glasses” little things for the job were taken from cheap plastic frames from Ali Express. Cheap Chinese frames, as a rule, are purely decorative - they are small in size, have a soft, fragile plastic frame and thin transparent plastic “lenses”.
When fixing the glass, the principle used in the Tiffany stained glass technique was used - the edges of the glass are covered with copper foil (the edges of the glass are enclosed in a C-shaped profile) and soldered.
What was used for work
To work with glass - an oil glass cutter (preferably for curved cuts, with a narrow head), a glass breaker, but you can get by, a glass grinding machine, but you can also get by with an abrasive stone.
A soldering iron with a power of 60...80 W with accessories, a set of small plumbing tools, a jewelry jigsaw with accessories, a drilling machine, but a screwdriver or a small drill will also do.
Blanks made of neodymium glass, small standard parts of glasses (from a plastic frame), sheet brass of different thicknesses, copper tape (foil) with an adhesive layer, thin copper wire. Lead-free soft solder (tin-copper or tin-silver alloy). A piece of textile elastic tape (fastening at the back of the head), paint coating (solvent), rags.
So, in order
Working with glass.
A silhouette of a frame with glasses of a suitable shape was found on the World Wide Web, scaled to the required size, printed in its original form, and tried on.
Using a paper template, a “lens” template is copied and cut from thin (0.5 mm) transparent PET film. The film can be replaced with any suitable sheet material that is, if possible, waterproof and can be cut with scissors - thick foil, plastic, wax paper. For one-time use, you can also use thick, thin cardboard.
The hinge joint is broken
Repairing a broken hinge mechanism begins with removing the broken part, for which you can use a file.
Important! The process of removing the broken part must be done carefully to avoid damaging the frame.
After leveling the surface with a file, it is necessary to make a replacement part; for this, copper wire of a similar diameter is passed into the remaining loop of the mechanism and bent in the shape of the letter of the Greek alphabet - “Omega”.
Subsequently, the parts are connected, and the wire is heated using a soldering iron. It is carefully pressed into the softened plastic until it sinks as much as possible. After cooling, the output is a strong connection. After the wire has hardened, the repair area is leveled and sanded; it can also be painted over with nail polish to match the color of the frame. This repair only applies to plastic frames.
DIY steampunk glasses
Create your own original eye protection - DIY steampunk goggles, specially designed for airship flights and time travel. In this article you will learn how to cheaply and cheerfully make something incredible out of a pair of welding glasses. If you are ready for fantasy, then go ahead - prepare everything you need!
DIY steampunk style
So, you will need:
1. A pair of ordinary welding glasses (they will cost you 300 rubles)
2. Glue
3. Kraft paper or newspaper
4. metallic spray paint
5. pieces of leather (which I took from a couple of cheap bags)
6. small clothespins (or a lot of patience to hold everything yourself)
7. scissors
8. writing utensils (pencil)
9. decorative tips (like these)
10. hairpin/toothpick
11. pliers
12. stationery knife
13. Watch parts and random assortment of metal items for decoration. They are called decorative magnifying glasses. Another great idea is to glue decorative screw heads to your glasses frames.
Step 1. Paint the frame and attach the leather
1. First, disassemble the welding glasses into parts. Unscrew the earpieces and bridge of the nose from them and remove the elastic strap.
2. Cut the nose bridge piece. As you can see in the second photo, they were already painted and the skin was glued on first. So it turned out a little more complicated. So, do this before you start painting - you will thank yourself later. There are many ways to get rid of this plastic part. To avoid damaging the paint, cut it with a knife and pliers. If you think you'll still need this rubber piece, you can skip this step.
3. Paint the frame and screw the glass. You can paint it with spray paint or acrylic paints. Also give them a good scrub and polish to make the metal finish look more natural. After that, glue them together. Paint them with a bright, beautiful copper-colored paint, so they look better with tan-colored skin.
4. Make a pattern/template. You can do this before you start painting, but you will still have to wait for the paint to dry. Place your glasses, glass side down, on note paper or newsprint. Use your fingernail or some sharp object to make an imprint of your glasses and then cut out the template.
5. Transfer the template onto the leather from the wrong side, and then cut it out with sharp scissors.
6. Glue the patterns. Yes, yes, be brave! Once you are sure that the leather patterns are the perfect size, take out the glue. Apply glue to the wrong side along the edges. Remember that the glue will spread a little, and be careful when applying it. It costs a lot! Also remember that it will foam up a bit. The whole process will take about 30 minutes. This is where you will need clothespins. Be careful and patient.
Step 2. Bridge of the nose
7. Make a sketch of the bridge of your glasses. Place the glasses on your eyes and see how wide it should be. It would be good to ask a friend to help. After this, draw a rectangle - the length should match the length of the bridge of the nose, and the width should be about 1.25 cm less. Then add a couple more smaller rectangles on the sides.
8. Cut out the bridge of the nose. You should get something similar to what is shown in the photo.
9. Glue the bridge of the nose. And here glue will help us - apply glue in an even thin layer on a large rectangle, then fold the long sides towards the center and press. This will not only make the part stronger, but the part itself will look finished.
10. Attach decorative tips to the smaller rectangles. These components will need to be inserted into the glasses. They should fit perfectly there and not fall out. This is why we need tips. You only need two of these parts. Using pliers, attach them to the ends of the bridge of the nose, and at such a distance that the sizes match and can be securely attached to the glasses.
11. Now attach the bridge of your nose to the glasses, insert the lenses and screw them. And your main part is ready.
Step 3. Strap and other parts
12. Cut two leather strips from what is left of the handbags. Make one longer than the other, so that later they can be threaded into D-shaped rings, also left over from surviving wallets. Place them on the sides of the glasses, determine the length based on your head or hat. You can also wrap the ends of the leather straps (where they attach to the glasses) with aluminum decorative wire in a matching color.
13. Add various details. Surely, you will find spare parts for watches, various teeth, etc. Just glue them to the product. If you cannot secure these parts with clothespins (they are very small), build a stand structure for glasses so that the glue has time to dry and the structure itself does not fall apart.
Step 4. I want more!
Now... you have some chic, creative, personal steampunk glasses!
14. Add more metal parts. I really wanted to get my hands on an incredible jewelry magnifying glass, but just as much to make something so unique that you could look at it and say, “Handmade!” Find a couple of interesting details, glue pieces of cellophane to the lenses you happen to come across. The part attached to the right lens can rotate and tick, just like a walker.
Doll glasses with lenses: master class
You can use the wire method described above, or you can make a slightly different shape of the accessory. It would be a good idea to take measurements before making glasses for the doll. Or try on the accessory as it is being made.
So, we take the wire and make a bow at the tip using a knitting needle. We measure the distance from the ear to the temple. We bend the wire at a right angle. Using a cube we make a frame for one lens. We form a “frame bridge” under the bridge of the nose - a small arch; a knitting needle will be useful for this. We take the cube again and make a frame for another lens. Using a knitting needle, bend the second bow. The glasses are basically ready!
We make lenses. We cut out two identical parts from plastic. They must fit the frame. We try on the lenses to the glasses, trim them and glue them on. We are waiting for it to dry. Use paint to mask the traces of glue. The glasses are ready!
How to make sunglasses for a doll? Just take a bottle with dark or colored plastic. Glasses will perfectly complement rhinestones and sequins.
Anyone can make doll glasses: adults and even children. All you need is available materials, a little patience, free time, and you can enjoy the result!
—Categories
- Master classes (3765)
- scrapbooking (1069)
- knitting (811)
- sewing, cutting (503)
- made of polymer clay, salt dough, baked pl (257)
- made of paper, cardboard (219)
- from foamiran (146)
- floristry (133)
- Tilda dolls (87)
- wool felting (68)
- from plastic bottles, plastic, isolon (68)
- from ribbons (62)
- from threads (59)
- decoupage (54)
- jute, rope, filigree (53)
- soap making (51)
- fabric (51)
- nylon (47)
- quilling (45)
- bag holder, keeper, warmer (44)
- topiary (44)
- made from candies (42)
- papier-mâché (37)
- coffee toys (33)
- plywood (21)
- cat house (20)
- applique (19)
- home furniture (17)
- Gift decoration (16)
- from newspaper tubes (16)
- paperrtole, arte-Française or 3d decoupage (13)
- from coffee beans (13)
- from plastic bags (13)
- kanzashi (12)
- leather (10)
- from cones (10)
- using oya technique (9)
- weaving, kumihimo (9)
- from pompoms (8)
- made of plasticine (7)
- made of buttons (7)
- isothread (6)
- drawing (5)
- eggshell (5)
- beading (5)
- paper art (5)
- pergamano (5)
- napkin folding patterns (4)
- Wire Work (4)
- foam (4)
- from yarn (4)
- floating spill cups (4)
- using iris folding technique (3)
- origami (3)
- string-art (3)
- pasta (3)
- in oshie technique (2)
- epoxy resin (2)
- using the lyapochika technique (2)
- guilloche (2)
- from clothespins (2)
- from light bulbs (1)
- punch needle (1)
- kinusaiga (1)
- Cooking (2148)
- Salads, snacks (158)
- Breakfast (29)
- Multi-baker recipes (25)
- Sushi, rolls (5)
- Multicooker recipes (3)
- Microwave recipes (2)
- Recipes in a ham maker (2)
- Cocktails (1)
- Ice cream (1)
- Handmade (for inspiration) (231)
- Miscellaneous (219)
- Photoshop (93)
- Embroidery (61)
- 3D embroidery (40)
- Estate development (54)
- Design (47)
- interior (36)
- landscape design (13)
- Useful tips (45)
- Plant care (44)
- Travel (18)
- About cats. (10)
- Traditional recipes (9)
- Pin-up (5)
- Makeup (4)
- Painting (2)
- Figure exercises (1)
- Car Utilities (1)
A great way to entertain your child and brighten up his leisure time is with crafts that are aimed not only at developing creative abilities, but also those that you can play with!
In this article we want to offer you a very cool children's craft - paper glasses that you can easily make with your own hands. The result is cool, fashionable, stylish, bright and very elegant paper accessories that both girls and boys will love.
Print and create a pair of cute paper glasses using our six fun-shaped glasses templates. You can make regular shaped glasses, a pair of round glasses like Harry Potter, awesome heart and star shaped glasses, flower shaped glasses and a pair of retro glasses!
Materials needed: thick A4 paper, transparent film, scissors, glue, crayons, colored pencils, markers, glitter glue, stickers, rhinestones, glitter, etc.
Print any of the templates given in the article on a sheet of A4 paper
Color the template.
If you chose a black and white template, then color them with markers, crayons or colored pencils. Use one color or make it as colorful as you like. When using paint, add only a little or no water to prevent your paper glasses from curling at the edges.
Cut out the template (all three parts).
Cut out holes for the eyes.
Fold the side tabs.
The front frame has a pair of side projections, each of which is delimited by a dotted line. Fold the side tabs.
Glue the ears of the glasses to the side tabs.
Decorate your glasses with stickers, glitter glue, small paper shapes, rhinestones and other materials.
Make lenses from cellophane paper or clear film. Glue the lenses to the back of the frame.
Once the glue is dry, try on your awesome glasses.
Some tips!
Making paper glasses can be a great activity for any children's party or party. Prepare templates and materials for decorating glasses.
Print the glasses onto heavy cardstock if you plan to decorate them with heavier materials, such as buttons, small pom-poms, or wooden beads.
If you need a pair or several of these paper glasses with minimal processing and preparation, print any of the simple templates onto colored or patterned cardstock.
Print any of our stunning colored glasses onto white cardstock. Use them for parties, school events, parades or any fun event.
Make fun dots, zigzags, stripes and other simple patterns by applying paint with your fingers, a q-tip or a brush. You can also draw them with markers or crayons.
We also want to offer you the option of making glasses from paper using the origami technique.
Origami glasses made from A4 paper step by step for beginners