Of course, there are transparent gasoline lighters, but they are of the valve type. I pressed the button and gasoline seeped into the chamber with the cotton wool.
Now such lighters are not produced at all. And why? It's so convenient to see the fuel level. I decided to make a gasoline supply system without a valve at all. Through testing and sampling, my first lighter was created.
Video:
Later I made a second one, a little more complicated. The system is the same, but the complexity lies in the mechanism of gears. The gears can be rotated from the outside. They do not provide any functionality for the lighter to work. It's just stylistics, steampunk.
Video:
The system is actually simple. There is cotton wool in the tube, preventing gasoline from spilling. And the supply of gasoline to the wick is regulated by the density of its packing. Gasoline enters the wick only at the moment when the tube is heated by the burning wick.
The wick goes out, the tube cools down and the gasoline stops coming up, remaining in the cotton wool, thereby the cotton wool in the tube is constantly saturated with gasoline. It is important to correctly adjust the packing density of the cotton wool.
Push it too weakly and it will leak through the wick; too much and the wick will dry out.
I tested my lighters for a long time. Everything works flawlessly and is no different from simple gasoline ones. Except for the positives: The fuel level is visible. Gasoline fits much more than a regular lighter. The fuel does not evaporate at all (it is completely sealed). Can work on anything that is ignited by a spark (due to a thicker wick).
The third lighter was already made to order. I want to talk about it in a little more detail. This is for those who are interested in the process (worklog). And maybe you want to make yourself an equally convenient lighter.
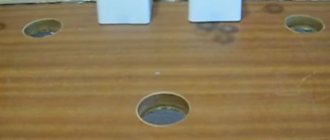
- I found the material for the body at a plumbing store, and off we go.
- And here is the same tube where the cotton wool is stuffed and the wick is inserted.
Kresalo. A wheel from a regular cricket lighter.
Worm gear parts and eye for cap holder.
I soldered everything with POS, it's simple solder. The worm will be removable and threaded.
The glass was removed from the LED lamp. I sharpened it with a diamond file. I'll paste it in last.
- Mechanism.
- Soldering again.
- A few more details.
- And after a long and tedious cleaning of excess solder and assembly, I got something similar to a lighter.
Well, the soldering didn't end there. You also need to solder the back cover with a coin.
I cleaned the solder, removed all the marks and scratches with fine sandpaper, riveted the seat and the cap holder.
Patinated it in ammonia vapor (ammonia) and glued the glass. All that remains is to remove the excess patina, polish, adjust the cotton padding, insert a spring and flint.
The wick weaved itself, because it is thicker than standard. After the cotton wool, I inserted a felt fawn. You can do it without it, of course, but this will make the filler neck look neater. The spring is all from the same “cricket”, Zipp flints. The tube holds four spare flints.
- Well, now you can enjoy the long-awaited result.
This is how the lighter turns out. It takes about a month to work, at least for me. It’s long and tedious, but believe me, it’s worth it. If you like the idea and want to make yourself the same lighter, ask, I will be happy to answer all your questions. Happy creativity and successful work to everyone!
Source: https://mozgochiny.ru/interesno/prozrachnaya-benzinovaya-zazhigalka/
Unique DIY lighter
Like any other author, at first he began to print all sorts of trinkets: vases, animals, more vases and animals.
Then he estimated the dimensions and started printing. This printer is incredibly simple, I loaded the print file onto a memory card, stuck it in the printer and pressed a single button.
The case turned out to be quite decent. There is a beautiful design with patterns on the body, but the author never managed to paint it adequately, but oh well, that’s something else another time. Initially, the idea was to make something like Zippo lighters with a hinged lid, but the author did not find the required template, and he does not yet know how to model. For this reason, we will take the most suitable case for these purposes and print the case and a half.
Next is adjustment to our body. And after some suffering, everything is ready. Ugly, sloppy, but it works.
Now the most important thing is the electronics. The case turned out to be quite pocket-sized, quite comfortable and pleasant to the touch. We have to push into it a battery, a system for protecting and charging the battery (we will charge from the USB port), a flashlight, a high-voltage voltage converter to produce a burning arc, and a high-voltage voltage multiplier, which together with the converter forms, although low-power, but still a stun gun . Plus you need a central switch and a button.
If the lid is open, the lighter is removed from the safety lock and the button is pressed, this thing can be used for its intended purpose. If you close the lid and do the same, you get a stun gun.
Let's look at the diagram:
And now in more detail.
It is this part that generates high-frequency voltage; the voltage at the output of the transformer is more than 3000 V. The temperature of the high-voltage arc is very high, and it can easily set fire to flammable materials.
The circuit is a conventional blocking oscillator based on one bipolar transistor. The transformer was taken ready-made, they are sold on Aliexpress, you will find the link in the description under the author’s video (link SOURCE). Of course, you could wind the same transformer yourself, but if you’re lazy, it’s easier to use a ready-made one.
Sectional transformer. It was filled with resin. The transistor hardly heats up during short-term operation, so there is no point in sculpting it onto a radiator.
These are still Soviet-made diodes, but there are plenty of imported analogues. High voltage is supplied to the bayonets, which are located on the lid. The distance between them is only half a centimeter. More is possible, since the discharges stretch to a length of up to 1.5 cm. But in our case, this arrangement of pins is due to the design features of both the multiplier itself and the cover as a whole.
A pair of series-connected resistors are installed parallel to the multiplier output, each with a resistance of 30 mOhm.
These resistors discharge the residual voltage of the multiplier after the shocker is turned off.
OK it's all over Now. Thank you for attention. See you again!
Source
Why can't you fill Zippo with regular gasoline?
There are situations when the original fuel has run out, and the lighter needs to be refilled “yesterday”. Some Zippo owners mistakenly believe that regular car gasoline is quite suitable for temporary refueling, but this is not true: the decision to use car fuel will lead to almost instant wear of the “insides” of the lighter. Technically, such refueling is possible, but instead of smooth combustion without foreign odors, the result will be a smoky flame with the aroma of exhaust gases. Again, the wick will become unusable and will have to be replaced. And in general, the picture turns out to be inharmonious: an original Zippo lighter and unrefined motor gasoline.
Making a gasoline lighter
Hello! In this article we will talk about a lighter, the special advantage of which is that the fuel is stored in it for a long time and does not evaporate.
Video on how to make a gasoline lighter with your own hands
Materials and tools: - 2 pumps from the Shmel primus stove; - cheap Zippo lighter; — nipple from a truck camera; — brass lever key (butterfly); - solder tin; - soldering iron; - soldering flux or soldering acid; - gasoline or gas burner; - fine-grained sandpaper; - needle file; - flint and wick;
We remove all irregularities and burrs by processing them with a needle file, and at the same time adjust the height of the tube to the height of the valve.
The bottom cap, the one for refueling, can be made smaller. To do this, screw the valve into the lower part of the lighter, also attach the second tube, and mark it. Only now at the level of the side hole of the valve.
Having cut off the part, cut off the valve at the same level and process it with a needle file in the same way as the top cap.
From what is left of the second tube you need to cut off two parts. The first is a 15 mm long tube. A little later we will use it to make a windscreen, which will also serve as a guide for conveniently screwing on the top cap.
The second is the plate. Clamping it in a vice, you need to saw the tube lengthwise and straighten the plate out of it, carefully tapping it with a mallet.
Next, having screwed on the valve and installed the body in a vertical position, you need to place the tube evenly on it, and the plate on top with the tinned sides facing each other.
After heating the structure evenly with a burner, we solder all three parts together into one.
After soldering, cool the part and, using a little force, unscrew the cap. It's almost ready. All that remains is to cut off the excess with scissors and process the irregularities and burrs with a needle file.
We perform the same operation with the parts of the top cap, only before we start soldering, in order to avoid fuel leakage in the future, we need to plug the top and side holes of the valve.
After this, having fixed the roller for a while, we attach the mechanism to the lighter body, placing a rod from a brass key between them, and try it on. The distance between the roller and the housing should be about two mm. The diameter of the rod is a little large and the distance is large.
By the way, you should pay attention to the fact that the gap for striking sparks, the one under the roller should be 1-2 mm above the top point of the threaded element. There will be a wick in that place and the sparks produced by the roller should fall exactly on this wick.
The lighter is almost ready, only a little remains, namely the wind protection. In the previously prepared tube, on the front part, using a 3-point drill in a checkerboard pattern, we make 8 holes at a distance of approximately 7 mm from each other.
We make a cut on the reverse side and cut off 13 mm of the tube wall.
After this, you need to reduce the internal diameter of the part by tapping it with a mallet and having previously installed an 11 mm drill into it.
We select a nail according to the diameter of the hole in the spark mechanism and, with gentle blows of a hammer, flare it and finally fix the roller.
In this case, you should pay attention to the direction of the roller teeth; it is important not to make a mistake.
Having installed the flint, we place the wick.
To do this, we unwind a little copper wire from the same transformer coil and use it to make a knot at one end of the wick. Having aligned the ends of the wire, we pass it into the upper hole of the lighter and remove it from the lower one. Then we pull the wire until almost the entire wick is laid.
Now, whether you are hiking or fishing, you can be sure that your backpack has a reliable source of fire that will not let you down in any weather.
If anything in the article seems unclear to the reader, write your questions in the comments, or I suggest you watch the video at the beginning of the article.
Source
Advantages of original Zippo gasoline
Zippo gasoline is designed specifically for refilling lighters. Manufacturers carefully hide its composition: it is known that premium petroleum products are used for its production, and the finished liquid goes through several stages of purification.
This removes possible impurities from the fuel and gives it qualities that bring it to a leading position among other options:
- instant fire in any weather;
- even flame without soot and burning;
- long period of time between refills;
- no unpleasant odor.
One of the main advantages of the original gasoline for refilling lighters is the gentle operation of the accessory. The fact is that low-quality fuel leads to rapid wear of consumables: you have to change the wick more often, and the inside of the lighter becomes clogged with surrogate sediment, which leads to breakdown and expensive repairs. This can be avoided - high-quality liquid does not cost that much.
The popularity of original gasoline for refilling Zippo lighters brings with it a huge number of counterfeits, so when purchasing you should always take a couple of minutes to inspect the metal canister and determine the quality:
- the fake has a pronounced pungent odor;
- the height of the fake canister is less than the original one, which without taking into account the neck is 121 mm;
- the fake canister is paler in color and has a glossy surface;
- The markings on the real one are on the bottom and are a black stamp, versus the embossed signs and numbers of the fake;
- The original has a sticker in Russian with instructions for using the fuel.
Special fuel is the key to a long service life of the lighter without repairs, soot, the smell of burnt gasoline and constant refueling.
Lighter from a cartridge case
You don't have to be a smoker to use lighters. We are not talking about simple lighters that can be bought in any store. They won't surprise anyone. It’s another matter if the lighter is a beautiful souvenir item, especially if it is made by yourself. A striking example of this is a lighter made from old metal things, for example, from a cartridge case. This craft can be used every day or given as an original gift. A lighter from a cartridge case can be made in different ways, the best of which will be described in this article.
Piezoelectric effect
- the ability of some materials to generate an electrical charge in response to applied mechanical stress. Piezoelectric crystals exhibit the piezoelectric effect. This piezoelectric effect has two properties. The first is the direct piezoelectric effect, which means that the material has the ability to convert mechanical deformation into electrical charge. The second is the opposite effect, in which the applied electrical potential is converted into mechanical strain energy. The piezo element of a lighter is an example of this effect.
Features of trench creativity
Trench creativity of World War II
Note! If possible, the soldiers drilled a small bottom in the sleeve, into which a filler plug was installed to add fuel. But in most cases, gasoline was added to the lighter through the top.
The flint with a spring was soldered together with a small copper tube to the case body. To make the wheel, a round file was used, in which a hole was made for the screw. Regular gasoline was used as a refill for such lighters, since it was almost always at hand. Of course, due to the rapid evaporation of fuel, the product had to be refueled regularly , but the result is worth it. The lighter worked, and anyone could make it.
Soldier's lighter made from a cartridge case
But if at that time lighters were made for the purpose of survival, now they are more of a souvenir that you can show off to your friends. In addition, now such products are created in different styles, for example, in the steampunk .
Cases were often used from Mauser (the brass there is better quality)
How often is refueling needed?
On average, a full refill is enough for 200-300 lights. This amount depends on the duration of combustion, the quality of consumables, fuel and the accessory itself. For Zippo lighters, they recommend branded highly purified gasoline: a full portion will last for about 7-10 days. If the period is significantly shorter, then it’s time to check the consumables - unlike the lighter itself, they need to be changed regularly as they wear out:
- The wick does not require frequent replacement: as it burns out, it is carefully pulled out with tweezers to a clean length, aligned with the wind protection, and the excess is cut off. One wick is designed for two such procedures: then the length will not be enough for full work, and fuel consumption will increase. Poor quality or underfilled gasoline, due to which the wick is not completely saturated, is another reason for premature wear.
- One flint is enough for at least 3 weeks. The replacement period is determined by the quality of the spark: if it cannot be struck the first time, or it is missing, it is time to install a new flint.
- Felt, springs and wheels cannot be found on the open market: Zippo gives a lifetime guarantee on its products, and replaces such parts as the resource is exhausted.
If you use the lighter about 20 times daily, the silicon wheel will last at least 10 years, but a lot depends on how carefully the accessory is used.
How to remove a primer from a case
If you want to make a lighter from a cartridge case yourself, then first you will need to learn how to remove the primer from the cartridge case. The step-by-step instructions below are suitable for different calibers, for example, 5.45x39 and 7.62x39 mm.
Step 1. Light the inside of the cartridge case with a flashlight or other device to see exactly how the capsule is positioned.
Consider how the capsule is positioned
Step 2. Insert a strong spoke into the case, being careful to get the end into the small hole in the capsule. A long nail may work if it fits into the sleeve itself.
The spoke is inserted into the sleeve
Step 3. Place the sleeve with the inserted spoke on the anvil, which serves as a small bearing. You need to insert it so that the capsule is in the bearing hole.
A small bearing is used as an anvil
Step 4: Gently tap the inserted spoke with a hammer to dislodge the primer. It should fall out after the first hit.
Knocking out the primer with a hammer
Step 5. Remove the primer so it is out of the way. Repeat the procedure with other sleeves. If they are of a larger caliber, it does not change anything. You just need to choose a long knitting needle that would reach the primer in the inside of the case.
Done, now the capsule can be removed
DIY flower pots
In our new article you will find the best options for making flower pots with your own hands! Step-by-step instructions, tips and more can be found at this link.
Making a device from a battery
How to make a lighter from a battery? Making this element in a similar way will be even easier than all others, so if you have a minimum of free time allotted to work on making a lighter, use this method. And it consists of just a few steps.
First, the basic materials are prepared - a 12-volt battery and a piece of regular foil. As an alternative, take a chewing gum wrapper - this does not change the essence of the matter.
How to make a lighter next? In the next step, a small fold is made in the middle of the folded sheet of foil. Afterwards, the folded piece is closed at the ends of the battery (polarity “+” and “-”, respectively).
As soon as both contacts are closed, a small “fire” will form at the fold of the foil. Of course, from a reliability point of view, such a lighter is not very convenient to use, but in nature, especially on a picnic, such a thing will definitely not hurt you.
So, we found out how to make a lighter from scrap materials.
Option #1. Lighter "Star"
To work, you will need a star from a soldier's cap from the times of the USSR. It is not difficult to find it, because similar products are often found in markets. If you wish, you can buy such a star online. You will also need to prepare paraffin, a soldering kit, a cartridge case, some cotton wool and brass parts to create the body of the future lighter. In this case, eyepieces from old Soviet binoculars are used. Next you need to follow the instructions.
Step 1. Attach the star to a pre-prepared plate cut from a beer can.
First, the star must be fixed to the plate
Step 2. Make impressions for the sides of the lighter. For this purpose, it is advisable to use candle paraffin.
Candle paraffin is used for work.
Step 3. Prepare current-carrying contacts for the lighter, which will later need to be anodized in a galvanic bath. Cover them with graphite (a small layer is enough).
Next, you will find a long and tedious galvanization process. After placing the manufactured molds, you need to connect the contacts of the cathode to the anode. The recommended tightening time is 5 hours and the current is 1.5 A. Immediately after tightening the cathode, the current should be reduced to approximately 300 mA. Then the molds await 7 days of electrolysis.
Galvanization process
Step 4. Using brass binocular eyepieces or other similar shaped parts, make a lighter body. This stage requires metal soldering skills. The body can be made during galvanization to avoid wasting time.
Making the lighter body
Step 5. Solder the flint to the sleeve, and the sleeve itself to the lighter body. Next you need to install the wick and fill the entire space with cotton wool.
The entire space must be filled with cotton wool
Step 6. Firmly solder the sleeve with flint so that it does not break during use of the lighter. Carefully polish all resulting seams.
The seams need to be carefully polished
Step 7. Attach the special cap covering the wick using the same brass chain if you have one. Such a lighter will look more impressive. Just don't forget to fill it up.
A cap is attached to the wick with a chain.
That's all. A gasoline lighter made from a cartridge case and an army star is ready. Now you can add it to your collection or give it to a loved one. The finished product will look something like this.
Alternative fuel brands
If you don’t have highly purified liquid for refilling, and you don’t want to fill in just anything, the question arises: what is the best way to replace the original gasoline for lighters? There is an affordable alternative: fortunately, the market offers options for refilling liquids that do not harm the accessory and are safe for humans if precautions are taken.
Royal
Dutch-made universal fuel is suitable for any lighters and is available in 125 ml canisters. There are no foreign odors, the flame is even and without soot, the lighter does not become clogged with impurities. There are also disadvantages: any gasoline evaporates on its own, even the original one. Royal evaporates much faster and with regular use a full refill will last for a week.
Newport
“Super pure,” according to the manufacturers, the liquid of the British brand is used not only for refilling lighters. It is used for cleaning watch mechanisms, refilling soldering irons and degreasing metal.
Clipper
The Spanish-made alternative can be compared to Royal - the fuel is suitable for any type of lighter, it “reacts” quickly at sub-zero temperatures, and refills last for 6-7 days. There is no pronounced smell. The volume of one fuel cylinder is 133 ml.
Gasoline “Galosha”
Russian economy version: the smell is clearly visible, there is a little soot, in cold weather it does not ignite the first time, refills last for a maximum of 5 days. The alternative is dubious and is more suitable for use as a solvent or cleaning fluid for tools, but many users tip the scales of “Galoshi” towards temporary use in lighters.
Runis
The refill lasts for 3-4 days - it evaporates very quickly. There is a smell and soot, but the price for Russian-made Runis is much lower than for foreign liquids: hence both the popularity and the disadvantages. Used for refilling lighters and heating pads, removing oil stains and deposits.
Only its owner decides how to refill his lighter. But the phrase that the miser pays twice is appropriate here: low-quality fuel evaporates faster, increases wear on consumables and clogs the accessory, so it is better to adhere to the manufacturer’s recommendations.
Option #2. "Three-sleeve" lighter
Few people will be surprised by ordinary lighters made from cartridge cases, but here you can go further by making an unusual design from three cartridges at once. One sleeve serves as a reservoir for cotton wool, and the rest are spare containers.
"Three-sleeve" lighter
But how to make a “three-sleeve” lighter? More on this below.
Set of tools
Tools
Work should begin by preparing everything you need. First of all, gather the following tools:
On a note! Making a three-sleeve lighter requires working with small parts, so if you have vision problems, you may need a special magnifying glass or other magnifying device.
Materials
It is also necessary to prepare some materials for working with sleeves:
Once you have everything you need ready, you can get to work. Of course, the procedure will take quite a lot of time, so it is recommended to start on the weekend so that nothing distracts from the process.
Instructions
Step 1. Make small holes in the sleeves and solder the partitions cut from brass tubes. This is necessary to attach the tanks to each other.
Holes are made in the sleeves
Step 2. Solder all three sleeves, thereby creating one solid structure.
Step 3. Drill out the end part of the liners for further installation of the filler neck. All primers must be removed before starting work.
The end parts of the sleeves need to be drilled out
Step 4. Turn the valve, cap and burner on a lathe. The details should look similar to the photo.
Valve, cap and burner
Step 5: Remake the post on the lathe by turning a small ball for later mounting of the flint.
A small ball is needed to install the flint
Step 6. You should end up with a stand like this. The length of the rod with the spring is exactly this, since it will pass through the second tank of the manufactured structure.
Step 7: Grind the needle valve if necessary. It was already mentioned earlier that this part is made of steel, although you can use other options.
The needle valve can be ground if necessary.
Step 8. Turn out the valve cover and make the same holes in it as in the photo.
Step 9: Solder the special loop to the top of the valve cap. The loop here is needed to secure the rocker arm of the cap.
The loop here is needed to secure the rocker arm of the cap.
Step 10. Once you have soldered the wheel stand, reinforce the entire structure with an additional rim.
The structure is reinforced with an additional rim
Step 11. Make such a rocker with a special valve. The surface of the valve can be smooth, so to make it, cut a small piece of brass tube.
Rocker arm with valve
Step 12. Perform a test installation of parts to identify possible defects.
Test installation of lighter parts
Break, don't do
The current discharge produced by the lighter's piezoelectric element can break your smartphone. It will be enough to “click” the metal connectors of the gadget, the headphone input, and the exposed parts of the board 8-12 times. If exposed to this, the phone will refuse to work. In this case, there will be no visible damage or melted elements. Now you can happily take your broken gadget to the salon and demand a refund. The service center should not understand anything.
But the piezoelectric element of a gas lighter cannot disable ordinary “dialers” made in the PRC. I don’t know why, but even after 50 shocks with a weak current, the push-button telephone continued to function properly.
Option #3. Lighter "Trench"
Another option for making a homemade lighter, the main element of which is the sleeve. The process is simple if you strictly follow the step-by-step instructions given below. So, let's go.
Step 1. Prepare everything you need for work. All parts must be made of non-ferrous metals: brass tubes, rods, rods, etc. are suitable.
Materials for making a lighter
Step 2. Drill out the primer socket in the cartridge case, and then begin to tap the threads in the resulting hole.
Step 3. Make a wick socket from a brass blank. To grind a part, it can be fixed in the chuck of an electric drill.
Fitting socket for wick
Step 4. Make several indentations in the sleeve, or rather, at the base of its barrel. To do this, use a center punch or dowel.
Recesses on the sleeve
Step 5. Press the machined socket into the cartridge case mouth. It is advisable to use a vice for this.
The socket needs to be pressed into the cartridge case Another photo of the process
Step 6. Place a washer or small nut under the seat of the press-in wick to drive it even deeper (much like in the photo).
The wick needs to be driven even deeper
Step 7: Solder the two pieces together for a more secure fit.
Two parts need to be soldered
Step 8: Empty the bullet until only the core remains. This step must be performed with extreme caution.
Only the bullet core should remain
Step 9. Cut off the spout of the core and its lower part so that the part can fit into the sleeve itself.
Core after trimming
Step 10. Connect the sleeve to the cut core.
The sleeve is connected to the core
Step 11: Find an old lighter wheel and a small rectangular piece of brass.
A piece of brass and a lighter wheel
Step 12 Bend a piece of brass into a “P” shape. This element will act as a holder for the wheel.
Brass bent into a "P" shape
Step 13: Cut a small piece of tubing. You need a brass tube whose diameter matches the size of the flint you will use in your design.
Piece of brass tube
Step 14. Drill holes in the U-shaped element to install the wheel, and then connect this element to the tube. Solder these parts to each other.
The tube is connected to a U-shaped element
Step 15. Perform a test assembly of all elements to check their functionality.
Test assembly of elements
Step 16. Trim off any excess and grind down the solder areas so that the structure looks solid.
The structure should look solid
Step 17. Make two copper or brass loops to secure the sleeve with the spark striking unit.
Step 18. Install the manufactured loops onto the tube. The dimensions of the loops must match the dimensions of the tube. Solder the elements for reliability.
Loops are attached to the tube
Step 19. Carefully bend the antennae from the soldered loops.
Loop antennae are bent
Step 20. Connect the finished structure with the sleeve and solder the bent antennae to the body of the future tank.
The structure is connected to the sleeve
Step 21. Give the assembled structure a more presentable appearance. Polish its entire surface, paying special attention to the solder areas.
The lighter needs to be thoroughly polished. The product after polishing
Step 22. Make a plug for the bottom of the sleeve. In this case, part of the bolt and a copper cap are used to make it.
Plug for the bottom of the sleeve
Step 23: Place the wick in the lighter and stuff the cotton through the bottom of the lighter.
The wick is placed in the lighter
Step 24. Connect the cap to the lighter body using a chain so as not to lose it. Now you can test the lighter!
Brand Zippo
Zippo gasoline lighters were born when the enterprising American George Blaisdell brought home a test batch of Austrian IMCO lighters. But he couldn’t sell a single device, and started improving them. This is how the legendary Zippo was born, working in any weather.
From the drawings on the body of these products one can trace the entire history of America - all achievements in the military, scientific or sports fields were reflected in the engravings on the body.
The Zippo company has always produced, and still produces, only gasoline lighters. 45,000 products are produced daily. Most of them are relatively inexpensive mass-produced items. But there are also exclusive models, with a case made of gold, silver and titanium.
Option number 4. Lighter from the game "Metro 2033"
Don't know what to surprise your gamer friend for his birthday? Make him a unique lighter in the style of the acclaimed game about the post-apocalyptic world “Metro 2033”. Below are step-by-step instructions for this process.
Step 1. Prepare the case by removing the primer and cleaning the surface of any dirt.
Prepared sleeve
Step 2. Make cheeks for the wheel of the future lighter. For this you will need a brass tube. Of course, you can use an old lighter wheel, but it won't fit well with the rest of the design.
Make cheeks for the wheel of the future lighter
Step 3. Cut out two thin wheels. Do this carefully so that the parts are smooth and uniform.
Wheels are cut out
Step 4. Cut a couple of mandrels to press on the second piece. To make them, use a steel rod.
Mandrels are cut from the rod
Step 5. Press all the parts into one piece so that you end up with a full-fledged lighter wheel.
Step 6: Secure the sleeve in a vise and drill through the bottom using a drill.
Drilling the bottom of the sleeve
Step 7. A small threaded bushing made of brass must be soldered into the resulting hole.
Brass bushing with thread The bushing must be soldered into the hole
Step 8. Make the central element of the burner. It should also be threaded.
Making the central element of the burner
Step 9. Now complete the wrist part of the burner, which will protect the fire from the wind. This element is called “wind protection”.
Next you need to make a “wind protection” Almost finished “wind protection” That’s it, the part is machined
Step 10. This is what the windbreak will look like in the end.
Ready-made “wind protection”
Step 11: Solder the inside of the windbreak.
The internal part needs to be soldered. The result of the work done
Step 12: Use an internal thread tap. The thread is needed at the cap.
Internal thread being cut
Step 13. Try on the manufactured parts, placing them together. This is necessary to see how everything will look in the end.
Trying on finished parts
Step 14: Grind out the lighter cap so that the top is shaped like a bullet.
Next, you need to grind out the cap for the lighter. Turning out the cap. The upper part of the cap should resemble a bullet.
Step 15. Having replaced the cutter with a drill, make many holes in a circle in the cap. This is not necessary, since such holes do not perform any functions - they are for beauty.
Small holes are drilled in a circle
Step 16: Make the bottom fill plug.
Then you need to make a lower filling plug Bottom plug
Step 17 Once the spring and flint tube is ready, test fit the element.
Test fitting of the tube
Step 18. Machine a small spacer post.
Remote stand
Step 19. Solder the stand to the previously made tube so as not to lose this small part.
Option #5. Lighter based on the game “Bioshock” (Big Daddy)
Everyone remember the asshole who wandered around in the first part of the Bioshock game with a big and scary drill? Of course, this game has delighted many people thanks to its unusual storyline, breakthrough graphics and atmospheric locations. People inspired by this game can make a custom lighter using an old cartridge case, parts from a non-working lighter, and other scrap parts.
Lighter based on the game “Bioshock” (Big Daddy)
This is what a lighter looks like, made under the impressions of seeing the underwater city of Rapture in the game “Bioshock”.
Foil and battery
To implement the method, you will need to remove one battery from the device and take a piece of foil. A double-sided one from a pack of cigarettes is ideal.
Algorithm of your actions:
We figured out how to light a cigarette without a lighter and matches in the forest. The main thing is, after lighting a cigarette, do not forget to put out the tinder wigwam. Now let’s find out how a smoker can do without the usual accessories in an urban environment.
Option number 6. Souvenir lighter
Of course, there are many different ways to make a lighter from a cartridge case on the Internet, but if you are initially making a product for a gift, then it needs to be well decorated. A souvenir lighter decorated with copper ornaments is a great way to please a friend or loved one, even if he does not smoke.
Souvenir lighter This lighter will be an excellent gift.
Tools and materials
Before starting the work process, you need to prepare everything you need to make a lighter:
Once everything you need is prepared, you can begin making the lighter. This is a rather complex process that requires a lot of time and effort.
Not working lighter on the part
Instructions
Step 1. Remove the primer from the cartridge, and make an internal thread in the resulting hole.
Internal thread in the resulting hole
Step 2: Prepare a small copper plate. It can be made from a copper tube, which must be cut lengthwise and leveled.
Small copper plate
Step 3. Clean the finished plate from dirt, and cover one side with self-adhesive vinyl.
One side of the plate must be glued with vinyl self-adhesive
Step 4: Apply the stencil to the other side of the plate using paint markers. Choose a drawing at your discretion.
A stencil is applied to the plate
Step 5. Etch the plate in a ferric chloride solution brought to a boil. Once the thickness of the plate is reduced by approximately 40%, stop the chemical process.
Plate etched
Step 6. Carefully trim off the unnecessary edges of the plate and bend it to the shape of the sleeve.
Plate bent to fit the shape of the sleeve
Step 7. Carve out the neck of the lighter, and bleach the resulting part in a special lemon solution.
Finished lighter neck
Step 8. Solder the pad to the body of the future lighter. To prevent the pad from sliding on the slippery surface of the sleeve, wrap it with wire.
For reliability, the cover is tied with wire
Step 9. Sand the lighter body with the soldered plate using fine-grit sandpaper.
Lighter body after cleaning
Step 10. Cut the chair mount from the brass plate. The holes should be 5.5 and 10 mm.
Step 11. Twist thin wire onto a nail and cut rings for the chain. Then connect all the cut out elements and solder the cut points.
Rings for chain
Step 12. Try on all the assembled parts. This will help you find out if the items are suitable. Otherwise, they will need to be sharpened.
Trying on parts of a souvenir lighter
Step 13. Polish the lighter parts and complete the final assembly of the structure.
After polishing, final assembly is carried out
Step 14: Install the wick and then fill the sleeve with cotton.
The sleeve is filled with cotton wool
Step 15. Once the product is ready, fill it with fuel and test it. Below are photos of the finished souvenir lighter.
Finished souvenir lighter Photo of the souvenir lighter Another photo of the product
Option No. 7. Lighter "Three-bolt helmet"
You can make a lighter from a cartridge case with a diving theme. To do this, you will need the sleeve itself, materials and tools for soldering. The manufacturing process cannot be called simple, because it requires electrolysis, so people with experience in this matter need to start creating the “Three-bolt helmet” lighter.
Lighter "Three-bolt helmet"
Step 1. Prepare the base for the future structure using hydrolysis. For this you will need a tennis ball.
The base will be made by hydrolysis The base for the lighter is being created Another photo of the creation process
Step 2: Solder the main parts to the helmet. These are portholes and handles that are made of brass.
The main parts are soldered to the helmet
Step 3. Install the bottom for the lighter, made of brass plate. Carefully solder it and sand the soldering areas with sandpaper.
The bottom is made of brass plate The bottom is attached to the helmet
Step 4: Place the shell without primer into the finished helmet, then install the wick and fill the reservoir with cotton wool.
The sleeve is inserted into the helmet
Step 5. Make a lid and a chain to hold the lid on. How to make a chain was mentioned earlier.
Step 6. Polish the body of the lighter, bringing the surface to a shine.
The lighter body needs to be polished to a shine.
Step 7. Fuel the lighter and test it. Works? Great! Now you can use your diving-themed lighter everywhere.
Checking the functionality of the lighter Photo of the “Three-bolt helmet” lighter This is what the finished “Three-bolt helmet” lighter looks like
If desired, you can re-sand the lighter with sandpaper, changing the grit from coarse to finer. But you should understand that trench creativity does not require perfect condition , so many craftsmen leave small scratches or darkening on their creations. This is a “combat” lighter, so its appearance should be appropriate.
An example of a non-standard repair of a piezoelectric turbo lighter
A beautiful piezoelectric turbo lighter in a metal case worked flawlessly for a month and suddenly stopped lighting.
An external examination showed that when the key was pressed, a characteristic click was heard, but a spark did not jump at that moment. At the same time, the hissing of gas could be heard, which ignited when an open flame was brought to the area where it came out. These facts indicated a malfunction of the piezoelectric element.
To remove the protective cover of the lighter, you need to unscrew one screw from the bottom side. There is also a tubular screw for adjusting the gas supply and a filling unit. To adjust, you need a flat-head screwdriver with a blade width equal to the outer diameter of the tube. As you rotate clockwise, the flame will decrease.
It turned out that the piezoelectric element was inserted into the body of the gas tank and to remove it it was necessary to disconnect the tank and the ignition part. They were secured to each other using a pin. To remove it, I had to install the tip of the core on the pin and apply several light blows to it with a hammer.
When the pin extends a couple of millimeters, it can be easily pulled out using wire cutters. If the pin does not want to budge when struck, you can try knocking on it from the opposite side.
Surprisingly, despite connecting the halves of the lighter with a tube for supplying gas to the nozzle and a high-voltage wire, they separated easily. The tube was made of rubber and was easily removed, and the high-voltage wire consisted of two parts that simply touched in an insulating transparent tube.
The turbo burner was held in the pilot part due to its tight installation and was removed with little effort. During assembly, it must be removed, since it will be necessary to adjust the length of the high-voltage wire and tuck it into the insulating tube.
When trying to install a replacement piezoelectric element instead of a faulty one, I encountered a surprise. The cross-sectional dimensions of the standard piezoelectric element were smaller than the standard ones. Instead of 6.52 mm it was 5.84 mm.
I had to file down 0.34 mm on each side. The walls of the piezoelectric element, contrary to my fears, turned out to be sufficiently thick and its size was reduced.
We must pay tribute to the simplicity and maintainability of this gas lighter. She put it together just as easily as she took it apart. The test showed stable operation of the lighter, a flame appeared every time the key was pressed.