The apron has long and firmly entered into people's everyday life. Not a single housewife can do without it. It is needed at work and at home to protect clothes from stains. And in some cases, even parts of the body from harmful effects (in the X-ray room or in laboratories).
In factories, all kinds of aprons are sewn, but for domestic needs (for the kitchen and garden) it is quite possible to sew this item yourself.
What types of aprons are there?
If we list them by purpose, then we can conditionally divide products into the following types:
- kitchen household;
- medical protective;
- for work in production (including with chemicals);
- special or corporate (for waiters, kitchen workers, salespeople, hairdressers, cleaners).
By appearance they are divided into the following:
- breast aprons (cut or one-piece);
- aprons (without bib);
- Japanese sundresses with straps;
- vests.
Chest models and products without a bib can be made with different hem shapes.
Useful tips
Markings on the material are done only from the inside out with chalk, soap or a regular pencil. It is unacceptable to use a ballpoint or gel pen - subsequently you will have to wash the finished armbands, since the paste has the unpleasant property of seeping through the fabric. Don't forget about seam allowances: sewing without them will reduce the finished product by 1-2 sizes!
Encourage your child to participate in a sewing activity. Perhaps he will enjoy the process, and spending time together will bring pleasure to both of you. Choose the material together - what you like doesn’t have to be what he likes! This is how you can sew armbands for work - easy, simple and quick!
Drawing class for a child
A student needs protective clothing for art school or labor lessons in general education - an apron. It is absolutely easy to sew.
You can use a ready-made template pattern, or you can make your own drawing.
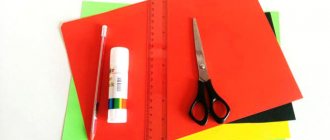
To work you will need:
- any suitable fabric (cotton, chintz, calico, satin, denim) - 1 sq. meter;
- a piece of soap or chalk;
- sharp scissors;
- bias tape - 2 meters;
- measuring (centimeter) tape;
- sewing machine (or needle and thread to match the fabric for hand sewing).
Manufacturing stages:
- The cutting is done directly on the fabric or first on paper, and then transferred.
- Using a soft “centimeter” measure the length of the entire product, hem and bib.
- The width of the bib should be approximately 1/4 of the width of the skirt.
- The fabric is folded in half and the measurements taken are drawn with chalk (soap), taking into account the folded material.
- Therefore, if the width of the bodice is 16 cm, and the waist is 40 cm, then measure 8 cm and 20 cm from the fold line accordingly (measurements for a child 6-10 years old).
- Connect the outer edge of the bib with the outer edge of the hem with a curved smooth line (if it’s difficult, then first draw a diagonal from the center of the waist line up and put a dot, and then connect the three dots).
- On the contrary, the hem is formed using a semicircle.
- Cut the workpiece along the marked lines.
- Cut two long sections of 25 cm from the fabric for ties or make them from binding (stitching).
- For convenience, the ties can be made with Velcro, then they will be shorter (you need to measure them).
- They begin to sew on the trim from the binding. Work begins at the top edge of the hem, where the tie will be located. But first, they leave the binding (25 cm) in free “flight” (that is, they retreat from the edge and sew it to the fabric only after 25 cm). If there are no sewing skills, then the binding is first basted, and at the end of the work these threads are removed.
- Hem with an edge seam in the direction of the bib.
- When reaching the top, leave the binding (20 cm) unsewn. This will be a strap to put on your head.
- And again they are hemmed down to the waist. Cut again with an allowance of 25 cm (or less, it all depends on individual measurements).
- Sew the binding at the top and sides.
- Now all that remains is to process the skirt.
- If desired, sew on a rectangular pocket. It can also be edged with trim. Or just fold the edges and sew.
The apron for classes is ready. To go with it, a set of the same fabric is used to sew sleeves with elastic bands and a headscarf (for girls).
Saving the sleeves
Many parents recommend giving their child more than just an apron for lessons. And it wouldn’t hurt for your baby to have armbands for children’s creativity either. Sewing them is not difficult. To do this, you should prepare two rectangles of fabric, the width of which will be equal to the circumference of the arm plus 12-14 cm for stitching and gathering, and the length depends on the height to which you need to protect the sleeves. Usually this is a measurement equal to the length from the wrist to the middle of the forearm. The sleeve is first sewn lengthwise, then along both edges you need to fold the edge and make a drawstring for the elastic.
For gardening
An old raincoat will make a wonderful apron.
How to do it:
- The sleeves, collar and front are cut off from the jacket.
- Fold the fabric in half.
- Draw the outline of the apron with chalk and cut it off with scissors. If bias tape is not used, allowance is left for folding the edges.
- Finish the edges.
- To sew the ties, cut 50-60 cm of ribbon 4-5 cm wide from the front side of the raincoat (vertically) and 40-45 cm for the top strap through which the head will be inserted.
- Sew the double ribbons together along the edges from the wrong sides and turn them out through the hole left. It is folded and stitched.
- Fix the ties to the apron.
- A pocket or pockets are sewn at the bottom for a cell phone or small items.
Instead of ties, they use old belts or leatherette belts that have lost their original appearance. But with a tight belt, working “bent over” in the garden will probably not be very comfortable.
Mom is calm, the child is happy...
So, what exactly is a children’s apron for creativity? How is it different from a regular apron, and what is its purpose? This accessory is designed to serve as a reliable barrier between the child’s clothes and the art materials with which he works. Aprons vary in structure:
- apron with bib;
- apron with cross straps;
- cape
The main feature of a product intended for working with paints, clay or plasticine is the material it is made from. In specialized stores, sellers offer various waterproof children's aprons for creativity made from raincoat fabric or from rubberized or oilcloth fabric. But it is not at all necessary to buy it, especially since the price for one such product is quite impressive. An apron for creativity with sleeves (for children) and Velcro fastening on the back will cost about 600 rubles, simpler models on average cost 250-350 rubles.
For my husband's garage
Men love to tinker with their car in the garage or do some carpentry work at home. Therefore, clothes after garage training are often very dirty.
You can partially solve the problem if you sew protective equipment for your husband in the form of an apron with your own hands. For work, take a dense, coarser fabric.
Cut out either a whole canvas or a cut of two squares. The height is approximately 100-107, and the width is 100-109 centimeters. The straps are sewn. Cover the edges with bias tape.
They sew many pockets at the bottom of the hem so that small tools can be stored in them: screwdrivers, tape measures, etc. My husband will really like it: everything will be at hand in an apron.
For super kids
Be that as it may, this is a necessary acquisition that will be useful for a mother for homework with her child, and it is imperative to prepare it for a kindergarten or school. That’s why we’ll tell you how to make a children’s apron for creativity with your own hands. Let's start by discussing the fabric from which it is best to sew it.
First of all, it must be moisture-repellent. A child, especially when he is passionate about his activity, has no time to think about such trifles as splashes of water or greasy and corrosive stains from plasticine that safely settle on clothes. It is very difficult to remove such flaws. Therefore, it is better to simply protect yourself from them with an apron. To sew it, you can choose thick cotton fabric, but it is better to replace it with something more practical. It could be:
- raincoat fabric, from which the tops of jackets are sewn;
- material intended for sewing workwear;
- camouflage fabric (perfect for boys);
- oilcloth on a cotton basis.
For those who have experience in tailoring, it will not be difficult to make a two-layer product, in which the front side can have any material you like, and a “waterproof fabric” can be used on the back side. Thus, the end result is something like a huge bib.
Japanese for homework
An apron in the Japanese style of a sundress looks very beautiful and looks like an element of clothing. For work, take any suitable fabric - 1.5 - 2 meters.
Sew this way:
- They are trimmed with bias tape or overcast, or folded over a rectangular piece of fabric. The size should be such that when worn, the apron reaches the knees (take measurements in advance). And the fabric wrapped almost completely around the waist.
- Two shoulder straps are sewn from the same fabric. They are sewn on the front, like a sundress, and on the back diagonally, sweeping towards the edges.
In essence, it turns out to be a sundress, but not sewn at the back. It is convenient to work in such aprons. They are long and protect clothing well. In addition, they are also very stylish.
If desired, a long horizontal pocket, single or with compartments, is sewn on the front.
Deciding on the model
Of course, you want to sew an unusual apron for the kitchen to please your child. However, the complexity of the chosen style should be related to your sewing skills. There are so-called “basic” models that can be taken as a basis, and then modified and decorated at will:
- An apron-sarafan (a bib is sewn to the wide “skirt”, the harnesses cross on the back) – has a very feminine and expressive silhouette that girls will like.
- The classic straight model with or without a bib is sewn from one piece of fabric. Ties and harnesses can be made of contrasting fabric. This option is easy to make, suitable for boys and girls, and is often decorated with convenient patch pockets.
- The diamond-shaped apron is very popular - sewing it is as easy as shelling pears, and it looks really original.
- An apron without a bib is an ideal option for inexperienced needlewomen. However, it will not provide sufficient protection to clothing.
- Model “Marilyn” - a low-cut bib-bodice is sewn to the lush hem. Exclusively feminine style.
- A long, frilly chef's apron with large side pockets and a wide bib is easy to cut and sew as it is made from a whole linen. But my son will be delighted.
For the first time, it is better to take one-piece children's aprons, in which you do not need to sew the hem to the bib. Of course, you can play up any basic style at your discretion: add decorations, shorten or lengthen the hem, change its shape, combine different types of fabric. The final option will depend only on your imagination and skill level.
More ideas
Very original aprons are made from ordinary women's large square scarves. They are arranged in a diamond shape, and the top corner is cut off. They are trimmed with bias tape of a suitable color and the strap and ties are made from it.
Now there are a lot of interesting models of this simple, but necessary in everyday use, item of clothing on sale. But if at home you have everything you need for your own tailoring, then why not? Such things are always closer to the body and heart than store-bought ones.
Interesting models
Patchwork apron
An unusual and bright apron is made from multi-colored scraps of fabric. You just need them to match each other in color and be approximately the same thickness.
The flaps are sewn into strips, which are then combined into continuous fabrics - until there are only two of them left. These blanks need to be steamed and sewn to each other, and then the ties must be attached.
From a kitchen towel
Such a children's apron will turn out to be very practical, especially if the towel is made of Teflon-impregnated cotton. Here the work is minimal: you just need to assemble the panel onto a belt-tie of some bright color.
Denim apron
A stylish thing that both kids and teenagers will love. It’s not a shame to give such a fashionable handmade item for the kitchen as a gift, and it’s easy to make in just an hour. To the cut-out front of a denim skirt or pants (with all the rivets and pockets), just sew a bright cotton frill and ties.
Shirt apron
It's easy to repurpose an old man's shirt and turn it into an apron for the kitchen. We cut off the sleeves and back of the shirt, trim the seams with a hem, sew on a belt and decorate - the wonderful apron is ready. If your dad is big, you can take your old blouse and sew an apron like this for your daughter.
By spending just a few hours in the evening, you will create a wonderful kitchen outfit for your child, which will teach him to be neat and hardworking. And, who knows, maybe you will be inspired to sew not only an apron for children, but also for women, and even men. Then cooking dinner in “family” aprons will turn into a family tradition!
Materials and tools
The main purpose of an apron is to protect clothes from contamination. It is quite natural that the product must withstand regular washing, so it is important to pay attention to the wear resistance of the fabric chosen for sewing. Textiles that are ideal for the kitchen should have:
- thick and durable warp threads;
- tight weave;
- resistance to aggressive detergent components.
Teflon fabrics ideally meet all these requirements. They do not get wet, prevent the absorption of stains, are easy to wash, and retain their original appearance for a long time. Their only drawback is their high cost.
Cotton is a universal and inexpensive material for sewing aprons. Its varieties:
- calico;
- waffle fabric;
- chintz;
- satin
A small percentage of synthetics may be added. Products with this composition will retain their strength longer and will not shrink when washed. Cotton aprons are convenient to use every day.
Linen is often used to make aprons. This is a natural fabric that shrinks greatly when washed. It easily absorbs dirt. Stains are difficult to remove and the product requires careful smoothing. At the same time, it keeps its shape well, so a linen apron rather serves as a decoration for the hostess and is indispensable for welcoming guests.
Another popular fabric for sewing aprons is denim. Products made from it are durable, beautiful, and non-staining. Moreover, it is not necessary to buy a new piece of material; you can save money and use old jeans.
There are no restrictions in choosing a color. But some nuances should be taken into account:
- Bright and variegated colors are preferred - stains are more noticeable on plain fabrics.
- Black color is considered the most non-staining, but it is not advisable to use it in its pure form. The finished product may turn out too dark, so it is worth using contrasting trim, inserts of a different color, prints and appliqué.
- Despite the fact that white color looks fresh and elegant, it is better to use it exclusively for decoration. A snow-white apron will become very dirty and will have to be washed regularly, so the fabric must be especially durable.
To sew an apron yourself, you will need a pattern, fabric, thread, scissors, measuring tape, safety pins, chalk, and a sewing machine.
Cotton Calico Waffle fabric
Chintz
Satin
Linen
Denim
Choosing fabric
It is best to choose natural fabrics such as linen or cotton; jeans are perfect.
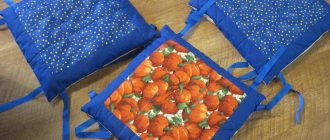
A nice kitchen towel is suitable for sewing a small apron.
If you want a children’s apron to be as practical and versatile as possible, that is, for both creativity and the kitchen, then you can sew it from laminated cotton. It looks like this (scroll the photo to the right):
Sewing a children's apron: master class, ideas and 70 photos for inspiration
Peel eggs, wash carrots and throw bay leaves into soup... so many important things kids have to do in the kitchen! How can a junior chef manage without a real apron? Or maybe an interesting activity is planned in kindergarten or school and you were asked to prepare an apron? In any case, the idea of sewing a children's apron with your own hands, rather than buying a ready-made one, is reasonable and justified. After all, it can be sewn in one evening, does not require any special skills and provides a lot of opportunities for creativity. And of course, beautiful children's aprons for the kitchen will help you introduce your baby to work and neatness.
This article will be useful for both mothers with sewing experience and beginning needlewomen. The main thing here is desire and imagination. Therefore, before starting work, let's get inspired by original ideas for aprons for boys and girls.
Dad can, dad can do anything
Of course, not every father will be able to sew an apron for his child, but he will be ready to give his old shirt to be “torn to pieces” by his mother. And it will make an excellent and very original apron. By the way, patterning a children's apron for creativity from a shirt may not be useful. The drawing is drawn directly on the fabric. The most troublesome part of this apron to process will be the collar. The needlewoman will have to carefully process the side that was sewn to the shirt itself.
If this is a model without a collar, as shown in the top photo, then you can use a standard pattern as a basis, for example this one:
Just to begin with, you will need to tear off the sleeves from the shirt (they will make excellent sleeves), the collar and separate its front part from the back. Next, the part with the buttons is folded in the middle, the pattern is placed on the fabric, you need to trace it, add allowances, after which the apron is cut out. Additional elements of the product (strings, eyelets and pockets) can be cut and sewn from the back of the shirt.
Decor options
The choice here is unlimited, but we should not forget that, first of all, the apron performs a practical function. Decorations should be securely attached, not interfere with work, and not make washing difficult. The most commonly used solutions are:
- combination of different types of fabrics;
- ruffles and flounces;
- lace;
- braid and ribbons;
- original shapes of pockets in the form of stars, flowers or hearts.
For men's aprons, the following are more suitable:
- all kinds of belts;
- buttons;
- metal fasteners.
Aprons for children have a wide variety of decor. They do not use them for their intended purpose, so the following will be relevant for decoration:
- rhinestones;
- beads;
- bright applications.
Aprons for girls are very elegant, decorated with bows, inserts made of various fabrics, with patterns made with decorative stitching or acrylic paints. Embroidery or applique is used on plain products. On the bibs of children's aprons you can find funny animals or characters from famous and favorite cartoons.
Decorated aprons require delicate care, so it is better to wash them by hand so as not to damage the decorations.
In fact, sewing an apron is quite simple. You can get ideas and patterns from numerous thematic resources. If you have them, in just a couple of hours you can create a wonderful gift for your mother or grandmother with your own hands, which will always come in handy around the house.