All lovers of country holidays dream of a stove in their cozy cottages. As you know, a brick stove is the oldest universal design for heating rooms. Its effectiveness and high performance have been proven for centuries.
It is not at all necessary to build a serious bulky structure. Sometimes a small-sized stove is enough, which you can build with your own hands. Models may differ in shape, size, type or design of the chimney, but in general, their construction will not take you much time and will not require serious stove-maker skills.
Master class on making three-dimensional decorations for fairy tales “Russian stove”
Vera Aksenkova
Master class on making three-dimensional decorations for fairy tales “Russian oven”
Dear colleagues, I would like to offer you a master class on making a three-dimensional decoration “ Russian stove ”. We use it at matinees, open classes, in theatrical fairy tales , as well as to introduce children to ancient life
I just want to remember the words of the poet Yulia Kalyakina
Russian Stove , Russian Stove !
There is no warmer place in a good house!
Hands of tireless and generous creation -
Thanks to the great ancestors!
We started work by selecting boxes of different sizes.
We glued them together, covered them with white paper, and made slits. When the stove was dry, we covered the base with white water-based paint. Made pencil sketches of the main patterns.
The stove itself was painted with gouache paints . Firewood made from paper can be placed in the bottom hole.
Master class on three-dimensional applique for Easter “Here I come!”
Hello, dear friends and guests of my page! I offer a children's master class “Here I come!” For work we will need: .
Master class on three-dimensional applique “Basket with tulips” Hello, dear guests of my page! For me, a tulip flower is the beginning of spring and women's holiday. I really love seeing them. Master class on three-dimensional applique “Cheerful Clown” Hello, dear friends and guests of my page! I would like to offer a children's master class “Cheerful Clown”. Ha ha ha! Here I am! Clap. Master class on making decorations for graduation. The Royal Castle. Master class on making decorations for prom. The Royal Castle. According to the script, we planned characters from the fairy tale about the Bremenskys. Master class on making a three-dimensional number “Unit” Not long ago I showed how to make a tutu skirt with your own hands, now I want to tell you how to make a three-dimensional number. I did one. Master class on making a three-dimensional postcard for mothers on March 8 IMG]/upload/blogs/detsad-420847-1457051251.jpg[/IMG]The idea of creating such a postcard is not new. I offered the children several options to choose from. Master class on three-dimensional applique “Apple Tree Branch” Let’s take red cardboard of A4 size. Glue an apple tree branch from thin brown cardboard onto it. Let's prepare mugs of different sizes for... Master class of three-dimensional postcard “Peep a peek at summer” So much greenery all around! What is this? This SUMMER is finally rushing into our house. Summer is the best time. The cold weather has ended and the most beautiful things have appeared. Source
At the behest of Emelya, a fairy tale with pictures
there was an old man. He had three sons: two smart, the third - the fool Emelya. Those brothers work, but Emelya lies on the stove all day, doesn’t want to know anything.
Once the brothers went to the market, and the women, daughters-in-law, let’s send him: - Go, Emelya, for water. And he told them from the stove: - Reluctance... - Go, Emelya, otherwise the brothers will return from the market and they won’t bring you gifts. - Well, okay. Emelya got off the stove, put on his shoes, got dressed, took buckets and an ax and went to the river. He cut through the ice, scooped up buckets and set them down, and he looked into the hole. And Emelya saw a pike in the ice hole.
He contrived and grabbed the pike in his hand: “This will be a sweet fish!” Suddenly the pike says to him in a human voice: “Emelya, let me go into the water, I will be of use to you.” And Emelya laughs: “What will you be of use to me for?” No, I’ll take you home and tell my daughters-in-law to cook your fish soup. The ear will be sweet. The pike begged again: - Emelya, Emelya, let me go into the water, I will do whatever you want. - Okay, just show me first that you are not deceiving me, then I will let you go. The pike asks him: - Emelya, Emelya , tell me - what do you want now? - I want the buckets to go home on their own and the water wouldn’t spill... The pike says to him: - Remember my words: when you want something, just say: By the pike’s command, By my desire. And Emelya says :- At the behest of the pike, At my will, go home yourself, buckets...
He just said - the buckets themselves and went up the hill. Emelya let the pike into the hole, and he went to get the buckets.
The buckets are walking through the village, the people are amazed, and Emelya follows behind, chuckling... The buckets went into the hut and stood on the bench, and Emelya climbed onto the stove. How much time has passed, you never know - the daughters-in-law say to him: - Emelya, why are you lying?
I should go and chop some wood. - Reluctant... - If you don’t chop wood, your brothers will come back from the market and they won’t bring you gifts. You don’t feel like getting off the stove. He remembered about the pike and slowly said: “According to the pike’s command, according to my desire, go, get an ax, chop some firewood, and for the firewood, go into the hut yourself and put it in the oven... The ax jumped out from under the bench - and into the yard, and give us the firewood.” chop, and the wood itself goes into the hut and climbs into the stove. How much or how much time has passed - the daughters-in-law again say: “Emelya, we have no more wood.” Go to the forest, chop it. And he said to them from the stove: - What are you doing? - What are we doing?.. Is it our business to go to the forest for firewood? - I don’t want to... - Well, there won’t be any gifts for you. There’s nothing to do. Emelya got down from the stove, put on his shoes, and got dressed. He took a rope and an ax, went out into the yard and sat in the sleigh: “Women, open the gates!” The daughters-in-law said to him: “Why, you fool, got into the sleigh and didn’t harness the horse?” Emelya says quietly: “At the behest of the pike, at my will, go, sleigh, into the forest...
The sleigh drove through the gates on its own, but so quickly that it was impossible to catch up with a horse. But we had to go to the forest through the city, and here it crushed and crushed a lot of people. The people shout “Hold him! Catch him! And he, you know, is driving the sleigh.
I arrived in the forest: - At the behest of the pike, At my request - an axe, chop some dry wood, and you, woodworkers, fall into the sleigh yourself, tie yourself down... The ax began to chop, chop dry trees, and the firewood themselves fell into the sleigh and tied up with a rope. Then Emelya ordered an ax to cut out a club for himself - one that could be lifted by force. He sat down on the cart: - At the behest of the pike, According to my desire, go, sleigh, home... The sleigh rushed home. Again Emelya drives through the city where he crushed and crushed a lot of people just now, and there they are already waiting for him. They grabbed Emelya and dragged him off the cart, scolding and beating him. He saw that things were bad, and little by little: “At the behest of the pike, At my will, come on, club, break off their sides... The club jumped out - and let’s hit.” The people rushed away, and Emelya came home and climbed onto the stove. Whether for a long time or for a short time, the king heard about Emelya’s tricks and sends an officer after him: to find him and bring him to the palace. The officer arrives in that village, enters the hut where Emelya is lives and asks: “Are you a fool, Emelya?” And he from the stove: “What do you need?” “Get dressed quickly, I’ll take you to the Tsar.” “But I don’t want to... The officer got angry and hit him on the cheek. And Emelya says quietly: - At the behest of the pike, At my will - a club, break off his sides...
The club jumped out - and let’s beat the officer, he forcibly carried off his legs. The Tsar was surprised that his officer could not cope with Emelya, and sends his greatest nobleman: - Bring the fool Emelya to my palace, otherwise I’ll take his head off his shoulders. I bought the largest one. a nobleman of raisins, prunes, gingerbread, came to that village, entered that hut and began asking his daughters-in-law what Emelya loved. “Our Emelya loves when they ask him kindly and promise him a red caftan, then he will do whatever you ask.” The greatest nobleman gave Emelya raisins, prunes, gingerbread and said: “Emelya, Emelya, why are you lying on the stove?”
Let's go to the Tsar. - I'm warm here too... - Emelya, Emelya, the Tsar will give you good food and water - please, let's go. - But I don't want to... - Emelya, Emelya, the Tsar will give you a red caftan, a hat and boots. Fairy tales with pictures
+170
Master class “Russian stove made from cardboard boxes”
Tatyana Pikalova
Master class “Russian stove made from cardboard boxes”
to form in children ideas about the Russian hut and the traditions of the Russian people
— introduce children to the interior decoration of a Russian hut ;
- to cultivate interest and respect for the traditions and customs of the Russian people , the origins of Russian culture ;
In the old days, in the center of the hut there was a Russian stove , in which they not only cooked, but also slept on it. Popular wisdom says: “The hut is not red in its corners, but red in its pies.”
. All this equipment near the stove was called the woman's corner. Here was everything she needed to cook dinner and feed her pets.
This is the Russian stove I made for the “ Russian Izba ”
from cardboard boxes .
Cutting out the furnace (firebox)
and damper.
Cover with white wallpaper.
We design: we draw a stove, bricks on a pipe, fire, firewood, stairs, doors (large and small)
.
"For lovely ladies"!
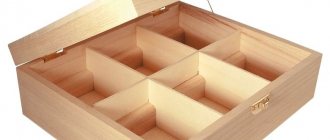
Boxes made of cardboard boxes using decoupage technique Good day everyone! I bring to your attention the production of boxes that will be very useful for storing our ladies' accessories. Household appliances made from cardboard boxes for role-playing games for preschoolers Thanks to gender education of preschool children, the successful formation of the child as an individual depends. Gender education of children. Decorative fireplace made of cardboard boxes. Master class Hello, dear colleagues, Happy New Year 2022! Happiness, health and all worldly blessings to you in the New Year! And I want to share. Photo report on the excursion to the library “The stove feeds, the stove warms, the stove is a dear mother” Dear colleagues! I have already dedicated several posts to the Day of the Russian Stove. It turns out that the entertainment “Visiting Alyonushka” was not the final one. Christmas tree toy “Russian stove”. Master class Emelya, Baba Yaga, Ilya Muromets, Masha and Vitya... What unites these fairy-tale characters? Of course, the stove! Emelya used it as original. Master class on making a model “Russian stove” My idea to build a model of the stove was necessary to answer the question: what was used to cook food in the old days? It is important to maintain the original appearance. Master class “Russian stove”. Making a Russian stove from scrap material Let's plunge into the still so recent world of the Russian stove. This is what the whole world of our grandfathers and grandmothers revolved around - it will feed and dry. Source
Required tools and materials
To build a small stove you need:
- 60 pcs. red stove brick
- 37 pcs. fireclay bricks
- 20 liters of clay solution
- one vent door
- one grate
- one firebox door
- one cast iron plate
- one valve.
The tools you need to prepare are:
- trowel
- pick hammer
- level
- plumb line
- roulette
Master class “Making a Russian folk stove from boxes” for a theater corner
Yulia Chuvardina
Master class “Making a Russian folk stove from boxes” for a theater corner
(making an attribute for a corner of the theater»)
homemade materials and aids . Children also very often and with great pleasure get involved in the work and help me. I would like to bring to your attention a simple way of making an attribute for the corner of a theater-stove using simple cardboard boxes . This is an indispensable attribute when conducting entertainment and performing theatrical performances .
To make the stove, I needed boxes from collapsible chairs (Ikea)
First, the boxes need to be pressed tightly together and glued together using adhesive tape or PVA glue, and then cover the blank with sheets of white paper (you can also use wallpaper in light shades, or simply paint it with paint
Then, using paints, markers and pencils, outline the main elements of the stove and its decor, draw and color the stove
Wait until our stove dries out
I. You can use it!
Our stove is used not only by us, but also by our music workers for their events, and other teachers of our kindergarten as an attribute for decorating groups in preparation for classes.
Making a Russian folk rag doll “Bird of Joy” (replenishment of the collection). The Russian folk doll “Bird of Joy” took part in the “Invocation of Spring” ritual. It is believed that this doll turns. Master class for parents “Making the Russian folk doll “Ubozhenka” (photo report) Goal: Instilling interest and love for the Russian rag doll as a type of folk art. Objectives: 1. Introduce. Master class for older preschoolers. Making a “Tank” from waste material (boxes). February 23 is the birthday of the army, Defender of the Fatherland Day. We are grateful to those who served and are serving in the army, who defended our Motherland over the years. Master class “Making a house for a patriotic corner” To make a house you will need: 1. PVC panels 2. Glue gun (4 packs of tubes for the gun) 3. Self-adhesive paper (wood-like. Master class on making a calendar of a Russian folk doll-twist "Round dance of dolls" As I already told in my previous publications, in my group there is a mini-museum of the "Russian folk spinning doll". Exhibits. Master class on making a scarf theater based on the Russian folk tale "Turnip" Autumn, autumn. In guests are welcome! Autumn, autumn, Stay for eight weeks: With abundant grain, With tall sheaves, With leaf fall and rain, With migratory rain. Master class on making the Russian folk doll "Domovushka" According to the Slavic calendar, the holiday of Pochinki is celebrated on February 16. Following the saying " Prepare a sleigh in the summer and a cart in the winter," men immediately after. Master class "Theater screen for a musical and theatrical corner" Good afternoon, beloved MAAM! So I decided to share my work on replenishing the group's developmental environment. The theater screen is an excellent aid. Photo report on the educational and play program “With the stove, at the stove and around the stove” Goal: to introduce children to folk traditions and culture, to continue acquaintance of children with objects of Russian life, with the Russian stove. Integration.
A fairy tale for theatrical activities “Box of Matches” based on the Russian folk tale “Three Bears” (middle group) Characters: Presenter (adult, girl Sasha, papa bear, mama bear, little bear cub, moose, jackdaws, foxes, eagles, pigeons, .
Source
DIY children's kitchen
By the age of two, my daughter Mashenka developed an interest in kitchen chores!
And on my second birthday, it was decided to buy a children's kitchen. After going shopping, we compared prices and quality, but there was nothing comforting. I didn't like even the most expensive kitchens. While my husband was at work, I decided that we would do the kitchen ourselves. I drew a sketch and estimated the dimensions. I met my husband from work on the street with a child and a notebook in his hands, ready to go to the hardware store. We tried to buy as little as possible in order to use as many unnecessary things as possible at home - it’s more interesting that way. So, we took a bedside table as a basis (it had been there for a long time and was no longer needed).
The result is glass - a ceramic panel with touch buttons.
A piece of plywood was attached under the tabletop, on which a block with batteries was placed. A hole was drilled in this plywood into which a light bulb was inserted in the oven. A block with batteries for the oven was also placed there.
The inside of the oven was covered with self-adhesive tape and guides were made for the baking tray. The baking tray became a plastic tray. On the panel: oven power button (turns on the light) Temperature selection (front wheels from an old car, decorated with aluminum tape.) Timer (rear wheels with a spring mechanism; when you start it, it comes back. It’s as if time has passed;
They hung the door on the hinges (they cut a hole in the chipboard and covered it with the same film from the box with the doll), attached a magnet to keep the door closed, and a handle.
My husband took over the washing machine. The drum is made of a plastic colander, the base is made of a microwave lid. The motor is from an old broken down radio controlled car.
Source
Master class: crafts from boxes “Russian stove”
Diana Medvedeva
Master class: crafts from boxes “Russian stove”
Master class “ Russian stove ”. The children and I decided to make pies from salt dough, and pies are baked in an oven, and to make the activity even more interesting, I made a stove .
To begin with, I found a picture on the Internet of a suitable stove , then took a TV box and cut out a hole.
box is not where the pipe should be . box (the future stove ) in two layers.
unnecessary light wallpaper using PVA glue.
And inside, where I cut out a hole, I also covered it with wallpaper and drew a flame. I drew from a children's book.
I drew bricks on a separate piece of cardboard and glued them onto PVA over the flame.
Then I started drawing individual elements.
Of course, all my work is checked by my main controller.
The activity turned out to be a success; the children played with the stove .
.And the sun and clouds are from the ceiling tiles.
"Miracle stove" Kindergarten decoration What is summer? This is a lot of light, This is a field, this is a forest, These are thousands of wonders. There are many miracles, and one of these miracles appeared on the territory. Christmas tree toy “Russian stove”. Master class Emelya, Baba Yaga, Ilya Muromets, Masha and Vitya... What unites these fairy-tale characters? Of course, the stove! Emelya used it as original.
Summary of a lesson on familiarization with the life and culture of the Kuban Cossacks “The Russian stove is the nurse for the whole house” Summary of a lesson in the preparatory group of MDOU DSKV 31, Yeisk, Yeisk district. Educator: Kovalenko T.Z. Russian stove for the whole house.
Master class “Design of the mini-museum “Russian Izba” Hello, friends and colleagues! You have already become acquainted with my events at the Russian Izba mini-museum, and now I want to introduce you to. Master class on making a model “Russian Izba” To familiarize children with Russian life, how and where Russian people lived many years ago, I decided to make a model. I took it to make it. Master class “Russian folk doll “Village Angel” MASTER CLASS “RUSSIAN FOLK DOLL “VILLAGE ANGEL” Elena Viktorovna Melnikova, e-mail ( [email protected] ) additional teacher. Master Class. Russian rag doll-amulet “Lovebirds” In our group there is a folk art corner in which kitchen utensils, napkins and towels embroidered with satin stitch are placed, wonderful. Hairdresser and stove for role-playing games on the site. Hairdresser and stove for role-playing games on the site. I took two large egg boxes and glued them together. Colored garbage bags.
Educational lesson in the preparatory school group “How the stove appeared” Topic: “How the stove appeared” Purpose: to introduce children to the origin of the Russian stove; about its use by humans; cultivate love for yours.
Source
The process of constructing a small-sized furnace
The small-sized oven occupies only 0.4 square meters.
It is laid out from bricks placed on edge or flat. If you know the basic rules for building a stove, then you won’t even need a diagram or preliminary calculations to build it. Due to the relatively light weight of the mini-oven, it does not require a foundation, but in this case a thick, durable board, well secured to the joists, should be used for the floor.
Finishing set
The design of a children's kitchen is carried out at the stage when the base is already ready, but “engineering” parts have not yet been attached to it - burners, mixer, buttons, handles, etc. There are several finishing methods, for example:
- self-adhesive PVC film;
- remnants of wallpaper (preferably washable);
- acrylic paint;
- decorative stickers;
- decoupage
You can involve a child in this process - let the future housewife or owner choose the color, texture, and decorations for the play area. Interesting ideas and harmonious combinations of shades are often found in “store” models that are available in online catalogs.
dekupazh_detskoy_kuhni.jpg
Preparatory work
The first thing the work begins is choosing a location. The distance from the outer walls of the heating device to the wooden wall must be at least 25 cm, the walls must be insulated with non-combustible material for protection. For heating, the stove is placed so that it opens into two rooms at once, for example, into the kitchen for heating and cooking, and with the side part into the room for heat transfer
When working with your own hands, it is important to take into account their location; the rooms must be adjacent, and their ceilings must be protected with fireproof material.
Next, you need to lay the foundation; it must be strong and reliable; it is best to lay it at the same time as the foundation of the house. It is necessary to supplement the housing project with a heating device
Since when working with your own hands it is important to take fire safety measures into account, ignoring them is unacceptable
Before starting work, it is better to make sure that you have all the necessary tools, this will avoid some mistakes and save time. For masonry you must have:
- trowel for applying the solution;
- hammer-pick for splitting and trimming bricks;
- level and plumb line to check the evenness of the masonry and the evenness of corners and walls;
- an order that will allow maintaining the verticality of the masonry;
- rule for the levelness of the foundation.
You should also stock up on materials in advance. In order to choose it and not make a mistake with the dimensions, you need to correctly complete the drawings and diagrams. The drawing must be made from different angles of the unit and in cross-section, indicating the exact dimensions and numbering of the rows. They are written side by side and duplicated with chalk during construction, so as not to get confused when doing the work yourself.
Required material:
- fireclay and refractory bricks for fireboxes;
- clay and sand for mortar, or ready-made refractory brick mixture;
- wire for fastening;
- grate;
- valve;
- asbestos cord;
- doors.
Stove accessories for the Russian Izba mini museum
It’s easy to make your own stove accessories for the mini museum of folk dolls and folk life, Russian Izba. Let's make a stove shovel and grip.
Let's take wooden skewers. They can be found in any supermarket. We file it with a knife and break it to the desired length. For the size of our stove, this is 10-11 cm. We split the ends of the skewers with a knife and glue a grip and a shovel cut out of cardboard into the split.
Let's paint the grip and the bread shovel. And the stove accessories are ready.
The stove for the mini museum of folk dolls and folk life Russian Izba can be supplemented with rugs or a patchwork blanket. Dishes – jars and pots – would also be appropriate here. We will put firewood in the oven.
The stove can be used independently or placed in the composition of the Russian Izba mini museum.
“At the behest of the pike, and at my request, bake, go straight to the king’s palace!” - Emelya ordered the stove. This is such a fabulous stove made from matches. To make the pike comfortable, make a bucket for it.
To make crafts from matches you will need:
If you are gluing a symmetrical panel of matches of different lengths, as in our case, start from the middle. First, glue long matches onto the paper strip, and then stick regular ones, placing them alternately to the right and left of the middle ones.
1. Cut printer paper into strips for gluing panels with a straight edge. Cut two strips for gluing panels with a comb edge.
2. Sort 150 matches - 144 regular and 6 long - and strip their heads.
3. Glue three panels with a straight edge: two of 30 matches each and one of 19 matches. These are the walls of the stove.
4. Glue the fourth wall using long and regular matches, placing the long matches in the middle of the panel. The top of the long matches will serve as the base of the pipe.
5. Glue another panel with a straight edge from 25 matches and three panels with a straight edge from four matches each.
6. Place the panels under the press.
7. Using matches with colored stove heads, glue the panel to the edge with a comb. Glue the same panel together using bucket matches. Place the panels under the press.
8. Glue an array of two layers with two matches in each. Place the array under the press. It is more convenient to fix such a small array with paper clips or clothespins.
9. Take a panel of matchsticks with colored stove heads and cut it in half vertically. Place the panels under a press to dry completely.
10. Also cut the panel for the bucket vertically on one side, departing approximately 10 mm from the heads.
11. From a panel with a smooth edge of 25 matches, cut a strip vertically slightly wider than the width of 6 matches.
12. Take a paper strip slightly shorter than the width of the resulting panel and 10-12 mm wide. Bend the panel with the top side out and glue the cylinder for the bucket.
13. Place the cylinder onto the drying bucket mold.
14. Cut the array into four equal parts. Dry the pieces of wood under pressure.
15. Take the bar from the blinds and cut two identical pieces from it 25-30 mm longer than the long wall of the stove.
16. On one side, cut the pieces into a triangle and bend these ends up.
Attaching the pipe and top panel
Match stove. Assembly and design.
1. Glue panels of 4 matches end-to-end (method 2) to the base of the pipe. Glue one match with the heads stripped into the gaps formed.
2. Glue the walls of the stove using the same method.
3. Trim along the upper and lower edges of the walls, using long matches for long ones, and regular matches for short ones.
4. Place panels of matches with colored heads with the bottom side facing you so that the heads face in different directions. Place a strip of 25 matches in the middle, also with the bottom side facing you. Glue the top of the stove end to end (method 1).
5. Glue the top of the stove to the walls.
6. Under the top along the edge of the walls, perform the binding as at the bottom of the walls.
7. Attach pieces of solid wood to the bottom of the walls, and glue runners from the slats from the blinds to them.
8. Cut out several strips of corrugated cardboard, making teeth on them on one side. Glue strips to decorate the top of the stove. Also cut and glue bricks on the walls of the stove and two strips for the vent. Make cuts on one strip and bend it into an arch shape.
9. Glue the bricks and the stove mouth to the walls.
10. Make smoke out of paper and glue it to the inside of the pipe.
When bending the panel and placing the cylinder on the mold, gently press down the surface, giving the cylinder the correct shape.
Crown and pike pattern
If the smoke paper is too thin, coat the smoke piece with glue, shape it, and let the glue dry.
A bucket of matches. Assembly and design.
1. Remove the cylinder from the mold and place it on a sheet of paper.
2. Trace the outline of the base of the cylinder from the inside.
3. From the remnants of a panel of 25 matches, cut a circle for the bottom of the bucket.
4. Glue the bottom to the inner surface at the bottom of the cylinder.
5. Cut out the pike and crown from paper in matching colors using the included pattern.
6. Glue the pike together and place it in the bucket.
7. Bend the handle of the bucket from the wire and glue it in place using a heat gun.
8. Cut out strips of paper and glue them onto the surface of the bucket.
Crafts from matches “At the command of the pike” are ready.
Add a comment | Comments to the news “Crafts from matches. By magic. Master class" is already 0: Interesting on the web:
E-book “The best handicraft master classes.”
To receive the book, you just need to enter your EMAIL and NAME in the form below.
After that, click the “Get book” button.
We promise that your data is completely safe. You will find additional information in our Personal Data Storage Policy. "Masterclasses" © 2011-2017. All articles on the site are copyrighted, copying is strictly prohibited. In case of partial citation, a direct indexed link to the “Masterclasses” website is required.
If you liked our site, express your “thank you” by clicking on the buttons below:
Attention! It is forbidden to use expressions in the form of obscene and insulting. HTML tags and URLs are not allowed.
The nuances of drying a lined stove
The laid oven should dry well.
There are several nuances:
drying is necessary even before the construction of the chimney; You cannot fully heat the stove right away - there is a risk of loss of tightness and the appearance of streaks; drying should be natural for at least 10 days, with doors and valves open; The first times you need to heat it carefully - use little wood, open the smoke valves and close the fireboxes; For 1-1.5 weeks, the stove is heated every day, starting with 3-4 kg of firewood and increasing their amount daily by 1-1.5 kg; a full-fledged firebox is permitted when, after 2 hours from the start of the firebox, there is no condensation at all on the metal elements.
Functional elements
It is impossible to imagine a real kitchen without appliances. It’s quite easy to imitate it, because most of the necessary items can be found in any apartment. For this purpose the following will be useful:
Washing. The function of a sink can be successfully performed by a basin of any shape, a stainless steel bowl, a deep baking sheet, or a plastic tray.
Mixer. As a rule, old taps are used, but an elbow from a small-diameter pipe or a special toy set will also work.
Cooking surface. The burners can be made from appropriately sized items such as CDs, computer fan grilles, plastic lids, drainage strainers, or simply black cut out circles (like on an induction hob).
konforki.jpg
Oven. In fact, this is an opening bedside table with a window and a characteristic cross handle. The lighting and grill installed inside (for example, from a broken refrigerator or grill) will help bring it even closer to the real prototype.
Washing machine. Although this piece of furniture is not related to cooking, it is also sometimes installed in a play kitchen. The resemblance to a real machine is ensured by a round transparent window on a magnet with a glass salad bowl mounted inside. A colander without a handle, or a PVC jar with holes made, will work well as a drum. Buttons can be made from plastic covers, buttons, and the touch panel can either be taken from a broken device or drawn.
bolshaya_kuhnya_dlya_devochki.jpg
Foundation
The stove has impressive dimensions and weighs a lot, so it needs reliable support.
The work algorithm is as follows:
- Prepare the pit. Calculate the dimensions based on the stove base. On each side you need a margin of 15 cm. Go deep by 50-70 cm.
- Pour sand, pour water, compact it so that the thickness of the waterproofing becomes 15-20 cm. Pour more sand, pour water and level it.
- Lay out the roofing material in 2 layers.
- Install the formwork and cover it with film.
- Mix cement, sand and crushed stone 1:3:5. Use water to get a semi-liquid mixture.
- Pour cement mixed with gravel into the formwork, 20 cm high. Pierce this layer several times to let the air out, compact it.
- While the solution has not hardened, install the reinforcement. Height above concrete 5-7 cm.
- Fill another layer of 10-15 cm, when it sets, lay the reinforcing mesh.
- Fill the entire formwork with mortar and level it.
- Lay roofing felt in 1 layer.
If you are planning a small stove, then a guard base is allowed. Install it on the floor beams. Such a base is a frame made of timber or logs with 2 crowns. To strengthen the beams and stabilize the furnace, intermediate piles are driven into the center. Rubble is poured into the free space, with felt soaked in liquid clay on top. This base can support construction up to 700 kg. If the weight is greater, then a slab foundation is needed.
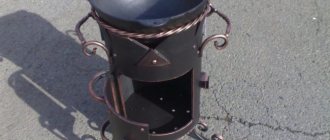
Fire-battery (TMF, Russia)
The Termofor company (after rebranding in 2022 - TMF) is a Novosibirsk manufacturer of stove equipment for home, garden and bathhouses. Positions itself as No. 1 in Russia. One of the company’s know-how is the development of the Fire-Battery steel stove. According to the manufacturer, when creating this long-burning model, all the shortcomings of existing designs were taken into account. Available in four modifications: the basic model without additional identifiers - with a cast iron burner, glass in the door; Light is the simplest model, without a hob and a viewing glass in the door. Both options may have an additional water heat exchanger for heating water, then the stove is designated respectively as Fire-battery B or Fire-battery Light B. The power of the equipment varies depending on the size of the housing and the number of sections of the slot convector, which can be 5, 7, 9 or 11 pieces.
The feature of the model is the fine tuning of the draft and a special lock in the ash pan, which prevents uncontrolled air leaks. You can enter the smoldering mode, in which the operation of the furnace from one load is extended to 8 hours. There is a jet to ensure complete combustion of fuel. The chimney vents either backwards or straight up. The model is durable, because it provides replaceable protection for the firebox - inclined intermediate steel sheets are installed in its lower part above the cast-iron grate.
PATTERNS OF DOLLS, TOYS
PATTERNS OF DOLLS, TOYS post pinned
DIY pillows. Sewing, patterns, MK
What is needed for such a potholder:
thick fabric; Show in full... filler; beads; threads; tools.
Cut out the details for the mouse and bow using the patterns. It requires two parts of material and one of filler.
Immediately make a bow and sew it to the front of the mouse. Decorate the muzzle with eyes, if desired, make antennae out of threads, and under them a nose made of a button or a larger bead.
Fold the layers of tack and join with a rough basting stitch. Prepare a loop.
Good evening everyone! We announced a competition for the New Year - a craft project based on Russian fairy tales. And my daughter and I created this Emelya on the stove.
We started our work with the stove. They made it out of cardboard. First a large square, then a smaller one, and a pipe in the same way. Partitions were placed inside for strength. Then they covered it with napkins and painted it with white acrylic paint. We made a hole for the saucepan.
The main character is Emelya. First, a frame was twisted from wire. They wrapped it in napkins and pasted it over it. Then, for plumpness, they covered it with padding polyester. The head was rolled into a ball of paper and covered with napkins for evenness. We made clothes for him. Hat, mittens and felt boots made of felt. Hair made of thread. We drew a nose, eyes, a mouth and now our Emelya is sitting on the stove.
Irina Mochalova
Stocking doll “Emelya”
Is the Russian folk tale important in our modern age, the age of computers and smartphones? Yes of course it is important! For a person’s life to take place, it is important that it takes place in childhood. And of course, the child receives everything good and right through a fairy tale. It is in fairy tales that we understand what good and evil are, we learn to recognize good and bad deeds, see our beautiful world, admire it, make it more beautiful and kinder.
Every person makes a fairy tale for himself. “Old, Old Tale” will take place in our Voronezh region
, which takes place every year.
And this year the guys and I decided to take part. After much debate, they decided to make the main character of the fairy tale “At the Pike’s Command”
-
Emelya . Doll ,
made with your own hands is a great idea for implementing a creative project. The project involved not only students from the senior group, but also their parents. I think our work will delight the guests of the festival “Old. Old fairy tale"
.
Event “Emelya, Princess Nesmeyana and Baba Yaga” in the senior group New Year 2022 “Emelya, Princess Nesmeyana and Baba Yaga” Senior group. Goal: Create a festive mood and evoke a sea of positive emotions.
Doll “Maslenitsa” March 18 to 24 - on the day of the spring equinox, the Slavs celebrate the great holiday of “Maslenitsa”. The second name of this holiday is “Komoyeditsa”. Photo report of the New Year's holiday “Emelya the Magician” in the senior group Zimushka-Winter enters the hall Children exit. Dance with tinsel. Children stand near the Christmas tree. They recite poems and sing the song “If only.
Summary of OD on traffic rules “Emelya in the city” MUNICIPAL BUDGETARY PRE-SCHOOL EDUCATIONAL INSTITUTION KINDERGARTEN No. 30 “CAMOMILE” CLASS OF OD in the middle group of kindergarten.
Maslenitsa doll Maslenitsa is the first call of Spring. This is a riotous celebration dedicated to seeing off, or more precisely, the expulsion of Winter and the welcome of the spring sun. Lifesaver Doll Every teacher wants to present new material in a way that will interest children. For this, various benefits are used as purchased. Photo report “Maslenitsa doll” Elena Viktorovna Postnova. Maslenitsa is a cheerful festival dedicated to seeing off Winter and welcoming the spring sun. Doll "Maslenitsa". Photo report about the New Year's party "Emelya on the Christmas tree" There was a party in my group dedicated to the New Year. The matinee began with a general dance to the melody “And one, two, three, how many good boys there are.” Scenario for the sports festival “The Tale of How Emelya and Marya, together with the boys, were preparing to become soldiers” “The Tale of how Emelya and Marya, together with the boys, were preparing to become soldiers...” for children of the middle group. The presenter is the FC instructor Emelya.
Source