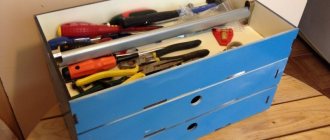
Toy cars are not necessarily an attribute of a boy’s nursery. Many girls play them as much as boys. If your little car enthusiast has already run out of ideas on how to play with cars, offer him one of the options that we have collected in this article. Or maybe not just one: all the ideas on how to play cars with a child can be combined perfectly.
DIY games: garage parking for cars
In addition to the fact that this is a great idea for a game, such parking will help solve the eternal problem with cars that constantly get under your feet. Making this game with your own cars couldn't be easier.
You will need a wooden box and a thick cardboard tube. You can use a cling film tube, cardboard paper towel rolls, etc.
Cut the cardboard tube into equal lengths along the width of the sides of the box, and glue them together to fill the box. You can use a sheet of cardboard as the “back wall” of the garage.
Sand the finished parking lot, paint if necessary and hang a sign.,
How to play cars with your child: a real track right in the nursery
Is your child bored of simply pushing cars around on the carpet? Make new games with your own cars with him: for example, this track. It looks like the real thing and can be placed right in the nursery on the floor.
Print out templates of intersections, turns and straight paths, connect them into a complex route, similar to the intersection of city highways, and you can organize races. You can download road templates here.
To make playing with cars more interesting with your child, complement the road with model houses from the designer. Or use cardboard boxes to create two-level driveways.
Another option for a track for playing with cars is “Eco-Track” stickers. This is a whole roll of “road” based on adhesive tape. The adhesive properties of such a road make it possible to fix it both on a flat floor and on furniture, but after removing the tape, no dirty marks remain. The track comes with road markings and road signs, so during this game with cars you can unobtrusively teach your child the rules of the road for a pedestrian in the city.
You can buy Eco-Track stickers here.
An idea on how to play cars with a child: a racing track for cars
On an inclined plane, the cars start together, but do not reach the finish line at the same time. The winner will be the most technically advanced car! Making this DIY toy car game couldn't be easier: all you need is a cardboard box and a little spatial thinking.
If a child, in addition to a passion for cars, loves Lego. Guides for cars, Start and Finish marks can be assembled from it. Playing with your own hands will be even more interesting.
Idea on how to play cars for boys: racing platform
This design looks more complicated than the previous ones, but is also simple to manufacture. And running cars down inclined chutes is unusual and fun. See for yourself.
How to play cars with a child: DIY games, video
You can make this DIY game from a couple of pizza boxes.
Last news:
Pregnancy and childbirth
From birth to one year
From 1 to 6 years
From 6 to 16 years
Family
useful links
or login using:
or login using:
THANK YOU FOR REGISTERING!
An activation letter should be sent to the specified e-mail within a minute. Just follow the link provided and enjoy unlimited communication, convenient services and a pleasant atmosphere.
RULES FOR WORKING WITH THE SITE
I give my consent to the processing and use by the web portal UAUA.info (hereinafter referred to as the “Web Portal”) of my personal data, namely: first name, last name, specified dates of birth, country and city of residence, email address, IP address, cookies, information about registration on websites – social Internet networks (hereinafter referred to as “Personal Data”). I also give my consent to the processing and use by the Web portal of my Personal data taken from the websites I specified - social Internet networks (if indicated). The Personal Data provided by me can be used by the Web Portal solely for the purpose of my registration and identification on the Web Portal, as well as for the purpose of my use of the Web Portal’s services. I confirm that from the moment of my registration on the Web portal, I was notified of the purpose of collecting my Personal data and the inclusion of my Personal data in the personal database of users of the Web portal, with the rights provided for in Art. 8 of the Law of Ukraine “On the Protection of Personal Data”, read. I confirm that if it is necessary to receive this notification in written (documentary) form, I will send a corresponding letter to the address indicating my postal address.
A letter has been sent to the specified e-mail. To change your password, simply follow the link provided.
Master class “Parking and track”
Yulia Fedoseeva
Master class “Parking and track”
WE HAVE A LOT OF CARS,
BUT THEY STAND IN THE CORNER.
I'LL BUILD THEM A PARKING PARKING PLACE
I WILL GIVE THEM A HOUSE!
DEAR COLLEAGUES!
I am glad to share with you our new find - a cardboard parking lot-auto-track.
Boys love to play with cars. I propose a great idea for playing cars: a two-tier parking lot and an auto-track on the last tier, this design is very convenient for storing vehicles for which there is always not enough space. All cars in one place. This teaches children order. Every day after playing with cars, children put them in their place. Everything is very simple, but incredibly interesting. The game layout can be used to develop fine motor skills, visual perception, and spatial orientation.
Children will be delighted with such a toy and can play for hours without getting bored. With parking - auto-track, games with cars become more varied and interesting.
All we need is time, desire, creativity, imagination and a good mood.
But, seriously, the materials and tools for the creative process of creating parking spaces are simple. So, we need:
- cardboard boxes - pallets;
- paper towel tubes;
-paint (water-dispersion acrylic);
Everything is ready, forward - to the ideal order in toys. You will need to work hard on parking; the work is painstaking and consists of several stages.
1ST STAGE.
To make the base of the game layout “PARKING-AUTOTRACK” you need to select a cardboard box, I found the ideal option for parking - a box - pallet (4 pcs.)
Let's start work by cutting off the height of the side walls of a cardboard box-pallet to the height I need.
Then I carefully seal the cut areas.
Now the base of one tier of our parking lot is ready, now I’ll make limiters on the descent and ascent that will prevent the car from falling or rolling out of the parking lot. I will also complete the base for the second tier.
I prepare paper towel rolls.
2nd STAGE.
Painting our finished bases and parking lot details
3rd STAGE.
I move on to the design, highlighting the markings in the parking lot.
4th STAGE.
I glue all the prepared and decorated parts together. And with this, the parking - auto - track made of cardboard for cars with your own hands can be considered complete. This is how it turned out:
Photo report "Children's master class "Autotrack". Master class “Gas station” Preliminary work: Conversations about professions using illustrations. Excursion to a gas station in the city. Reading fiction:. Master class “Butterfly” Master class “Butterfly”. Title: Master class “Butterfly”. Nomination: Kindergarten, methodological developments, Master classes. Author: Lushnikova. Master class “Mimosa” From napkins you can make an original mimosa flower, which will remind us of the wonderful time of year - spring. Having the minimum with you. Master class "Bird". Master class “Snowman” New Year is the most beloved and fun holiday. Children are especially happy and look forward to gifts. It's always nice to receive a gift given. Master class “Topiary” To make topiary we needed: - tulle (several colors are possible) - glue gun - toothpicks - base for topiary made of foam.
Simple garage made of cardboard
If this is your first time picking up scissors and cardboard, start with a simple parking lot. Moreover, in this case, in parallel with the child, you can make two stops at once. Your little son (or daughter, if she’s interested) will repeat your actions and as a result will receive self- made toy for storing cars. Please read the instructions before starting the creative process.
Find a suitable box : in this case, a pizza box would be an ideal option for the garage. Cut into two parts, one of which you give to your child. If desired, decorate the inside and outside of the parking lot with colored paper.
Make
a mark on the garage floor: it can be straight or oblique. To determine the width, place a large machine and, stepping back 1 cm from each edge, draw lines with a pencil. Measure the resulting distance and make appropriate markings throughout the garage using cardboard. Apply half the width of masking tape to the pencil lines and you have parking spaces. In the middle of each place you can make intermittent markings with black strokes. At this point, the DIY cardboard garage for cars can be considered complete. However, only if you are not going to teach your child the intricacies of traffic. In this option, it is necessary to decorate the parking field with signs, barriers and other road elements.
What will you need?
To make a toy plywood garage, you will need to stock up on certain materials and tools. The craftsman also needs to have drawings according to which the parts will be made. You should think in advance about the size of the product so that there is enough space in it to accommodate children's cars of all sizes and shapes.
So, you need to prepare the following tools and materials in advance.
Plywood. In this case, it is advisable to take a sheet 0.3 cm wide. This size will make the product durable, while working with such material is not so difficult.
You should also prepare a sheet of paper or whatman paper to make a drawing, take a pencil and a ruler. You can make a drawing for a toy plywood garage yourself or take ready-made models from the Internet. According to users, the PRO100 program will help create a drawing for a future garage.
Photo gallery
There are many options for creating a garage for cars. We invite you to look at photos of the most interesting crafts: maybe this is where your dream parking lot is located? If you would like to receive a master class on a specific garage, leave your wishes in the comments, and we will definitely review an interesting model.
To make a garage out of cardboard for cars with your own hands, you don’t need to be a genius: it’s enough to love your baby and learn creative lessons with interest with the whole family. Thank you for being with us!
Beautiful examples
Toy garages and parking lots made of plywood can have different designs and dimensions.
Such products help develop imagination. They can play the role of hangars for airplanes and helicopters, and serve as a place to park spaceships.
Models made from unpainted plywood look very interesting. Bright cars against the background of an unpainted garage will look more impressive, attracting attention. This color contrast will attract the child's attention. The kid will be happy to place the cars on the shelves.
If desired, you can paint the garage using acrylic paints. It's better to do this with your baby. The process will allow you to enjoy the work done and will make the model even more attractive in the child’s eyes.
To learn how to make a plywood garage for children's cars with your own hands, see the following video.
Source
Boys' dream: cardboard garage with overhead gates
Another addition to our collection of cardboard toys. This time I want to share with you the technology for making a garage for cars . It is quite simple to manufacture, but at the same time structurally and externally it is very similar to modern garages made of corrugated metal and equipped with lifting gates. Corrugated cardboard is simply ideal for solving this problem, and we will use its capabilities to the maximum. And at the same time, we’ll look at new tricks and techniques that will help implement the lifting gate mechanism.
If there is a little boy growing up in the family, a toy garage , frankly speaking, belongs to the category of “must have” (there must be a period =)). After all, every owner of a toy fleet faces the question of building a garage (or even more than one) sooner or later. In this case, the building must be of a suitable size and it is also desirable that it looks like a real garage, which is located on the street nearby. It is clear that if the needs and imagination of a young designer are still ahead of his own skills, this question is automatically forwarded to the parents :).
What to do in such cases? You can assemble a garage from a children's construction set, but in this case some wishes in terms of appearance and functionality will have to be neglected.
You can buy a ready-made one, but it is not a fact that you will be able to find the one you need, and besides, you will have to fork out money (in some cases, quite a lot).
Or you can make a toy garage with your own hands from ordinary packaging corrugated cardboard - a material for which almost nothing is impossible. And this method is the cheapest in terms of costs (if not free), it allows you to easily realize your wildest fantasies and perfectly helps develop handicraft skills in both children and their parents =).
Making a garage out of cardboard.
So, to create our corrugated cardboard craft you will need the following materials and tools:
- corrugated cardboard itself (three-layer, about 3 mm thick);
— white office paper (for printing templates);
- wooden skewer (for barbecue) and wooden toothpicks;
- a tool for creasing (I talked about which tool can be used for this operation with corrugated cardboard in the MK on making a safe from cardboard);
- ruler and pencil (or pen);
- “Moment” glue, glue stick and PVA glue.
In addition, we will need templates with which we will mark and cut out all the necessary parts of the garage. Therefore, immediately download a set of templates and development diagrams:
How to open a pdf file? Instructions.
1. Garage doors.
Let's start work with the most technically complex element - with overhead gates and the device for fastening them. In fact, there is nothing complicated here, just the rest of the elements are even simpler.
First of all, cut the wooden skewer so that you get 2 rods 13 cm long.
Then we will prepare a strip of craft paper about 10 cm wide or less (we will need only 2 cm wide, but for ease of use we take it with a margin). The length of the strip is arbitrary, taking into account the fact that it will be necessary to twist a roll approximately 9 mm thick.
We tightly wrap the kraft paper around one of the rods. In this case, we make the first 1-2 turns without glue, and then lubricate the entire strip with a glue stick.
You should get such a dense roll, from which, when the glue dries, you need to cut off 4 even washers 5 mm high (the rod must be removed before doing this).
Next is an interesting point: in order for the washers to become more rigid and the internal coils not to come out, we grease the washers with PVA glue on each side one by one (this is convenient to do with a toothpick). You can also coat the inside of the holes with glue, but so that the holes do not become clogged.
When the glue is completely dry, we will have excellent fasteners, hard and durable.
We transfer the printed and cut out templates G1, G2, G3, G4 and G5 onto corrugated cardboard. We cut out the corresponding parts and crease them along the fold lines (indicated by dashed lines on the templates). We make round holes in part G2 with an awl.
We will paste the gate itself (part G1) around the edges with kraft paper to make the ends look more presentable.
Now let’s glue parts G2 and G3 to the inside of the gate: for part G2, apply “Moment” glue to the protrusions that are inserted into the holes in part G1; for part G2, apply glue to one long and two short ends.
After the glue has set, insert wooden rods into the holes, as shown in the photo.
Since the decoration of the walls and gates of our toy garage will imitate corrugated metal, we will cut out another part using the G1 template and separate the top layer from it. With our hands we simply separate what comes off (with corrugated cardboard this can happen differently, depending on the brand and manufacturer), and remove what remains with a slightly moistened sponge.
Important! Do not overdo it with water, otherwise the corrugated layer will quickly get wet and the cardboard will become deformed.
Glue the resulting blank onto the front side of the gate.
We put parts G4 and G5 on the rods, as shown in the photo. Then we screw washers onto the ends of the rods. There is no need to glue them; they will stick well due to friction.
At this point, the gate block is completely ready, and all that remains is to attach it to the garage body.
2. Foundation and body of the garage. The final stage.
We installed the garage on the foundation. Firstly, this makes the garage more durable and holds its shape better. Secondly, we wanted our toy garage to have its own floor. And thirdly, it is also inspired by images from life :).
We will draw the foundation layout on corrugated cardboard using templates B1, B2, B3, B4, B5 and B6, arranging them according to the diagram given in the file. Then we will cut out the development and punch it through.
Let's glue the foundation together with "Moment".
In the same way, we will prepare the layout of the walls of the cardboard garage (templates W1, W2, W3, W4). We will cover the opening for the gate, as well as the gate itself, with kraft paper.
We install the garage body on the foundation.
. and glue the back wall. There is no need to glue the body to the foundation.
Now is the time to install the gate. To do this, place them in the opening and insert the protrusions of parts G4 and G5 into the slots on the front and side walls of the case, having previously lubricated the protrusions with glue.
All templates are sized fairly accurately and the gate should function normally. But still, in the process of marking and cutting out cardboard parts, small errors may occur. Therefore, I recommend that you first cut out all the details of the gate, the development of the foundation and the body and carry out a preliminary dry fitting of the gate (without gluing).
The next step is to cover the garage walls with corrugated cardboard without a top layer. To cut out blanks (or one blank for the entire perimeter), we use the same templates as for making the body development. In this case, it is desirable that the waves of the corrugated layer on the front wall of the garage coincide with the waves on the gate (on the wrong side of the corrugated cardboard the location of the waves is clearly visible).
We will cut out the roof using the template, punch it through and give it the desired shape. Since it must also be corrugated, we separate the top layer of cardboard. Then we glue the roof to the garage body from above, exactly in the center. Press it until the glue sets.
Let's check how the gate works. They rise and fall quite freely - that's what you need!
There are just a few final touches left:
- glue a corner to the top of the roof (it is made of ordinary cardboard for children's creativity, pasted on top (with double-sided tape) with craft paper;
— At the bottom of the gate we will attach a handle.
These elements are not required, but with them the work looks more complete.
We made the handle like this: we rolled a strip of craft paper into a tight roll, wrapping it around a toothpick. The ends were bent and pieces of toothpicks were inserted into the holes (for strength, they can be greased with PVA glue). Then the ends of the handle, coated with glue, were inserted into the holes made (not through) in the gate.
Well, the cardboard garage for cars is ready. But what is it like in action? See:
This garage is suitable for most models of toy cars. In addition, the volume of the building is taken with a reserve (so as not to be too small with fasteners for the gate), and even a couple of cars can fit inside.
In general, I like it just the way it is, but my husband (and he is the author of this cardboard toy) and his son decided to paint the garage so that everything would be “real.” We painted it together with gouache (Tanya, thanks for the recommendation ;)), and this is what happened:
Friends, last time I promised you a tutorial on making a children's shelf from corrugated cardboard. I have everything ready (templates, layout), but, as it turned out, I somewhat overestimated my cardboard supplies - there weren’t enough sheets of the required size to make an “Elephant” shelf on a 1:1 scale. Therefore, we are now resolving the issue with materials, and we will return to the rack later.
But even now we will have something to do. So keep your office knives ready and don’t throw away the corrugated cardboard, it will be very useful to you =). Don’t forget to subscribe to site updates to promptly learn about new interesting crafts made from corrugated cardboard.
And see you again in KARTONKINO!
It's nice that our idea of a cardboard garage was in demand. And it’s especially nice to see the results of your cardboard experiments.