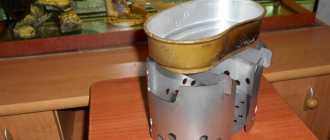
One of the main tools in the garage is a vice. They are a clamping device that holds various parts and workpieces for further processing. Almost every master has such a tool, but if not, then there is no need to rush to buy it. Any home craftsman can make a homemade vice with his own hands. Where to start and what a clamping tool can be made from is described in detail in the material.
Design of the tool and its main components
Before you start making a vice, you need to take a closer look at the structure of this tool. The vice consists of the following elements:
- Base - the supporting part with which the tool is fixed to the table, workbench or other surfaces
- Fixed jaw - connected to the base, and can be moved in different directions to change the angle of position of the entire tool
- Movable jaw - its movement is carried out by rotating the handle. The handle is connected to a screw, which engages with the nut of the movable jaw. The sponge moves in two directions, while ensuring the fixation of workpieces for subsequent processing
The cross-sectional design of the vice is shown in the photo below.
The types and operating principles of vices can be found in this material. The photo shows the design of a factory-made vice. If you have available tools, you can make a vice with your own hands at home. Moreover, there are many options for their manufacture, which we will look at in more detail.
Next, we will consider different options for making homemade vices from improvised materials. Each master can take into account the manufacturing features of the corresponding options, and based on the instructions, make his own tool.
This is interesting!
Making a vice with your own hands allows you not only to save on the purchase of an expensive tool, but also to get the device that is necessary to perform specific actions.
Required Tools
Before starting work, you should carefully consider all the nuances, especially when it comes time to draw up a drawing, because the project must take into account the specific design of yews. For example, it is advisable to provide a small anvil for processing various parts with a hammer, the ability to achieve minimal backlash of the lead screw, the option of removable plates on jaws, as well as a method of attachment to a workbench or other suitable table. You will also need professional tools.
And also devices can be assembled from a hydraulic device if, for example, the unit breaks down or is no longer in use. There are no parts made of plastic, plastic or wood in a bench vise, therefore all parts except the stops on the handle will be made of metal.
To make a small bench vice, you will need to prepare a drawing or sketch and tools in advance:
- electric drill;
- drills of different diameters;
- pencil or felt-tip pen;
- file;
- tap, wrench;
- a set of keys;
- angle grinder;
- ruler;
- welding machine.
Materials you will need:
- a metal sheet;
- corner, channel or other profile;
- a piece of pipe for a handle or a rod;
- blank for thrust screw;
- bolts, washers, nuts;
- dye.
The above list is approximate, because the equipment for making a vice depends on the model.
Instructions for making a bench vice from profile pipes
If you have profile pipes at your disposal, you can use them to make good homemade vices for fixing various parts and workpieces. To make a device from profile pipes you will need:
- Profiled pipe measuring 6x6 cm. The size of the pipe affects the dimensions of the future tool
- Nuts
- Coarse threaded stud
- Tube - the handle will be made from it
When carrying out the work, you will need tools such as a welding machine, angle grinder or grinder, as well as a drilling machine or drill. The process of making a homemade vice from profile pipes is as follows:
- The first step is to make a drawing, on the basis of which parts of the future tool will be cut out from profile pipes
- Initially, the base is cut out from the profile pipe according to preliminary dimensions. The longer the pipe being cut, the higher the distance between the jaws. The recommended length of the profile pipe is 15-20 cm. This pipe will act as the moving part of the tool
- Next, a thrust plate is made, which is connected to the movable jaw of the tool. To do this, you need to connect two nuts, the inner diameter of which must correspond to the size of the stud used. The two nuts are welded together and then welded back to the hole plate. These holes will be used to attach the plate to the workbench.
- At the next stage, it is necessary to cut off future jaws from the profile pipe, and using bolts, attach cheeks to them (plates for direct fixation of parts)
- As a result, you should get two parts that are identical in size - these are the jaws of the tool, which will eventually be used to fix various parts and workpieces
- Next we move on to making the base of the tool. To do this, you will need corners that can be cut from profiled pipes with a grinder. A base is made from the corners, through which the tool will be attached to a table or workbench. The corners also act as guides
- In the corners it is necessary to pre-drill two holes through which the tool will be fixed to the workbench
- Weld a section of profile pipe to the resulting base, placing it perpendicular to the profile. The resulting structure is a stationary sponge
- It is recommended to immediately remove and clean welding seams, otherwise these places will be subject to corrosion and will very quickly become weak points of the tool.
- Next, you should weld the second sponge to the profile pipe, which was cut at the first stage. The pipe together with the sponge will be the moving part of the tool
- In the lower part of the profile pipe, which will play the role of a moving part, a cutout should be made for half the length of the workpiece
- It is necessary to weld a plate with a hole pre-made in it to the back of the profile pipe. This hole is required to install the screw
- Now we proceed to install the pre-fabricated thrust plate, consisting of two nuts. This plate should be attached to a table or workbench by pre-drilling holes
- We drill holes to install the stationary part of the tool, and then secure it
- We begin to manufacture the screw, through which the moving part will be moved. To do this, weld a nut to the stud on one side, making an indentation of 5 cm
- We install the pin in place (in the hole in the moving part of the profile pipe), then screw in the nut and weld it. Don't forget to loosen the nut a little to ensure free movement of the screw
- Another nut is welded to the stud, positioning it perpendicularly. This nut is needed to secure the handle, so its internal diameter must be larger than the outer size of the pipe prepared for the handle
- To enhance the strength of the jaws, it is recommended to weld plates inside the profile, as shown in the photo above. After this, the tool is almost ready for assembly. All that remains is to first degrease its surfaces and paint all parts except the threaded parts
- Install a pipe into the hole in the nut, then put clamps on its ends to prevent the handle from falling out
- After this, the tool can be assembled and tested in action.
At this stage, the process of making a homemade vice with your own hands is completed, and all that remains is to show your creation to friends and family. Using a similar pattern, you can make a vice of any size - small, large or medium. For this purpose, appropriately sized profile pipes are used. Buying profile pipes and making the tool yourself is much cheaper than buying a factory vice.
This is interesting!
The cheeks for the tool can be bought ready-made or made independently from metal plates with a thickness of at least 6-8 mm. On one part of such plates, you need to use a grinder to make shallow grooves in the shape of a diamond.
Types and purpose of vices
When making any part or modifying it, its position must be firmly fixed. This is why a vice is needed.
The choice of characteristics and sizes is based on knowledge of what work will be carried out and with what tool.
The vice consists of such basic elements as:
- chassis screw;
- lever;
- fixed and movable sponge;
- base plate.
In addition to the listed parts, the cleats must be well fixed to the surface.
The vice can be fastened with a screw, permanent or with suction cups.
Vices are available for different types of work, namely:
- metalwork;
- carpentry;
- for the machine.
Now let’s take a closer look at how they differ?
Locksmith
This type of vice is attached to the table with bolts at the base. They are widespread compared to other species.
Carpentry
This type of bench vise can be made of both steel and wood.
They are fixed to the table from below, and also have guides, between which the lead screw is located.
The smooth jaws of the vice have a large surface area. Wooden or rubber pads are installed on them, this helps protect the sponges from damage that occurs during the processing of the material.
For the machine
They are used in the process of working with different machines. The vice has two oblong cutouts (grooves) at the base, designed for fixation to the working area of the machine (table).
They also perform the role of adjusting the position of the fixed material relative to the working area along the horizontal plane.
How to make a carpenter's vice yourself
A bench vice is used to work with metal parts and workpieces. If there is a need for processing wooden workpieces, then a bench vice is least suitable for such purposes, as they have some disadvantages. The parts being fixed may become deformed, so it is recommended to use a bench vice when working with woodworking materials. There is no need to buy them specifically for working with wood. For such cases, you can make a carpenter's vice with your own hands. Let's look at the manufacturing instructions in detail.
Carpenter's vices are made of wood, which is an advantage in their manufacture. When working with wood, the need to use a welding machine is eliminated. A drill is used to drill holes, and to cut off parts of the future tool, a hand saw, jigsaw or grinder with a wood disc is used.
- First of all, let's prepare the screw. To do this, cut off the required length of the pin
- A nut is screwed onto the stud on one side
- Using a plumbing tee, you should put it with the central hole on the stud. Moreover, it is important to ensure that the pin does not protrude beyond the edges of the two parallel holes of the tee. Drill a hole in the center of the tee to install a key bolt at “10”. It is necessary to drill the tee together with the stud
- Install a key bolt at “10” into the resulting hole. This is how a handle for a future tool is made.
- Next we move on to making the jaws of the vice. To do this, from a board at least 6 cm thick, you should cut the required length - 20-30 cm
- The two boards should be the same size in length. It is these boards that will act as fixing sponges.
- In the center of both boards you need to drill central holes through which the pin will pass
- We drill additional holes on the sides of both boards, which are needed for the guides
- In one board, you need to make a groove in the central hole to accommodate the nut
- Now screw the nut and place the washer on the stud from the side where there is a through hole
- Install the pin into the central hole of the board with the groove
- A washer is installed on the other side of the stud, and a tee is installed, secured with a bolt.
- The nut on the back of the board should be tightened, pushing it into the groove. To prevent future rotation of this nut, it must be connected to the stud. You can use welding to do this, but an alternative method is to use a drill. Using a drill, a hole is drilled in the nut mounted on the stud, through which a rigid fixation of the two parts is ensured
- Using a bolt of the appropriate diameter, you need to hammer it into the hole made in the previous paragraph
- We assemble the structure, resulting in a movable vise jaw
- We use two metal rods that need to be installed in the side holes of the board
- A second board is attached to the table or workbench, which will play the role of a stationary jaw of a carpenter's vice. To do this, fix the board to the table with a clamp, and then drill holes in the table structure
- Let's start assembling the structure. To do this, you need to connect the two parts using a wide nut. After screwing the nut onto the stud, you need to circle its edges around the perimeter
- According to the resulting markings, it is necessary to cut out a groove using a chisel. This is necessary in order to fix the nut in the vise jaws.
- We recess the nut into the jaw structure
- The result is an almost ready-made carpenter's vice, which only lacks a handle. It can be made from a wooden tube of the appropriate diameter. After that we assemble the tool
In order for the guides to move freely in the fixed jaw, steel bushings should be made and installed inside the holes. The fixed jaw is fixed to the table surface using self-tapping screws. Moreover, this matter must be approached responsibly. You should first drill holes and also make grooves for the screw heads. After all, the surface of the board is the working part of the carpentry vice, so any protrusions on it and other defects will negatively affect the quality of the workpieces being processed.
In this simple way you can make a carpenter's vice at home. Moreover, you don’t need to buy materials to make them, since every home craftsman probably has everything he needs.
What is a vice + why are they needed?
In simple words, a vice is a mechanism for holding parts. The main areas of application of the equipment are plumbing and carpentry (sawing, drilling, planing, and so on). More than 80% of vices are made from strong metal alloys, and 20% are tools made of wood. Depending on the purpose, the shape, size and weight of the unit may vary.
1) General design + vice types
The vice does not have many design features. It is essentially a mechanism of two metal/wooden lips, with a knob for adjusting the screw on the clamp. When the handle rotates, one lip of the tool is clamped/unclamped, resulting in a change in pressure on the part.
Please note: the basic parameter when purchasing/making a vice is the peak distance between the “cheeks” of the tool. The larger it is, the larger the part the device can fix.
The design of the vice can be supplemented with other elements, due to which the mechanism will be able to change modification/specialization for use in other areas of industry or everyday life.
Structural features of the vice:
- The lead screw runs along the entire vice mechanism and is one of the key elements of the product. Whatever material the frame of the vice is made of, the screw is always made of metal;
- Rubberized linings are installed on the jaws of the vice in 60%, the remaining 40% are blanks made of non-ferrous metals. The need to use a structural component is determined by resisting pressure on the surface of the part, avoiding incisions and deformations;
- the vice is fixed through a clamp or screw clamp;
- with small dimensions, the vice can be attached using a powerful magnet. For example, mechanisms for processing jewelry.
When working with delicate parts (pipes, wood), it is necessary to remember the applied force and protection of the part. As a rule, the element is additionally wrapped in soft fabric or a couple more rubberized layers are added to the lips of the vice. Now let's take a closer look at each type of vice - a brief description + advantages/disadvantages of the mechanisms.
A) Bench vice
| Advantages | Flaws |
| Increased wear resistance due to hardened lips. | They often backlash. |
| High level of anvil strength, which provides protection from mechanical damage. | As they are used, the cheeks periodically need to be adjusted, which is extremely difficult to do without specialized tools. |
| If there is a turning mechanism, the turn works in a full circle. | You will have to change the lock washers frequently due to their rapid wear. |
| Small size and weight. | Not suitable for parts with long lengths of fixation. |
By design, the vice is classified as all-metal. For installation, bolts are used on a surface made of wood or metal. Depending on the design features, bench vices are divided into parallel and chair vices. The width of the cheeks is 4-20 centimeters, and the average stroke length is 15 centimeters.
B) Chair vice
| Advantages | Flaws |
| It is good to use for elements with fixation along the length (long). | Unreliable fixation both in terms of grip and the vice itself |
| Quick opening of the cheeks thanks to the spring. | Narrow parts are grabbed at the top of the cheeks, and wide ones at the bottom. |
| Simple and highly durable mechanism design. | Due to the nature of the clamps, there is a high probability of deformation. |
| Fast wear of screws with open threads. |
You will no longer see such a vice on open sale. Outdated design made of forged steel + hardened cheeks with welded steel grade U8A. The inside of the vise is serrated for a stronger grip, and the fixed jaw has a jaw and rod for clamping through the clamp.
The width of the cheeks is 8-16 centimeters, and the length is 80-170 centimeters. The movement of the cheeks is done through screw movements. Most builds include an anvil in addition. You can study the types of chair vices in more detail in GOST 4044-75.
B) Machine vice
| Advantages | Flaws |
| Assisted clamping forces are well suited for large items. | Due to the vertical, oblique grip of the lips, there is a risk of deforming the part if laid unevenly. |
| Mechanical shock resistance due to the robust housing. | You have to compensate for the distortion with foil, or by gripping only the upper part of the cheek. |
| Anti-corrosion coating. | |
| There is no backlash, which is good for high-precision work. |
The main area of application is production-type work. Fixation takes place on workbenches. There is a rotating mechanism. The advanced classification includes basic/sine machine vices, as well as fixture distribution based on the number of axes.
In the first case, parts are fastened at an angle of 90 degrees, in the second - any angle, and in the third - rotation is supported along 2+ axes. Models for household needs are also produced, but they are difficult to find at a reasonable price in the Russian Federation.
D) Hand vice
| Advantages | Flaws |
| Easy to disassemble and require minimal storage space. | Due to its shallow spread and width, the vice is only suitable for use on small items. |
| They fit for precise work + have minimal play. | Dents after clamping on soft metals. |
| The Santoprene handle reduces the likelihood of the vice slipping out of your hands. | Not suitable for clamping at angles. |
It is a priority to fix parts with a wide contact area using a hand vice. Such mechanisms are made of carbon steel, and due to their design features, such devices are divided into sponge and lever.
The second ones resemble pliers with a small latch. The area of application of hand vices is jewelry making, model making of small copies of cars/ships/airplanes and other areas where fixing small parts is required.
D) Carpenter's vice
| Advantages | Flaws |
| Can be used for working with soft workpieces. | Not suitable for processing hard parts. |
| The cheeks are located at the same height, which makes it possible to process elements in the same plane. | Benchless variations are not very popular due to their reduced rigidity during fixation. |
| Increased cheek opening. | The equipment is demanding in terms of lighting parameters and space for placement. |
| Wide range of fastening systems. |
The device is used to fix parts made of wood and plastic. In 70% of assembly variations, fastening occurs through a screw that presses the part into the frame or table. Occasionally there are assemblies with front clamping or a combination of cast iron and wood.
When choosing the type of vice to manufacture at home, you need to find out for yourself the purposes that the equipment in question will have to solve. It is impossible to say right off the bat which vice is the best, because classification by functionality cannot give an objective assessment to a person regarding his question. For a jeweler, the best ones will be manual ones, and for a car mechanic, metalworking ones. And there are a lot of such situations.
2) Using a vice + precautions
When choosing a vice from a store, you should pay attention to 3 parameters - the size of the lips (wide ones are a priority), the stroke (the more, the better) and the comfort of the handle, because it is through it that a person will apply effort when fixing the part.
Operational features consist of timely maintenance of structural elements + compliance with certain precautions. To maintain the mobility of the moving parts of the vise components, it is sufficient to wipe them with a solvent-soaked cloth after each use.
Vise care schedule:
- We spread the lips as far as possible.
- Apply a lubricating layer. You can use special or motor oil.
- We compress/uncompress the vice 3-4 times.
- To remove rust, apply an anti-corrosion compound and leave the vice alone for 24 hours.
- We clean rust spots with a metal brush.
- Wash off and dry.
The main operational problems for a vice are the wear of its constituent components - the body, screw and locking pin. When repairing the body, welding based on nickel electrodes is used, and the gas-powder method can be used for nuts. The screws can only be replaced with the same ones or, if you don’t have them, you can sharpen them yourself.
What not to do with a vice:
- metalwork tools cannot be used to clamp hot elements;
- You cannot artificially increase the length of the handle - this greatly increases the pressure on the parts and can lead to breakage;
- It is not recommended to attach bed variations to curved bases in order to avoid breaks in the workpieces.
The warranty on a vice can only be extended if there is a full set of accompanying documents - a coupon with a factory number, which contains the date of purchase and a stamp from the distributor + a receipt or other document confirming the fact of purchase of the tool.
Instructions for making a vice for a drilling machine with photos and descriptions
To work on a drilling machine, it is almost impossible to do without one important part - a special clamping vice. This is especially true when using a homemade drilling machine from a drill. For a drilling machine, a vice is used, which has a design that differs from metalworking and carpentry tools.
For a drilling machine, it is not at all necessary to buy a factory-made vice, since you can make them yourself with your own hands. To do this, you will need a welding machine, a drill or drilling machine, a grinder, as well as metal blanks from which a drilling vice will be created. Let's look at how to make them in detail.
- First you need to take a steel plate, the thickness of which should be at least 8 mm. Markings should be applied to the plate to cut rectangular holes
- Next, you will need to take a channel on which the jaws of the tool will subsequently be located. The channel also needs to be marked, as shown in the photo above
- To make sponges, two steel plates, 10 cm thick, are used. The dimensions of the plates are 40x100 mm. A rod is cut out on the second plate, through which the plate or future jaw will move in the channel groove
- The moving jaw will be moved using a screw, for which it is recommended to use a 16 mm pin
- Let's start making the tool. We cut a rectangular groove on the channel along the previously marked lines. To do this, use a grinder and a drill with a drill bit.
- On the steel plates on one side it is necessary to make a diamond-shaped notch, which will act as cheeks
- A hole with a diameter of 10 mm is drilled in the second jaw. Through this hole the pin will be attached to the sponge. We cut the plate to get a rod for connecting to the channel groove
- One side of the pin needs to be ground down to a size of 10 mm in order to be able to install the part in the pre-drilled hole in the jaw
- It is necessary to drill a hole in the rod and cut a thread in it. Using this threaded hole, the movable jaw will be fixed
- A frame is prepared in which rectangular holes are cut. A square hole in the center is needed in order to have access to tighten and unscrew the bolt on the channel
- To make a drilling vice, you will also need an oblong nut, through which the screw will move
- The channel is welded to the frame, after which the seams are cleaned. A fixed jaw and nut are welded to the channel, after which you can begin assembling the tool
At the final stage, the handle is made from the anchor. To do this, a groove is made in the screw structure and a hole is drilled. The photo above shows how to make a handle for a drill vice with your own hands. A detailed description of the manufacturing process of a vice for a drilling machine is presented in the video material.
Stocking up on essentials
Source svoyles.ru
The following materials are needed:
- steel corner 50×50 mm, shelf thickness 4-5 mm;
- steel profile 20×20, wall thickness 1.8 mm;
- steel profile 25×25, wall thickness 2.0 mm;
- flat metal file – 400x40x10 mm;
- stud with metric thread M12;
- nuts with washers M19;
- steel tube with internal Ø 12 mm;
- steel rod for wrench Ø 8-10 mm;
- various bolts and nuts.
Prepare the following tools:
- electric or gas welding;
- grinder;
- electric drill or screwdriver with a set of drills;
- fitter's square;
- caliper, tape measure, scriber.
How to make a vice from a channel
A channel is the most common type of metal product, which is excellent for making a vice. Let's take a closer look at how you can make your own vice using a channel.
The instructions for making a vice from a channel are as follows:
- Initially, the base of the future vice is prepared. A channel is used as a base, in which a rectangular hole is made
- From the end side, weld a plate to the channel, which will act as a stationary jaw of the tool
- A stop is made, consisting of a nut and a guide fitting. The movable jaw of the tool will be attached to this stop.
- We attach the movable jaw of the tool to the stop
- A screw is installed, to which you need to attach a handle to move it
- The result is a ready-to-use vice, made independently from a channel
The video below shows in detail the process of how a vice is made from a channel. It is important to take into account that it is not at all necessary to subject all parts to processing. The screw can be made from a pin with a diameter of 16 mm or turned on a lathe. Please note that you will also need to make a nut with the appropriate thread.
In order for homemade clamping devices to last a long time, they must be painted. To secure the resulting product, it is necessary to weld a plate in the lower part to the channel, in which holes must first be made. Now the homemade tool is ready for use for clamping various workpieces.
Workbench vice
They are also easy to make with your own hands . First you need to cut the plywood to size. Weld two nuts to the flat panel for the threaded guide and attach them under the table with screws, as this will add stability to the structure in question. It is very important to align everything correctly, otherwise it will not work.
After this, you need to use a chisel to make a recess for the nut. On the outer lock, drill a hole 3 cm deep. Therefore, the thickness of the plywood should be 3 cm.
We make a simple vice with our own hands from corners
What could be simpler than the procedure for making a vice from corners. If you have metal corners lying around in your garage, then it’s time to use them to make a very useful homemade product. You can make a vice from the corners, and this procedure is quite simple and does not require much time and effort.
To make such a tool you will need corners, as well as a stud with nuts. All work will be performed using a welding machine, grinder and drill. The manufacturing principle is quite simple, and every home craftsman will be able to implement the idea at his own discretion. Using the drawing as a standard, it will not be difficult to make a hand vice for your garage based on it.
Below is a video of finished vices made from corners.
Non-consumable electrode welding in argon or submerged arc
The work technology requires the presence of a protective environment (argon or flux). The additive is made from cast iron, to which copper, aluminum, and nickel are added. They work with carbon, graphite or tungsten non-consumable rods.
To ensure a high-quality seam, welding is performed in compliance with the following rules:
- the surface is well cleaned of dirt and grease;
- the parts to be connected are fixed in several places;
- preheat the joint; the need for this step depends on the type of cast iron from which the parts being connected are made;
- the filler rod is fed at an angle of 20-30°;
- work is performed at low current;
- welding is carried out in stages: 2-3 cm are boiled, then this section is forged with a small hammer;
- After welding, the parts are cooled gradually; a sharp drop in temperature should not be allowed.
This method of welding cast iron requires a lot of labor and finances, and there are also some difficulties in adhering to the technology, so it is rarely used.
How to make a vice from a jack - simple instructions
If you have an old diamond-shaped jack lying around among the old tools in your arsenal, then do not rush to dispose of it. This tool can serve as the basis for making a vice. Even if you don’t have a jack, but you are planning to make your own vice, you can find a lift through advertisements or scrap metal.
The advantage of a homemade vice from a jack is that a person does not need to make much effort to clamp the workpiece. To make a clamping vice from a diamond-shaped jack, the following manipulations are performed:
- Initially, the necessary tools and materials are prepared. The materials you will need are a jack, a 100 mm section of channel, and profile pipes (40x40, 30x30 and 25x25 cm)
- After this, we immediately begin making a homemade tool, cutting 40x40 mm pipes to the required length
- We get four blanks from profile pipes
- A frame is made from the resulting parts by welding steel profile pipes 40x40 mm
- Sponges are made from a channel by cutting out two identical blanks
- The supporting part of the jack is being prepared, which will be connected to the sponge
- Apply notches in the form of inclined lines to the outer surface of the channels. These notches will act as cheeks for more effective fixation of parts.
- We proceed to the manufacture of the moving part of the vice, for which tubes measuring 30x30 and 25x25 mm are used
- Weld a channel to the 30x30 mm tube, which will act as a movable jaw of the tool
- We weld a second channel to the base, which will act as a stationary sponge.
- On the other side of the frame, weld a profile that will serve as a stop for the jack
- Weld the jack to the stop and movable jaw
- Finally, all that remains is to paint the resulting product, having previously cleaned the welding seams. After this, you can test the resulting tool in operation by clamping metal workpieces
As you can see, making a homemade vice requires very little time, effort and materials. As a result, we get a reliable tool that you don’t need to spend money on to purchase. Below is a video on how to make a vice from a jack.
Double screw joiner
If you need a carpenter's vice for a workbench that is truly powerful, then the two-screw modification of the specified device . M20 towbar bolts provide a force of several tons, which is an excellent option for such a vice. The assembly procedure for such a device is as follows:
- We prepare all the necessary tools;
- We make the appropriate slots and holes;
- Insert bolts and turns;
- We check the vice for strength and performance.
Step-by-step and detailed instructions on assembling and making your own vices for the workshop and workbench are available on specialized resources and forums in the form of photographs and recommendations.
How to make small vices from boards
To work with small parts you will need a small vice. They can not only be made, but also purchased in the store. Unlike large tools, small ones are not expensive, so you don’t have to go to the trouble of making them. But if you still want to make a small vice yourself, then in the material you will only find detailed instructions describing this process.
To realize your idea, you will only need wooden planks. The dimensions of the bars will affect the future dimensions of the tool. Let's start making small vices from wooden planks:
- First, the base of the tool is made by gluing wide and narrow strips. Narrow ones are glued onto wide strips, resulting in the base of the future instrument. To increase the strength of the base, the planks should be connected to each other with self-tapping screws
- Using two square beams, we connect the two bases of the future tool. The beams are also coated with glue, after which they are attached to the base prepared in the first stage
- After gluing the structure, it is necessary to tighten it with clamps and wait for the glue to dry completely.
- Now let's move on to making sponges. To do this, markings are made in one workpiece along the perimeter of the nut. A hole will be cut based on the markings
- After cutting the hole, you need to install a nut in it
- A hole is drilled in the second workpiece, the diameter of which corresponds to the size of the stud or bolt used
- We use a wide washer in which it is necessary to drill 4 holes around the perimeter
- Cut the washer in half to create 2 holes on each side.
- The blank into which the nut was installed must be glued to the base and secured with self-tapping screws
- A handle is being made for future vices. To do this, screw a nut onto the bolt, in which a hole is made for installing a thin pin
- Glue a piece of block to the movable jaw of the vice, which will act as a guide.
- We connect the jaws of the vice using a screw, which is secured in the movable jaw using a divided washer
- As a result, we get a ready-made tool for fixing various small workpieces
What kind of vice and what available tools to make is a personal matter for everyone. This article will help everyone who does not want to buy a special tool for a lot of money, and will be able to make an alternative option, while saving a significant part of the money. There are craftsmen who are not at all accustomed to buying tools and trust only with their own hands, so based on the examples described above with detailed instructions for making a vice, you can start working immediately.
Preparing cast iron for processing
To create a high-quality and durable seam, it is important to carry out the preparatory work correctly.
Execution order:
- cleaning the surfaces to be welded from existing dirt and dust;
- degreasing cleaned surfaces with acetone or other solvent;
- preparation of linings for heat removal, they are used when connecting thin workpieces;
- cutting edges, it is performed before joining thin-walled parts, this is done with a file or using an angle grinder;
- processing of cracks, they are drilled along the edges and cut along the entire length or a crack is cut out and then its edges are rounded;
- The product is heated depending on the welding method (cold or hot).
To create a seam, you need to prepare the cast iron for processing.
Quick-clamping vice - operating principle and do-it-yourself manufacturing features
A vice is used to clamp the workpiece for subsequent processing. This tool is an almost indispensable assistant, but it has a drawback. The disadvantage is that in order to fix workpieces of different sizes, it is necessary to rotate the handle for a long time in one direction and the other. When you don’t use the tool often, this drawback is practically unnoticed. If you have to use a vice often, then fixing workpieces of different sizes takes a lot of time.
It is in order to eliminate the above-described disadvantage of vices that manufacturers produce a special type of device called quick-clamping. They differ from conventional devices in that they do not have the disadvantage of the need for prolonged rotation of the screw handle. This type of tool is appreciated by craftsmen who often use it.
The most common type of quick-clamping vice is eccentric, but there are also screw models. To become the owner of a quick-clamping vice, you don’t need to buy one at all. You can make a quick-clamping vice yourself, and we’ll look at how to do this using the example of eccentric devices.
- To manufacture the devices in question, you will need appropriate materials. These are metal corners, channel, profile, etc., in general, everything that is at hand
- The work will be carried out using a welding machine, angle grinder and drill
- Make a rectangular groove in the channel, and weld a corner to one side, which will act as a fixed jaw
- The second corner, which will be a movable sponge, should also be prepared. To do this, a rectangular groove is made on one side, through which it will be fixed to the channel
- In order for the movable jaw to move only in one direction without distortions, it is necessary to make guides. Metal plates are used as guides, which are welded to the corner on both sides, as shown in the photo below
- On the back side of the channel it is necessary to weld two plates around the perimeter of the rectangular hole. These plates are needed so that when fixing the jaws, the clamping nut does not rotate, and it does not have to be held with a wrench
- It is necessary to drill two holes in the corners, through which the clamping cheeks will be fixed. The cheeks are made of steel plates followed by notches. After this, they are attached to the jaws, recessing the head of the fixing bolts deep into the plate
- After this, all that remains is to make a quick-clamping mechanism that works on the eccentric principle. To manufacture such a mechanism, you will need the help of a turner. The quick-release mechanism is shown in the photo below
- A through hole on a metal blank is not made in the center, but with a slight offset. Through this hole the mechanism will be fixed to the movable jaw and channel. The second hole on the blank (not through) is intended for fixing the bolt head in a stationary position
- Another hole is drilled in the side of the cylindrical blank, followed by threading for screwing in a long bolt. This bolt will act as the handle of the eccentric mechanism
- After assembling all the parts, we get a ready-made quick-clamping vice, which you can make yourself from improvised materials. To be able to attach the vice to a table or workbench, two plates with holes must be welded to the bottom of the channel
The principle of operation of the quick-clamping mechanism is that the cylindrical blank, when moved in one direction, rests against the side surface of the angle (moving jaw). In this case, the nut in the lower part of the channel is tightened, thereby ensuring the immobility of the mechanism. To increase the distance between the jaws to fix large workpieces, it is necessary to move the blank to its original position, thereby loosening the movable jaw, and manually move it to the required amount. Fixing or clamping of workpieces with a movable jaw is carried out with just half a turn of the handle. Below is a video material in which you will find a detailed description of this process.
To think through each subsequent step, it is recommended to make drawings when making a vice with your own hands. First you need to decide on the size of the future tool, and only after that get down to business. Now you know how to make a vice at home from improvised materials, so you can resort to making them.
What to expect from homemade
The described device is, of course, temporary - all its parts get wet quite quickly, even if the tree is crushing the tree. Therefore, let’s first address the question: what homemade vices should be made?
An innumerable variety of clamping devices of various kinds are used in technology; patents for them number in the thousands and tens of thousands. It makes sense to make a vice yourself, firstly, the most commonly used ones. Secondly, they do not require special materials, production equipment or complex technologies for production.
An ordinary bench vice (item 1 in the figure) will have to be made non-rotating. Otherwise, you will have to look for either a ready-made neck-skirt pair (see below), which can also be taken away during assembly by welding, or the opportunity to use a shaping machine (simply - shaping). Of which there are very few left in operation, labor- and energy-intensive shaping processing is increasingly being replaced by precision casting, stamping and robots.
Types of vices
Adjustable (mobile) mini-vises, pos. 2 seem to be simpler, but their production requires particularly high-quality and, accordingly, difficult-to-process materials. The fact is that the clamping force of a hand vice is determined by the muscular strength of the worker. And the cross section of the vice parts decreases according to a quadratic law as their sizes decrease, i.e. fast. The paws most often break off just at the mini-vise. However, it is not difficult to expand their functionality on your own, see below.
Conventional carpenter's vice, pos. 3, are part of the carpentry workbench and are inoperative without it. But next we will look at how to make a Moxon vise for woodworking, which turns any workbench (including even a desk) into an almost full-fledged carpentry workbench.
What a home craftsman should really do on his own is a single-axis machine vice (a simple fixed table) for a drilling machine, pos. 4. They can also be used independently (separately from the machine) for a wide variety of jobs. The material for machine tools is the usual one that is widely available; Literally nothing is required to produce a machine vice that is not inferior to a branded one.
Jewelry vices, manual (item 5) and tabletop (item 6) are the most convenient things for small precision work. But alas, their production requires special materials and equipment, which is available at every general machine-building plant. At home, you can make good substitutes for “frog” vices, pos. 7, which, by the way, are often included in the set of desktop jewelry vices, pos. 8.
But with an angular vice (item 9) for clamping parts connected at an angle, the matter, as they say, is deaf. It is possible to make something similar with your own hands (item 10), but, firstly, it turns out that it is very difficult to ensure clamping at a fixed angle of exactly 90 degrees, and if you succeed, then the angle then quickly “floats”. It’s not worth talking about a homemade corner vise with an adjustable clamping angle. The same applies to 2-3 coordinate manual machine vices (pos. 11-14) and, for example, devices for tying fishing flies (pos. 15), which are no longer a vice, but a highly specialized machine.
Video about welding cast iron vices
You can weld cast iron products or repair damage that appears in them not only in a factory, but also at home.
If a home craftsman has experience in welding, then by choosing one of the existing methods, electrodes and work mode, he will be able to independently weld a vice or any other cast iron product firmly and efficiently. To make it easier to understand the technological process, you need to watch thematic videos, and then there should be no difficulties when performing such work.