Making corn from corn yourself is not difficult and a lot of fun. Therefore, every child will take on such work with pleasure. Together with him you can create wonderful crafts from corn for the autumn holiday. The photo shown in our article will help you cope with this task.
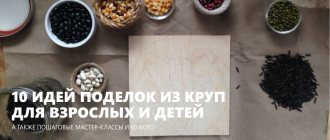
DIY corn crafts: master class with step-by-step photos for the autumn holiday
What can you use as a basis for crafts:
- fresh corn cob, you can immediately peel it - separate the stigmas and peel;
- a sprig of rowan or viburnum (with berries and leaves), you can also take cranberries or lingonberries;
- a couple of dried physalis fruits;
- dried flowers (dead wood);
- fresh flowers with flexible stems (for example, cornflowers, oaks, rudbeckia, yarrow or clover);
- dark beads, buttons or berries (for example, chokeberry);
- glue;
- some thin wire or tailor's thread.
Craft Materials
First of all, we will take all the corncob wrappers and put them together by folding the edges.
Connecting the edges of the leaves
Wrap the folded wrappers around the core of the cob and secure it with wire or thread. You will get a fluffy skirt.
Wrapping the cob
Let's disguise the wire with flowers. We use white and blue flowers. We lay out the white waistband of the skirt.
Belt of white flowers
We place the blue ones on top of it, forming the bodice of the dress. We distribute a few blue flowers along the hem.
Attaching the blue flowers
Decorate the hem with viburnum or cranberries. We glue them with polymer glue or sew them with threads. The result is a figurine of a doll in a fluffy elegant dress.
We attach the berries to the hem
We use corn silk to create a fluffy hairstyle for the doll.
Doing your hair
We give the hairstyle a beautiful shape by throwing individual strands back or combing them forward in the form of bangs.
Shaping your hair
Now we begin to weave a wreath from flowers with flexible stems - just as we weave a wreath from dandelions in the summer.
Flowers and berries for a wreath
To make the wreath large enough, we take as its basis the flower with the longest and strongest stem.
Wreath base
We gradually weave different types of flowers and berries into the wreath. The more of them are used, the more interesting the craft will be. You can complement the wreath with beautiful autumn leaves, beads, ribbons or paper figures.
We weave flowers, fruits and berries into a wreath
We make eyes from dark berries, beads or buttons. And we make large beautiful earrings from physalis.
Eyes and earrings
We decorate the head with a wreath. Cut out a smiling mouth from any red fruit and glue it on.
Attach the wreath and make a mouth
Our corn craft on the theme “Autumn” is ready!
Autumn themed corn craft
This corn craft is well suited for kindergarten and school.
Corn craft for kindergarten
Corn Leaf Crafts
A pupa can be made simply from corn leaves.
Corn leaf pupa
You can make a magical Christmas angel from corn leaves.
Corn Angel
It can be used to decorate a table at a traditional autumn fair or to add to an exhibition of autumn gifts.
Check out more great corn craft ideas:
Beautiful flowers from corn cob leaves :) Ideas, master classes
The post is dedicated to all my talented readers and Olenka Beck, who is ready to risk her health, image and personal freedom in order to get corn for handicrafts in the vast German expanses :)
Good day!
The leaves of a corn cob are called: involucre leaves, top leaves, bracts, talash. I would like to show you what beautiful flowers can be made from talash, since the corn season is not over yet and if you wish, you can always find and use leaves of corn cobs. By the way, talash is perfectly stored, so you can safely prepare them for future use :), especially since the use is not limited only to making flowers, talash has proven itself well as a material for all kinds of weaving, for appliqués and other crafts.
The leaf of the corn cob has a striped-corrugated structure, thanks to which the flowers made from it have a natural appearance, please note.
The material tolerates staining well
Tears come to your eyes when you see something like this... Olympic champion surfer Sofia Noseti-Klepacka from Poland sold her bronze Olympic medal in order to help a little girl suffering from a dangerous illness survive. A medal in exchange for life is not the most important act in life?.. A low bow!
For bouquets of fresh flowers, of course, you can use fresh corn wrap leaves; to do this, just roll them into a flower or cut them into petals, fold them and secure them with staples, wire, etc.
But, unfortunately, a leaf of a corn cob dries out very quickly and becomes deformed, i.e. the result is absolutely unpredictable, so for decorative purposes it is used in a dry state. Better yet, lightly boil the wrapper and then dry it. By the way, I don’t throw away the wrapper in which I cook corn :) For now I just dry it and save it, but I hope that I will get around to doing something with it :) Yes, another addition: when you do handicrafts, you can use dry leaves slightly moisten them, then they take the desired shape more easily and do not break :) Actually, the material is there, and you can use a variety of options for making flowers: twisted flowers cut into petals turn out very beautiful; if the sheet size allows, be sure to try making spiral flowers, they also turn out great, in general, the material is incredibly beneficial for making decorative, bouquet and scrap flowers. Well, we are moving on to the master classes.
Master class on making flowers from corn wrappers for decorating gifts from craftswoman Cris, USA, author of the resource Crissy's Crafts (crissyscrafts.blogspot.com)
The process of making flowers can be clearly seen from the photographic process; my comments are absolutely unnecessary. The craftswoman uses a heat gun to glue the fragments together.
And here a figured circle made from a corn wrapper is used to decorate the gift wrapping - also a very cute solution :)
By the way, a little off topic, look at what interesting candlesticks Chris came up with to make from corn cobs:
Unusual, right?
A miniature made from a corn wrapper from the Sining Factory resource - an unusually elegant design!
You can color corn wraps with food coloring.
Corn flowers for small decoration from Martha Stewart
Based on materials from the site: marthastewart.com
I really like the next work with the unusually decorated core of a sunflower flower. The author of the work and master class is Eileen Teagle, Queenie Eileenie blog (queenieeileenie.blogspot.com)
You see, coffee beans and brown corrugated paper vermicelli are glued in the middle. The master painted the corn cob leaves with yellow paint. Original work :)
The author uses hot glue to glue the coffee and paper decor to a circle cut out of a brown disposable plate.
Glue the wrapping sheets on the back side
In several layers
We bend the leaves
Beautiful!
Another option
But flowers are made using the same principle, but with a center made of dry corn kernels:
Or it can be completely natural :)
Next on the schedule is a master class from Iram – Arts Crafts & Hobbies
Based on materials from the site: craftionary.net
I really don’t like small photographs, but what can I do...
You can make pom-pom balls from long cob leaves: fold several leaves together, tie them in the middle, tear and cut the ends and fluff the whole structure. Such ball flowers look very beautiful in decoration.
Based on materials from the site: centsationalgirl.com
Aren't you tired?
Then another little idea: this is not a flower, but a bow made from a corn leaf. Look how dashing he looks on a postcard:)
Well, now let's admire the options for using corn wrappers to make flowers and floral arrangements
Look how famously the bottom of the bouquet is played out :)
Good luck to everyone and endless creative inspiration!!
Craft a tree from autumn leaves, step by step
Material:
- Paints
- Brush
- Paper
- Autumn leaves
- Glue
Progress:
- On a white sheet of paper, draw a tree trunk with paints.
- Grind the leaves.
- Apply glue to the intended tree crown. Sprinkle with leaves.
- When the glue dries, shake off the excess leaves.
- Apply glue under the tree and sprinkle the area with crushed leaves.
- Wait for it to dry, remove excess leaves.
From beets
Khalimov Demid Sergeevich, 4.4 years old, Kindergarten 31, Magnitogorsk.
Beet Nyusha:
Adamson Olesya, village Novopervomayskoye, Tatar district, Novosibirsk region. "Mr. Beet."
My mother and I came up with this unusual little man and called him Mr. Beetroot.
From cucumbers and tomatoes
"On a visit to Cheburashka." Ivanova Daria. Made from vegetables (zucchini, cucumbers, potatoes, tomatoes, carrots), plastic, moss, flowers, plasticine.
"Pointe". Kalycheva Victoria. The work is made of cucumber. Decorated with satin ribbon and sequins.
Cucumber machine:
"Autumn mood". Ivanov Artyom. The mushroom stem is daikon, the cap is tomato, the dots are mayonnaise.
Kozlova Daria, 9 years old, town. Tuzha, Kirov region. Work: “Signor Tomato.”
Quilling dress
You can make a “Queen of Autumn” craft from a doll using the quilling technique. The dress is made from strips of paper twisted in a special way. The combination of autumn colors will add brightness to the image. For work, you can use double-sided colored A4 paper, cut into strips 5 mm wide, or buy ready-made tapes at a craft store.
The simplest elements in quilling are circles. To simplify the process, you can use a toothpick, the tip of which should be slightly split. Insert the tip of a paper strip into this gap and roll it tightly. Carefully remove the wound element and slightly unravel it if necessary to form a spiral. Secure the free end with a drop of glue. To ensure that all the circles are the same size, you can use a stencil with holes. The blanks can be shaped like droplets, hearts, or triangles. Simple elements make up more complex ones - flowers, leaves, twigs.
Using colored paper, you can create autumn leaves, daisies, cornflowers. It is also easy to make chrysanthemums. To do this, you will need a strip 2 cm wide. Using sharp scissors, make frequent cuts along one of the long edges of the paper, not reaching the edge 2-3 mm. Then the prepared workpiece is rolled into a tight roll and sealed. Fluff the ends and the paper flower will come to life.
Prepare the individual elements, and then use PVA glue to glue them onto the cardboard skirt to create the image of the “Queen of Autumn” doll.
Other ideas
Corn is an excellent material used in creating simple and complex works for various exhibitions and competitions. Creative projects for children and adults can be made from the vegetable itself, its seeds, stems and leaves. Corn grains go well with other natural materials - berries, twigs (both fresh and dead wood).
Car
Sunny yellow ripe cobs look interesting in a variety of crafts. But if children can easily cope with simple options on their own, then it is better to do more complex ones together with their parents. In addition to the cobs, you will have to take care of toothpicks and dry leaves obtained from peeled corn.
The procedure for making the craft will be as follows.
All that remains is to make the steering wheel from a thin cut of corn and a toothpick. The convertible is ready.
Rocket
A simple craft for kids in kindergarten can be made from cobs and colored cardboard. It is enough to place the corn vertically, stick portholes and wings on it, giving it stability. Even a 3-4 year old child can easily master this craft.
Sun
Corn leaves (dry or soaked in warm water) are an excellent material for creativity. By gluing them onto a base of yellow cardboard, you can create a beautiful sun. The leaves lend themselves well to coloring and can be soaked in food coloring.
Girl
A girl doll made from talash (corn leaves) is made using the weaving method. This craft is widespread in the southern regions of Russia, Ukraine, and other countries.
The material must be prepared according to the rules. The leaves framing the cob are divided into strips longitudinally, along the fibers - a width of 10-25 mm is sufficient, soaked, and stored in wet wipes until use.
The procedure for making a girl doll will be as follows.
A girl in Russian folk style is ready. You can paint her face with acrylic paints or permanent markers, or sew a sundress.
Sunflower
Talash and corn cobs can easily be turned into a beautiful wreath in the form of a mature sunflower from the gifts of nature in autumn colors. It will require a round-shaped base frame on which the product will be assembled. It is worth choosing multi-colored cobs - this way the decorative element will look more like a sunflower. They are fixed in a circle with glue, pressing tightly against each other, and can be additionally secured with toothpicks or wire. Leaves (talash) are abundantly attached around the cobs, giving them the appearance of flower petals.
Doll
A child will be able to make a beautiful doll from a corn cob under the guidance of adults. It is better to prepare the material for work in advance, since it should be quite varied in this craft. Among the necessary components are:
You need to start making a pupa based on a corn cob from the leaves. After cleaning the cob, they are saved and dried. Then fold it in half, getting a fluffy flounce of the skirt. The corncob is placed vertically. Along its lower edge, the formed skirt parts are placed on top of each other and secured with wire.
The next steps for assembling the pupa will be as follows.
All that remains is to make a smile for the doll using red thread or felt. A beautiful craft on the theme of autumn is ready.
Source
How to Preserve Autumn Leaves for Crafts
- The traditional option is to dry the leaves between the sheets of a notebook or book. A weighting material should be placed on the top of the book. This method is suitable if you have a small amount of material. Leaves should not be stacked too often, as this will ruin their shape and they will dry out and become uneven.
- Use an iron - place clean paper on both sides of the sheet and iron the material. Be sure to place something hard under the sheet if you use the iron on the ironing board. The leaves will quickly become flat and dry.
- Paraffin will help - melt a candle on the stove, when the wax is liquid - dip a leaf into it. Then take it out, turn it over and do the same with the other side. Remove and tilt so that excess paraffin remains in the container. Place the material on a newspaper or sheet to harden the wax. Make sure that the paraffin does not boil and is not too thick.
- Preservation in glycerin - make a solution of glycerin and water (1:2) and leave the leaves in it for 2 days. The leaves will acquire a greasy sheen, but will successfully retain their shape and will be useful for crafts.
Autumn craft painting from leaves for kindergarten, details with photos
Material:
- Paper
- Dry leaves
- Glue
- Scissors
- Brush
- Wax pencils
Progress:
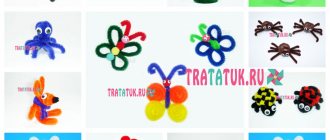
- Select leaves for making a ladybug - 1 large and 6 small (you can take maple seeds, which are called “helicopters”).
- Using glue and a brush, glue to the paper first a large piece of paper on which the insect will sit, and then the rest of the leaves that make up the ladybug.
- Fold the butterfly in the same way and glue it to the paper.
- Using wax pencils, add spots to the ladybug and a pattern to the butterfly.