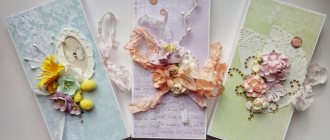
Where can you use knitted flowers?
DIY gift for grandma: a selection of the best craft gifts for your beloved grandma’s birthday. top 90 ideas and step-by-step master classes
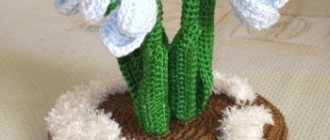
Homemade flowers can be used as decoration in a variety of areas:
- decorate hats and hats.
- decorate sofa cushions;
- add as jewelry elements;
- design homemade bags;
- Use as bookmarks or napkin clips;
- create wall panels;
- use when creating cards or gift wrapping;
- collect bouquets to decorate your home interior.
The thread for creating flowers must be chosen that does not break up into individual fibers; it can be cotton, synthetics, silk, darning, wool or a mixed thread.
The crochet technique involves making flowers of various shapes and sizes. Volumetric flowers can be knitted from several tiers of different diameters. From the semicircular petals located around the center, you can knit simple flowers with five petals. Petals with sharp corners make daffodils, elongated petals make daisies or lilies, and narrow petals make carnations. Small cups are suitable for making lily of the valley or bells, and wide petals make orchids and poppies. You can make tulips from oval petals.
Flowers knitted like a ruffle look beautiful, when in each row the number of loops is significantly increased and the petal goes in a wave; if you gather such petals tightly from below, you will get a real carnation; it’s easy to assemble a rose from straight lace.
Flowers made from cotton pads
Many people do not even suspect that cotton pads can be used not only as a hygiene product, but also as a universal material for creating all kinds of inflorescences.
The surface of the cotton pads can be smooth, or maybe with a pattern applied. Depending on the type of flower, choose the one that suits you best.
Even a child can make a spring card with a primrose using cotton pads, scissors, glue, colored paper, paint or simple felt-tip pens.
If you fluff the cotton pads a little around the edges, you will get these airy roses. It looks very gentle and original!
Using cotton pads, a cotton swab and a drinking straw, you can create an elegant calla lily.
Cotton pads and a stationery stapler will help you make an original daisy) If desired, you can use glue instead of stationery staples and paint the daisy with gouache or acrylic paint.
Cotton pads are often used to make a very popular flower – roses. The roses will be decorated with pearls, which will add nobility to the resulting flower arrangement.
SunduchOK113 will reveal the secrets of creating flowers from cotton pads with his own hands in a video master class:
From a large number of roses you can create such a festive Christmas wreath. To do this, you will need a round blank, glue, cotton pads and various elements for decoration (ribbons, beads, rhinestones, sequins, etc.)
You can assemble an original topiary from snow-white roses. Decorations made from simple cardboard in the form of butterflies and leaves will add airiness and completeness to his image.
Roses can be created not only from “fluffy” cotton pads, but also made from a twisted cotton cord. The result will be a less airy, but no less original topiary.
How to make packaging for a bouquet
There is a wide range of wrapping materials, varying in texture and color, the most common of which are:
- multi-colored corrugated paper is ideal for decorating yarn compositions;
- thin transparent film is a classic packaging option. It is used as a component of a more complex wrapper, involving several tiers of different materials;
- the floral mesh retains its shape well, gives the bouquet elegance and tenderness, and in appearance resembles material with “holes”;
- craft paper is suitable for any craft and also adds brevity;
- translucent organza will create a luxurious and rich look.
A bouquet of threads - a gift for grandma on her birthday
For additional decoration the following materials are used:
We use cardboard
Such beautiful thread flowers are made using the same principle as crafts created with a fork. At the same time, the process of creating buds is completely safe for children, since no sharp objects are used in the work. Making such a flower is very simple.
- The first step is to select a piece of cardboard of suitable length and width.
- Red yarn is wound on it. The more threads are used, the more voluminous the finished bud looks.
- After this, all the coils must be removed from the cardboard base.
- Next, this skein needs to be pulled in the middle with thread.
- After this, you can begin to form the bud. The edges of the skein on both sides must be cut with sharp scissors.
- To create a stem, you need to select several sticks of suitable length.
- The buds should be slightly fluffed and attached to the branches. The best way to do this is to use a glue gun. The base of the stem can be decorated with green thread if desired.
You need to assemble a beautiful bouquet from ready-made flowers. You can decorate it with branches of living plants. The composition will turn out beautiful and realistic.
Dandelions made of threads on wire
And here are the sunny dandelions. First, wind the yellow yarn around the fork. Using a large needle and strong thread, make two lines down the middle to secure the threads. Apply glue along the line to secure the yarn. We wind the roller tightly using additional thread, fix it with glue again and cut it.
We cut the top, take the green threads and string/glue them onto the thread, wrap the dandelion in the green blank, and tighten the thread. Glue the bottom cut. The photo shows a detailed master class on dandelions.
Ideas for inspiration
You can get ideas for inspiration anywhere. It could be a beautiful piece of jewelry, or an ordinary flower from a flowerbed or bouquet. You can crochet a shape of any complexity, which is why this type of knitting is so popular.
The most picturesque look are voluminous crocheted flowers, which are quite difficult to make, as they have complex patterns and require assembly and starching. Simple flat options can be done right away, having mastered the initial knitting techniques.
To begin with, it is better to use diagrams and descriptions for beginners. This will help you master the principles of creating petals and inflorescences. For convenience, you can also watch a video on crocheting flowers. Later, relying on them, you can create your own masterpieces.
Where can I get the information I need?
What can you use when searching for the desired design option? In terms of content of opportunities for providing knitting tutorials, the Internet is of course in first place.
At the present stage of time, the global network is the first source from which one obtains the necessary information. It allows:
- read the recommendations of the masters on their personal websites;
- complete a whole training course, including video lessons;
- get step-by-step instructions for making your favorite flower or bouquet.
Those who are more passionate about knitting buy colorful illustrated books on the topic, magazines and other printed publications. Over the years, many craftswomen have accumulated entire libraries of such literature in their homes.
In the basket
A DIY bouquet made from knitting threads is placed in a small basket.
To make this craft you will need the following materials:
- 5 short knitting needles;
- green “grass” threads;
- universal glue;
- pink and yellow “Iris” yarn;
- flowerpot or large plastic glass;
- foil;
- brown threads;
- decorative braided braid;
- polyurethane foam;
- 2-sided tape;
- 2 pins and needles;
- stationery knife;
- scissors;
- crochet hook.
Bouquet of threads for knitting in a basket step by step
Features of using threads
A bouquet of knitting threads is created taking into account some features:
- For fluffy balls, it is recommended to select the thickest or medium yarn.
- The best material for forming inflorescences is acrylic, and the fiber should be a little fluffy and stretchy.
- If the technique involves the use of knitting needles, then large elements are created with a thick tool, and small elements are made with thin rods.
To create bouquets you can use different types of yarn and threads
- If you choose wool yarn, you should remember its positive characteristics: it repels moisture, elastic texture and durable thread. Handicrafts made from wool will not wrinkle.
- It is not recommended to iron finished inflorescences. If you need to iron the craft, this process is performed through gauze or white cotton cloth.
- The main condition for working with fibers is not to crush them or wet them.
Sweet bouquet
A handmade bouquet of sweets is an unusual and very popular gift. Everyone will love it, especially children, because you can eat it! And beautiful ladies will be happy to receive not only a very beautiful, but also a very tasty bouquet.
There are a lot of options for candy bouquets. It all depends on your imagination and patience. As an example, we will tell you how to make a bouquet in the form of red roses, inside of which there will be a surprise in the form of a delicious candy.
- Cut red and green corrugated paper into rectangles measuring approximately 7x8 and 4.5x7 cm, respectively. The quantity depends on the number of roses you want to make.
- Cut one of the corners of the red rectangle into a semicircle.
- Fold the green blank along the width like an accordion and cut it halfway along the edge so that when you turn it around, you get a “fence.”
- Place any round candy in the middle of the red piece and, twisting the paper clockwise, make a bud.
- Take a skewer, insert it on one side of the resulting bud and secure the joint with glue. The bud should sit firmly on the stick.
- Make a sepal. To do this, wrap the green blank with the sharp ends facing up at the bottom of the bud, after applying glue.
- Fold the uncut piece of green paper diagonally, slightly shifting the corners, and wrap it around the joint so as to hide all the joints. This will be the receptacle.
- In the same way, make the number of roses you need.
- Gather a bouquet and tie the “stems” with ribbon or rope.
- Pack the bouquet in beautiful paper and tie it with a red ribbon.
How to crochet a rose for a hat
Today, there are many patterns on how you can knit a beautiful decorative piece of a headdress using only thread and a hook. Having the desire, all that remains is to choose what kind of decor will be created.
Despite the many options for knitted flowers, they are mainly divided into two types:
- Volumetric flowers.
- Flat flowers.
At the same time, it is difficult to say which of them is preferable for a beginning needlewoman. The fact is that flat floral products are easier to knit, but in voluminous inflorescences it will not be so visible if there was an accidental mistake.
Watch a video on how to crochet a rose flower for a hat:
The following video perfectly shows how to cast on the first loops and how to finish knitting:
To start knitting you need to cast on 48 air loops (VP).
- The first row is knitted as follows: knit a double crochet (Dc) in 4 loops from the hook, then skip one loop of the chain, again Dc in the next loop, skip a loop, and so on until the end of the row.
- Second row - VP, turn the work to the other side. Knit 2DC, 2VP, 2DC into the arch. This is done with each arch. The VP is knitted and the fabric is turned over again.
- Third row - 7DC is knitted into the arch, a single crochet (SC) is made between the reports, 7DC is repeated again in the next arch, SC and so on.
It turns out to be a long knitted strip. Before cutting the thread, you need to measure at least 10-15cm. Thread this thread into a needle and thread it through every second loop along the cast-on edge. Tighten the thread and secure the end. The beautiful rose is ready!
On paper
Necessary materials for making applique from threads on paper:
- bulky multi-colored yarn;
- green floss;
- cardboard rectangle measuring 7x4 cm;
- yellow and white cardboard;
- glue;
- scissors.
Bouquet of threads for knitting on paper (applique) step by step Design technology:
- Wrap fibers onto cardboard rectangles, then cut off the thread edge.
- Tie the resulting parts with thread at the top and bottom, and then remove the cardboard.
- Cut the workpiece horizontally in half and open the resulting bundles.
- Cut off excess threads.
- Use similar steps to perform elements from other shades of yarn.
- On a cardboard template (A4 format), make 5 notches at the top in the form of small triangles directed inward, and cut 1 such cut in the center at the bottom.
- Wrap the floss onto the cardboard, threading it into the cut-out notches; these will be the stems.
- Glue prepared pom-poms in any shape onto each green line and spread them out in the form of an inflorescence.
- Glue the finished craft onto thick yellow paper, the size of which is slightly larger than the base.
Continuous knitting maple leaf
In the image of the pattern diagram, a black dot marks the beginning of knitting.
We make a chain of 15 VP. Below is the scheme of work:
- 1p.: 1 VP under., 13 RLS, in the outer st. knit [1 column. without/n +4 VP + 1 column. no/n], 13th column. with double crochet on the other side of the original chain;
- 2p.: 1 VP under., 13 RLS, tie into an arch from VP [2 columns. without / n +4 VP + 2 columns. no/n], 11th column. without/n.
- knitting the next 8p. leaflet - see diagram. Let's continue:
- 9 rubles: 1 air. p. under., then - RLS according to the scheme, we complete 4 VP;
- 10 rubles: we begin knitting the side left part: 1 VP, 8 single stitches, 1 air. p. above the stlb without / n the lower r., 1 RLS;
- 11r.: 1 VP under., 10 StBN, 4 VP;
- 12r.: 1 VP under., 14 tbsp without/n, 1 air. p. above the stlb without / n the lower row, 1 sc in the sc of the 9th row.
Further knitting of the pattern - see diagram. We attach the even rows with columns without / n to the column without / n of the 9th row.
Without breaking the thread, we knit the second left side of the sheet in the same way, and continue knitting sc until the end of 9 p. on the right, 4 VP.
Next R. we start 1 VP under. and knit the two right parts of the sheet in a mirror image to the left.
Master classes on making bouquets from yarn
You can use cups of yarn to create large and small bouquets. By choosing the right shades of threads, you can create a composition that will look like real flowers. To make bouquets look festive, they need to be decorated with beads, colored paper and dried flowers. Equally important is to design the packaging beautifully.
Further in the article you can consider instructions for making various bouquets from skeins of thread.
"Mimosa"
You can make a bouquet of balls of yarn in the shape of a mimosa branch with your own hands in 1.5 hours.
What you will need for work:
- yellow acrylic yarn;
- thick green floral wire (No. 20, diameter 1.1 mm);
- green corrugated paper;
- PVA glue;
- small foam balls;
- green floral ribbon;
- satin ribbon;
- wire cutters
First, the wire must be cut into pieces using wire cutters. The table lists the number of segments and their length.
| Number of segments | Length, cm |
| 3 | 30 |
| 2 | 25 |
| 6 | 18 |
| 2 | 15 |
| 2 | 10 |
Procedure:
- First you need to collect the branch on which the inflorescences will be located. Place a 30 cm piece of wire vertically in front of you.
- Attach 2 pieces 25 cm long to it. Bend their edges to the sides. Secure the stems with pieces of floral tape at the top and bottom. The lower ends of the wire should be at level 1.
- By analogy, wrap 2 pieces of 18 cm each with tape.
- Secure 2 wires 15 cm long.
- Attach the last 10 cm pieces.
- Wrap the resulting stem tightly with floral tape.
- Bend back the branches.
- Temporarily set aside this stem. Now you need to make 2 branches of leaves. A piece of wire 30 cm, connect with 2 pieces of 18 cm each. Wrap the lower part of the stem with tape. By analogy, make branch 2.
- Cut the corrugated paper into strips 5 cm wide. It is important to cut it along the grain and not across it.
- Make a fringe on each ribbon by making transverse cuts. The width of the uncut edge is 1 cm, and the width of small strips is 0.5 cm.
- Coat the uncut edges of the paper strips with PVA glue.
- Wrap them around branches simulating leaves.
- Straighten out all the “needles”. Dry the product.
- Take a stem intended for inflorescences. Grease the tip of each branch with PVA glue.
- Place 1 foam ball on each branch.
- Unravel a skein of yellow yarn and twist it into 9 small balls of 5 cm in diameter. There is no need to tighten the threads. The skeins should be light and soft.
- Tuck the loose ends of the threads into the balls.
- Place the balls on the branches.
Collect leaves and inflorescences into a bouquet, tie the stems with a satin ribbon. Tie a fluffy bow. Trim the excess tape and burn its ends with a lighter to prevent them from unraveling.
"Ladybug"
A bouquet of balls of yarn called “Ladybug” will turn out to be colorful and bright.
To work you will need:
- 7 multi-colored balls of linen yarn;
To create a bouquet you will need linen yarn of different colors
- 7 plastic tubes for attaching helium balloons (with cups);
- green acrylic paint in a can;
- a simple pencil;
- sackcloth;
- brown sewing thread;
- needle;
- scissors;
- transparent glue “Moment”;
- half a pistachio shell;
The bouquet will be decorated with a ladybug made from a nut shell, painted with acrylic paints
- acrylic paints;
- thin art brush;
- green corrugated paper.
Procedure:
- Cut the burlap into strips 20 cm long and 5 cm wide.
- Using a needle, pass a thread through each ribbon and pull the fabric into a ring. Straighten out the wavy edges. You can pull out a few of the top threads to create fluffy edges.
- Paint plastic tubes with bowls with spray paint and dry.
- Place balls on the cups. Secure them by wrapping the base of the bowl with the tip of the thread, which must be pulled out from each ball.
- Under the tied knot, on the stem, apply a drop of glue.
- Place a fabric ring on the stem from below, fluffy side up. Press with your fingers until the material sticks to the tube.
- By analogy, collect the remaining flowers.
- Fold the corrugated paper like an accordion. You should get a rectangle 10x5 cm, consisting of 10 layers.
- Draw the shape of leaves on one side of the paper. Cut them out.
- Spread out the sheets.
- Collect a bouquet and add paper leaves to it.
- Wrap the flowers in burlap. Wrap with sewing thread and tie a knot.
- Paint the pistachio shell with red acrylic paint. Dry it.
- Using a thin brush, paint the head and spots like a ladybug.
Glue the shell to the edge of the package using Moment glue.
"New Year's boom" with Christmas balls
A bouquet of balls of yarn can be a good gift for New Year or Christmas.
What you will need to create such a bouquet:
- 5 large red balls of acrylic yarn;
- 6 medium-sized white balls;
- 6 small green balls;
- foil;
- thick floral wire;
- wire cutters;
- stationery knife;
- tape measure;
- felt-tip pen;
New Year's bouquet of balls of yarn
- spruce branches;
- small golden balls for decorating the fir tree (9 pcs.);
- a piece of foam;
- green tinsel without glitter;
- small basket.
Procedure:
- Cut the wire into 26 pieces 25 cm long.
- Roll 26 small balls out of foil and place them on the tip of each wire.
- Place all the balls on the wire.
New Year's bouquet of balls of yarn in red and white colors
- Place balls on the remaining pieces of wire, having first removed the fasteners from them.
- Cut spruce branches. Long branches should be chosen. 7 pieces are enough.
- Using a measuring tape, measure the circumference of the bottom of the basket and its diameter.
- On foam plastic, using a felt-tip pen, draw a figure of the recommended shape and size. Cut the blank with a stationery knife.
- Place a piece of foam inside the basket.
- Roll up the tinsel and place it on the foam.
- Stick the flower stems into the foam. There should be red balls in the center. White and green should be placed along the edges in a checkerboard pattern.
- Insert the wire with golden balls between the balls in a chaotic manner.
Another option for a New Year’s bouquet is a Christmas wreath made from balls of yarn.
Carefully insert spruce branches between the green and white “flowers.”
Bouquet of roses on skewers
To create such a bouquet you will need skeins of yarn in which the thread is laid crosswise. These skeins have 2 ends: on the side and in the middle. They are soft and light.
What you will need to create a bouquet of roses from skeins of yarn:
- 3 large skeins of white acrylic yarn;
- 3 large skeins of red yarn;
- 6 long wooden skewers;
- 6 artificial roses with realistic stems and leaves;
- wire cutters;
- green acrylic paint;
- medium-sized art brush;
- foil;
- satin ribbon.
Procedure:
- Paint all skewers green. Dry them.
- Roll 6 tight balls from foil and place them on the end of each skewer.
- Carefully place the balls on the skewers, threading the foil balls through the center of the balls to the middle. Cross winding should be on the sides.
- Use pliers to separate the artificial rose buds from the stems. They are not needed. Only the stems and leaves should remain.
Collect a bouquet and secure it with a satin ribbon. Tie a fluffy bow.
Flowers from egg trays
Egg trays are one of the waste materials for handicrafts. Usually, egg containers are thrown into the trash, not knowing what beauty can be created from them! Hand-made flowers from egg trays will decorate your home interior, photo frames, wreaths, mirrors, etc.
To make these flowers you will need:
- egg trays (cardboard and plastic can be used);
- brush and paint (gouache, acrylic);
- scissors;
- glue;
- wire.
We cut the egg tray into separate sections, after which we use scissors to form the petals of your future flowers from each section. The height of such blanks may vary. We paint the resulting petals with paint, preferably in two layers. Further, depending on the type of flower you are making, one blank can be inserted into another, forming a bud. We fix the elements of the resulting flower with glue.
The materials and process of creating flowers from egg trays are discussed in detail in MK Handicraft Masterpieces:
We bring to your attention the most common types of flowers from egg trays. But remember that you can come up with the flower shape yourself!
The process of creating a rose from an egg tray
Tea rose
The pride of the flower world is the narcissus
Tender cosmos
Wonderful pink cyclamen
The frame of the summer wreath is also made from egg trays. A similar wreath can be decorated with daisies, cornflowers or pansies.
You can even make a small floral masterpiece from plastic egg trays!
For example, snow-white roses from plastic containers in combination with pearls and decorative gypsophila form such a delicate bouquet.
Decorative moss or fern, as well as red ribbons and beads will add brightness and festiveness to a Christmas wreath made of plastic roses.
For details on creating flowers from plastic containers, see this master class.
A personalized flower on the table will please a colleague or your loved ones:
Let's see how you can turn a simple photo frame into an exclusive one:
A simple mirror decorated with flowers from trays will look more interesting and sophisticated.
Chic mirror decorated with lush peonies
You can create an interior floral arrangement using flowers from trays in pastel pink tones in combination with dried natural roses and simple thin twigs!
Using LEDs, you can decorate the interior of your home with a flower garland.
Or make a flower lamp:
Bouquet of roses
A bouquet of knitting threads can be given as a gift for women's holiday.
Materials for creating roses:
- cardboard from the box;
- red and green sewing threads;
- scissors;
- cellophane bags;
- skewers;
- 2 types of glue (PVA and Titanium);
- shiny gel;
- brushes;
- ruler;
- pencil.
Design method:
- Draw squares measuring 19x19 cm on cardboard, then cut them out. Place the resulting templates into small bags.
- Wrap the workpieces tightly with threads (separately red and green).
- Apply PVA liberally to the fibers, then leave the parts to dry for a day.
- When the adhesive is completely dry, make 2 cuts on the sides of the scarlet figures and remove the cardboard. Next, cut 2 whole sides. Divide the blanks to make 2 square sheets for the inflorescences.
- In the same way, decorate the green fragments for the leaves.
- Cut off the corners of the red elements to form a circle, then cut them into a spiral.
- Twist a rosebud from the created curl, then glue it together.
- Dip the brush into glitter gel and cover the flower petals with the mixture.
- Cut leaves from the green segments in any shape.
- Glue 3 elongated skewers together and wrap them tightly with green thread, securing the ends with glue. These will be the stems.
- Connect the stems with the buds and secure them with Titan adhesive.
- Glue 2 leaves at the bottom of the inflorescences.
- Create the required number of roses for the bouquet.
With balls
A bouquet of knitting threads is presented for the New Year holidays.
To create a composition you will need the following components:
- small balls of red and white flowers;
- New Year's purple and milky balls;
- live spruce branches;
- packaging paper material;
- wide satin scarlet ribbon;
- wire;
- elongated skewers;
- scotch;
- twine.
New Year's bouquet of knitting threads
Creation process:
- If the skeins are too large, it is recommended to rewind them into smaller elements, and cut off the tip and tuck it into the middle. It is recommended to make 4 white balls and 5 red balls.
- Wrap the Christmas balls at the top near the mount with wire, thread it through the hole, pull it through the other side and twist the ends together. In this way, decorate 5 balls of different textures.
- Place a spruce branch against a skewer, wrap it with thin twine, and tie the ends in a knot. Make 10-15 such blanks.
- Determine the upper side of the ball, pierce it from below with a metal thread, thread it through to the side, bring the second edge down and twist the cords together. Using the same method, secure all other skeins.
- Assemble the composition in any form, connecting the made stems together and fixing them with tape.
- The voids should be filled with spruce branches.
- Cut the wrapping paper into 3 parts and pack the composition in them. It is recommended to wrap the craft in each segment in turn so that they are offset from each other.
- Tie the product with a satin ribbon and make a bow.
Winter bouquet Happy
I am accepting orders for paniculate hydrangeas; the seedlings are of excellent quality and will delight you with lush blooms this summer. Reservation without prepayment. Issue in May. There are other varieties of hydrangeas, a good selection of conifers and perennials, consultation on creating compositions, write in private messages. 1. Hydrangea paniculata 'Diamant Rouge' Compact bush, no more than 1.3–1.5 m tall. Blooms in VII–IX. At first the flowers are greenish-white, then quickly turn pink and after two weeks they acquire a rich red color. Heavy pruning is recommended. Pot 3l - 990 RUR 2. Hydrangea paniculata 'Fraise Melba' Tall variety, bush up to 1.7–2.1 m. The color of the flowers when blooming is greenish, later milky white, then soft pink, towards the end of flowering rich wine red colors. Blooms in VII–IX. Large inflorescences are obtained only with annual heavy pruning. It overwinters without shelter, a hardy and unpretentious variety. Pot 5l - 1490 RUR 3. Hydrangea paniculata 'Magiсal Moonlight' Bush with a height and diameter of up to 2 m with strictly vertical shoots. It blooms in July, does not lose its decorative effect even after flowering in the fall, and is suitable as a dried flower for winter bouquets. At the beginning of flowering, shades of creamy yellow and lime green predominate, turning into white. In severe winters, freezing of shoots is noted; open, windy areas are not recommended. 3L pot - 990 RUR 4. Hydrangea paniculata 'Magiсal Starlight' Bush 1.6–1.8 m high with a symmetrical, regular rounded crown shape. The inflorescence is loose, cone-shaped and consists of two types of flowers: sterile and fertile, of which the majority are. Sterile flowers are located unevenly in the inflorescence, large, consisting of four round-oval elongated sepals of dazzling white color. Blooms in VI–IX. Prefers moist, well-drained, fertile soils with acidic and slightly acidic reactions. Light-loving, but feels better in shade. Winter hardiness is high. Zone 4, down to -35°C. Pot 5l - 1490 RUR 5. Hydrangea paniculata 'Phantom' Bush height from 2.1 to 2.5 m with a round spreading crown. The shoots are strong, strong, weakly branched, and grow vertically. The inflorescence consists of white sterile flowers, which acquire a lilac-pink hue by autumn. Blooms in VII–X. Annual early spring pruning is required. The shorter the pruning, the larger the inflorescence. An unpretentious variety, resistant to diseases and pests, has high winter hardiness. 3L pot - 990 RUR 6. Hydrangea paniculata 'Polar Bear' Bush with a height and diameter of about 2 m. The inflorescences consist mainly of sterile white flowers, turning slightly pink in the fall. Blooms in VII–IX. Requires short annual pruning and does not like overhead watering of flowers. It has high frost resistance down to -35°C. 3L pot - 990 RUR 7. Hydrangea paniculata 'Skyfall' Forms a bush 1.2 m high and 1 m wide. The inflorescence of this variety is large and filled with unusual, sterile flowers, similar to hyacinths. This variety is popularly called hyacinth hydrangea. It blooms greenish, then turns white and later acquires pinkish hues. It winters well in the middle zone, but we recommend mulching and planting in a place protected from the wind. Prefers sunny places for planting, but can tolerate partial shade. Pot 3l - 990 RUR 8. Hydrangea paniculata 'Sundae Fraise' A low-growing variety with a dense, compact, symmetrical rounded crown of about 1 m. The flowers are sterile, white, towards the end of flowering they become pink, the color of strawberry ice cream. Flowering is long and abundant from VII to IX. An unpretentious, stable and winter-hardy variety. 3L pot - 990 RUR 9. Hydrangea paniculata 'Vanille Fraise' One of the most popular varieties. It has a bush of 2–2.3 m, with erect, hard shoots. The flowers are sterile, at first milky white, then a delicate pink hue, towards the end of flowering a rich wine red color. It is very responsive to fertilizing: in a good agricultural background it produces maximum decorativeness and clean, bright tones in the color of flowers. A very hardy and unpretentious variety, resistant to diseases and pests. Has high winter hardiness. Pot 3l - 990 RUR, pot 5L - 1490 RUR
great yarn, say goodbye to leftover yarn forever
Is your house filled with half-used balls of yarn? Don't despair if your closet doors won't close. There are plenty of ideas for decluttering projects - and we've rounded up the best for you.
Whether you want to make an afghan, love pillows, or something less will be enough to use up your excess items, the following patterns will get your hook working and your yarn back under control.
1. Amazing wallet toss
This magnificent throw is a great treasure. The individual hexagons are nice and compact, so they're great for those pieces of yarn that are too big to throw away but too small to use easily. They're also the same color—less ends to worry about. Don't forget that although these instructions only use one range of yarn, you can choose any yarn you have on hand from any of your previous projects as long as it is the same weight.
2. Good old grandmother
Grandma really knows better when it comes to crochet - the traditional granny strip is perfect for using up lots of half-lengths of yarn. This lovely example is cozy, colorful and truly desirable. If your yarn doesn't stretch to a large cast, this is the perfect stitch for pillowcases and pillows.
3. Bouquet from leftover yarn
Make a decorative element out of yarn!
4. Hangers
Everyone needs a hanger - with a little crochet work and some imagination, you can use a variety of your own to decorate them and take them from utilitarian to unique. Hangers make practical gifts and you can style them to suit your friends or the occasion - shades of white for the bride, pink for the little girl and so on.
5. Pencil case
Keep your favorite pens on hand or create this little project for the kids - it's the perfect back-to-school item that will be truly appreciated and will make a nice dent in your stash.
6. Rings and more
If you have a bunch of decorative lurex or fluffy yarn prims and don't know what to do with them, then you'll love this idea. Why not crochet fun faux rings? They only take a few minutes to make and look really pretty. If you're wearing your own cardigan or shawl, you'll love making a matching or contrasting ring. Or why not create one for your friends? If you are unsure about rings, make a larger bracelet.
7. Stashbust Scarf
Sometimes the best way to finish the yarn of a big project is to start another project—just something not quite as big. How about this beautiful colorful scarf? As you can see, it is multi-colored, so it will use up the remains of all kinds of blankets and blankets.
Other ideas
Photo examples are the best inspiration. And even if you don’t repeat them completely, but take only the basics, you will get something more convincing than a complete impromptu.
Ideas for cool yarn bouquets.
- Bouquets in monochromatic colors are always especially subtle and elegant. Due to the artificial hare's tail (such a plant) between the heads, these balls look very believable. Well, then such flowers will turn into a knitted cardigan, for example.
- And this is an entirely knitted bouquet, even its base is made of yarn. Only the leg is durable, made of plastic or a thick cardboard cylinder, but still wrapped in thread.
- It turns out that even bridal bouquets are made from tangles. And if the bride is also a needlewoman, this bouquet will become some kind of business card for the main character of the celebration. It should be gentle and match both her outfit and the main line of wedding decor.
Well, over time, from these happy wedding balls you can knit the first things for the heir - very symbolic and romantic. And also rational.
- To create a bouquet, you can use yarn of different textures: so that some threads are fluffy, others a little rough, and others smooth. And real spikelets and dried flowers will only decorate this combination.
- For the birth of a child, you can also give a bouquet of skeins - here is an example of how such a decorative design (probably intended for the mother of a newborn boy) could look like. It’s also conveniently made: some skeins have crochet hooks stuck into them.
- An example of how beautiful a single-color bouquet made of yarn can be. Feathers and dried flowers in small quantities will complement it. It is difficult to present accessories to a craftswoman more gracefully.
- And in this union, both real flowers (hyacinths) and ball flowers found a combination. Thanks to this, it looks extremely unusual and very elegant. And for some reason it is most associated with March 8th.
- Some craftsmen are intimidated by the number of skeins in a composition - they don’t always plan to give so many. Here is an example of a more compact bouquet that still looks original.
The main highlight of such compositions is the absolute utility of the bouquet. It can stand in the house as a decoration for a long time, and then from the yarn that was so pleasing to the eye, the knitter will create beauty on a new level.


