What girl doesn’t dream of becoming a princess, and what boy doesn’t dream of becoming a king? It is enough to make a simple and effective origami crown out of paper to make this wish come true. The rest of the outfit can be very unpretentious, because it is by the special headdress made of gold and precious stones that the monarch is recognized. It is not for nothing that the ceremony of officially accepting power is called coronation, although the ruler is also given other attributes - an orb, a scepter, a mantle, a sword or sword, and so on.
Craft template
The finished crown can be of absolutely any shape, size and made from any suitable material. Before printing and using the template, you need to adjust it to the desired size.
How to find out the size of the finished crown? Measure the circumference of the child's head - this will be the size of the product. When preparing the template, leave 1-1.5 cm for gluing the crown. You can edit the template to size in any photo editor.
Owl
Origami paper crafts for children are very educational; they develop perseverance and hand motor skills in the child. You can make such souvenirs together with your parents and give them to your loved ones for any occasion:
Take a regular sheet of paper and turn it over so that you get a rhombus; Fold the sheet in the middle twice and return it to its original position.
It is important that fold marks remain; Fold a small triangle over the top. It should occupy 3 parts of the entire sheet; We bend the bottom part, it should occupy 2 parts of the entire sheet; Now it's the turn of the wings
We bend two triangles on the sides; On the large curved triangle we make a small bend, as if forming a mouth.
The owl is ready. You can decorate it with painted eyes and imitation of feathers on the wings.
Paper crown for princess
A paper crown decorated with sequins looks very interesting. To bring your idea to life, you will need yellow or gold paper, scissors, glue and large sequins. This is the simplest version of the crown and is quite easy to make:
The first step is to prepare a template. You can either find the blank on the Internet or draw it yourself.
The resulting template must be attached to a sheet of colored paper, circled and cut out. Having adjusted it to the circumference of the child’s head, the product must be glued and wait for the glue to dry completely.
We recommend reading:
- DIY polymer clay jewelry: review of the best master class with step-by-step instructions for beginners (150 photos of original ideas)
DIY polymer clay flowers (120 photos of the best ideas) - simple instructions with full description + master class and video tutorials
- Quilling for beginners (200 photos) - step-by-step instructions with description. The best master class on creating quilling crafts with your own hands
The last step is to decorate the craft: take large sequins and cover the product in random order or laying out a specific composition.
How to sew a king's robe
In fact, despite the apparent complexity of the image, everything is quite simple. In order to make the king's robe yourself, you need to stock up on red or burgundy satin and faux white fur for finishing. Then follow the instructions:
1. Using special chalk or soap, draw a large circle on the fabric. Its diameter depends on the height of the child and how long you are going to make the cape.
2. For the neckline, draw a smaller circle in the middle of the large circle. Calculate the size in advance for ease of wearing.
3. First cut out a large circle, then a small one. And finish the edges with a sewing machine.
4. Sew white fur to the hem of the robe. Cut out a fur collar and decorate the collar with it. At the junction of the collar you can sew a large gold button.
5. Also, using fabric paint and a stencil cut out of paper, you can draw a royal sign on the back. Just attach the stencil and apply paint with a brush in 2 layers alternately. The robe for the New Year's costume is ready!
"Fur" crown
A real royal crown with fur trim can be made from cardboard and cotton wool.
Prepare for work: thick cardboard, cotton wool, paint, glue, scissors, decorative elements. So, first, let's cut out a template from plain paper and transfer it to cardboard.
Next, you need to cut out the blank and glue it. We will make a fur trim along the bottom of the product. To do this, draw a straight line around the circumference, spread with glue and cover with cotton wool.
Cotton wool can be painted with any color. Instead of cotton wool, you can use a strip of faux fur. To decorate the product, you can use any material - beads, colored rhinestones, sequins, cotton balls, and so on.
The main details of the image in the king’s outfit
If you remember Russian fairy tales where such a character appears, you can try to recreate a similar image yourself. But first, let’s remember what characteristic details are present in the king’s costume:
- mantle;
- crown;
- shortened trousers;
- scepter;
- shoes with buckles.
Based on this, you can begin making a suit for the royal person.
Elsa's Crown
Many girls are fans of the cartoon “Frozen” and each would like to be like one of the heroines. Please your daughter and make an Elsa crown with her, especially since it is not at all difficult to make.
What can a crown be made from? Prepare silver cardboard, glass beads of a similar shade, thin gray satin ribbon, scissors, glue, and blue pebbles for decoration.
Prepare a strip of cardboard 3-4 centimeters wide and a length equal to the circumference of your head. Tie pieces of satin ribbon to the ends of the strip.
Using the template, cut out the front of the product and glue it to the strip. Next you need to decorate the product. Use glass beads and blue stones or rhinestones for this. This is the simplest option for making a crown for the heroine of an animated film.
Using a figured stencil and decorative elements, you can make a more original product.
Second version of the mantle
You can take an even simpler route and sew a rectangular cape. To do this, cut a rectangle out of fabric. Choose the length based on your child’s height, and the width based on his size. After cutting out a large rectangle, wrap it around your child to see exactly whether the size fits or not. If it is suitable, sew a loop to one of the corners. And to the other - a large metal button. Decorate the edges of the cape with faux fur. Along its entire length it can be decorated with an ornament of sequins, beads or other decorative elements. Another decoration idea is braid. Sew bright painted braid along the center of the mantle or in any other places.
Miniature crown
A neat little crown can be made from a toilet paper roll.
Shape one edge of the sleeve and thread a thin elastic band through it to hold the crown on your head. The sleeve crown can also be glued to the rim.
You can decorate the products to suit every taste: cover them with colored paper, sequins, paint them, add feathers, flowers, and so on.
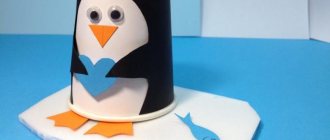
Pigeon
This is an option for those who are just starting to get acquainted with Japanese papermaking techniques. The dove folds in just a few steps. You can make two mirror-symmetrical birds and decorate a Valentine's Day card or wedding invitation with them.
We start with a traditional square. For the Japanese, this figure has a special meaning, symbolizing the structure of the world, the four main elements, the unity of the cosmic and earthly principles. That is why the square is the basis for origami, which is primarily intended for religious rituals.
Algorithm of actions:
We turn a sheet of paper measuring 21x21 cm with one of the vertices towards us. Fold in half, connecting two opposite corners: top and bottom. You should end up with an inverted triangle. We bend the resulting figure in the middle parallel to the base. The blank will resemble a boat standing on its own mast. We turn the model over.
Separate the top layer of the triangle and bend it to form a rhombus. Next, fold the workpiece in half from left to right. Bend the protruding part back. This will be one wing of the dove. We bend the remaining part in the same way. We get the second wing.
Forming the head. We make a reverse inner fold, pressing the middle line of the “torso” fold with a finger almost at the top. We iron the resulting fold well so that it does not diverge.
Now you can write some message on the bird, as was customary among the Japanese aristocracy. Or use as a pendant.
Homemade crown decoration
Currently, on the shelves of specialized craft stores you can find many decorative elements for crafts, which can also be used to decorate a homemade crown: rhinestones, beads, sequins, colored and packaging crowns, satin ribbons, lace, plastic flowers and much more.
In addition, you can decorate the product with improvised materials - pebbles, pasta, shells, cotton wool, and so on.
A DIY crown is a fun, original accessory for a carnival, party or children's entertainment. By using your imagination and imagination, you will end up with a product of incredible beauty.
King's Scepter
An important attribute of a king's costume for a boy is a scepter decorated with stones and gold. For this you will need a small stick, some foil and a lot of decorations.
First you need to make a small ball of paper. Roll the paper into a ball and wrap it in foil. Then do the same with the stick. Then secure the ball to one end of the stick and carefully wrap them together with several more layers of foil. Wrap until you are sure of the strength of the structure. Then there’s the small matter – decorations. Using a glue gun, glue lots of decorative rhinestones onto the scepter and its top. Lay out a pattern of beads and sequins. You can glue a small cross cut from silver or gold cardboard into the middle of the ball.
Photo of a paper crown
Did you like the article?
1+
How to make an origami frog: master class, diagram, recommendations
To make origami that would also jump - what could be more interesting? We offer a diagram of such a craft in the form of a frog:
- First, fold a sheet of paper in half vertically, face up. In this case, you need to try to make sure that the fold line is on the right.
- Next, the resulting rectangle is bent horizontally and unfolded again.
- Now each of the upper corners needs to be attached to the horizontal fold line diagonally. The result will be criss-cross lines.
- In the middle of such a cross you need to make a horizontal line by folding the top square in half.
- Now the side lines should be bent towards the master, and the diagonal ones - away from him.
- It’s time to take on the bottom square of the structure. Its lower edge must be attached to the upper one - that is, fold the square in half horizontally.
- The lower corners of the upper triangle should be folded upward.
- The bottom at this stage is a rectangle. It needs to fold the sides towards the middle. At the same time, they should slightly fall short of the middle.
- The lower part of the resulting rectangle again needs to be folded in half horizontally.
- At the bottom you need to bend and immediately bend the upper corners. As a result, the lower part will resemble a boat.
- The corners of the “boat” go down.
- And then they bend to the sides as indicated in diagram No. 11.
- The lower part then bends up and immediately bends down again as in diagrams No. 12 and No. 13.
- The frog is ready! To make her jump, you need to click on the ledge below.
An origami frog is made according to the following scheme