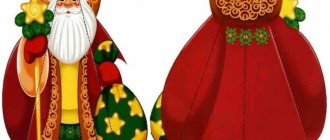
Photo: christmas.yerevan-city.com What New Year would be complete without its main symbol? Figurines, Christmas tree decorations, drawings on windows - all this is already there. And now it’s time for 10 ideas on how to make Santa Claus out of paper! Each of them will give you pleasant moments, relaxation and wonderful holiday leisure with loved ones.
How to make Santa Claus from paper or cardboard
Fans of the origami technique can make Santa Claus using one of the diagrams. For the craft, they will need one-sided colored paper.
If you choose a more complex painting scheme, then you will have to prepare a brush and paints for a sheet of white paper. In this case, coloring the craft is done according to the scheme.
Manufacturing instructions
On our square we make folds along two diagonals, red side up.
Once the markings appear, we work on the white side. Fold the top corner towards the center of the fold.
We wrap the tip of the corner back, up, to the edge.
We unfold this corner back and bend the tip of the corner to the resulting line.
We completely fold the lapel with a corner, as shown in the photo:
We wrap the lower part to the top point, then we turn the corner back to the bottom point. We unfold the workpiece with the red side up.
We wrap the sides with narrow strips. We wrap both sides with a corner towards the middle line.
Then we fold the resulting white parts towards the red line. We get even angles on both sides. We turn the bottom back, just as smoothly.
We unfold our figure and it turns out to be Santa Claus. We correct Santa Claus's hands, if necessary.
Cut out a nose from red paper and glue it on. You can also draw a nose with a red marker. Using a black marker, draw Santa Claus's eyes and smile. If desired, you can glue a loop on the back with tape and hang our Santa Claus on the tree. Our Santa Claus is ready to delight you and those around you. We hope you enjoyed it!
The size of our Santa Claus depends on the size of the paper square we take initially, respectively, the larger the square, the larger Santa Claus in the end. OK it's all over Now. We hope you enjoyed it!
Watch the video where you can see step by step the process of making Santa Claus using the origami technique:
Santa Claus made from cones
This craft can be done with children; it is easy to make. You can make it using templates or using your own blanks.
For the craft, prepare:
- a sheet of white and red paper;
- paper glue;
- scissors;
- stapler;
- pompom or bead for a cap.
Stages of work:
- On a sheet of red paper, draw a circle using a compass, plate or other object. The radius of the circle will be equal to the height of the craft.
- Fold the cut circle in half (you can cut it, then you get 2 crafts or leave it like that), twist the cone and secure the edges with a stapler or glue.
- On a sheet of white paper, draw a beard with wavy edges, make a slit in the upper part, draw eyes and a mustache.
- We pass the workpiece through the hole onto the cone.
- Attach a pompom or bead to the top of the cone.
Option No. 3
You will need:
- felt-tip pens (or pencils) black and red,
- square sheet of paper 10 by 10 cm (you can take more or less). The paper should be two-colored - white on one side, red on the other. If you don’t have such paper, you can glue together sheets of white and double-sided red paper.
We need to bend our square diagonally.
Unfold the workpiece and also bend it in half along the second diagonal.
Now we see the markings made and continue to work on the white side.
We bend the outermost corner to the top of the workpiece.
We see we have a line drawn, we need to turn the corner back.
We turn back. We see that we have a line; we need to bend a corner to it.
Now we can completely wrap up our lapel along with the corner. You will get it like this.
We work with the bottom of the craft. We bend the bottom corner to the top point.
We make a bend to the bottom point.
Turn over:
We make narrow stripes on the sides.
The same on the opposite side.
We see the middle line and bend both sides towards it.
And the second one.
We take the white parts and make a fold along the red line to the white one.
We bend this strip and make a square.
We do the same on the opposite side.
And a square.
And when we turn the figure over, we can see Santa Claus.
You need to draw his eyes and nose.
And that is all!
This Santa Claus can be used to decorate rooms, or made into a Christmas tree toy by gluing a string. This craft is also perfect for creating and decorating a New Year's card with your own hands.
A selection of other crafts at the link - “Do-it-yourself Santa Claus”
In order not to forget the page address and share with friends, add to your social network: Do you want to know news about competitions or master classes?
Tags: New Year's crafts
Attention! It is better to write urgent questions in the comments on the website (form at the bottom of the page) or, better yet, directly by email. There are no notifications about comments from the VKontakte form! This form is more for feedback. 
Discussion: 3 comments
- Natalia:
December 13, 2022 at 19:50Thank you very much for the detailed description. Today we did Option 1 with the children at school. Everyone liked Santa Claus. We will do other options.
Answer
Larisa, editor:
December 13, 2022 at 08:04 pm
Wonderful! If you want, you can send a photo to our competition
Answer
July 11, 2022 at 10:33 am
Cool Santa Clauses! I have already made 1 and 2 for school, this year I will make the third option for the new year.
Answer
Santa Claus - box
It's always nice to receive a gift in an unusual gift box. On New Year's Day, it will be symbolic to see gifts under the tree in boxes in the shape of Santa Claus. A large gift, of course, will not fit in it, but a small souvenir or sweets can be given in this way.
Santa Claus and Snow Maiden colored from paper: templates and stencils for cutting and window stickers
In anticipation of New Year's miracles, everyone tries to decorate and clean their home and workplace. Unfortunately, the weather does not always please us, and the temperature does not allow frost to “decorate” the windows with winter patterns. But you can do this yourself using ordinary thin paper and glue.
For such patterns, white paper is often used, but if you want a bright and creative design, you can use multi-colored paper for New Year’s vytyanki. The gluing technique is the same as with white paper, but is often not as intricate and does not require many different cuts. True, you will have to glue the beard, torso, boots, etc. separately. therefore, this is quite painstaking work and requires careful attention and concentration during the process.
New Year template New Year template
Template #1
Template No. 2
The “broken glass” effect also looks very beautiful, that is, every detail of the picture is cut into many more small pieces. It's better to cut rather than tear. But this process takes a lot of time and when gluing it is worth working hard to ensure that the drawing turns out accurate and beautiful. You can buy paper that is colored on both sides, in which case, in daylight, the design will be ironed wonderfully both from the inside of the house and from the outside.
Before the New Year, everyone tries to decorate their home in a special way; various New Year's decorations allow you to plunge into the atmosphere of fairy tales and magic. In addition, the preparation process is not only interesting, but also educational, especially cutting out stencils to decorate windows.
Crafts using ready-made templates and stencils
Templates and stencils can be chosen for both Santa Claus and other fairy-tale characters. Print them out on thick paper, and then cut them out and glue them together with your child. This activity will not only allow you to spend time usefully, but will develop creativity and bring a lot of joy.
Plasticine figures
Many people remember the Soviet plasticine cartoon with congratulations from Grandfather Frost and the snowman. He is cheerful and joyful! You can make a similar figurine yourself! We use the figurine in New Year's crafts for school and kindergarten. Attached are the sculpting diagrams.
Santa Claus from a napkin
Prepare:
- red napkins;
- the required number of templates with the face of Santa Claus;
- scissors;
- marker;
- glue;
- hole puncher;
- narrow ribbon or twine.
Stages:
- Pre-print the required number of Santa Claus face templates;
- cut them out;
- fold the napkin into a cone with the base shaped like an angle;
- fix the napkin with a cut out template;
- paint parts of the face at your discretion;
- Use a hole punch to make a hole in the top of the napkin and thread through the ribbon or twine.
From snow and ice
What else can we make Father Frost and Snow Maiden out of? Of course, from snow and ice! We set off to sculpt sculptures in the yard. Now the New Year's mood is guaranteed!
Post photos of your Santa Clauses in the comments!
Photos used from the sites: E-polska.ru, Pinstake.com/ded-moroz-iz-plastikovoy-butyilki-svoimi-rukami-master-klass-s-poshagov, Avanak.ru, Mymaille.us/shitye-razvivayuschie-igrushki , Mmm-2011.ru, Zelenhoz-ukhta.ru, Verbilkiclub.ru, Zaogzd.ru, Cro-nv.ru, Ok.ru, Newyear.realpix.ru, Pinstake.com, Free4pic.ru, Hinkalnaya-moscow, Fsakhalin .ru, Vam-tortik.jimdo.com, Misterbrelok.ru, Re-adv.ru, The-liberty.ru/53, Playing-field.ru, Podelkidlyadetei.ru, Jupiter-servis.ru/ded, Norbert-dentressangle , Megadex.ru, Giftspromo.ru, Avanak.ru, Nefertiti.spb.ru, Dashette.ru/kukly-tilda, Toysew.ru, Vtemu.by, Taxin1.ru, Detskoerazvitie.info, Lovebiser.gallery.ru, Evrikak .ru, Obninsk-hockey.ru, Babyblog.ru, Yandex.ru, Livemaster.ru, M.kidstaff.com.ua, https://yandex.by/collections/card/58d6348577f31ae77f67728a/, Magic-flour.ru, Magic-cakes.com.ua, Blogger.com, https://www.rukovechka.ru/catalog/ded-moroz/1200-927, https://my-shop.ru/shop/toys/1667555.html, Liveinternet.ru, Magazcheap.ru, Kaanni.ua, Passionforum.ru, Dom-del.ru, Fusion-of-styles.ru, Filosofyfree.ru, Elenawal.livejournal, Heaclub.ru, Rybinsk-portal.ru, Newsler. ru, Willcomfort.ru, Riabir.ru, Photoforum.ru, Bigbosses.ru, Gazeta-ch.ru, Tveremiova.livejournal, Sungreat.ru, Gribnika.ru, Bolshoyvopros.ru, Rentaldj.ru, Vellamonik.wordpress
Santa Claus using quilling technique
An unusual Santa Claus will be created using the quilling technique.
For this:
- glue a cone out of red cardboard;
- prepare small red and white paper rolls, fix the tip with glue;
- We make a collar from red rolls, and from white buttons on a cone;
- We make larger rolls from beige paper, pushing through the middle, we get convex blanks;
- We make curls from thin strips of white paper and glue them to one beige cone;
- connect the beige cones together;
- make a hat from red rolls;
- on the bottom beige roll of white paper we make a mustache and beard;
- make eyes from black paper;
- We make sleeves from very elongated red rolls;
- small beige rolls can be used to make palms or white mittens;
- You can stick red rolls along the cone.
Manufacturing instructions
We place our square with the colored side up. We bend it diagonally, and then in half on one side and the other. We unfold the workpiece with the white side up.
We bend the perpendicular sides to the middle and unbend them. Turn the workpiece over, you should get lines like this:
We wrap the bottom corner towards the middle, unfold it, bend the tip of the corner to the resulting line and bend an even smaller corner in the same way. Toward the tip, once again fold the bottom edge into a narrow strip twice.
Turn the workpiece over again with the white side up. Along the fold lines we fold the two sides in such a way that it looks like in the photo:
Now fold the bottom corner with the top corner, diagonally. We bend the corner approximately to the middle and back, not all the way, and again in the other direction.
Turn the workpiece over to create a triangle. Bend both bottom corners towards the top. Then we bend both sides of the resulting rhombus, as shown in the photo:
We also bend the bottom corner slightly to stabilize our Santa. Turn it over. Our Santa is ready. We hope you enjoyed it!
Watch the video where you can see step by step the process of making Santa using the origami technique:
Paper Santa Claus applique
This is the simplest craft option. First you need to cut out blanks from colored paper:
- from red - cap and nose;
- from black or brown - eyes;
- from white - a beard, edge and pompom of a cap;
- from soft pink, peach or light beige - face.
Stages:
- We glue the cap, nose and eyes to the face blank.
- We twist the beard blanks at one end with a pencil or scissors and make curls.
- Glue the straight end of the beard blank to the oval of the face.
- Glue the edge and pompom of the cap.
Origami
Another original option for making holiday decorations. How to make Santa Claus out of paper using origami technique? By correctly and consistently folding a sheet of paper, you can create a beautiful figurine with your own hands without using complex improvised means.
Materials for production:
- Two sheets of paper. Colors: red, white.
- Glue stick or PVA glue.
First you need to make two blanks - cut a square from each sheet of paper.
Tips from needlewomen
For a Santa Claus craft, material that, at first glance, is distant from the image is suitable. For example, half a disposable plastic plate can be used as a beard. Cotton wool is suitable for this purpose; it can also be glued to the craft. Strips of spiral-twisted white paper, secured in several rows, create the character's voluminous hair. Together with your children, you can make not only an applique, but also a three-dimensional toy based on an ordinary cone.
Advice! To keep small details neat, it is better to cut them out with nail scissors.
To fix a more rigid material, such as cardboard, use a glue gun or double-sided tape. Stationery glue will not be able to hold its shape. Beads, toy eyes, and snowflakes are used as accessories.
How to cut a protrusion correctly
To successfully create a vytynanka, follow these recommendations:
- Attach the printout to a substrate, which can be a cutting board, rubberized material or a computer mouse pad, or a piece of linoleum.
- You need to cut out the template from small parts, gradually moving to larger ones. From center to periphery. At the very end, the silhouette of a fairy-tale character is cut out.
- It is best to cut straight lines under a ruler; in this case, you can avoid the “running away” of the stationery knife.
- For cutting you will need a sharp stationery knife and nail scissors. Each part is cut out slowly and carefully so as not to damage the protrusion.
Roll is not only sushi
An original paper Santa Claus can even be made from a sheet of thick red cardboard rolled into a roll. But the simplest material for making a New Year's figurine is a cardboard roll from toilet paper or paper towels.
Manufacturing stages:
- A sheet of red colored paper should be glued on top of the roller, and then the lower and upper edges of the cylinder should be folded in different directions as shown in Figures 1-6.
- A white triangle should be placed on the top of the video - this is where the face of Santa Claus will be.
- Using a black marker, draw boots on the lower corners of the cone and a belt around the cylinder.
- Draw the character's face. Secure a loop between the upper corners of the cylinder to hang the toy on the Christmas tree.

