- June 14, 2019
- Crafts
- Antonina Bataeva
Often children need a model of a mountain for school, play or other purposes. How to make it at home from scrap materials is presented below. This activity is exciting. The whole family can be involved in the process of creating a landscape. The list of materials from which a model can be made is huge and varied.
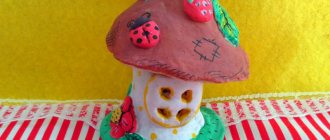
Made from plasticine
The easiest way to make a mountain craft with your own hands is from plasticine. Schoolchildren often end up with used plasticine after school, which is no longer useful in other work. But for creating a layout - just right. If you mix all the colors, you get a brown shade that is suitable for simulating rocks.
You can use a thick cardboard cone as a base. You can first make a sketch of the future craft.
First you need to install the cone on the stand and fix it with plasticine. Paint the base of the mountain brown. The peak can be turned into a snow-capped peak by using white. Use a green tint to depict herbaceous vegetation along the base. Red and yellow colors will imitate flowers.
All that remains is to draw the gorges, washed out by water flows, and crevices with a stack so that the mountain takes on a natural appearance.
Fabric nativity scene
Dolls for a nativity scene can not only be drawn or molded. They can also be sewn. Felt is perfect for this. From hard felt you can make cones - bodies, and from soft felt - heads. You can also make stuffed toys.
For those who know how to crochet, it will be great to use their talent and make figurines of angels in this way, for example.
Env. world. How to sculpt a model of a mountain, volcano, hill, or ravine from plasticine?
The world. Social science. Modeling. Technology. 1-2-3-4-5-6 grades. How to sculpt a model/model of a mountain, volcano, hill, ravine, mountain range from plasticine).
Assignment on the surrounding world for 4th grade. You can also use clay and raw sand.
A sample of a section of the surface of the earth's edge using the example of a mountain, a mountain range made of plasticine.
In order for us to make a given model of a surface, a hill, a mountain, etc., from those presented in the question, we need to have an idea before our eyes of what it should look like. We study images of mountain ranges, mountains, remember them by color. In order to sculpt a convex part from plasticine, we first need to make a surface using thick cardboard, or from any box. The surface can be sculpted from a green plate, and a pond can be made from blue and light blue. Now we take brown or black and sculpt a mountain. We make the top white, since in the mountains at altitude the temperature is below zero, and the snow does not melt there.
If you need a very small model of a mountain or ravine, then it can be made entirely from plasticine.
Nativity scene options
For outdoor compositions you can use snow, thick cardboard, or wood. For small indoor Christmas nativity crafts, the choice of materials is very wide.
These are paper, plasticine, clay, salt dough, fabric, it is possible to use natural gifts - acorns, chestnuts, cones, and much more.
Making a beautiful Christmas nativity scene for home, school and kindergarten, the whole family, together with children, can be a wonderful pastime on the eve of Christmas.
Layout "In the mountains". Master Class
Svetlana Kundryukova
Layout "In the mountains". Master Class
To make the layout we will need :
1. A sheet of cardboard or fiberboard.
6. Gouache or watercolors.
7. Ceiling tile adhesive, PVA glue, tile adhesive.
Original topiary
You will need: multi-colored paper napkins, scissors, a stapler, cardboard or a foam ball, a sheet of green paper, a satin ribbon, double-sided tape, glue, a wooden stick for the trunk, a small pot, woolen threads or twine, decorative butterflies, a piece of foam.
Master Class
- Print out the ball template, transfer it to cardboard and make a tree crown. You can also use a ready-made ball.
- Fold the napkin in half twice and fasten it in the center with a stapler.
- Cut out a circle and assemble the bud, lifting each layer of napkin up.
- Make 36 flowers in the same way.
- Cover the ball with flowers using double-sided tape.
- Wrap threads around a wooden stick.
- Glue the flower ball to the trunk.
- Place a piece of foam in the pot and insert the stem into it.
- Make grass from a strip of green paper and glue it at the base of the trunk.
- Cut out the leaves and decorate the crown.
- Tie the pot with a ribbon and decorate the topiary with butterflies.
The napkin topiary is ready!
3D star
You will need: paper napkins, scissors, metal wire.
Master Class
- Open the napkin.
- Fold the napkin so that the 2 outer edges point toward the center.
- Turn the napkin 90 degrees and fold the 2 outer edges into the center. Repeat the action.
- Fold the resulting rectangle in half along the center line to form a tight strip, then unfold the napkin.
- Fold the accordion along the fold lines, unfold and fold the accordion again in the opposite direction.
- Wrap the accordion in the center with metal wire.
- Fold each corner of the napkin inward at a 45-degree angle. There should be 4 corners on each side of the accordion.
- Connect the ends of the accordions on both sides to make a star.
The voluminous star made from a napkin is ready! I recommend watching the video master class!
How to fold napkins for table settings - star. Napkin folding tutorial
Step 14. Landscaping
It's time to pick up the shovel again. I purchased several bags of red clay to improve the spring and the surrounding area. I filled the trenches and prepared the soil for landscaping - I plan to sow lawn grass in this place.
Instructions on how to make a volcano out of paper and cardboard
A volcano is also a mountain, but it has no top. It is replaced by a depression called a crater. Most often, an erupting volcano is made, with fiery lava flowing down its slopes.
To make a volcano out of paper you will need decor (plasticine or paint) in bright orange and yellow.
Video master classes on how to make volcanoes
A volcano model for children's games and experiments can be created by following the instructions from the following video master class:
To make a small volcano, which can become a decoration for playing with toy soldiers, you need paper and plasticine. The construction stages are described in the following video:
Papier mache
Here's how to make mountains out of paper for a model, imitating a mountain range:
- Crumple up newspaper sheets and moisten them with water from a spray bottle.
- Shape into mountain peaks or hills.
- In a bowl, dilute PVA glue with water in a 1:1 ratio.
- Tear newspaper or writing paper into pieces up to 10 cm in size.
- Soak the strips in glue and apply them to the desired area of the base. Apply 5-7 layers.
- Next you need to glue paper or white napkins so that later after painting the typographic font does not show through the paint.
- Color the slopes.
How to make a mountain layout more realistic? Coat the slopes with a thin layer of glue and sprinkle with sand, salt or semolina. Once dry, it can be painted to even out the background.
DIY volcano
The volcano model is a rather interesting thing; it can serve as part of a large composition or as an independent model.
Some of them are simple, even a child in kindergarten can do them, and those that are more complex will appeal to schoolchildren during a labor lesson in primary school.
There is another type of volcano model - one might say, an “active” hill . The method of reviving it is more suitable for chemistry lessons, since it will erupt as a result of an ordinary chemical reaction.
It’s not difficult to make a model of a volcano with your own hands at home. For this you can use a variety of materials, such as:
Plasticine model
The easiest way to make a volcano with your own hands is to fashion a model from plasticine . To do this, you will need a platform for the model, for example, plywood or thick cardboard and a base (a cardboard cone or a plastic bottle), as well as plasticine. Step-by-step instruction:
- Attach the cone to the platform using dark plasticine.
- Cover the cardboard base with plasticine.
- Make multi-colored stains on the volcano cone. The green ones will represent grass, the red ones will represent lava flowing from the top of the volcano.
- At the top you can make a depression - something like a volcanic vent from which an eruption occurs.
- All that remains is to diversify the nature around the volcano itself. It could be small trees or just green grass.
- The plasticine volcano is ready!
You can make many fun and very beautiful crafts from plasticine. For example, models of great architectural buildings such as the Moscow Kremlin, the Baiterek monument in the capital of Kazakhstan or Big Ben in London. You just need to use a little imagination and patience!
Salt dough hill
You can diversify the dough layout by “revitalizing” it. To make it, we need salted dough (its ingredients: flour (400 grams), salt (200 grams) and water (150 ml)); as a base - a small glass, and for a stand - a sheet of plywood or cardboard. You will also need gouache paints, PVA glue, vinegar and soda. The manufacturing technology is as follows:
- First, prepare the salt dough by mixing all the ingredients until smooth.
- Then paint the stand the color you want, if needed (like green or brown).
- Place the glass in the center of the future model, and around it, mold the shape of a cone (volcano) from the dough. Unevenness is not a problem, because a real mountain is also not an ideal shape. After the shape is given, the dough needs to be dried, this can be done in the oven in about 20 minutes.
- After which the model should be painted with gouache. Don’t be afraid to mix colors and look for interesting solutions, because the color of a volcano can be absolutely anything. At the base there are more greens and light shades, closer to the top - brown and dark gray. A strip of hot lava of a bright red or scarlet color stretches from the vent to the base of the mountain.
- For an “eruption” to occur, you need to mix baking soda and vinegar. Pour a little soda into a glass inside the mouth of the hill and pour vinegar into it. To make the resulting foam look like real lava, tint the vinegar with red paint and enjoy the spectacle!
Instead of salt dough, you can use clay. True, you will have to burn it in a kiln if you want to experiment with the model of the hill.
Layout using papier-mâché technique
If you have accumulated a lot of unnecessary scraps of paper, you will be interested in how to make paper mountains with your own hands. You will need a plastic bottle (as a base, the “mouth” of a volcano), a thick sheet of cardboard, whatman paper, white paper, PVA glue and brushes, gouache. First, create the shape of a mountain. To do this, place a bottle in the center of a sheet of cardboard, secure crumpled sheets of newspaper around it to expand the base. The next step is to complete the frame. To do this, cut sheets of whatman paper into small strips, glue them first vertically onto the resulting shape, and then horizontally.
Once the frame is ready, you can begin the papier-mâché technique . The first 3-4 layers can be made from newspapers. They need to be torn into small pieces, soaked in water and stuck to the frame. Each layer should be coated with glue. It is better to make the last layer of white paper. After the work has completely dried, it can be painted.
Papier-mâché is a very interesting technique; in this way you can make not only a volcano or mountains, but also, for example, a yurt - a small portable dwelling in the shape of a dugout.
Crafts made from polyurethane foam
For the base of the layout, you can use pieces of foam plastic and cardboard. Cut pieces of different sizes from polystyrene foam, place them one on top of the other, gradually reducing the diameter of the mountain towards the top. Color them green, brown and gray, making streaks and transitions. Pour a little polyurethane foam onto the top of the hill so that it flows down the mountainside like lava. It should be red, so it also needs to be painted. If desired, the model can be varnished, and another model of the hill is ready!
The decorations are homemade. backgrounds, grottoes, rocks.
I am considering design options to match the natural landscape - simply because of my taste.
Someone may offer something completely different. Material from which you can make decorations and background volume:
- denser foam plastic (coated with cement like M-500, M-700, then painted, regarding paints - separately). Proven to last for years. - construction foam (or macroflex) - natural stones and sand (fastened with silicone, the seams are masked with sand) - branches, roots, pieces of bark that are stuck into silicone or foam - clay (with subsequent firing) - bamboo (the bottom is densely and randomly stuck along the back wall, so you can arrange shelters for fish, plus scatter coconuts). Only it probably rots in the water.
The background is glued: - with silicone to the glass (then it is extremely difficult to peel it off) - with silicone or other suitable adhesives to PVC sheets, with which the walls to be decorated are previously glued with the same silicone (silicone is then peeled off from PVC) - the idea was met, the implementation was not: in the background a metal plate or magnets are glued, respectively, magnets or metal are glued to the back wall of the aqua. Obviously not for backgrounds made of natural stone.
- on pieces of PVC or plexiglass, to which they are glued - on ordinary ceramic tiles, to which they are also glued
You can glue shelves and containers to the background, in which plants are then planted - anubias, mosses. If there is a lot of space in the aqua, then the fish caves go straight into the background, which in this case is more voluminous. Behind such backgrounds, water can stagnate, so either a filter intake is installed behind it, or an air sprayer is lowered behind it.
further in more detail and with photographs.
Foam plastic is not necessarily too hard; softer ones are easier to cut. The polystyrene foam is needed only as a frame; after the solution has hardened, it is as if it is not needed; the result is a very strong, thick crust. We cut pebbles out of it with an ordinary kitchen knife. Then lightly melt it over a gas or electric burner to remove the “shags”. The main thing is that there should not be too much foam or too thick a layer, although silicone holds normally, but if you overdo it, there is a risk that the structure may come off and float up.
The foam-mortar ratio should be somewhere around 2 parts foam and 1 part solution. The gluing area needs to be larger; the result is a fairly durable structure.
First we glue PVC plastic to the bottom and back glass of the aquarium. We glue with silicone for gluing aquariums. Why plastic first? If you need to replace the background: silicone or solution is easier to clean from plastic than from glass. We glue the cut out foam pebbles onto the plastic using the same silicone. The frame is ready. Now we take ordinary cement brand M-500.
We dilute it with water until it becomes a liquid porridge. Apply the solution with a brush in 2 layers with an interval of 5-12 hours. When applying subsequent layers of solution, do not let the previous ones dry completely, and if they do, be sure to moisten them with water (otherwise it will crack and peel). 3rd layer - decorative. We apply it in places with a brush, in others with a sponge, and in others with a spatula (to give a natural look to the stone), while adding dye to the solution (universal TINTING PASTE). Any one can be used for outdoor work, the main thing is that it is not toxic. (I used dark brown, pistachio, +natural cement color). After the solution has completely dried (2 days), soak it (several days) in water to remove the dust. This is what it looks like finished:
Rocks and grottoes are made in the same way, you just need to make sure that the structure will sink. Cement will not be enough for this; it is necessary to glue it inside or outside the stones, and it is better to glue it to ceramic tiles that are wider than the base of the grotto - so that you can sprinkle it with additional soil and roll it with stones.
This is a gas silicate block; foam concrete can also be used. A workpiece of the required size and configuration is cut out with a hacksaw. Next, take a drill, a long drill, a diameter of your choice, and forward, the direction of movement is chaotic =) The blocks give in easily, so you can move the drill from side to side, up and down, so you get holes of different shapes. On the right is the workpiece, on the left is what comes out =) Next. We take the resulting beauty, wash it with a hose, and it would be nice to soak it. I don’t know how long to soak, by the way, can anyone advise? You can paint it, in principle, but I think when he gets older, it will be very natural and beautiful without any frills. Well, this is a view in an aquarium. Very picturesque, isn’t it? =) On topic - today I held a drill in my hands for the second time in my life, but for me everything was extremely simple. And in this situation, it will not be difficult for anyone =) Well, a fly in the ointment for dessert =): in gas silicate compounds there is aluminum and lime, in foam concrete compounds there is a surfactant. Who knows which of two evils is the lesser? =)
———— for me, this is a very dusty job. and you can’t make normal caves, just create holes. It will also be suitable for julidochromis, but the yellow ones will no longer be very convenient - they will huddle at random in these pits... but still better than nothing. And after being overgrown with algae, it probably looks quite natural.
Something, somehow not very good. A? Maybe to my taste, but it’s somehow not right to sculpt on the back wall. . I’m sitting here, looking at something. mmm somehow. Well not like that. Doesn’t Amano experiment in Africa? Damn, when there, behind the background, it’s like there’s still space there, further away. And if you cover the wall, then boom, and that’s it, a closed space. Maybe someone likes it closed. I must be claustrophobic.
There, Uncle Sasha Kryuchkov in Ortosai (VDNKh) has been sculpting backgrounds on the back walls for a long time, we still need to go to him and ask what else he adds to the cement there. He says that at one time he had iguanas hanging on the background walls (like the ones Nastya showed). He made shelves and caves for them. And in my opinion, from some kind of building material but not cement. Foam or something.
The most creative. Background and grottoes made of polyurethane foam.
1. quick background. Irreversible for aqua. Spread foam on the back wall, cover it with sand or whatever your heart desires. Let it dry, soak it a little. You can do the same with silicone glue. You can create a light texture.
2. The same thing, but we create holes and caves. We press the stones in and cover them with sand. In my opinion, this is very difficult to do in aqua. I couldn't even find any photographs. The next stage (I quote further) is not cheap. We take two-component automotive putty and cover the free areas of macraflex. You need to work quickly and carefully sprinkle with dry coarse sand. And always in the fresh air (it’s poisonous, but after drying it becomes durable plastic).
Then we cover everything three times with waterproof cement, just like foam plastic ones. The cement layer is 0.5 - 1 cm, you can add color to the last layer.
You can paint it with anything if you coat it with epoxy resin on top. They also paint with car paint from cans, choosing a non-toxic, good brand.
4. Cement is mixed with foam balls, and grottoes are made from this. I'll find out more and post it. Interesting.
Steel Rat I've seen a lot of photos of aquatic animals with a blurry background... I didn't like any of them. Probably claustrophobic too. Somehow the space is eaten up at once... and the whole action takes place against the backdrop of the wall. I prefer a dull black background. In the pseudo-sea you can use blue, with a gradient. But up to half of the water there is something like a voluminous background or a narrow grotto - this interests me. Yulidochromis would be constantly racing there.
SYS foam is absolutely possible. Completely safe material. And from polyurethane foam - everyone shoves it into the aqua, and no one writes that the fish are starting to get sick. But they are covered with cement, which is harmless if it does not contain any toxic impurities. In the photo there are just bags of cement marked, for example, “M-500”, and 400 is also sometimes used. More waterproof is better, as I understand it.
I'm copying the whole thing. I once read about this method, and there were illustrations. Coral chips are used here because we are talking about seawater. I think you can replace it with foam balls.
Cement grade 500, the most common one from the construction market. Just don’t take the ready-made mixture, just cement. Next, dilute the cement with water to a liquid state and pour coral chips into it. A lot of. To get the mixture, how can I explain it, - crumbs smeared in cement. Before that, prepare the form. Take a cardboard box the size of your decoration, the height of the side is no more than 10 cm, line it with film. Pour sand, any kind, spray it with water from a spray bottle so that it becomes moist, but not wet. Now the most important thing is to make a recess for future decoration. It should be as deep as the thickness of the decoration. First, draw an outline, and then use a spoon, scoop, or just your fingers to remove the excess sand. It turns out to be a rough hole with the contours of your future decoration. Please note that the bottom of this hole will then be the face of your decoration. It is very good to make sure that the decoration is not a monolith; to do this, take thin cardboard, or scraps from a box, make strips out of it, roll them into rings and wring them, make irregularly shaped figures, and then stick them edgewise into a recess in the sand. You can make three or four such holes. Then, when you pour the mixture into the mold, these figures limited by the cardboard will remain holes, which is why the decoration will have a more natural look, and it will also be pleasant for living creatures. After you fill the mold, some of these fragments will be walled up in the body of the decoration, and sunk into the sand of the mold will stick out after you remove the hardened decoration from the mold. Pay special attention to the preparation of the mold, make it irregularly shaped along the contour, holes, etc. Before pouring the mixture, it is advisable to pour a little coral chips or coral sand into the finished mold - just pour a little in a thin layer with the gesture of a sower. This is necessary so that the surface of your decoration is just like natural stones. Crumbs or sand will stick to the poured mass, or rather to the mass laid out in the mold; the mass should not be liquid in consistency, but dough-like. Don't skimp on the crumbs, there should be a lot of them. The thickness of my decoration is no more than four cm. It’s not necessary. After you put the mixture in the mold, you need to let it harden properly. Do not touch your work for 2-3 days. After this, carefully remove it. Yes, try to keep the edges of the holes and the edge of the decoration from being too close to each other. In general, the decoration turns out to be very durable if you manage to fill the mold with a uniform thickness. You can soak the decoration in fresh water, preferably for 2-3 weeks. After that, place it in the aquarium. It grows beautifully; in the sump, the unsuccessful first pancakes are all covered with encrusting algae. In the aquarium, hedgehogs eat everything from them. I did not notice any changes in the composition of water associated with the use of cement.
Paper or cardboard mockup
The simplest models are made from paper or cardboard. Parents can make this craft together with their preschooler, and an older child can make it on their own.
You need to take three sheets. The formats can be any, this will affect the size of the finished sample, but it is preferable to take A4, A3 and A2 with a density of about 180 g/m2. m. On a medium-sized sheet, use a compass to draw a circle and cut it out along the contour. Then a cut is made from the edge to the center, the circle is rolled into a cone and glued together - this will be the base of the volcano.
The second, smallest leaf is rolled into a tube. This is a muzzle, it also needs to be glued and put on top of the base. The third, largest leaf will imitate the ground; it can be crushed a little to imitate the unevenness of the soil. A cardboard volcano is placed on it.
To complete the work, the model is painted. For this you will need watercolor paints. If there are no paints, only pencils or felt-tip pens, then it is more convenient to first paint the parts and then assemble the structure. The top of the mouth can be sprinkled with bright sparkles - they will play the role of fire and lava. The “ground” is sprinkled with sawdust or sand, having previously been coated with glue.
Nativity scene with toy figures
Surely in every home there are small toys in the shape of animals and dolls representing people of a suitable size.
They can be used in a composition. This simplest craft option is also available to kids; together with their parents, they can choose suitable figures and find a place for them in the cave.
Paper mountains
The most accessible material that is available in every home is newspapers. How to make mountains with your own hands from paper is described below.
You need to place a plastic bottle on a stand. Cut strips of cardboard 2-3 cm wide and length equal to the height of the mountain. Place 5-6 pieces vertically, fasten them at the top with a stapler or glue, and decorate the slopes. In order for the mountain to take shape, you need to glue horizontal strips around the entire circumference at different heights. It turns out to be a “skeleton”.
Crumple up sheets of old newspapers or magazines and place them under the frame to give it strength. After this, you need to cover the surface with sheets of white paper. Double-sided tape or glue is used for fastening. Paint the blank.
History of the nativity scene
Initially, the nativity scene looked like a two-story box with slots in order to move the dolls in it. The top floor of the box was decorated like a cave, with the Star of Bethlehem glued on.
The interior walls were hidden behind snow-white rabbit skins, as white is the color of purity and innocence. There were always figures of the baby Savior, the Virgin Mary, Joseph, a donkey and an ox. Sometimes there were also Magi.
Such nativity scenes were made by ordinary peasants, as a rule, in winter, in their free time from agricultural work. The owners of the box, the nativity scene workers, themselves told stories and moved the dolls, sometimes boys from the church choir helped them with chants.
And the first such nativity scene, personifying the events of the Nativity of Christ, was created in 1223 by the monk Francis of Aziz. After that, they gradually spread throughout Europe and reached Siberia in the 19th century. In this way, even people who cannot read could become acquainted with Bible stories.
What is a volcano?
Before starting work, it will be interesting and useful for children to learn what a volcano is and what parts it consists of.
A volcano is a mountainous formation that appears naturally above faults in the earth’s crust, through which lava comes to the surface. Lava is magma that has come to the surface and has gotten rid of its gases. Magma is the liquid, burning component of the earth's crust.
A volcano is most often represented as a high mountain, from the mouth of which steam pours out and lava bursts out. This is not entirely true, it can not only have the shape of a mountain, but also be very low, like a geyser or a small hill.
Pay attention to the cross-sectional diagram of the volcano . Hot magma rises through the crater to the surface, where it turns into lava, escaping through the crater. During an eruption, being nearby is extremely dangerous.
In our article, you will get acquainted with the creation of various volcano layouts. You can make a cutaway model. This work will serve as a good teaching tool for children.
Varieties
A riverbed, an artificial spring and a modest pond. The pump from it will pump water to the mouth. Knowing this simple diagram, you can build a spring of any configuration that fully corresponds to your ideas about beauty, as well as your financial capabilities. There are some features and varieties of streams.
By slope
The flat channel has a slope ranging from 3 to 5°. It has a smooth and quiet flow. Ideal for building in a garden at a summer cottage.
The mountain bed can have a slope of up to 45°. This stream has an active current, making it ideal for an area where there are large differences in elevation.
By geometry
A straight channel is used as an auxiliary element in the landscape, for example, to combine a waterfall with a pond. This is an excellent way to plan a spring that divides an area into zones.
A curved riverbed is ideal for a landscape garden. Thanks to this method, you can effectively use the available space.
From salt dough
Using salt dough significantly expands the scope for creativity. The molded base is painted with paints.
It is necessary to knead the dough by mixing flour, salt and water in equal proportions. The dough should be tight. If you add dyes to it, it will acquire color. But for the mountain layout it is not necessary to add them.
A cardboard cone, foil or plastic bottle is used as a base. Place it on the stand and secure it. Paste over pieces of dough, giving the desired shape and working out the details. This workpiece must be dried thoroughly before continuing to work. During drying, cracks may appear on the surface. But in this case it will only add naturalness.
Paint with gouache or acrylic paints. This is how you can make a model of a mountain from salt dough.
Snow layout
The snow surface is made like this: the desired part is smeared with glue and sprinkled with brown powder mixed with boric acid to add shine. You can also make the surface of cotton wool (absorbent), which is spread in an even and thin layer on top of white paper. The cotton wool is sprinkled with boric acid on top. When the glued parts are dry, they are covered with putty made from chalk (tooth powder) and glue. Depending on the color that the soil should have, different paints are added to the chalk. The putty is applied in a thin layer, and in those places where it is required, it takes the shape of the necessary convexities, relief, protrusions, banks, etc.
The purpose of coating with putty is to hold the model together, smooth out or create unevenness, and make it dense and monolithic. When applying it, the putty can contain pebbles and roots that imitate one or another object.
The background of the layout can be painted with brown paint or sprinkled with wood powder over glue, or covered with dark paper. After finishing, the entire model, while it is raw, is sprinkled with diamond mounds, which makes it come to life, especially in the evening light.
The inscriptions are made on drawing paper in ink and placed under glass, like labels, and the layout is ready. Let's turn to making some details of the layouts.
Preparing for painting
The next stage is one of the most important. Painting the finished relief largely determines the realism of the entire layout. You should know well what kind of area you are depicting, what kind of flora there is. Season.
And again, it is advisable to have a lot of photos. If the area is close to you, it is easy to take as many photos as possible, especially details. A protruding tree root in the middle of the path, a loose stone, a dried tree. These details will help you give everything a special realism.
The painting stage itself is too voluminous and is no longer included in the scope of this article. Just be more attentive in nature, on the street, notice everything that surrounds you. There are no uniform methods for creating a landscape. We looked at one of perhaps the simplest and cheapest methods of creating nature on a shelf.
The article was prepared by educational teacher Valery Smirnov.
Municipal preschool educational institution kindergarten “Alyonushka” of the Pavinsky municipal district of the Kostroma region Abstract of the NOOD on speech development in the secondary group “Our Mothers” Prepared by Brueva M.N. 2022 Topic: “Conversation on the topic “Our Mothers.” Age group of children: senior Goal…
Municipal preschool educational institution kindergarten "Alyonushka" Pavinsky municipal district of the Kostroma region Summary of a walk in the senior group on the topic "Observation of a drop" Performed by Margarita Nikolaevna Brueva with Pavino 2022 Date 03/15/19 Venue: On the children's site...
Municipal preschool educational institution kindergarten "Alyonushka" Pavinsky municipal district of the Kostroma region Notes on cognitive development in the preparatory group Topic: "History of the emergence of paper." Integrated areas: social and communicative development, speech development, artistic and aesthetic development. Goal: to introduce children to the history of paper; Objectives: Educational…
Municipal preschool educational institution kindergarten "Alyonushka" Pavinsky municipal district, Kostroma region Summary of a mathematics lesson in the preparatory group "How to help Pinocchio?" Prepared by Brueva M.N. 2022 Integration of educational areas: “Cognitive development”, “Socio-communicative development”, Physical development…
Often children need a model of a mountain for school, play or other purposes. How to make it at home from scrap materials is presented below. This activity is exciting. The whole family can be involved in the process of creating a landscape. The list of materials from which a model can be made is huge and varied.
Step-by-step creation of simple mountains and terrain
Before you make paper mountains with your own hands, you can look at options for ready-made layouts and crafts. You can change the color and decor of the product, or you can completely repeat it using step-by-step master classes.
Layout examples
A simple option for making mountains using cardboard and white sheets looks very original. It can become an interior decoration.
To make it you will need to do the following:
- Determine the size of the composition.
- Cut out triangles of different sizes from cardboard.
- To make snow-capped peaks, you can use white paint, a marker or white paper.
- Cut out clouds and the moon from white sheets.
- Glue the composition onto a dark blue cardboard base. Alternate the vertices so that they do not coincide with each other.
To make a daytime landscape, you need to replace the moon (white circle) with the sun (yellow circle) and make the background light blue.
Paper mountains in the trendy style of polygonal sculpture are glued together from pre-printed drawings. This layout is suitable for creating a landscape composition.
To make such a relief, you need to print a ready-made template, make cuts and folds along the intended lines, then assemble the layout.
Schoolchildren will be able to make snow-covered rocks made using the origami technique during creativity lessons. Such works are suitable for exhibition at children's art competitions.
We make a pyramid, and then you can place paper cut out in the form of snow slopes (as in the photo above).
Video master classes on how mountains are made
A paper mountain model can be made for room decoration or to decorate a photo zone. An example of creating cone-shaped rocks with snow and fir trees is shown in the video:
And the next master class tells in detail how to make an applique in the form of a mountain landscape with your own hands:
Model made of polystyrene foam and polyurethane foam
Before making a model of a mountain from polyurethane foam, you need to prepare the base. This could be a sheet of cardboard or a piece of plywood. Squeeze a stream of spray onto it from the bottle and form a mountain. It should be taken into account that when the polyurethane foam hardens, it expands, so the dimensions will increase. When working, do not touch uncured material with your hands!
Leave for a day to thicken. Use a sharp knife to cut off excess. The top layer can be made of papier-mâché, or simply painted in the desired colors.
You can make a mock-up of a mountain from a thick piece of polystyrene foam. Several layers of this material are pricked on top of each other, fastened with toothpicks. Then the excess is cut off and the top layer is decorated.
Your imagination will tell you how to make a model of a mountain. You can use a large number of available materials. For decoration you can use twigs, cones, artificial plants. Imitation of water can be done using a glue gun.