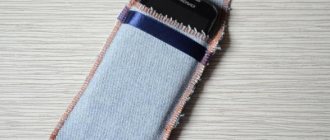
kanzashi.com.ua
Felt is a unique material that is ideal for crafts. It is elastic, soft, and does not crumble at the edges when cut. The assortment includes a huge number of felt colors, so needlewomen can create real masterpieces. Photos showing the unique design of felt toys constantly appear on the Internet. A very popular felt toy is the horse. It is relatively simple to make, but the product turns out bright and colorful due to the mane, tail, and various color combinations. The pattern of a horse toy consists of several parts, so even if you are working with felt for the first time, you can make an excellent craft.
How to make your own pillow
The production of a pillow can be divided into several stages.
Ears
Sew the parts along the sides and the triangular part and turn them inside out. From the oval side they are connected so that the ear is curled into a semicircle and stitched.
Horn, tail, legs
The triangle of horns is sewn in half, the tail and legs are sewn on the sides, lengthwise and one side widthwise. They turn it inside out. Stuff with a pencil. The horn is tight, the tail and legs are weaker.
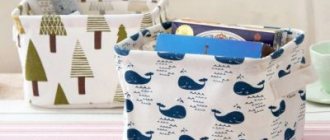
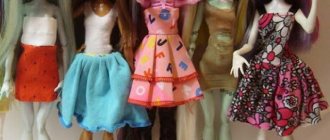
Photo 2. Various color options for a decorative pillow in the shape of a fabric unicorn.
Mane
- Made from cotton. Fold in half with the right side inward, stitch along the width. They turn it inside out. The open part is basted, and then the thread is pulled and the fabric is gathered, making folds and reducing the length of the thread. The fold is ironed.
- Made from fleece. Stack the blanks on top of each other and stitch them in the middle. Then cut into strips 1-1.5 cm wide, not reaching the center.
Torso
The parts are fixed inside. The ends of the horn and ears point down, the legs upward.
Important! The unicorn is facing to the right, the horn is pointing up and to the right. Pinned from the inside with the point down and to the left
- Remove the pattern and pins. Pin a horn to the bottom part in the middle of the head. Then the ears, with a cotton mane between them.
- The mane is secured along the edge of the neck.
- The tail is pinned. The legs are fastened at the same distance from the ends of the body.
- The body is secured with pins along the contour. They sweep.
- The product is sewn with frequent stitches. A hole is left on the stomach through which the pillow is turned out. If fleece fabric is used, one seam is sufficient. The edges of the cotton fabric are finished with a buttonhole stitch.
- They turn it inside out.
Details
The eyes, nose and mouth are embroidered. The unicorn's eye is closed.
Embroider a smooth arc, then the eyelashes.
Back stitch, wide stitches, it is recommended to sew without gaps. Use floss in 3-4 folds or thread in 4 folds.
Sew the cheeks on both sides.
Stars and a crescent moon are sewn onto the croup or back. Use a loop stitch for cotton and a backstitch for fleece.
The fleece mane is sewn to the finished product from the ears along the neck.
Stuffing the pillow.
Reference. It is recommended to “fluff” the synthetic winterizer before stuffing. To do this, tear the padding polyester into small pieces, pull against the grain, adding volume.
How to sew a saddle pad for a horse yourself
Both a saddle pad and a sweat pad are created quite simply.
A saddle pad is created as follows. First prepare for work:
- sewing machine,
- fabric (natural and synthetic),
- foam rubber,
- sewing tools.
Manufacturing process:
- Take measurements. The standard size is approximately 70x90 cm. It should be remembered that the saddle pad always looks out from under the saddle. Transfer measurements to natural and synthetic fabric. Cut the workpiece, leaving 2 cm on each side for seams.
- Cut out a suitable layer from foam rubber and place it between the fabrics. Attach the layer using stitches along the perimeter of the workpiece.
- Using a sewing machine, stitch the workpiece along the edge, and then go over the product in such a way as to obtain even squares. This will make it possible to more securely fix the foam inside the fabric. Then the equipment will fit better to the horse’s croup and will not cause him discomfort.
- Cut a strip from the remaining natural or synthetic fabric and sew it along the edge of the saddle pad so that the tape hides the seams.
Anyone who loves horses, but does not have the opportunity to keep a real horse, can make a horse with their own hands. Or buy a toy version for yourself and choose ammunition for it of any size and from any material. Patterning a horse is also quite simple. It all depends on what kind of horse you need: how believable, what size, etc. But you can make any decoration and equipment for it.
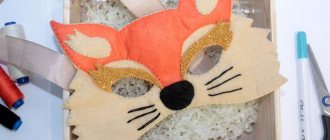
Christmas tree decoration: felt horse pendant
On New Year's Day it has already become a tradition to give a symbol of the coming year. In 2014, the most desired gift will be a horse. According to the ancient Chinese calendar, the colors blue, blue and green correspond to the year of the horse. Let's prepare for the upcoming holiday in advance and sew a blue horse from felt that can decorate the New Year tree.
Soft toys made of felt - a horse and a lion cub. Master classes
- Felt toys Horse
- We sew a soft toy “Lion Cub”
Felt toys are very cute and funny. Here are interesting options from our authors - step-by-step descriptions with patterns on how to make toys with your own hands.
horse
In this master class from Anna we will make a felt horse, which can be used as a toy or as a decoration for the New Year tree.
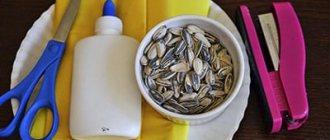
For production you will need:
- Paper;
- Felt of any color;
- Scissors;
- Felt-tip pen or pen;
- Floss thread;
- Needle;
- Black paint or nail polish;
- Blush pink.
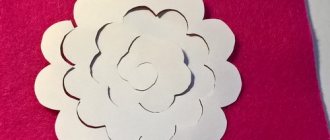
On a piece of paper we draw a template for the future horse. We draw all the parts of the horse together in one detail. Let's draw 2 small ears on top. Then cut out the template using scissors. This horse can be made to any size. Photo 1
Next you will need a blue sheet of felt. You can use any other color, but it is better not to choose too dark. Such horses look great in soft colors: blue, beige, pink and so on. Using a pen or felt-tip pen, trace the paper template onto the felt. Then cut out 2 identical parts. Photo 2
Now you need to sew the 2 parts of the horse together. Sew using any convenient seam. As we sew, we fill the horse with padding polyester. The padding polyester can be pushed into the paws with scissors or a ballpoint pen. Photo 3
Popular articles Congratulations on May 9
Now we need to make the mane. For this we will use floss thread. In this case, it is a peach-colored thread, but you can take any other color. The main thing is that it goes well with the color of the horse. Cut short pieces of thread. We don't make the mane too long. Then we form a bang from the tip of the bun and place it between the ears.
We make 1 seam, attaching the bangs to the head. Next, we lay a bunch of thread down along the neck and make stitches periodically. This is how we will sew on the mane and create the effect of a braided mane. Photo 4
Let's make a tail. It also does not need to be made long, no longer than the horse’s legs. To do this, you will need 1 more bundle of peach-colored thread. We tie it in the center and fold the bun in half. We insert the thread used to tie the bundle into the needle and pull it through the seam to the horse in the right place. Then we tie a knot and cut off the excess. Photo 5
Now let's design the face. We won’t come up with anything complicated, we’ll just draw it. Use black varnish or paint to paint the eyes. You can use a toothpick or a match. And apply blush to the cheeks, which will make the horse’s face more expressive. Photo 6
We sew or glue it onto the horse's head. This is such a funny and cute felt horse.
We sew a soft toy “Lion Cub”
Lion cub made of felt . A cute trinket that you can make with your child. A very detailed step-by-step master class on sewing toys from Milena.
Materials and tools:
- beige and brown felt - 1 sheet each,
- black felt - piece 5 x 5 cm,
- piercing eyes – 2 pcs.,
- holofiber - palm-sized,
- beige, brown, black threads,
- sewing needle,
- flexible wire – 6 cm,
- black thermal rhinestones with a diameter of 2 mm – 12 pcs.,
- iron.
Procedure for making a lion cub :
Re-cut the pattern.
Pin together two layers of beige felt and cut out two main pieces for the lion cub figurine.
From the lion cub pattern, cut out the mane pattern and place it on brown felt.
Cut out the mane - one piece. For ease of cutting, pin the pattern with felt using pins.
Place the mane on the main pattern.
Cut out eyebrows from black felt.
Now the nose.
Prepare the piercing eyes.
Their pins are too long, they need to be shortened. This is easy to do with a regular knife.
Lay out the pattern and mark the location for punching holes.
Pierce holes with sharp scissors and insert eyes. Punching eyes hold well in thick fabric; in order for them to hold well in felt, lubricate the base of the eyes with any glue before inserting them. Instant glue, PVA glue, acrylic glue, etc. are suitable. I have a heat gun, I glued the eyes with it.
This is what the eyes look like from the wrong side of the felt, only sticking out a little.
Cut out a tassel at the end of the tail.
Outline the contours of the mouth.
Sew along the contour of the mouth with black thread. You can sew with either a stem stitch or a loop stitch. If you don’t know such seams, at worst, just sew as best you can, just along the line.
Use a few stitches of black thread to create eyelashes around the eyes. Now the lion cub’s muzzle has its own, rather cute, expression. And the eyes wide open to the world resemble the eyes of a small child. Now sew the mane to one layer of the workpiece using a “forward needle” or basting seam, as it is also called. Also grab the tassel on the tail.
The front side of the toy is ready, now start sewing the front and back parts of the workpiece, the mane, with beige threads, but do not grab it. Sew with a U-shaped seam, I don’t remember what it’s called correctly.
As you sew both parts of the toy, fill it with holofiber. First fill your head with it.
When you reach the tail, stop.
While the lower part of the lion cub is not yet filled with holofiber, glue thermal rhinestones imitating claws to the paws.
Now fill the lower part of the lion cub with holofiber through the open hole near the tail.
Sew one side of the tail.
Insert the wire into the tail. Don’t even try to push the holofiber, the tail is too thin.
Now sew the other side of the tail.
Use brown threads to go along the edge of the mane and along the outline of the tassel on the tail. Don't forget to add a little follofiber to the brush.
Our lion cub is ready, thanks to the wire, his tail also bends.
See also:
Felt Christmas toys
In order not to forget the address of the page and share with friends, add it to your social networks: Do you want to know news about competitions or master classes?
Tags: DIY toys, Felt crafts
Attention! It is better to write urgent questions in the comments on the website (form at the bottom of the page) or, better yet, directly by email. There are no notifications about comments from the VKontakte form! This form is more for feedback. 
How to make a pattern with your own hands
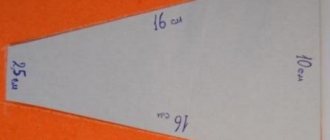
Glue 4 sheets of paper into a rectangle or take a piece of wallpaper.
- The biggest one is the body. Divide the length into 3 equal parts.
- A square is added to 1/3 of the part in the upper left corner - this is the neck.
- Add another rectangle to the neck - this is the head. Its length is slightly more than half the body. The unicorn looks to the right.
If you draw the neck on the right, the unicorn will look to the left. The edges of the rectangles can be rounded.
For the horn, draw a triangle with a height of 1/3 of the length of the head. The length of the ears is approximately equal to the length of the horn or slightly less. For the ear, an oval is drawn, but on one side the oval is sharpened in the shape of a triangle.
Legs and tail. Draw two rectangles 1/3 long from the body or a little more. One wider rectangle is the leg, and the other narrower is the tail.
To decorate the pillow, stars and a crescent are drawn. For the cheek - a circle.
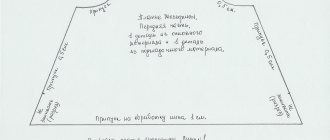
For the mane. The width of the pattern is 2 times wider than the desired length of the mane. For example, if the mane needs to be made 4 cm long, then the width of the pattern is 8 cm.
Photo 1. Making eyes on a soft felt toy using dark threads and a standard seam.
For fleece fabric, draw a rectangle of this length: the middle of the neck is 1/4 from the head inclusive.
For cotton: the beginning of the neck at the body is 1/3 from the head inclusive.
Cut out patterns.
The mane and tail can be made from wool threads. To do this, cut the threads of the same length so that when folded in half they are the desired length. For example, if you need a mane and tail of 15 cm, then the threads are cut into 30 cm pieces. Gather the part into a tail and tie it with thread to make a loop. For this, the tail is sewn to the finished pillow. The mane is stitched with a “back needle” seam and, when assembled, sewn inside.
How to work with felt
Before we begin a specific conversation about making toys from felt, let’s say a few words about the features of working with this craft material.
- Felt comes in different thicknesses. It is better to work with thin felt if the craft has a rigid frame. If a frame is not provided, then it is better to choose felt sheets with a thickness of at least 2 mm.
- Toys made from felt are glued or stitched. It is best to glue with PVA glue or hot glue.
- It makes sense to talk about stitching in more detail. This process is performed in one of two ways - by machine or by hand.
With the machine method everything is clear. As for hand stitching, there are several types of seams:
- loop stitch. This is what it looks like (see the picture below);
- single and double seam “needle forward”;
- seam “over the edge”;
- chain stitch type.
There are other types of seams, more complex, but I think these are enough to make a beautiful New Year's toy from felt. Well, now – master classes on making specific toys.
Master Class
We begin work by preparing the pattern. Below you will find a diagram of the toy parts, which you need to download and print on plain paper. You can reduce or enlarge the picture and achieve the desired size of the future craft.
Next, you need to cut out the parts from the printed sheet, transfer them to cardboard using a simple pencil, and cut out cardboard blanks.
Pattern
The next stage of work is transferring the patterns onto felt cloth. Place cardboard patterns on felt and trace along the outline with tailor's chalk
Please note that the picture shows the number of parts of the toy that must be cut out of felt. Carefully cut out the parts
Additionally, cut out two small triangles, from which you will later form ears. The base of the horse is ready. We begin assembling the felt toy.
First, take the two lower parts and the belly, fasten them with English needles along a concave line and carefully sew them together. Then connect the parts of the tummy and the side of the body with the wrong sides so that the contours of the legs match. Secure with pins and check for symmetry.
Using small stitches, starting from the back leg, sew them together with a buttonhole stitch. Repeat the same steps with the second side part. The details of the tummy, the contours of the torso and legs should match in symmetry and be at the same distance from each other. After you sew the pieces above the legs, start filling them.
Popular articles Natural freshener
To stuff the legs, we recommend using soft wire: wrap it with threads and carefully insert it into all the legs. While continuing to sew up the side parts, neck and head, do not forget to leave a small hole through which you will fill the rest of the cavity of the toy with filler (you can leave it on the back of the horse, and later insert a hanging loop or cord there). Distribute holofiber or padding polyester inside the toy and sew up the stuffing hole.
Batik: practical advice
The base of the horse is ready, all that remains is to give it a beautiful mane and a fluffy tail. To do this, cut out a rectangular piece of felt and fold it into two parts lengthwise. Using sharp scissors, cut it across, leaving the middle (4-5 mm) uncut to form a fringe. Using an overcast stitch, sew the resulting mane to the horse’s neck, then sew the ears symmetrically on each side or glue them with a glue gun. Mark the locations of the eyes and sew on the beads using matching threads.
The tail must be made in the same way as the mane and sewn to the back of the body.
Finally, decorate the horse using beads, rhinestones, and ribbons. We recommend creating an imitation of a saddle and harness, so the horse will be more harmonious. If you make a loop, you can hang the toy on a door handle or in a car, or decorate your desk space with it. If you make a lot of horses of different colors, you will have a children's play set that any child will be delighted with!
Christmas tree - crochet pendant
The crocheted Christmas tree pendant can be crocheted in various color variations, so it will always look beautiful and unusual. They can decorate your home or Christmas tree. If you have a lot of leftover yarn in different colors at home, you can use it to knit these Christmas trees. The height of the finished pendant is 12 cm without the hanging loop.
To work you will need:
- Yarn Nako Bambino white and yellow (25% wool - 75% acrylic; 50g - 130m); Yarn Pekhorka “Children's novelty” blue (100% acrylic, 50g – 200m); Hook No. 2.0 mm.
Form
Make the shape. You can copy a toy horse, even a stylized one. Tear paper napkins. It is better to lubricate the mold with cream or Vaseline so that the paper layer can be separated more easily after drying. If you use children's plasticine, you can do without lubricant. Make the first layer from wet pieces of napkin or newsprint. Place the scraps close to each other. It’s okay if they overlap one another. Place the second layer on the paste. It, like all the others, is made from office paper. In total you need to make at least 8 layers. There are two options. Some papier-mâché masters alternate layers placed on paste and on water. Others sculpt pieces using glue only (except for the first layer). In any case, you need the thickness to be approximately the same over the entire surface. Let the workpiece dry, then cut it in half and take out the plasticine. Glue the halves together with pieces of paper and dry the figure again.
To make a horse we will need:
- - felt in gray, blue and light pink colors;
- - raspberry colored felt with polka dots;
- - black beads;
- - threads of black, gray, pink and blue colors;
- - scissors;
- - paper;
- - needle.
The procedure for making a small horse
1. Let's make a paper pattern of a small horse. It should consist of the following parts:
- - torso;
- - tail;
- - leg;
- - hoof;
- - muzzle;
- - ear;
- - collar;
- - two saddle parts - one larger and the other smaller.
2. Place the pattern of the body on gray felt and outline it with chalk, a ballpoint pen or a special felt-tip pen. Using sharp scissors, cut out two identical parts of the body.
3. You also need to cut out eight pieces of legs and two pieces of a tail for the horse from gray felt.
4. We will cut out the details of the ears for the horse from gray felt from pink flowers. Two parts of the ear need to be cut out from gray felt, and two parts from pink felt.
5. Now let’s cut out additional small parts for the toy horse. From blue felt we will cut out eight parts of hooves and two large parts of a saddle, from light pink felt we will cut out two parts of a muzzle, and from raspberry felt with polka dots we will cut out two parts of a collar and two small parts of a saddle.
6. Let's start sewing the horse. First, let's take the parts of the body and to each part we will sew a part of the muzzle in the head area, and then a collar in the neck area. We will sew on the details of the muzzle with pink threads, and the collar with crimson threads.
7. Sew smaller crimson parts to the large blue parts of the saddle. We will sew on the saddle parts using small basting stitches.
8. Sew the prepared parts of the saddle with blue threads to the parts of the body in the back area.
9. Sew the parts of the body with gray threads, and leave a hole on the stomach. We will sew the body together using an overcast stitch.
10. Fill the horse’s body evenly with padding polyester.
11. Take the parts of the legs and sew the blue parts of the hooves to them. We will sew on the hooves with blue thread.
12. Place the leg pieces in pairs. We sew these parts with gray threads, leaving a hole on the side of each leg.
13. Fill each leg with padding polyester.
14. Use gray thread to sew up the holes on the legs and body.
15. We firmly sew the legs to the body with gray threads using hidden stitches.
16. Each ear will be made of gray and pink parts. Sew these parts together using small, even overlock stitches. There is no need to leave holes in the ears.
17. Pull each ear a little at the base. Let's sew the ears to the head.
18. Put the tail parts together and sew them with gray threads.
19. Sew the tail to the body of the horse.
20. Use black thread to sew beady eyes to the horse’s head, placing them at the same level. If the horse is intended for a child who is less than three years old, then it is better not to make the eyes out of beads. In this case, it is better to embroider the eyes with black thread.
Popular articles Poems for Maslenitsa
The felt horse is ready. If you plan to use the horse as a pendant or as a Christmas tree decoration, then you also need to sew a loop of ribbon or colored decorative cord. The horse can be made not only in gray, but also in any other color - white, beige, blue, yellow, pink, etc.
A horse made of white felt with a bright red mane and tail turns out to be very elegant. It can be a souvenir - to decorate a chest of drawers or a shelf, or it can be a game - that is, an ordinary soft toy. Both girls and boys enjoy playing with horses. Therefore, such a toy is suitable for any child.
Making a snowman
Felt makes a truly wonderful snowman toy. To make it, you need:
- three pieces of felt: white, orange and red;
- scissors;
- threads;
- soft filler;
- decor
In this case, we will not make the entire snowman, but only one head. This is quite enough as a Christmas tree decoration. So.
- Cut out two identical circles from white felt. Size is at your discretion. The larger the circle, the larger the circle, which means the toy itself will be bigger.
- On one white circle we draw or embroider with colored thread the eyes and mouth of a snowman.
- From orange felt we cut out and sew or glue in place the nose in the shape of a triangle.
- Glue or sew two white circles. But not completely, but only partially, so that the head can be filled with filler.
- Cut out a hat from red felt. That is, two identical pieces in the form of a cap.
- We place the edge of one part on the back of the snowman’s head, and the edge of the other part on the front (where the face is). Sew the hat to the head using one of the seams indicated above.
- Through the hole that remains unsewn (or not sealed), we fill the head with filler. Having done this, we sew or seal the hole.
- Finally, we sew a loop to the top of the hat, with which you can hang the toy on the Christmas tree.
- To make the toy look even more beautiful, we decorate it with all kinds of decor.
That's it, the Christmas tree toy in the shape of a snowman's head is completely ready.
By analogy with the instructions above, it is easy to make other similar toys in the form of a snowman’s head.
Felt horse stitched on a typewriter
If you prefer to minimize hand sewing, then we offer you a master class on creating a blue horse with a minimum number of hand-made seams.
You will need:
- Blue felt 2 mm thick;
- Pink and white felt, 1 mm thick;
- Beads for eyes;
- Threads and needles;
- Scissors;
- Stuffing material;
- Glue Moment Crystal.
To create one horse you will need these parts. It will be in apples.
Sew two pieces with legs on top.
Glue the apples and ears with glue.
We attach the halves of the saddle to both halves of the body. A zigzag stitch is used.
Now we glue the apples and the white part of the felt eyes, and attach black beads on top.
Now we alternately sew the halves of the horse’s body to the belly blank. Left to left, right to right.
The lower part of the horse with legs must be filled with material for volume.
Now we glue the tail and mane to one of the sides.
Now you'll have to sew a little by hand. Using a loop stitch, we sew the upper part of the horse, securing the tail and mane. Our saddle remains unstitched. Through this hole we fill the rest of the horse with material. We sew the saddle with a hidden seam.
We cut the tail and mane into fringes.
We fold the ears in half at the base and sew them on.
The result is such a neat horse.
New Year is everyone's favorite holiday. So people ask us to make something for New Year’s. And what could be more New Year's than the symbol of the year. I draw the pattern by hand. I cut out the parts without allowances, because I will sew them by hand along the front side. I take acrylic yarn for the tail and mane. Cord ends to make hooves. Silver cord for legs. A piece of rubber band for the eyelet.
2. First, I will prepare all the “spare parts”. I wind several turns of yarn directly onto my palm, cut it and tie a bunch of threads in the middle. Then I tie it again to make a tassel.
5.
6.
7. For the mane, I take longer threads, step back 2-3 cm from the edge and stitch through the threads, trying to pierce them all. This is so that if you want to test the mane for strength, the horse does not suddenly turn out to be bald. Then I wrap the stitching area tightly and secure it with a knot. I cut the loops of thread, forming the future bangs.
9.
10.
11.
12.
I sew the tail to the body part. From the inside I place 4 layers of pieces of felt for fastening strength. If you just sew it to the part. it will come off easily; thin felt will tear easily.
12.
13.
14.
I tie a piece of round silver elastic with a simple knot - this will be a loop for the suspension. You can use a cord, but experience shows that it is better when the loop stretches easily. I cut legs from silver cord. I tie knots on one side, put on the end for the cord, and tie a knot on the other end.
17.
18.
19.
20.
21. I begin to sew the parts of the body from the front side, adding legs and a loop for hanging as I work. I sew the legs by piercing the cord near the knot, which is hidden inside, this is for the strength of fastening the legs. But I don’t pierce the loop, but secure it with two stitches between two elastic bands. At the end of the work, I stuff the body with holofiber or padding polyester and sew the part up to the end.
22.
23.
24.
25.
26. I make the ears from two triangles and, when sewing the head, I substitute the ears and sew on the mane. I stuff it, sew the body to the end and take the needle out in the middle of the back of the head, sewing the mane on the back of the head. And I sew the head to the body.
27.
28.
29.
30.
31.
Let's bring beauty. I braid the hair and attach flowers or bows. I draw the face and decorate the body
30.
31.
32. Happy New Year!!! In our cavalry regiment arrived
1.
Toys for children that develop fine motor skills
For the little ones there are options for crafts in the form of puzzles, it looks quite interesting:
Or you can make a game like this, choose “clothes” for the animal))).
Or make a finger fairy tale or cute animals.
The most famous fairy tale is Teremok.
Or lacing.
That’s all for me, what I liked I shared with you, so take threads, a needle, scissors and felt and create different masterpieces. Enjoy your creative fruitful work everyone. See you later))).
Sincerely, Ekaterina Mantsurova
Man began creating various toys at the dawn of civilization. They were carved from wood, woven or sewn from various fabrics. Children especially love wonderful soft toys. One has only to remember fairy tales, where the brave hero always had a magic horse that saved him and helped him cope with trouble. The Greeks believed that the Sun God rode out in the morning in a chariot drawn by beautiful horses. In Feng Shui, the horse is one of the most successful symbolic combinations. It means perseverance, success, growth in society and prosperity. Even people who are far from any religious beliefs attach a horseshoe in the house to bring good luck.
Kids will definitely like this toy in the form of such wonderful animals. It can be made from a variety of materials, but soft felt is the best choice for creating a small, cute and colorful craft.
It was born almost 400 years ago and was a type of felt obtained from the fluff and fur residues of rabbit skins or other small fur-bearing animals. Felt was made by dumping this waste.
Now there are quite a large number of types of this material. Thin and dense felt is suitable for creating crafts. Its composition can be wool, half-woolen or synthetic. Wool fibers add strength and make it less loose, and the high density allows you to wash products without the risk of deformation and perfectly retains the shape and clarity of the seams.
In this article we offer several master classes on creating cute felt horses of all possible colors.
Master class on how to sew felt souvenirs
Nowadays it has become very fashionable to sew toys for children who have just been born or when they are one year old. Usually they do this in the form of a name and some kind of plot. I suggest you watch this video, just for those who don’t know how to properly sew together the parts of felt toys, this video will help you figure it out, watch all the stages of work:
Well, and of course, if you dream of sewing any fairy-tale hero or cartoon characters, then be sure to use this video instruction, based on it you can subsequently make absolutely any animals or people, the main thing is to find and print the template of the one you plan to sew:
Christmas felt toys for the New Year 2022
When the time comes for the New Year's Eve, everyone will immediately start creating, so here are some small ideas for you.
Craft in the form of a deer.
House with a white snow cover. Beautiful Christmas tree.
Gingerbread men.
Heart.
The symbol of this year is a dog, so you can make one for the Christmas tree; below I will present you with even more patterns with different breeds of puppies.