How to sew a carrot from felt, master class
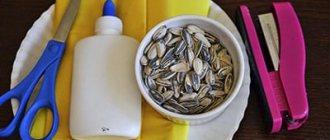
In order to make such a soft “harvest” with your own hands, you need to prepare a few simple materials, namely:
- Fabric scraps with any coloring and pattern, the main thing is that the orange tone predominates and a few pieces of green.
- Synthetic polyester to make the craft voluminous.
- Paper and pencil for creating a pattern.
- A sewing needle and several multi-colored threads.
- Scissors.
- If you have the opportunity to use a sewing machine, this is welcome, but not required.
Step-by-step production of carrots from fabric:
- First of all, you need to create a pattern and draw it schematically on paper. There are no clear standards, use your imagination, but if you want standard vegetable sizes, use our drawing.
- When you have decided on a pattern, lay it on the fabric and cut it out. Don't forget about the seams, you need to leave 0.5 cm or 1 cm of space for them. If you decide not to transfer the pattern to the fabric, then secure it with pins so that the paper does not move.
- The prepared blanks need to be sewn; it is best to use a sewing machine, not necessarily a professional one. If it’s not there, it doesn’t matter, use a needle and thread, but the seams should be as small and frequent as possible. By the way, you need to sew from the inside out, then the stitches will not be visible on the front part.
- The result should be conical pockets; they need to be turned out. Do this carefully, so that all corners are even and turned inside out.
- The next step is to give the craft volume. For this you need soft and non-crumpling material. Synthetic padding is best, but it can be replaced with small scraps of leftover fabric.
- All that remains is to connect the tail and the orange part. Sew around the top of the spine, but do not pull it all the way through. Insert an improvised green top into the remaining hole and only then pull the threads together. If you are worried that the tail may fall out, then sew it too, but with inconspicuous stitches, as close as possible to the junction.
For a small composition, you can make 5-6 medium-sized carrots or make a mound of smaller ones, but then you will need up to two dozen of them.
Craft “Orange Carrot” using the origami technique. Master class with step-by-step photos
Oksana Seyitmedova
Craft “Orange Carrot” using the origami technique. Master class with step-by-step photos
Orange carrot made using the origami technique. Master class with step-by-step photos
Author: Oksana Seitievna Seitmedova, teacher, GBOU School No. 1503
Description of the material: This material will be useful to educators, additional education teachers, parents, and is intended for an audience of 6 years and older.
Goal: making carrots from paper using the origami technique.
Objectives: develop creativity, aesthetic perception, fine motor skills, cultivate artistic taste, perseverance, patience and accuracy,
— introduce the “origami” technique and one of the types of modules in this technique.
— develop children’s creative activity, attention, imagination, fine motor skills;
- cultivate aesthetic, artistic taste, accuracy.
For work we will need:
Cut out a square measuring 15x15 cm from orange paper.
Next, fold the square diagonally.
Then fold it in half.
We open the triangle and pull the right corner down, and also bend the left corner.
We bend the corner to the middle, then bend the left corner.
We turn our preparation over, the carrot is ready.
Cut out a square measuring 10 x 10 cm from green paper.
Fold the square diagonally.
Then fold it in half.
We open the triangle, pull the right corner down, and bend the left corner in the same way.
We bend the right corner towards the middle, and also bend the left corner.
We insert the tops into the carrot pocket.
The origami carrot is ready.
Master class on making a poster with step-by-step photos in mixed media: drawing and quilling “The world through the eyes of children” Master class on making a poster with step-by-step photos in mixed media: drawing and quilling “The world through the eyes of children”. Author: Mishchenko. Yu. V. Cup made using modular origami technique. Master class with step-by-step photos Cup using modular origami technique. Master class with step-by-step photos Author: Oksana Seitievna Seitmedova, teacher, GBOU Gymnasium No. 1503. Apples made using the origami technique. Master class with step-by-step photos Apples using the origami technique. Master class with step-by-step photos. Author: Oksana Seitievna Seitmedova, teacher, GBOU School No. 1503 Description of the material:.
How to make carrots
In order for your child to understand how to make a carrot out of paper, you should first analyze all the work step by step and watch the video.
Required materials and tools
For a fruitful creative process, you should prepare in advance all the necessary materials and tools:
- colored paper or cardboard;
- scissors;
- a simple pencil for tracing;
- glue;
- markers, paints or colored pencils.
Ribbons, ribbons or frames, stands may be required when decorating the finished work - for hanging or installation (stationary).
Step-by-step assembly of a voluminous carrot
When making a craft with your own hands, you should assemble it strictly in stages to avoid mistakes, then the voluminous paper carrot will turn out neat and “natural.” The work is carried out step by step:
- For voluminous carrots, 194 orange, 73 green modules and 1.5 pieces are prepared from origami modules. toothpicks.
- Rows 1 and 2 – 16 green and orange elements each. The latter are attached to the former.
- 3rd row in the same number of orange modules (short side).
- Turn the workpiece inside out.
- Then collect 10 more rows of the same color, 16 pieces each. – inserting with the long side.
- The next row of 11 modules - each with 3 corners.
- The 15th row is from the same number of pieces, and the 16th is from 8 pieces. (one for three corners).
- The last row is 4 modules.
- From 19 green modules, collect tops - 3 pieces, insert ½ toothpicks into them.
- The parts are connected.
A very beautiful craft is ready.
Bulk carrots can be made in another way:
- a sheet of orange paper is rolled into a bag - the excess is cut off;
- They create a semblance of tops from corrugated green paper, glue it to the inside of a bag, which is also fixed with glue.
You can use felt-tip pens to apply additional elements for maximum similarity.
This option is suitable for packing surprises inside if the foliage is tied.
Video master class
To make a carrot out of paper on the first try, you should definitely familiarize yourself with the video material on this topic. Usually after this there are no incomprehensible moments left, the children get to work with enthusiasm.
Origami with a simple diagram
Origami carrots with a simple assembly diagram are recommended for children of any age. To work you will need orange (15x15 cm) and two green (7.5x7.5 cm) squares of colored paper. Assembly in stages:
- the orange square is folded diagonally and in half, the folds are ironed;
- straighten the workpiece into a large triangle, bend the sides towards the center;
- each side is folded again towards the middle from the bottom;
- an equilateral rhombus with a pocket is obtained;
- the green square is folded diagonally, unfolded, and both sides are folded toward the center;
- turn the workpiece over, fold narrow folds towards the middle;
- do the same with the second green square, but without turning it over;
- green blanks are inserted into the pocket of the orange blank.
The origami craft is ready.
Applications for children
The original carrot applique can be made in different ways, for example, a voluminous craft is assembled like this:
- Draw part templates with a pencil on colored paper and cut them out.
- The strips of the orange workpiece are cut off, leaving the bases intact for fixing.
- They do the same with green stock.
- The prepared elements of the carrot are fixed with glue, and the tops are glued.
The finished vegetable/vegetables are placed on cardboard, creating a composition, and glued - the spectacular picture is ready.
Crafts made in the younger group
An easy craft scheme for the younger group could be as follows:
- the child traces his palm with a pencil on green colored paper - the blank is cut off;
- cut out the shape of a carrot from orange paper;
- two parts are glued together.
The application is ready, it can be used in games, or hung on a string, or glued to a sheet of white paper.
Craft ideas for middle school
The middle group can handle more complex crafts. Paper carrots are collected step by step:
- table paper napkins are rolled into a roll;
- wrap a roll of napkin with corrugated orange paper, giving it the shape of a carrot - a cone (thin bottom and wider top);
- tops are cut from green paper, giving natural curves with scissors;
- connect the parts with glue.
A simple way to origami carrots - in seven steps:
What senior and preparatory students can do
Children of the senior and preparatory groups can already independently make not only carrots, but also a simple composition, for example, an applique of a hare with a carrot. The work can be done both in the form of an applique and in the form of origami, where the carrot for the bunny will be a three-dimensional diamond-shaped, cylindrical shape.
Master class: “Carrot” attribute for the dance “Hares with Carrots”
Elena Nelidova
Master class: “Carrot” attribute for the dance “Hares with Carrots”
-crepe paper (orange, green)
;
Roll a cone out of cardboard
Wrap the cone in orange crepe paper
tails for our carrots from green paper
carrot tails need to be cut and fluffed
In the clearing one after another
Hares jump in a circle,
Having fun trampling a snowball
“Christmas trees made of shells and plasticine hares.” Master class from kids: group work “Burns in a spruce forest” Good afternoon, dear colleagues and guests! I’ll tell you and show you how the kids and I did the group work “Burns in a Spruce Forest” yesterday..Decorative fabric vegetable - carrots
Few people know, but a few centuries ago carrots were purple; scientists eventually developed an orange one, but at the same time it did not lose its usefulness and vitamins. For many years, this bright and healthy vegetable has been used not only in preparing delicious foods, but also as a decorative decoration. Many famous designers have used the variegated colors and unusual cone-shaped shape of this vegetable in their projects using various materials. In this article we want to teach how to sew a carrot from fabric; for this we use felt. Such an unusual craft can decorate a child’s room, giving it unusual and bright colors, or create a decorative composition in the kitchen. Such an unusual craft will also attract the attention of children and whet the appetite of little fidgets.
Carrots made of cardboard and paper: vegetable crafts using different techniques
Making crafts with your own hands is always interesting, the creative process is fascinating, and its end result is an original work of authorship. It will definitely please not only its creator, but also loved ones. Vegetable crafts are especially popular, as they have a bright appearance and interesting shapes, for example, paper carrots - children of all ages love to make them. We offer you the most popular and useful materials for creating such crafts - diagrams, videos, step-by-step assembly, both for kids and for older children.
Procedure for making carrots
1. First, let's make a carrot pattern. It will consist of the following parts - carrot leaves and the carrot itself. Draw these two parts of the carrot on a piece of paper and cut them out.
2. To cut out the carrots, we need a sheet of orange felt. Let's redraw the outlines of the carrot pattern onto it and cut it out without adding seam allowances.
3. To cut out the leaves for the carrots we will need bright green felt. Let's redraw the outlines of the leaves onto it, and then cut it out.
4. Fold the orange carrot piece so that the sides of the piece are aligned. Sew these sides together using orange thread using a blanket stitch.
5. Sew the narrow end of the carrot with the same orange threads using a basting stitch, and then pull this thread so that the narrow end of the carrot is gathered. Secure the thread by making a knot.
6. Turn this part of the carrot right side out and straighten it well.
7. Stuff the carrots with padding polyester toy filler. You can use other fillers, for example, synthetic fluff or holofiber.
8. Now you need to sew along the edge of the wide end of the carrot. For this we will also use orange threads. Sew the edge of the carrot with a basting stitch, tighten the thread and make a securing knot.
9. The next stage of making carrots is making a bunch of leaves to decorate the top of the carrot. Let's take a green piece of leaves and a needle with a green thread threaded into it. We sew green threads along the bottom edge of the leaves and tighten them - we will get a bunch of green leaves.
10. Sew the leaves to the top of the carrot using green threads.
11. Let's make small decorative stitches on the carrot. To do this, thread a white thread into a needle and make stitches in the form of small checkmarks on the surface of the carrot. The stitches need to be done in random order. If the carrot is intended to decorate the kitchen, then you can stop at this stage, and if it is a toy for a child, then you can also make it a cute face.
12. To make the eyes, you need to take white felt and cut out two identical circles from it, the diameter of which is approximately 10 mm.
13. Use white thread to sew on the details of the eyes at the top of the carrot.
14. Black pupils made of beads need to be sewn to the eyes. To sew them on, take black threads. All that remains is to embroider the carrot’s mouth; we will embroider it with brown thread using a stem stitch.
The carrots are ready. It can be suitable not only for decorating the kitchen, but also serve as an original pincushion. In addition, felt carrots are suitable for decorating a children's room. If you make several of these carrots, you can use them to study counting and the basics of mathematics, and your child can also set up a toy vegetable shop at home, especially if you show your imagination, you can sew other vegetables and fruits from felt - cucumbers, pumpkins, tomatoes, onions , apples, pears and strawberries.
Making toys with your own hands is a special skill, but not everyone is given it. Making felt products is attractive because it does not require special skills. It is enough to show a little imagination and attentiveness, as a result of which you will get wonderful things, for example, felt carrots.
Hand-sewn vegetables and fruits can play the role of educational material, decorative element and toy all at once. And if you sew a whole basket of vegetables, you can easily play with your child in the store or garden, learning along the way the shape, color and vegetables themselves, because their assortment is quite large.
Sew bright carrots
In this master class I will tell you how to sew a carrot. I received an order from a kindergarten; I needed 14 pieces for boy bunnies. I'll tell you how to sew one.
So let's get started.
We will need: orange fabric, green fabric (in this case with polka dots) and filler (I took padding polyester).
Also threads, thin cord and a sewing machine. You can, of course, do it with your hands, but it’s very difficult.
So, the first step: we make a pattern from cardboard. A triangle of the desired shape and size of carrot. I have it 20x9 cm. And two “fingers” 9.5x4 and 6.5x4 cm, for making green carrot branches.
On the orange fabric, on the wrong side, we trace a triangle and apply the same triangle to its long side again and trace it. It turns out to be a quadrangle.
We cut out this part taking into account the fabric at the hem, approximately 1 cm.
To make the carrot more realistic, I painted brown stripes on the fabric. To do this, I took fabric paint.
I drew it and ironed it. If you don’t have fabric paint, you can do it with regular paints or felt-tip pens, but keep in mind that such a product cannot be wetted or washed. You can embroider stripes with brown thread. But for a large number of products, this technique is not suitable, as it is too labor-intensive.
Sew the fabric from the nose of the carrot to the base. The result is a cone.
Then we prepare the carrot tails.
Take the green fabric and trace the pattern. We will need to circle the small part once, then place it next to it and circle it again.
Then for the second tail again. And circle the second, larger detail twice.
Then cut, taking into account the hem.
And sew along the contour.
Then the products must be turned out and ironed.
They turned out like these - similar to the fingers of gloves.
Next, we connect all the parts: in the orange part, in the place of the hem, we put the cord and start stitching, placing our leaves in the inside.
The result is that all the parts are connected.
Then, we stuff our beautiful carrots with padding polyester. And tighten it with a string. It turned out to be an excellent bond. And there was no need to manually connect and tighten the product.
And here they are, our beautiful carrots.
Our bunny boys will be happy!
www.livemaster.ru
Step-by-step instructions with patterns and photos
In our master class we will look at how to sew such voluminous vegetables from felt as: cabbage, carrots, beets, eggplant, strawberries and tomatoes.
: patterns
We enlarge the patterns to the desired size and print them out; you can simply trace them from the monitor onto a sheet of paper, just like when you were a child you would transfer pictures through a window.
From fabric of the appropriate color, we cut out the parts, taking into account the seam allowance.
: carrot
We sew the edges of the main part, fill it with filler, gather the top together, and sew on the leaves.
: eggplant
We sew the eggplant in the same way as described in Steps 2-4. We try not to lose the pear shape. We sew the leaves in such a way (photos 5 and 6) that they remain slightly gathered.
: "bed"
If you haven’t run out of patience yet, then to complete the collection, we’ll make a vegetable bed. For this we need brown felt and a box or small drawer.
We measure and cut out a rectangle of the required size from felt fabric, fold the fabric in half and sew its bottom and side sides, and then stuff it with synthetic padding, sew up the side and place the “beds” in a box in several rows:
Tools and materials Time: 6 hours Difficulty: 5/10
- felt fabric of different colors (depending on what vegetables are supposed to be sewn);
- regular threads - for internal seams and floss for external seams;
- Velcro for fabric;
- artificial greenery;
- floral wire (or regular thin wire);
- filler;
- scissors.
Why vegetables made from felt? - you ask. The answer is simple: this is a very pliable and obedient material, even a novice craftswoman can handle it, and felt toys are pleasant to the touch, safe for babies and children like them
So, let's get to work - create a whole garden for the baby at home!
Tags
with your own hands with your own hands with your own hands with your own hands with your own hands with your own hands Dictionary of handicrafts with your own hands. sew a bright carrot with your own hands. beautiful carrots. Do-it-yourself furniture Do-it-yourself shoes Do-it-yourself clothes Do-it-yourself candles Do-it-yourself bags Do-it-yourself packaging Do-it-yourself jewelry Do-it-yourself furniture Do-it-yourself shoes Do-it-yourself clothes
kids handicrafts knitting crochet ends commentsyour costumeshow site here easy goods