What difficulties might there be?
Using a tripod in most cases is very helpful in creating high-quality, beautiful photographs. But sometimes, photographers using this accessory become its “hostages”. Many people unintentionally begin to limit themselves to one direction, adjusting to the position of the camera on the installation. This approach will never have a good effect on the development of a photographer. It is very easy to avoid this situation.
Option - out of the box
Another way is to make a homemade tripod out of a small box. This idea is the simplest, as it only requires a box and a knife. It is necessary to cut the structure so that the base remains intact, and the back serves as a holder for a smartphone. The tripod is simple, but the angle of the phone, unfortunately, is not adjustable.
Read also: Customs and traditions in Turkey
Mounting a smartphone on a camera tripod
Phone holder made from paper clips - the photo speaks for itself. The advantage is that you can use all the functions of a tripod - tilt, rotate the camera, change the height.
Before attaching the first clothespin, be sure to turn out the camera mounting screw so that it does not stick out. Otherwise the clamp will not hold.
Install the second clamp as in the photo. And then use rubber bands to attach the phone.
Take large, reliable clamps.
Thermal imager from a camera
A thermal imager is a rather complex device capable of detecting infrared radiation emitted by surrounding objects at a distance. This device is mainly used for repair and rescue activities, and it is also used by professional hunters to search for prey. A thermal imager is similar in design to a digital camera.
Despite its similarity to a digital camera, it cannot be used to make a full-fledged thermal imager. On the Internet you can find many tips on how to make a thermal imager from a camera. For example, it is advised to remove the infrared filter from the matrix, after which the device will supposedly begin to detect thermal radiation. But in practice, you won’t get anything other than breaking your digital device. This video shows what happens if you remove the filter from the camera sensor.
What is better not to make phone stands from?
Phone stands that can ruin your phone
- Random metal objects, even quite stable ones, can not only leave micro-scratches, but also cause electronic malfunction if a closed electrically conductive circuit of a certain size ends up in the wrong place (for example, near the built-in antenna);
- “Bare” paper clips and, in general, any rolled wire made of ordinary steel; however, see below. The phone stand they make is not only unstable. If the “ears” of office clips are made of smooth, cold-drawn “silver” steel, then take a closer look at the stamped paper clips – “naked” ones: they will show burrs and burrs that easily scratch the plastic. What if you really need to put your phone down and don’t have anything suitable at hand - make a stand for it from plastic-coated paper clips;
- From clothespins. Firstly, it does not satisfy the condition of free maintenance, see above. Secondly, the malfunction of apparently intact glass due to long-term concentrated strong pressure is easily detected by test equipment, which the average subscriber most often has no idea about. The result is a non-warranty case, repairs cost money;
- From plastic bottles, vials, etc. The result is the same as in step 3, but the reason is no longer the adhesion of the touch layer, but its microscratches. Or even visible on the glass and body, which makes any repair generally non-warranty. A bottle phone holder can be safe for him and very useful in another case, see below;
- From plastic cups and pipe scraps. The case is even more ambiguous. On the one hand, the phone gets scratched on the hard plastic. On the other hand, shown in pos. 5, the device makes the sound of the smartphone louder and adds “juice” to it, i.e. low frequencies. Therefore, when making an acoustic stand for a smartphone, cut the slot for the device wider and frame it with 4-5 mm foam film on mounting PVA or other chemically non-aggressive glue. Sponge rubber, polyurethane foam, neoprene, etc. - God forbid! Soon - “dead” non-warranty glass!
Option for assembling a tripod from a tennis ball
Another budget option is a mini tabletop tripod made from a tennis ball. To do this you need a knife, glue, a bolt and a nut. The ball is cut in such a way that most of it is stable on the table; to compact the surface, we glue the area under the camera with a second layer from the remaining piece. A hole is made in the center and a bolt is glued. Then you can paint the structure or leave it as is.
You can put a seal under the camera, and if you take a longer bolt, you can slightly increase the stand upwards.
For this tripod we needed:
- Tennis ball;
- Knife;
- Bolt with a diameter for mounting on the camera;
- Nut and seal for bolt;
- Glue and an hour of time.
This option is not suitable for a serious event, but it is quite suitable for home use with a small camera; it certainly will not hold heavy optics.
Types of phone holders for the car
The following varieties are currently on the market:
- Plastic clamp with silicone beads for fixing to the steering wheel. It is easy to use, but blocks the view of the dashboard.
- Clamp for installation in the air duct. Devices of this type benefit from functionality. There are models that allow you to quickly secure your mobile phone with one hand. They produce holders with a flexible cord, which allows you to rotate the gadget in any direction. But the fastening to the air duct grille is not reliable in itself. If the holder swings too much during movement, the phone or tablet will fall.
- Suction cup – attaches to the dashboard or windshield. The holder does not limit your view and allows you to quickly access the gadget’s buttons. But while moving, the mobile device will sway.
- Magnetic holder. It consists of 2 parts: a magnet, veiled in a frame placed on the panel, and a metal plate with a rubber gasket, which must be secured to the gadget. As long as you use a strong enough magnet, your devices will be safe. You can also make such a complex tablet holder for a car dashboard with your own hands.
- Silicone mat is a modern multifunctional mechanism. The clamps are angled for easy viewing of the screen. The mat is equipped with a USB connector to charge your phone if necessary. Additionally, magnetic outputs for Lightning and micro-USB can be built-in. The mat is installed on the panel without additional fasteners on its own sole, treated with a special compound.
Car tablet holder-mat
There are many offers from manufacturers. All products are in different price ranges, and every car owner can find something for themselves. But there are affordable ways to create your own model.
How to install an oval-shaped pot
Oval cauldrons or kanas have a flat, elongated bottom. They are easy to place in a row on a fire made of parallel logs (node). If a rope with hooks is stretched between two posts or trees, the ropes are hung in a row.
For a fire, you make a taganka “rails” with your own hands. The simplest design is two U-shaped brackets. They are stuck into the ground near the fire in parallel. Crossbars with hooks at the ends are placed on top for stability.
Tourists appreciated the folding “rails” made of stainless steel. They are made from steel strips. They weigh about 500 grams. The support legs are pointed. The connection is movable. The “rails” are packed in a thick fabric case. The length of the sliding tagan is adjustable.
Pots with folding side handles and frying pans are placed on the “rails”. You can put a grill and skewers. Shoes are placed on the “rails” over the burnt-out fire to dry. This is a universal Taganka.
Phone tripod in five minutes
How to make a tripod for your phone yourself using improvised materials - tips for those who don’t have time. These designs are more like holders for a smartphone than a tripod. Making a full-fledged tripod with your own hands takes a long time and not everyone can do it.
From jars, disposable glasses, etc.
The easiest way to quickly make a tripod holder for your phone is to cut a disposable cup or a jar of yogurt (sour cream, etc.). The photo below clearly shows how such a device works - you need to make slits and insert the phone into them.
- If you make the slits diagonally, the phone will be slightly tilted.
- To place it on a higher point, it is enough to place it on something else - on a stack of books, on a jar, shelf, etc.
Pros : easy, inexpensive, fast.
Cons – not suitable for vertical shooting (from above), a stand is required for a higher position.
Tripod made of clothespins
Another easy way to make a DIY phone tripod in five minutes is to use clothespins. Connect them as shown in the figure and place your device in the resulting system.
The advantages are obvious - accessible, practically free, fast.
The disadvantages are the same as with jars - there is no way to remove the overthrow - the phone simply will not hold.
Mounting your phone on a can, bottle, etc.
You can secure your phone to a water bottle using rubber bands as shown in the photo below. Be sure to fill the bottle with water, otherwise the entire structure will not stand.
A tripod for a phone at home from a table lamp
If you have a table lamp with variable guides and a flexible base, then this is an excellent option for a tripod. All that remains is to attach the phone holder directly to it and your tripod is ready!
Pros - you can change the height, tilt, etc.
The downside is a more complex design that cannot be done in a couple of minutes.
Tips and tricks
How to make a tripod for your phone yourself is an endless topic, there are many solutions, use your ingenuity, golden pens and you will succeed. Pay more attention to the shooting itself.
- Be sure to check that the mount is secure to avoid falls and damage to the phone.
- Get phone holders - simple and convenient. It's not expensive and makes the job easier.
- Shoot a lot, from different angles, so that during editing there is no capture in the video and photographic material.
Useful materials:
About choosing a phone, camera and video camera for filming.
How to film a master class at home.
DIY Tripod Tools
Tools needed to create a tripod
For five-minute tripods, you won’t need any tools, except perhaps scissors, and even then not always.
But for “serious” tripods, which have three legs that change height, more serious tools will be required.
Here's the main list:
- drill;
- hacksaw;
- pliers, wire cutters;
- screwdrivers (screwdrivers).
In addition, scissors, glue and other tools and materials that the Master always has in stock.
How to make a camera tripod: the first method
Tripods are even more in demand for video cameras than for smartphones. When shooting, you need a clear and static picture to make successful and unforgettable shots. Of course, you can purchase a stand in a store, but the prices for such designs are not exactly low.
For a homemade camera tripod you will need:
- 3 razors.
- A small piece of board.
- Durable glue.
- A screw with a diameter of 0.5 centimeters.
- Screw.
- Sealing ring.
- Drill.
The first step is to cut a triangle with equal sides (5-7 cm) from the board. In the middle of the figure you should make a hole with a drill into which you will need to insert a screw. Now on each side of the wooden triangle you need to glue the razors with glue so that they act as tripod legs. You need to screw an O-ring onto the screw so that the camera does not push the screw down. All that remains is to secure the camera to the screw by screwing the screw into the corresponding hole on the device.
This stand looks very beautiful and will also serve as an excellent attribute even for amateur video or photo shooting.
Second way
Surprisingly, you can build a homemade tripod from an ordinary bottle. For this you will need:
- A bottle with a lid (preferably a large one).
- A screw with a diameter of 0.5 centimeters.
- Construction washers (2 pieces).
You need to make a hole in the bottle cap and then insert a screw there. It is better to make the hole with a drill of a smaller diameter than the screw, so that it can be screwed in and fixed. The screw should be screwed in from the inside, after placing the washers inside the cover. Now the structure is ready to install a camera on it. It needs to be screwed onto the screw that protrudes from the outside of the cover.
The bottle must be covered with sand or stones so that it does not tip over along with the camera. Now you just need to screw on the cover with the camera. The homemade tripod is ready.
This design can be attached to a pole or tree using straps or rubber bands so that shooting can be done from a higher place.
Tools
Along with an extremely modest budget for consumables, only the simplest tools were used during the work:
- Wood saw.
- Drill.
- Drills 8 mm and 2.5 mm.
- A plate for sandpaper with Velcro.
- Sandpaper (100 grit).
- Clamps (not needed if you have another pair of hands).
- Tape measure, pencil, ruler, corner - by default.
The work can be significantly simplified and speeded up if you have a miter saw, jigsaw, drilling and grinding machine. By the way, a manual jigsaw would also be very useful.
Materials
Now let's take a closer look at the materials that will be needed to make the same tripod. In particular, the project used the following:
- Wooden block 4020 mm (about 5 meters in total).
- Cuttings of a 25 mm board are literally 40 cm.
- Wood screws 30 mm – 9 pcs.
- Furniture dowels – 9 pcs.
- Wood glue.
- Bolts, washers, wings – 6 sets.
- A can of matte black paint.
It is highly advisable to use dry lumber, otherwise the finished product will lose both shape and functionality due to changes in temperature and humidity. You don’t have to paint the tripod black, leaving a noble wood texture. If aesthetics are not important, then dowels are also not needed.
Ski pole tripod
You will need, in addition to the sticks, a tube larger in diameter than the sticks, two round or square bases: one for attaching the legs and the main tube, the second (smaller) for attaching the camera.
The tripod assembly diagram is as follows:
- Ski sticks are used as tripod legs. They are cut to a length of approximately 70-90 cm. Using bolts, they are attached to the base, which has a hole for the main pipe (it can be fixed, but then it will be impossible to change the height of the tripod).
- For fastening, you can use metal corners, which are sold in building materials stores, or you can cut similar ones from aluminum cans. Or cut the top of the stick so that “petals” are formed for fastening with bolts. The choice of fasteners depends on the budget and skills of the Master.
- If the legs are screwed “tightly”, then they should be screwed at equal angles. For those who have “golden” heads, an option with a hinged mount is acceptable so that the legs can fold freely.
On the base, which is connected to the main tube at the top, there is a bolt for attaching the camera.
That, in fact, is the whole essence of the design.
You can use any other poles instead of ski poles. The main thing is that they are rigid enough not to bend or break. And also lightweight so that the tripod does not become a barbell for athletes.
Master classes on making phone stands
Made of wood
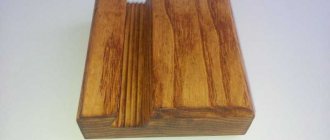
What a simple wooden phone stand looks like is shown on the left in the figure:
The option with a cable channel on the bottom plate (bottom left) greatly reduces the likelihood of connector breakage due to cord jerking. Dimensions are given in the center and on the right; the angle of inclination of the groove for the device is 10-20 degrees from the vertical.
Factory-made wooden phone stands or from private craftsmen are not cheap, because... their production requires quite complex and expensive equipment, for example. wood milling machine. However, exactly the same wooden phone stand can be made literally “on your knee” if you have:
- A suitable block of dense, fine-grained wood: oak, beech, walnut, etc.
- Hand jigsaw and initial cutting skills.
- Chisel 10-12 mm wide; You can use a sharpened flat screwdriver.
- Round coarse (bastard) file with a diameter of 13-15 mm.
- A strong wooden stick of the same diameter.
- Sandpaper (sandpaper) numbers 80, 120 and 240, i.e. from the coarsest to “semi-velvet”.
The manufacturing procedure is as follows:
- The contours of the groove are marked on both side edges and along the top surface. The wood grains should be oriented perpendicular to the groove;
- Using a jigsaw, starting from the face, file down its long (rear) edge by 10 mm, and the short (front) edge by 7 mm.
- Using a chisel, carefully select the wood between the cuts;
- Using a file, select a groove in depth until a semicircular bottom is obtained. It is even better than the “branded” one - the phone, if it is suddenly pulled out of the socket, will definitely not be scratched or stuck;
- With sandpaper wound around a stick, the walls of the groove are brought to smoothness;
- The lower cable channel is made in the same way (optional);
- External surfaces are cleaned;
- The product is varnished with acrylic varnish, dried for 2-3 days at room temperature - that’s it, the phone can be placed in the socket.
From paper
Now let’s try to combine both approaches in one material: “any way, as long as it holds” and “beautiful, worthy of respect.” Plus - speed and ease of production. This material is paper.
A purely utilitarian phone stand made of paper with a density of 70-80 g/m2. m can be quickly made according to the diagram on the left in the figure:
Methods for making paper phone stands
The locations of the incisions are marked in red; blue – folds. The length of the workpiece is about an A4 sheet (297 mm); Width – to scale with Fig. This stand already uses the principles of origami: no glue, no additional fasteners. The stand on the right in Fig. already completely made using origami technique. Blank – A4 sheet. Since this stand is much more durable than the previous one, it makes sense to put thin solid (ornamental) cardboard on it, covered with colored paper, decorated with appliqués, decoupage, etc. Also about the origami phone stand, see the video:
From fabric
The shape is a soft pillow. This business is for women. Cut a square of textile 10 cm longer than the vertical of the smartphone. Then fold the fabric in half to create a rectangle.
Sew the bottom part using a machine or by hand, carefully place the remaining padding polyester or cotton wool there, twisting them into a roll. This will be the heel on which the smartphone will rest. Next, also lay a line behind it.
From there, about four centimeters, smooth out the bottom and front side and back of your rectangle of fabric, and stitch again.
Up to this part of the pad, stitch from bottom to top at the junction of the strips, and also from above. Only the space for stuffing the top of the pad with synthetic padding will remain open. Close it with a seam too.
But unusual. You will have to trim it further so that when sewn together you get a triangle, with an acute angle downwards. This is the leg of the pad, and the smartphone rests semi-vertically on the wide part.
The stand is mostly ready. All that remains is to stitch or attach a pocket for the charger with Velcro. Now you will be surprised how you managed to make the stand yourself so quickly.
From socks
An original product, especially relevant for children. For all its utility, it is a cute toy.
Necessary materials:
- 12 oval cardboard blanks;
- 1 pair of fluffy white socks; 1 pair of black socks;
- blush;
- cotton wool;
- glue.
Appearance of the device
Terry socks are suitable for this device. They are hypoallergenic in composition because they are made of 100% cotton. The only difference from cotton is the technology of weaving the fibers.
Step 1. Cut out 12 oval elements from cardboard paper and divide them into 3 groups with an equal number of shapes. Take 1 stack and on one of the parts trace the outline of the bottom of the smartphone, including the hole for the charging wire. Cut according to the markings made. Using this template, do the same with the remaining 3 sheets and glue the 4 parts together.
Cutting out blanks
Marking
Gluing the cardboard
You should get three options for blanks
Step 2. The second group of cardboard ovals is intended to design the part of the phone in which the wire is located.
Gluing the cardboard
Step 3. Set aside 1 piece from the remaining 2 groups. Glue the remaining ones to the workpiece.
Fixing the charging
Hole for cord
Step 4. Fix cotton wool on unused elements. Cut a white sock and glue it onto the fluffy mass.
Glue the cotton wool
Glue a white piece of fabric
Step 5. Glue half of the black sock onto the main part of the product.
Glue on a black sock
Step 6. To decorate the ears, cut out 2 ovals, cover them with cotton wool and decorate them with a black sock. For the eyes, cut out 2 semicircles and decorate with a black sock.
The finished muzzle remains to be glued to the base
Step 7. Glue all the parts together. Fix the set aside white piece at the back. If desired, you can make a tail from a sock and cotton wool. Decorate your cheeks with blush.
From packaging cardboard
Corrugated cardboard is a really waste material, but quite durable; especially if it is impregnated with a water-polymer emulsion, see above. Cardboard makes phone stands, both crude “instant” ones and very aesthetic ones.
How to make a simple phone stand from cardboard without glue is shown in the figure:
The simplest cardboard phone stand
The only tool you will need is a mounting knife or other sharp knife. This is an option for a summer house, garage, workshop, barn and any place where there is some cardboard box lying around.
A “quick-made” cardboard phone stand can be made from one piece, on the left in the figure:
Cardboard phone stands: one piece and organizer
And using regular PVA for paper, using the pattern in the center you can make a stand for your phone - an organizer, on the right in Fig. It’s the same from plywood, but it’s easier to make cardboard, and impregnated with EPE (see above), covered with colored paper and varnished with acrylic varnish, it will look no worse and will last no less than the famous “Chinese elephants”, one of which is shown in Fig. in the screensaver.
From wooden sticks
It is a classic telephone stand, similar in appearance to a subframe clamp.
Necessary materials :
- mini easel;
- pencil;
- decorations;
- wooden craft sticks;
- brush;
- glue;
- Mod Podge;
- knife;
- acrylic paints.
To process the product you will need fine-grained sanding paper.
Make a mark on a wooden stick with the length and height perpendicular to the crossbar of the easel
Cut the part according to the marks
Glue to the crossbar. Cut and fix several pieces of stick so that the width of the organizer is equal to the width of the telephone. Use sandpaper to remove all roughness
Facing stage. Draw the length of the perpendicular strip on a stick, mark the center and retreat 13 mm from it in each direction. From the obtained points, draw diagonal lines outward
Cut and glue this element to the front of the easel
Cover with paint and decorate with decorations
The stand is ready for use
From wire
A smartphone holder made of soft wire, harmless to the device, can still be made using the following technology:
- Buy a heat-shrinkable tube (HERE) at an electrical store or at an iron bazaar, the length of the entire length of the blank wire + 5-10 cm. The inside diameter HERE is 2-2.5 times the diameter of the wire. They are inexpensive HERE and come in different colors.
- Bend the wire into a stand in the desired manner. You can carefully try the phone in place.
- The ends of the wire should meet end-to-end, not overlapping. Therefore, having bent as necessary, bring the ends close to each other, clamp them with a clamp (at least with clothespins) and bite or cut both at once in the middle of the length of the overlap.
- Place it HERE on the workpiece, leaving 3-5 cm of hanging ends.
- Temporarily bend either end 10-20 cm from the other.
- Place it HERE on one of the ends (either), holding and turning it 30-40 cm above the flame of the gas stove burner. When HERE shrinks 5-10 cm of the wire, cut the shrunk end along the end of the wire.
- Fold the unseated end to the seated end.
- Pull the unseated end HERE over the seated one; bending carefully through HERE, bend the ends of the wire end to end.
- Shrink HERE over the flame sequentially along the entire length, starting from the edge of the already shrinked part - the stand is ready.
From bottles
The plastic stand made from a bottle is made in the form of a hanger, so you can conveniently hang your phone while charging by securing it to the block. To make such a device, you need to take ordinary scissors and any container for a drink, shampoo or cosmetic product.
The first thing to do is to wash the plastic bottle from any remaining soda or any other liquid. After this, you need to cut off the neck and front part to the center. A small hole is cut out in the resulting back for the charger.
To use the contraption, you need to put your phone in the inside pocket, insert the charger into the hole and secure it to the socket. In order to simplify the creation process, it is advisable to draw the boundaries of the future “bag” in advance.
This version of the stand can be perfectly decorated using paints, markers, fabrics or regular prints. If desired, you can attach an additional pocket for the cable from the charger.
If you need to create a classic stand for a table or any other surface, the bottle is cut almost to the very base. Small cuts are then made at the bottom, the thickness of which corresponds to the device. To increase stability, sticks or adhesive pads are glued under the bottle.
Origami
How do you like the idea of making a phone stand out of just paper? Previously, we told you in detail about the origami technique and its basic principles. We recommend reading our material on this topic, especially if you are a beginner.
For this craft, you only need a sheet of thick paper.
Watch the video tutorial in which the author makes a cool stand for his phone or tablet with his own hands. Repeat after him - it's quite simple. This accessory can be easily made in an office, university or school to use a mobile phone for reading or watching videos.
From paper clips
How to make a phone holder? One of the simplest homemade coasters consists of a paper clip. You can use this phone stand on your desk.
Now we will talk about creating a more advanced design. However, to create it you will again need office supplies - paper clips.
Step 1. Find the clamps You need to take 1 or 2 medium-sized clamps. You can choose any color you like.
Step 2: Bend Bend one end of the clamp so that it becomes a J-shape.
Using one clamp, one of its ends is grasped. You need to bend it into a J shape. This will keep the phone in place. You can use the gap between two tables or a desk drawer. Insert one end of the clip between the tables and then bend it to form a J shape.
There is also an option to insert the end when closing the desk drawer. You need to close the drawer until the clip forms a J-shape.
Step 3. Paste one into the other. Now you need to insert the first clamp (J-end) inside the second clamp.
The first J-end clamp must be inside the second clamp. Both clamps should be parallel to the table. One end of the first clamp should be able to hold the phone while its J-shaped end should be parallel to the table.
You can also add a USB dongle at the top of the end of the first clip. This will provide a larger area for the back of the phone. Everything worked out!
Simple tripod holders using bolts and glue
Before moving on to more complex designs, review the requirements to ensure that the rack and mount you create does not become unusable.
Working height of a homemade tripod
It is good if it is adjustable over a wide range. But for a homemade tripod it is difficult to ensure that the minimum height is 20-30 cm and the maximum is 1.5 meters.
Reasonable limits are from 50-80 cm to 1.5 meters. This is enough for both shooting objects on a table, for example, and for shooting “full-length” without distorting the picture.
Stability, reliability
– the tripod must support the weight of the camera and not fall at the slightest vibration of the floor or wind.
Carving is important to know!
For homemade tripods, this characteristic is important, since you will have to select bolts for mounting.
So, there are two main standards for fastening threads. These are 1/4" and 1/8". Check the threads of your devices and use bolts of the appropriate sizes.
Tripod made from a plastic bottle
The difficulty is not high:
- drill a hole in the lid;
- insert the bolt and strengthen it with glue;
- fill the bottle with water for stability;
- close the cover and place a gasket on the bolt;
- attach a camera or phone mount.
Do-it-yourself stable tripod tripod made from razor blade
The idea is not mine, I saw it on the Internet!
Three plastic razors will serve you as tripod legs.
By attaching them with glue or screws to the triangular base, you get an almost finished tripod.
Before attaching the razors to the base, you need to drill a hole in it, insert a bolt of the appropriate diameter for attaching a camera or phone holder - and the tripod is ready for use.
A problem may arise with the base - you will either have to cut it out of wood or look for a triangular object of acceptable size.
For reliability, it is better to strengthen the bolt with glue (moment, epoxy) and use a rubber gasket so that the camera is attached more tightly and does not rotate during shooting.
The spool is small, but expensive, isn’t it? Why not replace Chinese “octopuses” on the table?
What to consider when choosing the type of stand
When planning to assemble a phone holder, you need to understand:
- whether the structure is planned for temporary or permanent use;
- does its external aesthetics matter?
- will the material support the weight of the device;
- How safe is the option for the phone and its owner;
- If we are talking about a complex and intricate stand, it is important to understand whether there is enough time and skill to implement the plan.
Having decided on these parameters, you can begin to select the optimal model.
Option - from office clips
The second way to make a homemade tripod is from paper clips. You will need 2 clamps and some flat thing to attach them to. You need to clamp the paper clips on a flat surface at such a distance that you can install a phone on their handles. That’s it, the tripod is ready and you can shoot on such a stand no worse than on a regular store-bought one.
What is the exit pupil of binoculars?
Well, with the magnification of binoculars everything is more or less clear. But what is the “exit pupil” of binoculars?
The exit pupil of binoculars is the ratio of the diameter of the objective lenses to the magnification . The “ Exit pupil ” of Barska 16 x32 is 2mm (32mm/16 = 2mm). This parameter can also be observed firsthand by holding the binoculars straight ahead in front of you at arm's length and looking at the eyepieces . We will see light circles of end-to-end clearance on the surface of the eyepieces , the diameter of which will be equal in millimeters to the ratio of the diameter of the objective lenses to the magnification .
It turns out that when holding any binoculars with a high zoom and a small exit pupil (or a small diameter of the objective lenses), the image will noticeably jump due to a slight shaking of your hands. In addition, when observing for a long time, your hands simply get tired. There is a solution - you need a tripod .
Afterword
Whether to make a lens with your own hands or spend a certain amount on equipment is up to each photographer to decide for himself. But there are several important points:
- If homemade equipment were better than professional equipment, they would have stopped producing it;
- Experienced photographers with expensive optics will not rely on a “homemade” tripod and will purchase one that is suitable in weight and material for the safety of the equipment;
- For daily shooting you need a good tripod; from available means, the option is for 1 time;
- You will still have to spend a certain amount on materials, and you will also have to spend time on making a tripod;
- Homemade tripods are inconvenient when moving frequently, they are not compact and it is problematic to carry them with you.
Based on these points, the conclusion follows that it is better to purchase professional specialized equipment for work. There is no need to skimp on the safety of your camera and optics. But for home or very infrequent use, you can assemble a tripod with your own hands.
From a table lamp
Option 1
For this homemade tripod, a table lamp is suitable, the base of which itself is similar to it, that is, it has a reliable base, coverage and mobility. A table lamp attached to the table in the form of a large clothespin would be ideal.
You will also need a quick-release clamp (a tool for tightly fixing parts), it is available in hardware stores, its cost does not exceed 100 rubles.
You need to remove the shade from the table lamp (it is secured with a screw), drill a hole in the handle of the clamp to fit the diameter of the screw and connect the clamp itself to the lamp with the same screw. Carefully, without blocking the area of the control sensors, the phone is clamped with a clamp. You can use a soft material (napkin, pieces of fabric) to place it between the phone and the clamp to avoid mechanical damage.
A homemade tripod from a table lamp is ready.
Pros: functionality similar to a full tripod
Cons: you will need to purchase additional materials (clamp), work with a drill
Option 2
In the case of using a table lamp, this option is the simplest. There is no need to unscrew, remove or drill anything. All you need are rubber bands, with the help of which the phone is fixed to the hard lampshade.
Pros: simplicity and reliability of fastening
Sophisticated DIY Tripods: Cheap Tripods for Home Photography
A tripod made from ski poles or how to make a tall tripod for your phone or camera
You will need, in addition to the sticks, a tube larger in diameter than the sticks, two round or square bases: one for attaching the legs and the main tube, the second (smaller) for attaching the camera.
The tripod assembly diagram is as follows:
Ski sticks are used as tripod legs. They are cut to a length of approximately 70-90 cm. Using bolts, they are attached to the base, which has a hole for the main pipe (it can be fixed, but then it will be impossible to change the height of the tripod).
For fastening, you can use metal corners, which are sold in building materials stores, or you can cut similar ones from aluminum cans. Or cut the top of the stick so that “petals” are formed for fastening with bolts. The choice of fasteners depends on the budget and skills of the Master.
If the legs are screwed “tightly”, then they should be screwed at equal angles. For those who have “golden” heads, an option with a hinged mount is acceptable so that the legs can fold freely.
On the base, which is connected to the main tube at the top, there is a bolt for attaching the camera.
That, in fact, is the whole essence of the design.
You can use any other poles instead of ski poles. The main thing is that they are rigid enough not to bend or break. And also lightweight so that the tripod does not become a barbell for athletes.
Video instructions on how to make a tripod with your own hands from PVC pipes
I won’t describe it in detail, it’s better to watch the video. I found something more understandable for you, although without words.
Types of tripods
“Tripod” is a tripod. This is elementary physics. If they have different legs for attaching a camera or phone. This is a general characteristic.
But there are also differences. Let's figure it out!
Monopods . The prefix “Mono” indicates that this device has one “leg”. A kind of selfie stick, the main purpose of which is to increase the distance from your loved one. Equipped with folding knives. The well-known AliExpress offers many options. Sometimes for a camera or camera.
I purchased a folding monopod selfie stick for myself. The design of the knife can be very unstable and fragile. These should be handled with care. She's doing everything she can to earn her living in the DIY category.
Tripod is a tripod in different designs. Professional equipment can change the camera angle, height, and rotation.
A multipod is the same tripod, mounted in such a way that when assembled it turns into a monopod. The “legs” are folded along the main rod or removed from it altogether.
- Mini tripods , the same, multipod, only with short legs, low design, 30-40 cm high.
- Tripods - clamps, tripods-clothespins are essentially structures for attaching to a table, shelf, etc.
- Flexible tripods are mini tripods with bendable “legs”, which, ideally, should be easily attached to any post, tree, branch, etc. In fact, everything is not so simple, especially in inexpensive options - the legs are not strong enough to hold a heavy mobile phone and, especially, a camera in any position. So the ability to insert the camera in the tilt and desired rotation is limited.
Video about mini tripods and selfie stick monopod.
Watch a piece of the video lesson from my training in the video montage where I show my working tripods. This will help you avoid thoughtless purchases or, conversely, buy exactly what you need.