Do-it-yourself portrait from leaves: four ideas for children's creativity.
In this article you will find four ideas for making a portrait from autumn leaves with step-by-step descriptions and photographs
— portrait “Girl – Autumn”,
- portrait from leaves “Girlfriend - Autumn”,
— portrait from leaves “Queen Autumn”,
— portraits of a boy and a girl made of leaves.
The first three portraits were made by participants in our children's crafts competition "Autumn Workshop - 2015".
Materials for making crafts
- Cardboard. Most options use white
- Glue. It is recommended to use a glue gun, as it will be most convenient for attaching small parts. For some moments, a high-quality glue stick may come in handy.
- A marker or a good black felt-tip pen.
- Leaves. You should definitely select as many different colors as possible, then the picture will turn out more impressive.
- High-quality and sharp scissors that can cut and not tear off the sheet.
- It is also worth collecting various dry blades of grass, which will also become an essential component of the picture.
In the book
This is the simplest and most accessible method. Even a preschooler can do it. You just need to select beautiful blank leaves and place them between the pages of the book. You can also use old newspapers or magazines.
It is important to remember that when dried, the leaves release juice, which stains the pages. Therefore, it is better to take a book that is no longer in use, for example, last year’s catalog. If there is no such literature in the house, you can use new one, but then you should place paper napkins on top and bottom of the sheet.
It is advisable to choose a thicker book so that the sheet placed between its pages is pressed down with a weight. Otherwise, it may rot. Only leaves can be dried in this way. It is not suitable for flowers because they turn out flat and unattractive.
Leaves dried in a book completely retain their shape, but become fragile. Their color fades a little. You need to work with them very carefully, as any careless movement will cause them to break.
Stages of creating a craft
When starting any master class on creating crafts in the form of paintings, it is important to first outline the outlines of the image with a marker or felt-tip pen. This is done so that, firstly, all the elements are organically distributed over the entire area, and, secondly, so that later a particular image can be more accurately conveyed.
This is what happens with the painting of leaves depicting a girl. Let's consider one of the possible options.
- We make a sketch of the image of a girl holding an umbrella in her hand.
- The image is applied to white cardboard.
- Next, there are several options for how to make a girl craft from leaves, namely, you can simply color this drawing with a marker, or you can decorate it, giving it volume.
- Let's consider the option when the girl simply paints herself over.
- The drawing is no longer touched, and then work begins with the image of the painting, which they begin to decorate with materials prepared in advance.
- We mark a place for the future tree next to the figure of the girl, cut out the base from the bark, and use elements cut from the collected leaves as its foliage.
- We supplement the tree with twigs, which can also be cut from leaves.
- It is worth noting that the bark can only be glued with a glue gun.
- To give the future tree a natural look, dry all the collected leaves and glue them to it, already slightly crumpled.
- The result is a kind of mass that will look interesting and organic in the picture.
There is no need to skimp on leaves; the more there are, the fluffier and prettier the tree will be. Pre-trimmed blades of grass will serve as grass and decorate the lower part of the picture.
The more diverse species you can collect, the more interesting the picture will look. The finished work can be placed in a frame with glass. In this form it can already be hung on the wall.
Decoupage
This method is good because it allows you to preserve all the charm of natural material. You need to buy decoupage varnish. You will also need a brush, a sponge and an old newspaper.
This method can preserve berries and some flowers, but is best suited for leaves. It is advisable that they are not too dry. Decoupage is very easy to do:
- Take a brush or sponge in your hands.
- Carefully coat the sheet with varnish on one side.
- Place it on newspaper to dry.
- Next, coat it with varnish on the other side.
- Wait for it to dry and get creative.
Berries and flowers can also be varnished for decoupage, but this activity is too labor-intensive.
Painting girl - autumn
Previously, step-by-step instructions were presented on how to make a simple picture of leaves with children. But there are options that will certainly captivate adults too.
Creating a picture of a girl-autumn will not only be an interesting activity for several hours, but will also allow you to realize your imagination in it. It starts with the selection of materials.
To create it you will need:
- Fiberboard, the ideal size for such work is 50 by 40 cm
- As many materials as possible that autumn gave, namely, these can be not only leaves, but also ears of wheat, various twigs, acorns, rowan berries, all kinds of flowers, grass and even millet
- Glue. You can use PVA and a glue gun. Here, rely on the tool that is more convenient to use.
- Acrylic varnish, you should choose a matte version
- You will also need yellow acrylic paint.
If all the suitable materials are collected, then the chance of making a girl out of leaves with your own hands increases many times over.
Panel herbarium
A panel of leaves made in the form of a herbarium looks very impressive. The antique herbarium looks especially stylish. It is made on paper, which can be artificially aged for this purpose. The easiest way to do this is with regular black tea. Brew tea, dip a cotton swab in it and apply to paper. If the background turns out uneven, it’s okay, it will turn out even more natural. Before starting to work with the leaves, the base must be dried very thoroughly.
Leaves should be glued to the background in rows. You can label the leaves with the Latin names of the plants from which they are taken. Signatures are best done with a black felt-tip pen or gel pen, so it will look like the inscriptions were made in ink.
For such a panel you can use both autumn yellow and green leaves. Particularly interesting are panels that use green leaves, yellow leaves, flowers, and fruits at the same time. In this case, the style of the herbarium is maintained to the end, although, of course, its production will take several months.
Tips for creating a leaf painting
It is best to make a picture of leaves on the wrong side of the fiberboard. You should definitely think about the design of the frame; it can be done in the direction of terra.
- To do this, you will need putty, which is mixed with ears of wheat; if there are none, then you can use the thinnest twigs.
- The putty can also be replaced with some kind of dry glue, or you can even use a mixture for laying tiles.
- PVA is added to this mixture, it acts as a substitute for water, and then, together with plant elements, you can create decor.
- After the mixture is around the entire perimeter, you can sprinkle millet on top and leave it in that state for half an hour.
Next you need to shake off all excess. To add aesthetics, the frame should be painted, for example, gold. After which it is also necessary to cover the entire surface of the fiberboard.
In advance, you need to cut out the silhouette of a girl from cardboard, especially important for those who often have difficulties with drawing.
This silhouette is glued to the surface and also painted with acrylic paint. And then the most interesting part begins - the work of fantasy.
For a girl, you need to create an image: it could be a dress or a luxurious skirt made of leaves, or maybe a flying hat will be created. The combination of leaves in the picture with flower petals looks more elegant.
Wax
This method is suitable for any natural material. You will need:
- paraffin or light wax (you can buy regular candles at a hardware store);
- old saucepan;
- clothespins or wax paper.
Before work, you need to dry the collected natural material if there is moisture on it. Next, follow these steps:
- Divide the paraffin or wax into small pieces.
- Place them in a saucepan and put it on fire.
- When the wax melts, carefully dip one leaf or flower into it. Do this operation twice to get a thicker layer.
- Place the leaf on wax paper or hang it from a string using a clothespin.
If you pick a whole bunch of rowan or other berries, place it entirely in wax.
Photo of crafts girl made from leaves
Assistant - iron
Only the leaves can be prepared using this method. You will need:
- iron;
- wax paper - 2 sheets;
- scissors.
Dry or wipe the leaves. There should be no moisture on them. Next, you need to place them between sheets of wax paper and iron them with an iron. Hold the device for 4-5 minutes on one side, then on the other. When heated, the wax on the paper will melt and stick to the leaves. Let it cool. After this, carefully cut out the leaf.
Tree
The plot of the picture is very simple. To create it you will need leaves (preferably maple) and a twig or twig, as well as the materials listed above.
You can create a picture on a sheet of thin plywood. Follow these steps:
- Cut a rectangle out of plywood. Choose its length and width according to your own wishes.
- Sand the edges with sandpaper.
- Cover the plywood with brown paint (you can use stain).
- Draw the outline of a tree on it.
- Break off the cuttings from the prepared leaves. Only the records should remain.
- Start gluing the leaves with the tips facing up. Try to fan them out. Move from the top of the tree down. Apply glue to the entire surface of the sheet, except for the tips - they should be a little shaggy.
- When all the leaves are glued, attach a twig to the crown of the tree - it will be the trunk. Glue it to the plywood.
To make the leaves stick better, you can press them down with a press during the gluing process. But you can do without it if you work carefully.
Sunflower hat for making a hedgehog
Golden autumn can give you a large number of materials. If you show a little imagination, you can make bright things. The most ordinary sunflower hat can turn into an interesting hedgehog.
But you should stock up:
- Plasticine
- Leaflets
- with a hat
Sunflower can be used for crafts
Process of making a hedgehog:
- Take dark plasticine. From it, sculpt the legs of a hedgehog and a muzzle.
- Then attach the resulting parts to the hat.
- Finish the craft by making the back of the animal. Arrange decorative elements as if they were being carried on the back of a hedgehog.
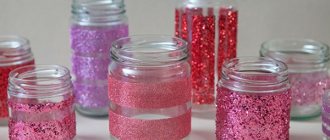
Vase decorated with autumn flowers
In many educational institutions, children give gifts to their mothers, and then they are given on March 8th. Here you must show your own imagination, focus on the ideas that you already have. Every mother loves bouquets created independently by her child. Thanks to the materials brought by nature itself, the craft will turn out simply wonderful.
But to make it, stock up on:
- Plasticine
- Glue
- Seeds
- Dry leaves
- Dried flowers
Vase
The process of making a vase decorated with autumn flowers:
- Glue the silhouette of the main product onto a cardboard sheet. Cover the vase with seeds, taking them from any fruit.
- Glue branches with leaves.
- Take red plasticine. Make daisies from it. Attach maple “wings” to the flowers.
- Attach other dried flowers.
- You can also decorate the card by writing nice words for your mom on it.
Flowers
If you are going to create panels of flowers, you can prepare them using wax or glycerin. These methods are suitable for harvesting tansy, yarrow, sedum, and small chrysanthemum inflorescences. However, it is best to use dried flowers.
They amaze with their palette of colors and variety of shapes. Here are just some types of these plants:
- helichrysum (petals yellow-orange);
- helipterum (flowers look like white cornflowers);
- xeranthemum (showy pink, red and coral flowers);
- lagurus (valued for its fluffy spikelets);
- immortelle (has yellow and pink flowers);
- kermeks (the genus includes 300 species, the flowers have a wide variety of petal colors).
Before using, dried flowers should be placed in a vase without water for about a week so that their stems are completely dry.
Having prepared the materials for the autumn panel, you can begin making crafts.