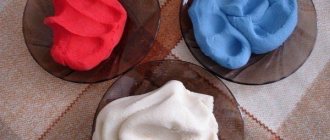
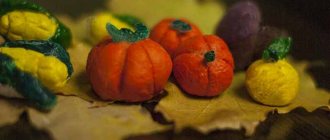
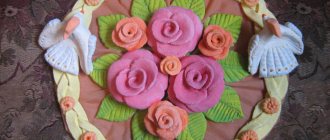
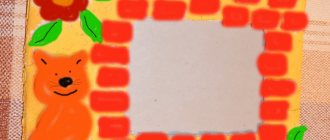
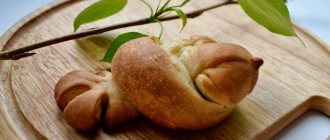
Using salt dough you can create unusual and stylish interior details. Due to its availability, ease of use and plasticity, the material even allows you to create paintings from salt dough. You can involve a child in the production of various figures and compositions, who will definitely enjoy the sculpting process.
How to make salt dough?
You will need: a glass of wheat flour, a glass of extra salt, half a glass of cold water, a bowl.
Recipe
- Take a bowl.
- Pour in a glass of flour.
- Add a glass of extra salt.
- Fill with cold water.
- Knead the dough.
The finished salted dough should not stick to your hands or crumble. It should be cool and easy to sculpt. I recommend watching the video master class!
SALT DOUGH | How to make your own salted play dough | A simple salt dough recipe.
DIY roses made from satin ribbons for beginners
A small piece of satin ribbon 10 cm wide can be used to make a beautiful rose with your own hands.
Materials:
- Ribbons
- Pins
- Thread
- Needle
To create a rosebud: bend the edge of a piece of ribbon at a right angle. And then fold the corner again. Secure the corner of the tape with thread. You also need to do this on the other side of the piece of tape.
On another piece, fold the corners and secure them with pins. Gather the edge with threads.
Attach the petal to the bud and sew. This must be done with each petal. The base of the flower must be carefully fixed.
How to dry salt dough?
There are two most common ways to dry salt dough. The first method: the finished craft will dry on its own. The main thing is that it should not be exposed to direct sunlight, otherwise it will crack. The craft can be placed on a flat surface and wait a few days. Second method: dry the finished craft in the oven for 3 to 6 hours (depending on the size of the craft). Drying occurs in batches with breaks. One approach is 1-2 hours. For quick drying in one go, set the oven to 75-100 degrees, and then the craft will dry in an hour. At a temperature of 120 degrees, the craft will dry in 30 minutes, but it is better to dry it naturally.
Drying rules
Not only the appearance of the craft, but also its durability depends on proper drying. There are several drying methods.
The first method is the simplest, but takes a lot of time - up to several weeks. The exact time depends on the thickness of the crafts. It consists of leaving the product at room temperature until completely dry.
Important! With this drying method, about 1 mm of material dries in one day.
A faster way is in the oven. The craft is placed in a cold cabinet, the temperature is increased every hour. In the first hour of drying it should be about 75 degrees, then 100 and 150.
How to color salt dough?
There are two most common ways to color salt dough. The first method: after drying, paint the finished craft with acrylic paints or gouache using a brush. Second method: food coloring is diluted in water, then added while preparing the dough. When the craft is completely painted and dried, it must be coated with transparent manicure or furniture varnish in 2-3 layers. Each layer must dry before applying the next. This way the craft will last for a long time.
Salt dough star
You will need: colored salt dough, glass, clear manicure polish, toothpick.
Master Class
- Roll into a ball.
- Make a flatbread out of it.
- Cut out a star using a stack.
- Brush the corners of the sprocket with a wet finger to make them smooth.
- Make dots with a toothpick.
- Make a smile with your eyes.
- Attach small flat balls of a different color using water to decorate the star.
- Dry the craft.
- Apply varnish and wait until completely dry.
The salt dough star is ready!
Salt dough caterpillar
You will need: colored dough, knife, PVA glue, toothpick, pendant, clear manicure polish.
Master Class
- Roll out the sausage.
- Cut it into 6 equal parts.
- Roll into balls.
- Glue 5 balls together.
- Glue the head.
- Make a nose and eyes, then glue them on.
- Poke a toothpick into the hanging area.
- Dry the craft.
- Apply varnish and wait until completely dry.
- Attach the pendant.
The salt dough caterpillar is ready!
Salt dough apple
You will need: colored salt dough, PVA glue, clear manicure polish.
Master Class
- Make half an apple, make the inside flat, pressing it onto a flat surface.
- Make a thin flat center and glue it to the main part.
- Roll 6 seeds and a stick, then glue to the apple.
- Blind the leaves, then glue them.
- Dry the craft.
- Apply varnish and wait until completely dry.
The salted dough apple is ready!
Salt dough elephant
You will need: colored salt dough, PVA glue, clear manicure polish.
Master Class
- Make the elephant's body by rolling an elongated ball.
- Make 4 legs in the shape of plump sausages.
- Make a proboscis.
- Make the elephant's ears in this way: roll out 2 flat cakes, glue flat cakes of the same shape of a smaller size and a different color to them.
- Make a small ponytail.
- Blind your eyes.
- Assemble the elephant in the following sequence: glue the legs to the body, then glue the proboscis, then the ears, eyes and tail.
- Dry the craft.
- Apply varnish and wait until completely dry.
The salt dough elephant is ready!
Salt dough roses
You will need: salt dough, foil, a candy vase or similar plastic container, gouache, a brush, clear manicure polish, a modeling board, a knife or a stack.
Master Class
- Fill the vase with foil.
- Roll into balls. For one rose you will need 5 balls, for a leaf - 1 ball.
- Make leaves and draw stripes in a stack.
- Make cakes from the balls and form a rose. Roll one cake into a tube, then attach it to different sides of the cake, forming petals.
- Attach roses and leaves to the foil.
- Dry the craft.
- Paint the craft and wait until it dries completely.
- Cover the craft with varnish and wait until it dries completely.
Salt dough roses are ready! I recommend watching the video master class on how to make a rose!
Master class: Modeling a rose with thin petals from salt dough. Master class for modeling rose.
DIY foamiran roses: master class
This material is very pleasant and convenient to create. Often you could see beautiful bright flowers, very similar to the original. Such flowers are usually used to create beautiful jewelry, for interior decoration, or gift wrapping. Since this material is presented in stores in a wide variety of colors, creative people consider it unique.
It will make a gorgeous rose.
Materials:
- Foamiran: red, green
- Ruler
- Scissors
- Hot gun
- Iron
- Foil
- Super glue
- Pastel: green, black
- Tweezers
- Lighter
- Wire
- Tape
- Mold
- Stationery knife
From red fom we cut 25 pieces measuring 3*4 cm
Fold this rectangle in half and cut off the corners. Let's do this with everyone.
Let’s hold each element near a hot iron for a few seconds and stretch the part in different directions to make the material thinner and allow the petals to be twisted. We make a fold, which we hold with tweezers and fix with fire.
Cut out a 10*15 cm rectangle from foil. Squeeze the foil to create an oval. Attach the foil to the wire. Lubricate the bottom of the petal with glue and attach it to the foil.
Attach all the petals to make a rose. We wrap the wire with tape, securing it at the beginning and at the end of the wire. We cut out three leaves from the green fom.
Cut out a piece measuring 7*7 cm and fold it in half twice. We trim the edges. This will be our sepal.
We make shavings from the pastel using a stationery knife and darken the edge of the sepals using a sponge. Heat the leaves and press them onto the mold. Attach the sepal to the base of the bud with glue, and the leaves to the stem.
Foamiran produces exclusive flowers, which can be very small or giant flowers that are used for photo shoots.
Hedgehog made from salt dough
You will need: salt dough, nail scissors, PVA glue, acrylic paints or gouache, brush, manicure polish.
Master Class
- Make an oval-shaped hedgehog body.
- Make an elongated tip.
- Make 2 small balls and glue them in place of the eyes.
- Roll the ball a little larger and glue it as a nose.
- Make needles by cutting the dough. The cuts should be made in rows, the needles should be placed in a checkerboard pattern.
- Dry the craft.
- Paint and wait until completely dry.
- Apply varnish and wait until completely dry.
Salt dough hedgehog is ready!
How to decorate the edges of baked goods
This can be done in a number of different ways. Again, it all depends on the imagination of the craftswoman and the time she can devote to decorating her culinary work.
Pigtail
First you need to weave a long, not too wide braid from strips of dough. And then carefully place it along the side of the pie, which must first be moistened with water or greased with yolk. This way the decor will not fit tightly and will not roll off.
Squares
In this case, the edge of the product must be cut shallowly with scissors and bent in a checkerboard pattern outward and inward. Making the squares too long is not a good idea. In this case, they will not be able to keep their shape and the appearance of the culinary creation will be ruined.
Leaflets
A wonderful decoration made from yeast dough for a sweet butter pie on top: we’ll tell you how to make it step by step with photos. Before you start finishing baked goods using this method, you should cut the dough mass. You will first need to roll it out into a thin wide layer, and then cut leaves out of it using a mold. They need to be laid out, as in the first option, on a side greased with yolk or moistened with water.
Harmonic
This design is done very simply - by hand. It is enough to form a zigzag pattern with sharp tips.
Wave
Almost the same as in the previous paragraph. Only the wavy edge needs to be made rounded and larger, pressing it harder with your fingers.
Circles
Similar to the above option, only using a round mold. In this design technique, the choice is practically unlimited, as are the varieties of forms for decorating pies.
Patterns using hands, spoon and fork
You can skillfully decorate baked goods with your hands, not only with an accordion or a wave. An edge with successive small turns will look no less attractive.
First you need to fasten the bottom and top of the product together, and then methodically pull the dough a little with your fingers and wrap it inside. It turns out something like a twisted rope.
Using a tablespoon you can create a scallop pattern. It will be enough to attach it to the side perpendicularly. The first dent should be made by applying the larger part of the cutlery, the second with the very tip.
There is also an opportunity for the fork to participate in beauty creation. Simple, fast and tasteful. Tilting it slightly, you need to leave characteristic marks along the entire edge. The end result is nice little ribs.
Owl (eagle owl) made from salt dough
You will need: salt dough, pva glue, nail file, manicure scissors, acrylic paints or gouache, brush, wooden board with a pendant, transparent manicure varnish.
Master Class
- Make an oval shaped body of the owl.
- Blind the eye in this way: make a round cake and glue it on, then take a piece of dough, form a small strip, wrap it in a tube and glue it as a pupil.
- Blind the second eye in the same way.
- Using a nail file, make small stripes from the pupil to the outer shell.
- Make rays around the eye by pressing the nail file onto the dough.
- Take scissors and make cuts to form the owl's feathers. This process is painstaking, the main thing is not to rush.
- Place the cuts in rows. The feathers should be staggered.
- Glue the craft to the board.
- Make the owl's paws and glue them on.
- Make the owl's wings, use scissors to make feathers and glue them on.
- Using the same principle, attach the “hairstyle”.
- Dry the craft.
- Paint the owl and wait until it dries completely.
- Cover the craft with varnish and wait until it dries completely.
The salt dough owl is ready!
How to make a rose from felt with your own hands
Handicraft masters are very fond of such material as felt. And this is not without reason, since felt is sold in a variety of colors, different thicknesses, with or without glitter.
Jewelry - brooches or hairpins made from this material - have become very popular recently. Therefore, you can consider the option of making a felt rosette, because it can complement the image as an accessory.
Materials:
- Felt: green, pink or red
- Threads
- Pencil
- Hot gun
You need to cut out 4 round pieces with a diameter of 7-8 cm from felt. You can make them using a compass or circle some round piece of furniture. Cut each circle in half. Sew a semicircle along the straight side with matching threads.
Finally, pull the thread taut, gathering the petal and securing the thread. We need to make 7 petals like this.
From one petal we twist the middle of the bud.
We fix the rosebud at the base with stitches and a knot.
We wrap the petal around the middle of the rose and secure it with a thread near the base.
We wrap the next petal around the previous ones and fix it. There will be as many petals as lush as you want the flower to be.
Cut out leaves from green felt. We attach them with a hot gun to the base of the rose.
Where can you use felt roses?
Salted dough fruit basket
You will need: salted dough, a base on which the craft will be attached, such as a board or plate, a glass or a knife, a sheet of paper, a simple pencil, a garlic press, a rolling pin, PVA glue, acrylic paints or gouache, a brush, clear manicure polish, cloves.
Master Class
- Draw a basket on a piece of paper or print out a template.
- Roll out the dough into a thin layer.
- Glue the central part of the layer onto the board.
- Attach a paper template.
- Cut out the basket with the tip of a knife.
- Pass the dough through a garlic press to create stripes, then twist into ribbons.
- Lubricate the handle of the basket with glue and place the flagella on it.
- Glue the flagella onto the rim.
- Using the tip of a knife, draw a mesh on the basket, making it look wicker.
- Roll out the layer and cut out 9 leaves with a knife.
- Using the tip of a knife, draw stripes on the leaves.
- Glue 3 leaves on the sides and top center of the basket.
- Make 4 large circles and glue them on as apples.
- Make a small indentation with a stack in the center of each apple and glue a clove.
- Make 3 small circles and glue them on as plums.
- Make about 20 small balls and glue them like a bunch of grapes.
- Dry the craft.
- Paint and wait until completely dry.
- Apply varnish and wait until completely dry.
Salted dough fruit basket is ready! I recommend watching the video master class!
#Salt dough/ Basket with vegetables.
Beautiful pastries
Openwork cookies
Roll out the dough. Cut it in the same way as in the photo. Add grated apples mixed with a little lemon juice and wrap!
Cookies "Button"
You can make crispy buttons using a bottle cap and a straw.
Bunnies for children
Roll the dough into balls and shape into bunny ears using scissors. Use a match and make eyes.
Puff pastry flowers
Make circles from puff pastry. Place a prune in the center of each, pinch and cut as in the photo. Prepare deep-fried products. Drizzle jam on top.
Rose Pie
If you have always been amazed at the skill of housewives who decorate pies with beautiful flowers made from dough, then it’s time to learn how to do it yourself. It's very simple. Divide the dough into 8 parts, roll out, brush with jam or your favorite nut butter, make rolls and then do what is shown in the picture.
Apple or vegetable rolls
Take a paring knife, cut strips from apples or zucchini, shape them into roses and place them in the pie crust.
The same Zebra pie
“Zebra” is one of the most popular cakes of the last century. Prepare two bowls of dough: chocolate and regular. Lay it out in layers. Using a toothpick, draw a couple of shallow lines from the center of the pie out to the edge. You will get a beautiful pattern. Place the pie in the oven.
Serving ice cream
Bake the cupcakes in the pan and then top with ice cream. It turns out very tasty.
Croissants “Day and Night”
Roll out two circles of dough of different colors. Place one layer on top of the other, cut and roll the bagels.
Chamomiles with jam
Place dough flowers into muffin cups. Bake them in the oven. Then cool and put jam or your favorite filling inside. Sprinkle with powdered sugar.
Pie "Star"
Take 2 layers of dough. Coat the bottom one with chocolate-nut paste, place the second layer on top. Cut and fold the edges as shown in the photo.
Nourishing dough roses
Cut the dough into thin strips, add any filling and roll into roses.
Pears in puff pastry
Peel the pears. Cut in half, cover with puff pastry and bake.
Unusual sausage in dough
If you want to eat sausage in dough, prepare it at home. Firstly, you can choose the best filling in your opinion in the supermarket, and secondly, you can make this dish in an original way.
Pie “With Love”
The idea of making a pie for your loved ones. They will definitely not remain indifferent to such a treat!
Pigtail
This is the most common method of applying patterns to baked goods. After all, there is not a housewife who does not know how to braid hair. To do this, you need to roll out the dough and cut into approximately equal strips. The thickness will depend on the size of braids needed for decoration. Now we have to weave the blanks, connecting them in three pieces.
The resulting braids will look great on the lid of any type of baked goods. Alternatively, the mass can first be twisted into strands, and then weaving from them.
Salt dough cat
You will need: salt dough, a knife, a rolling pin, a simple pencil, a sheet of paper, sandpaper, acrylic paints or gouache, a brush, transparent manicure varnish, a glue gun or pva, a base for crafts, for example: a board with a frame, transparent manicure varnish.
Master Class
- Draw a cat or print a template.
- Roll out the dough into a thin layer.
- Attach the template and cut out the cat.
- Dry the craft.
- Sand the craft with sandpaper, removing any unevenness.
- Using a simple pencil, transfer the desired design onto the cat’s body.
- Paint with paints and wait until completely dry.
- Cover the craft with varnish and wait until it dries completely.
- Glue the cat onto the base with the frame.
The salt dough cat is ready! I recommend watching the video master class!
Cat souvenir (Laskutok) | Salt dough modeling part 1
How to make a rose from plasticine: a children's craft
Plasticine is the very first material that children begin to work with. It may be simple fun for them, but it develops fine motor skills. Both boys and girls can make this flower, because girls love flowers, and boys will want to make a pleasant surprise for their mother or grandmother.
Materials:
- Plasticine: red, green
- Stack
- Board
- Wooden skewer
Cover the skewer with a thin layer of green plasticine to create a stem. To create petals, roll balls from red plasticine.
Press down each ball, stretching it in different directions. Make one flatbread long.
We wrap a long cake around the edge of the skewer, and then the rest of the petals.
The edges of the petals do not need to be tightly attached to the bud. After all, our rose should be lush.
Attach a sepal under the bud.
Form rose leaves.
We attach the leaves to the stem, and you can also add thorns to the stem of the rose.
Knowing how to make a rose from plasticine, any child, even kindergarten age, will be able to make a craft for his mother on March 8th.
Salt dough pencil
You will need: water, flour, extra salt, a cardboard jar for the frame, PVA glue, scissors, a piece of decorative rope or corrugated paper, gouache, a brush, a button, stacks, acrylic varnish for crafts, a toothbrush.
Master Class
- Knead the salted dough in this way: add a glass of flour, a glass of salt, add water, then knead until the desired consistency of the dough. Separate part of the dough, add beige gouache, then knead.
- Roll out the cake to a thickness of 10-15 mm.
- Apply PVA glue to the outer rim of the jar and wrap it with dough. Cut off the excess with a stack and smooth the joints with a damp brush.
- Create a small dotted texture with a toothbrush on the surface of the dough.
- Knead the brown dough, roll it into a flat cake 10-15mm thick.
- Cut a 5cm wide strip of brown pastry and glue it to the bottom of the jar.
- Make 2 large owl eye bases from white dough, then glue them on.
- Make a beak out of brown dough and glue it on.
- Make eyes from turquoise dough and glue them on.
- Roll out 8 strips of pink dough, twist them into 4 flagella and make a bow, then leave it to dry for 2 hours.
- Make droplet-shaped owl wings using brown dough, then glue them on.
- Weave ropes of beige dough and glue them onto the neck of the jar.
- Roll out a sausage from white dough, draw the texture of the lace with a stack and glue it as a collar under the beak.
- Place the craft in a warm place for a day.
- Paint the bottom and wings with brown gouache and decorate with white dots.
- Draw the pupils and eyelashes with black gouache, wait until the paint dries, then paint white highlights on the eyes.
- Glue a pink bow above the wing.
- Glue a button with a bow from a corrugated strip onto the lace.
- Cover the craft with varnish and wait until it dries completely.
The salt dough pencil is ready!
DIY napkin rose: step-by-step instructions
There are napkins in every home and often they are so beautiful that it’s a pity to just store them. After all, you can make beautiful decorative roses out of them. They can also become decorative elements of a feast or a gift.
The easiest way to make a rose from a napkin, for which we only need one napkin. The diagram will help with this.
Unfold the napkin completely. Divide the napkin into three equal parts and fold it a third at the top. Fix the fold with your finger and bend a small corner.
Pinch the edge with two fingers and begin rolling.
We do not remove our fingers, but curl the edge of the napkin. Then we help with two fingers. Twist the stem to the middle, and then you need to make a leaf.
Unscrew the lower part of the stem a little, but hold the upper part with your fingers. Lift the unfolded part towards the bud. At the end of the tourniquet, firmly squeeze a section of the stem with your fingers. From this point we twist to the end.
Salt dough dachshund
You will need: salt dough, a simple pencil, scissors, cardboard, paints, a brush, rope, toothpick, foam sponge, clear varnish, PVA glue.
Master Class
- Draw a dachshund on the cardboard as shown in the image.
- Cut out the template.
- Roll out the dough to a thickness of 5 mm and cut out the dachshund according to the template.
- Roll out the oblong eyes, then glue them on.
- Blind the eyelids and glue them onto the eyes.
- Use a toothpick to outline the paws, nose, mouth, ear and body contours.
- Roll out an oval, then glue it onto the ear and smooth the seam with a wet finger. Use the same method to add volume to the dachshund's back and tail.
- Mark stripes in different directions around the entire perimeter of the dachshund, so that the stripes resemble wool.
- Dry the figurine.
- Paint the figurine, then leave to dry.
- Glue a piece of rope to the back of the craft for further hanging.
- Cover the craft with varnish and wait until it dries.
The salt dough dachshund is ready!
Rose from isolon: master class for beginners
Until decorative creativity began to develop, no one could even think that building material could be useful for creating decorations. For example, such roses from isolon have become popular among photographers who decorate photo zones with them.
Isolon can be different in thickness - from 0.2 mm to 1 cm. To make flowers, a material of 2-3 mm is ideal. You can purchase colored material.
Thin isolon is easily cut with scissors. It also melts, but does not ignite. Therefore, you can make beautiful flower edges. You can easily make waves as the material stretches, but it is quite difficult to tear.
You can fasten the parts with hot glue, a stapler, or thread.
You can also use hot air from a hair dryer or a soldering iron.
In the sun, such material may turn yellow.
If you want to make a colored rose, then initially buy colored material, since isolon cannot be painted with simple paints.
To create a beautiful rose from isolon, you need to cut petals of different sizes.
It depends on what the end result should be.
For example, the largest petal can be 20*20 cm, 30*30 or even larger. The small one will then be about 12*12 cm.
First you need to cut out several templates of different sizes. We transfer each petal template to the material to make 6-7 identical parts. Number of them
depends on how lush you want the bud.
The larger the outermost petal, the larger the size of the petals needed and, accordingly, their number will be greater.
As mentioned above, you can attach the petals to each other in different ways. Choose the most optimal one for yourself.
Isolon lamps in the shape of a rose, for example, have become fashionable.
A growth rose from a laminate backing can also be made in this way.
Boletus mushroom made from salt dough
You will need: salt dough, light bulb, paints, brush, foil, cardboard, masking tape, superglue, PVA glue, paper napkins, clear varnish, stack.
Master Class
- Cover the light bulb with tape, then cover it with dough and dry the workpiece.
- Cut a ring out of cardboard and place it on the light bulb as a base for the hat.
- Form a hat from crumpled napkins, then secure with tape.
- Wrap the hat with foil.
- Roll out the dough to a thickness of 5 mm and stick around the cap.
- Remove the cap from the stem, cover the bottom with dough and make stripes in a stack.
- Glue the hat onto the leg.
- Mold the mushroom's arms, legs and nose, then glue them on PVA.
- Make a caterpillar and glue it to the hat.
- Dry the figurine.
- Paint the figurine, then leave to dry.
- Cover the craft with varnish and wait until it dries.
Boletus mushroom made from salt dough is ready! I recommend watching this video!
Modeling from salt dough: Basket with mushrooms. Master class for adults and children.
Funny salt dough pigs
You will need: salt dough, paints, brush, foam sponge, stack, thin rope, toothpick, black helium pen, PVA glue.
Master Class
- Roll 2 balls for the snout and use a toothpick to make the nostrils.
- Make a muzzle, glue a snout and eyes above it.
- Make triangular ears, glue them, then mark stripes with a stack at the junction of the ears and head.
- Make a heart and glue it to the bottom side.
- Make indentations along the edge of the entire circle.
- Using a toothpick, make 2 holes on the top for attaching the rope and 2 holes on the bottom for the legs.
- Roll up the arms and glue them in such a way that they hold the heart.
- Make the hooves and make holes in them for the rope.
- Dry the workpieces.
- Paint the blanks with black paint and let them dry.
- Wash off the paint from the convex parts of the workpiece under running water with a sponge and wait until it dries.
- Prime the figures with a sponge and white paint.
- Color the piglets.
- Draw small details with a black gel pen.
- Cover the craft with varnish and wait until it dries.
- Glue wool threads as hair.
- Make a pendant out of rope.
Funny salt dough pigs are ready! I recommend watching this video!
Salt dough cat
Salt dough fish
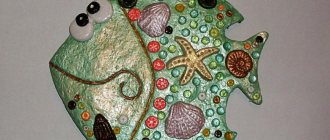
You will need: salt dough, baking sheet, rolling pin, knife, sheet of paper, acrylic paints, brush, ribbon, water, shoehorn, pencil, sandpaper, clear manicure polish.
Master Class
- Draw a fish or print a template.
- Sprinkle a baking sheet with flour.
- Roll out a sheet of dough on a baking sheet.
- Place the paper fish template on the rolled out dough.
- Cut the fish along the contour with a knife, remove the excess dough to the side.
- Make a thin strip and attach it with water in a semicircle, separating the face and body.
- Make a heart and attach it with water as the lips of the fish.
- Blind the eyes and attach with water.
- Form the pupils by pressing the back of a pencil into the dough.
- Make 2 holes using a suitable round object on the fin of the fish.
- Shape the scales of the fish using a shoe spoon.
- Make eyelashes and stripes on the fins with the tip of a knife.
- Dry the craft.
- Smooth out any imperfections in the craft using sandpaper.
- Paint the craft and wait until it dries completely (about a day).
- Cover the craft with varnish and wait until it dries completely.
- Attach ribbon for further hanging.
Salt dough fish is ready! I recommend watching the video master class!
Dough fish.wmv
I recommend viewing a photo gallery of ideas for creating crafts from salt dough!
Crafts made from salt dough are perfect as a gift for any occasion. Think about what your relatives and friends love most, then make it and make a pleasant surprise for your loved ones with your own hands.
How to make a paper rose with your own hands: step-by-step instructions
Paper roses can be used to decorate gift wrapping, or used as decor for photo shoots. You can make a paper rose with your own hands using different methods; choose the one that is optimal for you in terms of ease.
Paper is the cheapest material that can be used for crafts. Almost all types of flowers can be made from paper.
Simple DIY paper rose
The easiest way to make a rose from paper, which can be used to decorate the interior of your home, a gift, or create a beautiful picture or garland.
To make such simple roses, we will need:
- Thick colored paper
- Scissors
- Glue
You need to cut a circle out of paper. You choose the diameter yourself; the size of the flower depends on it. Optimal – 15-20 cm.
The circle must be cut in a spiral and twisted tightly, starting from the edge.
Spread the petals and glue the bud to the edge of the spiral inside.
You can plant a bud on a wire to create a bouquet
How to make a rose from colored paper with your own hands
Such an exquisite rose can decorate a wedding table or a simple card. You can collect a bouquet, or decorate the wall with paper roses.
Materials:
- Colored paper (for roses and green for leaves);
- Scissors;
- Pencil;
- Glue.
Fold a sheet of colored paper into 4 folds, then in half and diagonally again.
We will obtain a blank in the form of a triangle, from which we will cut out a petal and unfold the sheet.
We will get a flower that consists of 8 petals.
We need 4 of these parts.
in one of the blanks, which will be the last, cut off 1 petal. In another blank, the third, we cut off 2 petals. In the second part we cut off 3 petals and in the very first part we cut off 4 petals.
We glue all the blanks so that the outer petals are glued together overlapping.
Using a simple pencil, bend the petals in each part of the rose.
You need to cut out leaves from green paper and fold them like an accordion. Glue the leaves to the rose bud.
Large paper rose: how to make it yourself
Recently, paper roses have often been used to hand over decorations for a photo shoot. It should be a large paper rose almost the size of a person. Then it will look impressive.
Materials:
- Thick paper of any color
- Cardboard
- Scissors
- Glue
You need to make a template for petals of 3 sizes, which depend on how big the rose you want to get.
You will need to cut out 6 petals of each size.
At the base of each petal you need to make cuts. You need to curl the ends away from you.
Turn the petals over and glue the ends near the cut to get a flower shape close to the natural one.
Large petals need to be glued together, connecting in a circle.
Next, glue the medium and small petals.
You need to glue a piece of cardboard to the bottom of the flower.
Fold a sheet of paper in half and make cuts on the fold side. You need to make two such parts. Roll the sheets and straighten them carefully. This will be the core of the flower.
