Reading time: 4 min. 9k. Published 10.10.2015 Updated 18.10.2015
Hi all! Continuing the autumn theme, today I would like to return again to the topic of modeling from salt dough. I suggest creating autumn sensory material together with the children. Autumn sensory material includes rich gifts of autumn: acorns, cones, autumn leaves, sticks, etc., as well as vegetables and fruits made from salt dough. What vegetables and fruits are relevant in the fall? I think you will agree that these primarily include pumpkin, corn and apple. It is exactly how to mold this sensory material that I will talk about in today’s article.
- How to make a pumpkin from salt dough?
- How to make corn from salt dough?
- How to make an apple from salt dough?
- Stage 2. Dry vegetables and fruits from salt dough
- Stage 3. Color vegetables and fruits from salt dough
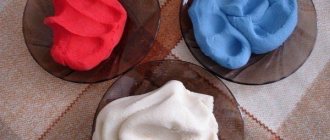
- How to color salt dough?
Advantages and disadvantages
Like any material for children's creativity, salt dough has both advantages and disadvantages.
The advantages include:
environmental friendliness - the dough is made from natural ingredients, and its production does not harm the environment;- safety - all ingredients of the material are completely edible (even food coloring) and hypoallergenic;
- cost - as a rule, you don’t even have to buy anything for modeling, because flour, water and salt will probably be found in the kitchen.
Minuses:
- shelf life - the dough must be used immediately after preparation;
- whimsicality - if processed incorrectly or poorly kneaded, the finished product will be deformed, crumble or crack.
- time-consuming - obviously, buying material for modeling is much easier and faster than preparing it yourself.
Step-by-step instructions for making dough crafts for beginners
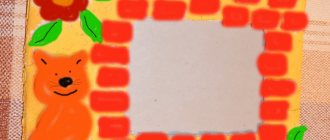
Now that you know how to prepare material for creativity, it’s time to begin the sculpting process itself. Let's start with the simplest. I will show you step by step how you can easily and quickly make a beautiful thing. We will sculpt a cute bear.
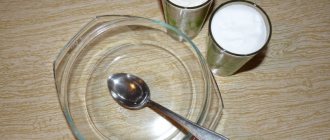
We will need:
- Flour;
- Salt;
- Water;
- Cup;
- Acrylic paints or gouache;
- Brush.
Manufacturing process:
1. First, knead the dough: mix half a glass of flour and half a glass of salt, add a little water and mix everything well. Next, wait 2 hours, during which time the dough sits in the refrigerator.
2. Now we start sculpting the figure: we make one medium-sized ball for the head, a larger one for the body and 7 smaller ovals for the paws, ears and nose. We connect everything together. Then we put the product in the oven and dry it for an hour. After drying, take out the craft and cool it.
3. Next we proceed to coloring. Take a brush and the necessary paints. We are waiting for the “Bear” to dry. That's all!!
Advice!! Cover the finished souvenir with varnish. This will make the craft brighter and more practical!!
Thus, the step-by-step instructions for sculpting products from salt dough are as follows:
- knead the dough;
- we sculpt the necessary elements and connect them together;
- dry the work in the oven;
- paint and wait for it to dry.
And remember that the main sculpting techniques are balls and sausages.