Creating a salt dough panel is an incredibly original way to surprise others or simply update one of the corners of your home. The woman is the keeper of the hearth. In order for it to be truly cozy, warm and simply beautiful, housewives come up with various ways to make it so. We will now tell you about one of them.
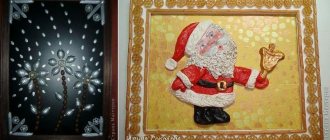
Even in Rus', products were baked from dough not only for consumption, but also for various decorations, jewelry, amulets, and amulets. At that time, women tried to place such compositions of salt dough in the kitchen, as they considered it a talisman and guardian of comfort. In foreign countries, dough crafts were created for the New Year and Christmas, which was considered a tradition. After all, such decorations bring success, prosperity and happiness to the home.
Crafts made from testoplastics are now mainly made in Eastern Europe.
Small recommendations
This composition is chosen taking into account the aesthetic features of the room where the future panel will belong. In a well-lit room, it should be 1-2 shades darker, otherwise the architecture of the room will merge with the work of salt dough. If the room is poorly lit, the panel should be made from a brighter color scheme. The interior color should also be taken into account. Even the prevailing mode, style and decor plays an important role in the manufacture of the product.
It is also not a good idea to place the work on a windowsill in direct sunlight; when heated, the paint or the material itself from which we will sculpt may leak. All ingredients used should be looked for in advance! You need to choose dishes that you won’t mind getting dirty in the future.
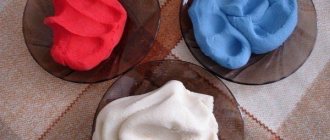
Have you ever thought about the fact that such a large amount of salt is added to the dough? You can just knead a lot of flour. Since ancient times, it has been the case that salt repels rodents and other unwanted animals. And this tradition has been preserved to this day.
Related article: DIY knitted wallet
Dough coloring
Natural colored dough crafts are a bit boring. I always want to color them. In practice, two simple methods are used for this:
- color the dough;
- paint finished crafts.
Finished products are given color using acrylic paints or gouache. A regular paint brush is dipped into paint and the toy is painted over, or contour patterns are drawn on it.
Another method involves giving the modeling mass a uniform color using food coloring. Coloring agents are diluted in water, then combined with the dough during its preparation. The final stage in creating the craft will be drying and coating with transparent varnish in 2-3 layers. This will extend the life of the toy and maintain its presentable appearance.
Knead the dough
We will need:
- two glasses of flour;
- a glass of salt (preferably medium-sized);
- a tablespoon of dry glue;
- a tablespoon of any cream;
- a tablespoon of vegetable oil;
- 200 g of water.
Mix everything in a large container, constantly adding flour, and the main thing is that there is as much of it as possible.
Panel "Cat"
The image of a cat is often used in various crafts. Therefore, we propose to perform it using another very interesting technique - testoplasty.
Accessories:
- ready dough;
- plastic fork;
- paints;
- frame with background 10*15.
Let's look at the instructions for implementation. Prepare the dough in advance. Draw a cat on a separate piece of paper.
Sculpt the parts of the cat separately, but at the same time fasten them together as you work.
Place a plastic fork in the dough piece itself.
Allow the finished figurine to dry thoroughly.
Color the animal to your liking. Cover with varnish. Glue it onto the background with the frame using durable glue, preferably “Moment”.
Ready!
Salt dough panel in a photo frame: pictures and instructions
The technique for making dough compositions includes forming the craft in a photo frame. It cannot boast of size, but the effect will be noticeable. Pictures with small flowers, such as lilies or violets, are preferable. For retro-style rooms, a slightly split image is suitable. This will bring the spirit of antiquity.
Before performing the work step by step, attention is drawn to some nuances.
Composition ideas
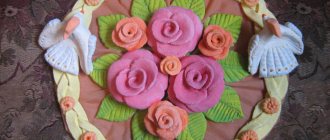
The living room will be decorated with flowers;
Summer theme
For a panel of sunflowers you will need the same things as for all other works.
Let's look at the implementation step by step. First we prepare a textured frame with a background. Glue the surface with PVA and prime it. Paint it with paint.
Paint part of the dough green. These will be the stems of the plant. The rest is yellow.
On a dried background, draw a sketch of a design in the form of sunflowers.
Please note that you should draw what you like; it is not necessary to use exactly the same image as shown in the master class.
Roll out the stem, petals and other details in advance.
Cover the background with an adhesive solution (glue + water in proportions 1:1). Then carefully apply the figures separately.
To prevent the dough from sticking to your hands, you should use dry flour, as in normal cooking.
After each application of a layer, dry the parts well and for a long time. Paint over all the spaces between them. It should look something like this:
Related article: Papertol: master class with photos of finished works and video
If your result is not similar enough to this composition or is bad in your opinion, don’t be upset. This technique is mastered over the years. Every time you do it, you will get better and better!
Drying
After the product is almost ready, it needs to be dried. You can't lay it out in the sun, it will crack. It’s better when everything dries out gradually, for a couple of days at a uniform room temperature or near a radiator. You can dry it faster by using a low-heat oven for several hours, in two to three batches.
Create a warm mood
Agree, daisies are little suns. They always delight us when they appear with the summer season of the year. According to legends, these flowers grow where a burnt star falls and new life is born in the form of white small plants. Making such a large bouquet will definitely not be difficult for you. Let's get started!
We use the same ingredients, but prepare the frame in advance. First we sculpt a vase of any shape. We sculpt the heads: make a circle, cut out the petals with scissors or a cutter.
Roll the cores into very small balls.
One by one, mold everything together against each other in the background.
You can color it like this.
Ready!
Even more ideas in the photo:
Star
To create a cute star you need to stock up on:
- colored modeling mass;
- toothpick;
- clear nail polish;
- stack.
The manufacturing instructions are simple and include the following steps:
- Roll the modeling mixture into a ball;
- Press the ball down with your palm and make a flat cake;
- Cut star wedges from the ball;
- Smooth the tips of the wedges with a wet finger to give them smooth outlines;
- Use a toothpick to mark points along the wedges, eyes in the center, a smile;
- Dry the toy thoroughly;
- Cover with clear manicure varnish and wait until dry.
The star is ready. Before it dries, you can make a small hole in one of the wedges and thread a thread or ribbon through it. You will get a star pendant.
The same principle is used to create ginger cookies, bells, and medals.