Greetings my beloved readers and blog guests!! Once upon a time in the distant past I worked as a teacher in a kindergarten, the work was very interesting, but poorly paid... But today we will not talk about that!! It’s just that anyone who has worked in this system knows that all the materials we use in creative work with children must be environmentally friendly or certified. Therefore, homemade tools come to the aid of purchased stationery. And the simplest means for development is salt dough.
Salt dough has been familiar since ancient times and is still popular in our time, because it is very easy to make, and it is a pleasure to sculpt from such a soft material. And what kind of crafts you get!! Just a sight for sore eyes!! I haven’t worked in the garden for a long time, but at home with my baby we often do modeling, and what was my surprise that not everyone knows how to prepare the dough and what can be obtained from it. That's why I decided to write an article on this topic.
And for a change, you can make New Year’s crafts with your kids from scrap materials, see ideas here.
Classic recipe
The minimum set of ingredients will be the safest for small children. This test can be used for children as young as one year old. Even if a child bites off a small part, it will not cause any serious problems.
This is certainly not the most pleasant outcome of events, but anything is better than swallowing the chemical composition of store-bought products. A large number of photos of salt dough can be found on the Internet.
Preparation
Prepare a bowl for mixing all ingredients. Sift flour and add salt. Mix thoroughly until smooth.
Gradually pour cool water into the bowl in a thin stream. Stir the mixture until smooth and the dough no longer sticks to your hands.
Note. If your mixture is too liquid or the dough still sticks to your hands after kneading for a long time, you need to add flour a little at a time. If your mixture is too thick and dry, you can add a little vegetable oil.
After kneading, you should have a dense and elastic mass. After cooking is completed, the finished dough must be placed in a plastic bag and refrigerated for about 2 hours.
Recommendations for Beginners
- Choose only wheat flour for preparing the mixture. If you want to color the product, rye flour will not work.
- Use any salt other than iodized salt. When dried, figurines made from such salt crack.
- The dough can be colored during the kneading stage using watercolors or food coloring.
- The finished dough should not be left, as it may dry out in the air. Cover it with cellophane or cling film.
- Failed dough can be corrected: add water to thick dough, and flour to liquid dough.
- You should not add fats, either food or cosmetic, to the dough. This may affect the uniformity of coloring.
- Keep the finished dough in the refrigerator, but no more than 2 days.
- Large parts should be sculpted using a frame. For this you will need cardboard or wire.
- It is important to dry crafts at room temperature, in the oven, or near heating devices. You cannot dry the figures on the radiator; they may crack.
- It is not recommended to use watercolors for painting crafts, due to the possibility of soaking the workpiece. Gouache or acrylic are better suited for these purposes.
- It is recommended to apply colorless acrylic varnish or manicure varnish on top of the dried paint. This will extend the life of the craft and give the colors additional brightness.
Dough with PVA glue
To ensure that the mass is strong after drying, PVA paper glue is added.
Note!
- Plasticine dinosaur: TOP-170 photos of creative DIY modeling solutions. Methods for making a dinosaur + simple master class
- Plasticine machine: simple diagrams and non-standard ideas for crafts made from plasticine. Step-by-step instructions for making a machine with your own hands with photo reviews
- What can be molded from plasticine - a master class on creating crafts from plasticine with your own hands. Creative modeling ideas + photo examples of the best works
Salt dough recipe for children:
- you will need 1 glass of salt (fine or coarse grind is suitable);
- 1 cup flour (it is better to take wheat flour);
- half a glass of water;
- tablespoon PVA.
Preparation: Prepare two bowls. Mix flour and salt in one, and water and PVA in the other. Gradually pour the second bowl into the first and stir constantly. The liquid should be added gradually, since different flours take up different amounts of liquid.
Water temperature and its effect on the dough
It is necessary to take into account the effect of water temperature on dough particles. The best swelling of flour and dissolution of crystalline raw materials occurs at elevated temperatures. The higher the dough temperature, the faster the process of dehydration of sugars occurs, and the frequency of interaction between protein, starch and water molecules increases.
The plasticity of salt dough can be achieved at a raw material temperature of 18 to 25 ° C. Elastic-plastic dough is obtained as a result of complete swelling of flour proteins at a water temperature of 38-40°C. To create a homogeneous mass, the mixing process is important. The better the quality of flour and the higher the gluten content, the longer the kneading.
When mixing flour, water and salt into a homogeneous mass, the process of dissolution of crystalline raw materials and swelling of flour colloids is accelerated. Stirring accelerates the process of gluten formation in the dough, so kneading the dough for a long time until a plastic and elastic mass is obtained.
Dough with starch
The recipe for salted dough with starch is considered one of the universal recipes. With the addition of starch, the dough becomes more plastic. This recipe for salted dough for crafts makes fine details (flower petals).
You will need:
- 2 cups of flour;
- half a glass of starch;
- a glass of salt;
- water.
Mix all components until smooth. If the consistency turns out to be liquid, you need to add a little flour.
Note!
- How to make slime - the best ways to make slime at home. Simple and quick recipes with a step-by-step master class for children (150 photos)
Plasticine dog - TOP-180 photos of unusual ideas for creating crafts. Detailed master class on DIY modeling for children
- Clay products: basics of modeling, tips for beginners. Master class on making clay crafts + photo reviews
Souvenirs for International Women's Day
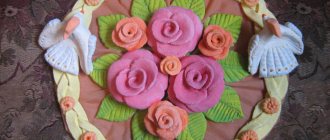
On March 8, it is customary to give flowers to women. But why not do it in an original way. Having looked at the photos of dough crafts, it is not uncommon to see figures in the form of individual flowers and entire bouquets. This craft will be an excellent gift for the women in the family.
Creating a vase of flowers includes the following steps:
- Prepare the dough according to the usual recipe and roll out a layer half a centimeter thick.
- Cut out a vase stencil from paper and attach it to the dough.
- Trace the outline of the vase on the dough and proceed to the flowers.
- Flowers can also be cut out using a stencil adding a little volume.
- You can decorate the vase with balls, stripes and other details.
- Paint the molded craft with paints and let it dry. Ready.
DIY Play-Doh
There is a simple recipe that will replace the expensive original Play-Doh. Below is a recipe for homemade salt dough.
Recipe:
- 350 gr. Flour;
- 180 gr. Extra salt;
- 180 ml. Water;
- 30 gr. Gelatin;
- 25 gr. Citric acid;
- 50 ml. Vegetable oil.
To prepare this recipe you will need a saucepan. Put it on the fire, pour out the water and add gelatin. The dough can be colored by adding a little food coloring to it.
Pour in vegetable oil and add citric acid and salt. It is very important that the last ingredient to go into the pan is flour. To avoid lumps, mix everything well.
All this should be kept on low heat until the mass begins to peel off the walls of the pan. After this, stir the mixture with your hands and let it cool. You can wrap it in cling film or put it in a container for storage.
Prepare the base in 5 minutes
The first version of a simple test is good, but you won’t be able to use it right away for crafts. If you want to get quick results, then use this recipe. Required:
- flour (200 grams required);
- 20 grams of soda;
- 60 grams of salt;
- 20 grams of sunflower oil.
How to make salt dough for future crafts:
- Pour all the ingredients into the pan.
- Place the resulting mass on the fire. Add dye if desired.
- Stir for a few minutes. Remove from heat and cool. After this, knead the base with your hands.
Ready. We put the rest in the refrigerator after work. To continue working, simply “revive” the material with water.
DIY colored dough
The salt dough product does not have a very attractive color. And the child will not be interested in playing with a monochromatic gray lump. Multi-colored funny lumps are another matter, and the colorful variety of dough makes the child’s imagination work.
Note!
- Animals made of plasticine - a master class on creating crafts with your own hands. Unusual modeling ideas + photo examples of finished works
- Plasticine crafts for grade 4 - reviews of creative ideas. New products, step-by-step master classes for schoolchildren + 150 photo examples
- Plasticine tank: step-by-step modeling instructions with simple work patterns. Master class for children on creating a tank with their own hands + photo reviews
There are two options:
- You can paint the finished product (acrylic, gouache, any paint will do);
- You can make multi-colored dough at once.
You can use any dyes, but for bladeless use it is recommended to use food dyes or natural juice (beetroot, carrot, spinach).
The saturation of shades can be adjusted based on the amount of addition. After drying, the product will be slightly lighter.
For uniform coloring, dry dyes are pre-diluted with water. Then you will need to reduce the amount of water added. By mixing basic colors you can get additional shades.
Oven
Dry in an open, preheated oven at a temperature of 35-55 C. Depending on the volume, the figurine can dry for an hour or longer.
The second method is oven drying. The product must be placed in a cold oven and heated to 150 C. After reaching the required temperature, turn it off. Leave until completely cool.
Choosing a drying method
There are several drying methods. On megamaster.info you can choose any one. Let's look at them each separately:
- At room temperature. Ideal for flat crafts. The condition for such drying is to make the craft immediately on the surface for hardening. It is ideal to use clear plastic so you can monitor the drying process.
- On a battery or in the sun in the summer. This method is faster than the previous one. Not suitable for small products, they begin to break and change their appearance.
- Under the influence of high temperatures. This is about the oven. In this case, you need to use a temperature treatment of no more than 50 degrees. To prevent cracks from forming on the product, dry it several times. Do not close the oven door tightly.
The speed of drying will depend on the thickness and drying method and the recipe you chose before making the salt dough. Products made according to the first recipe can be dried the fastest. All additional components, such as oil, only slow down the drying process.
How to make pictures
You can use this material to color pictures. Such a pastime will greatly delight the children. After all, it was very exciting when, instead of boring felt-tip pens and pencils, elastic dough fell into your hands.
For work, you can take any coloring book or draw it yourself. You can completely paint over the picture with different colors, in an even layer, or you can pinch off small lumps and glue them to the picture, it will also turn out very interesting.
Three-dimensional pictures also turn out interesting and unusual, you just need to take a little more dough. This activity develops fine motor skills very well and develops imagination. You can create a beautiful panel that will decorate your child’s room.
Children are able to sculpt dough themselves; they just need a little guidance and show them how to work with the dough.
How to learn to sculpt from dough?
We have already figured out how to make dough for crafts, now it is important to understand exactly how to sculpt different shapes.
This process takes a little time, but perfectly develops hand motor skills and the child’s creative potential.
Every mother can devote time to her baby and teach how to make crafts from dough.
How to make figures
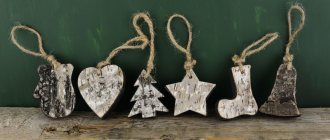
You can make a large number of different toys from dough with salt, as long as your imagination is enough. You can use baking molds. And by making small holes and inserting a string, the toy becomes a New Year's toy.
What if you glue a magnet to the back? This makes a beautiful magnetic souvenir for the refrigerator.
The most touching version of a fake made from flour would be a cast of the hand or foot of a newborn baby.
A short master class on creating salt dough and creating a dog figurine.
You will need:
- Salt;
- Flour;
- Water;
- Foil;
- Brushes;
- Paints;
- Black marker.
Recipe for salt dough for sculpting crafts: first you need to combine flour and salt in equal proportions, gradually add water and mix the mass until smooth.
For better elasticity, you can add a tablespoon of PVA glue or vegetable oil. Leave to set in the refrigerator for about two hours; the dough must be placed in a bag, cling film or container.
After the required time has passed, take the lump and divide it into parts: 1 large (body), small ball (head), 4 balls (paws), leave a small lump (for ears, eyes, tail and nose).
In order not to waste a lot of dough and have a voluminous lump inside the body, you can place crumpled foil and cover it with dough. Make a head from a small lump, add a nose, eyes and ears. Glue the head to the body using water.
It is necessary to lubricate the two surfaces with water and connect them. Make beautiful paws from four pieces and also glue them to the body. All that remains is to crochet the tail and that’s it! The dog is ready.
Master class on making animal crafts for children
And since most of us do little creative work, those who have children try to come up with interesting activities just for them, so that joint activities will be very exciting.
I suggest you, together with your daughters and sons, make this funny hedgehog, look for photo instructions further.
We will need:
- Salty dough;
- Scissors;
- Beads
- Paints.
Manufacturing process:
1. Make a drop-shaped piece from a piece of dough.
2. Make eyes and a nose from beads.
3. Now we will make needles, for this we take nail scissors and make small cuts, lifting them up a little.
4. We perform the next row in a checkerboard pattern and so on until the entire back is covered in needles.
5. Dry the finished toy in the oven. We color the hedgehog at will.
It’s also very easy to make a bird and decorate it with bean seeds; it’s not only easy, but also useful for developing children’s fine motor skills. Watch the video of how this craft is made:
Of course, there are a lot of options, and if you surf the Internet, you can find a whole storehouse of ideas, and your leisure time with your child is guaranteed. I share souvenirs that I personally liked:
- Magic fish
- Cows
- Princess Frog
- Mice
- Snail
- Blue elephant
Required Tools
To create beautiful masterpieces, tools will come to the rescue. You can use any available means.
Tools:
- rolling pin (for rolling out dough);
- modeling board;
- knife (suitable from a plasticine set or a regular plastic one);
- tube (for creating holes);
- brushes (for lubricating with water or painting the product);
- a jar of water;
- various molds;
- Any available items (lace, textured fabric, beads, buttons) are suitable for prints;
- paints;
- marker (to highlight the necessary lines);
- decorations (beads, rhinestones, cereals, beans, pebbles, shells, pasta, pine cones).
Rules for working with salt dough
To work with salt dough, you don’t need any special materials, everything you need can be found at home, and many will be surprised how unexpected results can come from simple everyday things.
Preparing the tools shouldn't be difficult. A plasticine board or kitchen board, a rolling pin or glass bottle for rolling out and a set of stacks for cutting out parts, and then everything you can find at home: a comb with fine teeth, cocktail straws, a garlic press, toothpicks, sushi sticks, forks and further ad infinitum. From something unusual, you can stock up on baking molds, beads, and nozzles for a pastry bag. All this will be used to create ornaments and textures on crafts.
When working, the dough resembles plasticine: you have to roll it out or give it the required shape with your hands and cut it into stacks. True, the dough does not stick together very well, so you will need a glass of water with a brush: you need to apply a little liquid to the gluing area and lightly press the pieces together.
What can be done
Salty play dough will help you get closer to your child and find a new exciting activity to do together.
Invite your child to stick around the jars. You can use jars that are left over from baby food. You can decorate with voluminous details, rhinestones or shells. Color with paints together with your child. In such beauty you can store pencils, markers, brushes.
You can roll balls and use a straw to make holes. Dry and let your child paint. You will get excellent beads that your child can string on a thread.
An interesting activity for older children would be sculpting letters or numbers. After drying and painting, they will become an excellent material with which it is fun to learn the alphabet and counting.
You will need a lid from a box of chocolates. Invite your child to stick to the bottom. This will be the beginning of a beautiful panel, and then it’s a matter of taste. You can depict a beautiful forest, a hedgehog with voluminous apples and mushrooms.
You can stick different animals. The child will be very interested in learning something new. Especially when he did it himself.
Roll up a ball and stick different twigs, needles, grass, and pebbles into it. Get a small island of forest right at home. And if you decorate with flowers, you will get a small flower meadow.
The benefits of modeling for children
Modeling has a very beneficial effect on the all-round development of a child of any age, namely:
- At the age of 1-3 years, fine motor skills of the hands are actively developed. Kneading the material, creating shapes, flattening, stretching, tearing off the dough develop the child’s tactile sense (touch) and contribute to the development of perception through finger touching.
- Teaches the child patience and the ability to concentrate on the figure being created.
- Forms creative abilities, figurative, logical and abstract thinking, especially in the process of mixing different colors and creating unusual shapes.
- Maintains the relationship between the two hemispheres of the brain (and subsequently develops memory) when using two hands at the same time (rolling a sausage or creating a ball).
It is very useful to sculpt figures according to a drawing with contours (the so-called plasticine pictures, in which you need to paint over the figure with a sticky mass).
In this case, the processes of comparison, logic and concentration of attention on one image are developing. This approach is recommended for children over 2 years old.
- Develops imagination (for example, if you invite a child to make a non-existent animal) and curiosity (make an insect and look for what it resembles).
- Promotes the development of perception and smell when working with colored materials that have different odors. For preschool children, it is recommended to combine modeling (from a single-color mass) and painting the finished product with paints.
- Plays an important role in aesthetic education and understanding of the sense of beauty.
Medical specialists have also noted the positive effects of modeling on children's health:
- Pleasant emotions during regular exercise have a beneficial effect on the nervous system, calm the baby and normalize the mental state, which subsequently leads to a decrease in excitability, sound and restful sleep.
- Modeling with colorful dough is a great way to lift your spirits (especially if you get everyone in the family involved).
Modeling from dough or plasticine helps develop fine motor skills and speech
- If a child has any internal fears, it is worth inviting him to blind his fear and study it more closely, making sure that it is safe. In this way, you can help overcome phobias associated with insects or animals.
- In special children (diagnosed with autism), modeling promotes the formation of understandable speech, establishing contacts and involvement in joint activities.
- with the teacher and other children.
- The process of creating complex figures from dough in combination with other materials (wooden skewers, toothpicks, beads, buttons, dry leaves, feathers) and demonstrating them to people around them allows you to raise children's self-esteem and convince them of the importance and uniqueness of the child.
