People love to give and receive gifts. One of the main ones is flowers.
They are comfortable and picturesque, attractive and elegant. Perhaps, just buying in a store is too simple and banal.
In this case, you can do it yourself. Let's analyze the production of flowers using the example of a tulip.
Master class Making tulips from napkins and plastic spoons
The master class will be of interest to teachers and parents in working with children (with the help of an adult).
the craft can become an elegant interior decoration or a wonderful holiday gift.
colored paper napkins, plastic spoons, green corrugated paper, PVA glue, superglue, scissors, thread.
Take a red napkin and cut it in half. Next, place a spoon into the resulting square of the napkin so that all the corners of the square meet at the base of the spoon.
Carnation
Another beautiful option for making a flower from a napkin is a bright carnation, for which a rich red color is suitable. Additionally, stock up on wire or thin tape, which will be useful during the work process.
The process of creating crafts from a napkin is also simple:
1. Make a paper accordion, fold the paper in layers;
2. We pull the accordion in the center with our own hands using a rope or wire, forming a bow;
3. Carefully lift each edge of the accordion, forming a semicircular bud, the structure of which will be similar to a carnation;
Dandelion clearing
You can make the most beautiful three-dimensional flowers from napkins with your own hands by mastering very simple simple techniques. If you learn how to roll yellow fluffy dandelions, then in the future you can decorate your child’s nursery by gluing yellow flowers to green Whatman paper and decorating the composition with the sun, bugs and butterflies.
To form 1 dandelion, 1 yellow napkin is enough. We fold it into four and fasten it with a stapler in the middle. Next, we trim the edges so that the workpiece has a round shape. For verisimilitude, this can be done with curly scissors.
Next, we begin to form the flower - lift each layer of the napkin, press it to the center and straighten the petal.
Simple tulip made from paper napkin
Making a flower from a napkin is very easy. It is best to use red or pink material.
Take a napkin, unfold it completely and tear it in half into two rectangles. We twist the upper part of one of them into a thin tube. Turn the rectangle over to the other side and roll it into another tube. This time its diameter should be approximately 2 cm.
We pinch a place with our fingers about three centimeters from the top edge of the resulting part and begin to twist the tight tube down. In the middle of the part we form a sheet, and under it we continue to twist the tube to the very bottom.
Red blooming roses
To make such a spectacular scarlet rose with a blooming bud, you will need 2 large napkins measuring 20 by 20 cm. Cut each of them into 4 parts and put them together. Fix the center with thread or a stapler. From the resulting square of napkins we form a circle, cutting the edges with scissors.
Next, we lift each layer in turn and form a petal with a wave-like shape. For work, we prepare a large number of napkins to make the rose look even more natural.
Magic topiary for the interior
To make an original decorative element you will need:
Napkins of the desired color. By the way, if necessary, the tree crown can be painted. Plastic ball for the base. If you don't have a ball, use a round piece of foam or make one out of papier-mâché. Another method is shown in the photo - we cut out 3 hearts from the box, glue them together and get a ready-made base for a heart-shaped topiary!
Corrugated paper, which I often use to pack bouquets, or burlap.
Plaster, glue, scissors, stapler.
There are no difficulties or catches in the process itself.
How to make tulips from napkins
- Gift for May 9 - DIY carnations A wonderful craft in the form of beautiful carnations can be made from an old disk and paper napkins. Many people will like this gift for Victory Day.
- Panel “Flowers of Summer” We paint all the parts prepared for the panel separately in a golden color and randomly glue them with “Titanium” onto a frame painted to match. We fasten it on the back side around the perimeter using self-tapping screws.
- DIY metal roses The technology for making metal jewelry is not complicated. You just need to master the skills of a carver, riveter, chaser, solderer, tinker and other, other skills. But don't be alarmed. Main
How to fold it beautifully?
When working with thin paper napkins, it is important not only to choose the ideal material, but also to learn how to work with it as carefully as possible
Animal figures
Elegant crafts in the form of animals will decorate any table. And if you make them together with your child, you can get not only a beautiful decorative item, but also a pleasant evening with your family.
The Japanese art of origami teaches how to create complex compositions from paper. You can roll the fabric in the form of a dog or crane figurine, or you can make a frog that will even be able to jump. But such crafts are far from the simplest, so you need to start with something easier.
For example, by creating your own origami from napkins in the shape of a swan. This table decoration looks very graceful, but is not as difficult to do as it seems at first glance.
First of all, you need to carefully fold the napkin diagonally and run your hand along the fold line, smoothing it. The edges of the napkin need to be lifted and pulled towards this fold in the same way as they do when folding an airplane. Then you need to turn the craft over and repeat the same thing, only on the other side.
The resulting workpiece is folded across. The corners should touch. Now you need to bend the narrow part upward, making a swan's head out of it. The neck will turn out if you fold the figure lengthwise. The last stage is the formation of the wings, which need to be pulled out and carefully straightened.
Flower and fruit compositions
Flower arrangements look no less beautiful. You can create amazing plants and flowers from paper.
At the same time, creating such a miracle takes much less time than creating an exquisite swan:
Rose. One of the simplest flowers is a pink bud. It is made from a napkin folded in half. It is then bent into a neat triangle, which is then rolled into a neat roll. This must be repeated several times until the pink bud becomes very small. Then you need to take out small leaves, while trying to act so as not to damage the rose bud.
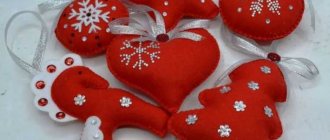
New Year decorations
The most obvious option for decorating a New Year's table is a Christmas tree made from napkins. To create such a craft, you only need green napkins and a step-by-step explanation.
There are several ways to make a Christmas tree out of paper. For beginners, the simplest of them is suitable.
To create a simple Christmas tree, you first need to fold the square in half twice. The edges need to be carefully folded so that there is some free space between the layers. After this, the napkin must be turned over and its edges folded into the center to again form a neat triangle. The result is a neat Christmas tree, which in itself will serve as an excellent table decoration.
Working with a flower stem and assembling a tulip
It is best to take small, oblong-shaped candies for tulips in quantities equal to the number of future flowers. It will be easier to make a flower with them. But if you don’t have others, you can try making it with a round shape and from truffle. So, step No. 2 of our master class is to create a flower stem. Let's get started?
Do you want to give your mom a bouquet of flowers that will never wither? Then try making them from corrugated paper. You can make beautiful tulips in a short time, thanks to the step-by-step instructions with photos from this article. With your own hands you can create real masterpieces from the simplest materials.
Tulips using origami technique
Not only children love folding things out of paper, but also adults master the more complex origami technique. Use this technique when creating flowers too.
Once you have created the flowers, the stem and leaf are finally glued on to complete the arrangement. This method can be done for children, it is not difficult to perform, and most importantly, the child can give a bouquet to his mother.
Volumetric paper tulip - collecting materials
Any instruction on how to make a paper tulip with your own hands step by step begins with recommendations on materials that will be useful in your work. The list is simple and very short:
History of napkin etiquette
People first thought about hygiene at the table and began using napkins 3,500 years ago.
Initially, napkins looked like fig leaves - this is how slaves wiped the faces and hands of their masters.
Alabaster napkins were used in Ancient Rome and only by rich people.
The same napkins were used by the Greeks and the rulers of eastern states.
Later in Rome they began to use linen napkins with embroidery and it was considered good form to always carry them with you - this is where the fashion of embroidering your initials on napkins came from.
In Japan and China, rice paper napkins were used. Before use, they were kneaded well, and then simply thrown away.
In Rus', napkins began to be used in 1729, and before that, clothing sleeves or tablecloths were usually used instead.
Beautiful peony rose made from napkins
For work, choose thicker napkins; they hold their shape better, and the folds at the folds remain clearer. You will need five napkins for one rose. If you want to increase its volume, use cuttings of different sizes, and not five, but, say, 7-10. You can also alternate material of different shades. For example, white as the main one and any other as the accent color.
Trim the edges as shown in the photo. Fold each napkin into an accordion and tie it in the middle using regular strong thread. Trim the ends slightly to make them textured and uneven, imitating the torn petals of a peony.
After this, straighten the inflorescence-petals, just do not smooth it, let the lines at the folds remain clear.
Also, at your discretion, you can glue a ring made of the same material into which a table napkin or cutlery is threaded onto the back side of the finished peony. In addition, a finished decoration of this kind will perfectly complement the appearance of candlesticks, decorate the stems of glasses, and so on.
Mimosa branches
Mimosa is a lovely, delicate flower that is used to decorate bouquets on the eve of spring festivities. Each of us can contemplate such beauty all year round if we make a paper mimosa sprig in the form of a wall panel and an artificial three-dimensional plant for a vase in the living room.
The painstaking work begins with the formation of a large number of flowers, each of them is made from a narrow strip of napkin, cut like “grass”. After this, cut the green napkin into leaves with fluffy edges.
The applique does not require a stem, but a wire is required to create a bouquet. We wrap the wire with a green napkin, attach leaves, and cover it with many flowers.
Volumetric flower
We will need:
- napkins for the colors themselves, choose the colors yourself + green;
- green corrugated paper;
- glue;
- straws or skewers;
- scissors;
- tourniquet or thread.
We lay out one napkin and wind it onto a tube or skewer from one edge, not reaching the end about five centimeters.
Squeeze it from both sides into the middle and remove it from the tube.
We twist the two sides into a petal, using the remaining five centimeters of free edge.
One rose requires 5-7 petals. We lay them in a spiral and secure them with threads at the end. We insert skewers wrapped in a green napkin or corrugated paper into the base of the bud, and also fasten it with thread.
The lower part of the rose must also be covered with a piece of green paper. Use glue.
We cut out the leaves from a napkin or corrugated paper and attach them to the stem with glue.
You can just leave a few flowers and put them in a vase. Or you can leave a more lush bouquet of more flowers, wrap it in wrapping paper and tie it with ribbon.
You need to prepare:
- napkins;
- wooden skewers;
- glue stick;
- scissors;
- glue gun.
Fold the napkin in half. Unfold and fold two sides to the fold line.
Then fold the strip in half. At one end we fold the napkin into a triangle at a right angle, then begin to twist it.
After a few turns, fold it again at a right angle. In this case, the joint must be coated with glue. And so on until the end of the strip. Don't forget to slightly bend the edges of the petals outward.
Insert a skewer into the base of the flower and drop hot glue onto its tip. Then you need to wrap a strip of green napkin around the base of the bud and the skewer. Use a glue stick to join.
Cut out a 4 by 6 cm rectangle from a green napkin. Using a skewer, twist it from the edges diagonally to the center.
We collect and curl the wide edge, giving a natural leaf look.
We attach 2-3 leaves to the stem.
The bouquet is ready!
Daisies
Using the following method, you can fold a voluminous chamomile, decorate a gift with it, or make a bouquet. To work you will need 7-9 white two-layer napkins, cotton wool and thread.
Fold the white napkin in half, twist it in the center, and form a butterfly. After which the “wings” should be folded and collected at the bottom - you get a petal. The same must be done with the remaining white napkins.
And from the yellow one we form the core of a chamomile - place a piece of cotton wool in the middle and wrap it around it. And finally, each petal should be tied with a thread to the yellow center. Now the lush chamomile is ready!
Necessary materials to create a delicious bouquet
What do we need to make tulips from candies and corrugated paper? To create a sweet composition you don’t need to have a lot of materials. The most necessary and indispensable item will be corrugated paper, and almost every housewife can find everything else in the house.
- Wicker basket. It can be replaced with something else: a flower pot or vase.
- Candies in wrapper/foil.
- Corrugated floral paper in yellow, white and green colors.
- Wooden long skewers.
- Styrofoam. If the container for the bouquet is an ordinary vase, then polystyrene foam will not be needed.
- Double sided tape.
- Regular tape.
- Scissors.
- Translucent fabric (such as organza or mesh).
- Floral tape. If it is not there, then you will need glue.
- Toothpicks.
Candy bouquets are a universal gift!
Our article offers you the perfect gift idea - tulips made of corrugated paper with candy inside. This gift perfectly combines sweetness and beauty. In addition, it is not at all difficult to do it yourself: you do not need a lot of money for this. Such a gift can be given to a woman, a man, or a child, and it will be appropriate for any celebration. The best thing about this idea is that such a bouquet can last a long time. It does not need to be watered, it will not wither. Well, maybe sometimes you need to brush off the dust. Such an original surprise will delight the eye and soul for more than one day. Whenever the desire comes, the bouquet can be “gutted” and the sweet component can be devoured with great pleasure. This gift is very original and can be a real surprise!
Simple DIY cardboard flowers. Photo
Now you need to make cuts on each piece towards the center. You should not make too large cuts so that the petals do not fall off your bud. The number of such cuts depends on the number of your petals.
Take one blank and glue it tightly so that you get the core of the flower.
Glue the remaining flowers on top of each other. As a result, you should have a beautiful rose. The smaller the blank flowers are, the more elegant your flowers will look.
Now you know how to quickly make a paper flower
. With the help of step-by-step photos, even a child can repeat making small roses or a beautiful tulip with a stem. Paper crafts require minimal time and money.
Both master classes are not quite complicated, but proven and effective. Such bouquets will be able to please loved ones for a very long time. So let's get started:
Applications and paintings
All children love to create bright colored appliques.
These crafts, made from paper napkins, are very bright and attract attention with their unusual appearance. There are several easy techniques for creating color pictures from napkins: mosaic, trimming, volumetric applique
Application “Bouquet of lilacs”
This craft is made using the mosaic technique. To work on it you will need:
- one napkin each in white, pink and purple;
- green paper;
- colored cardboard;
- scissors;
- glue.
Applications using the mosaic technique are made from a wad of paper. To make them, a napkin must be cut into 3*3 cm squares and rolled into a ball.
Stems and leaves are cut out of green paper.
Three small triangles are drawn on cardboard with a simple pencil, marking the place for the flowers. Glue the stems and leaves into place. Then lilac brushes are formed from paper balls. Using a brush, apply a little glue to the previously drawn triangle and place a lump of napkin on it.
After completing the work, the crafts can be inserted into a frame.
Fluffy pictures
Working with small objects develops a child's fine motor skills and helps teach him perseverance and hard work. Creating beautiful appliques from small pieces of paper can captivate both the baby and his adult environment. This technique is called trimming. To make fluffy pictures from napkins you will need:
- napkins of different colors;
- children's coloring book;
- scissors;
- glue or plasticine;
- toothpick.
Before starting work, several preparatory steps must be completed. Choose a coloring book whose design will correspond to the child’s age. For kids, you can choose a picture depicting a multi-colored butterfly or bird. Using a simple pencil, mark the details of the picture with the same color. For kids, you can draw circles of the appropriate color.
Next you need to prepare the tool for work. It is made from a toothpick; one sharp tip is cut off with scissors.
The material for applique using the trimming technique is paper napkins, cut into squares measuring 1*1 cm. You can attach them to the paper using glue, applying it with a brush to small areas of the picture. For small children it will be more convenient to work with plasticine, which is smeared in a thin layer over the picture and colored leaves are attached to it.
When all the necessary preparations have been made, you can begin to work. Place the blunt end of a toothpick in the center of the paper square. The ends of the paper are carefully pressed against it and the workpiece is transferred to the drawing. To make the craft fluffy and voluminous, the pieces must be placed very close to each other.
In the trimming technique, you can only make the main figure of the picture, and color the shape using paints, felt-tip pens or colored pencils.
Adults can also make appliqués using this original technique, using self-drawn templates or coloring books for adults for bright panels.
Basket with carnations
This craft can be prepared together with a child of primary school age by May 9th. It combines several interesting and original techniques. Master class will tell you step by step how to make simple paintings from napkins with your own hands. To work you will need:
- white and red napkins;
- strips of brown paper;
- colored cardboard;
- markers;
- St. George Ribbon;
- scissors;
- stapler;
- quilling tool;
- glue.
Roll strips of brown quilling paper into round shapes 1 cm in diameter. To make an openwork basket you will need about 50 identical parts.
Carnation buds are made from napkins, which are folded in half twice. The resulting square is fixed in the center using a stapler. Curly scissors cut out a circle. Each layer of the figure is carefully lifted and pressed to the center, without affecting the last 2-3 layers. Thus, you need to make 4 red and 6 white buds. Before forming the flowers, the edges of the three white blanks are outlined with a red felt-tip pen to create a beautiful border.
Assembling the applique begins by forming a basket of brown circles. Before gluing the handle to the basket, glue the tape on one side. Paper carnations are glued in rows: 1 row consists of four red carnations, then three white and red carnations are glued and the white buds are placed in the shape of a triangle. At the end of the work, the St. George ribbon is tied in the shape of a bow.
Option . How to make tulips from corrugated paper
1. Take corrugated colored paper and cut a rectangular strip, approximate size 5 by 26 centimeters.
2. Carefully fold the strip we have in half, iron it with our own hands, then in half again - we should get a rectangle of 5 by 7 centimeters.
3. From the resulting rectangle we cut out the shape of a petal, draw the shape in advance and cut along the contour. At the bottom of the petal there should be two corners for fastening (look at the photo).
4. Now, let’s arrange the petals separately, and curl the tip and corners of each one.
5. Then we give a realistic shape to the petals. To do this, stretch the edges of the petals with your fingers. We do this very carefully and give them cup shapes, as in the photo.
6. Placing it in a circle, with the concave side up, we begin to form the tulip bud itself. Holding the petals by the bottom, where they are curled, we fix them with a glue gun for needlework.
7. Now we will make the tulip stem. Take the wire and attach the bud to the end of the wire.
8. Then we take the green corrugated paper again, cut off a strip 1 - 2 centimeters wide and a leaf for the stem. Next, carefully and carefully from the base of the bud, we wrap the wire with our own hands to the middle. At the end of the stem we glue the paper using a glue gun. Then we take a leaf, fold it in the middle and glue it to the stem.
9. Congratulations! Your excellent bouquet is ready! Thank you for your attention! Delight your family and friends with delicate and sweet bouquets created by yourself. Such gifts are especially pleasant!
The ability to transform the simplest things that surround us into original handmade crafts is a pleasant surprise. And handmade results have won their place on the list of sought-after gifts. Literally everything is used: bottles, coffee beans, ribbons with ropes, and even ordinary paper napkins. Craftswomen give them shape and create products that you can admire for hours. Agree that you would hardly pay attention to the relief patterns, soft texture and delicate colors of paper napkins if they were just in a pile on one of the kitchen shelves. Although even if you were given such a gift, you would not immediately guess what was hidden under the mask of an unusual decorative tree. Let's try to make it together!
Paper tulip
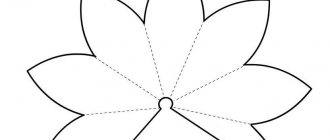
To make the craft more colorful, it is better to use colored paper (red, yellow, or pink for the bud and green for the stem):
- First, take a square sheet of paper and bend it diagonally so that the opposite corners are next to each other;
- We unbend the sheet and repeat the same procedure again, combining other opposite corners;
- Unfold the paper again and fold it in half;
- Next, inside the resulting rectangle, we move the upper corners along the folds, and bend the side corners to the very top;
- We turn the figure over to the other side and repeat the same manipulations;
- We open the craft in such a way that the tips bent upward move from the sides inward; to do this, you just need to bring the side corners together;
- We bend the side tip so that it goes slightly beyond the axis located in the center. Having done the same with the second corner, we set it into the first. We repeat the same procedure on the opposite side;
- Inflate the tulip through the hole located at the bottom of the craft (this will give the flower natural volume);
- We bend the corners to obtain petals;
- We twist the stem from a sheet of paper and insert it into the hole located at the bottom of the bud. Carefully fix the structure with glue.
If desired, you can decorate the flower with patterns using a pen or paints. Drops of glue on the bud will help recreate the dew and make the flower more realistic.
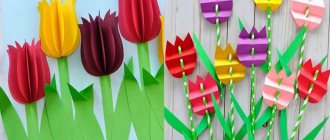
If your room looks dull and monotonous, you can add a little freshness and beauty with tulips made from napkins. You can create a whole bouquet of bright paper flowers.
To create tulips you will need: green electrical tape, a stack of thick colored napkins, paper sticks, scissors and glue.
First, prepare the basic elements for your craft. Carefully cut out petals in the shape of hearts from pink napkins, and leaves from green napkins. Each flower will need 6 - 8 petals.
Now you can move on to the petals. Take the blanks under the petals and bend them slightly along the edges. This can be done by twisting them onto a pen or pencil.
Then, place the wavy petal on the surface and place a stick in the center. Wrap the ends of the petal around the stem and tape in one turn. We attach the remaining petals to the stem in the same way.
Take another stick and glue a petal to it. Attach the resulting shoot to the main stem with petals. Pass green paper under the bud, covering the junction of the petals.
All that remains is to fluff up the bud and start creating the next masterpiece.
- DIY quilling tulips Today we will learn how to make quilling flowers, or rather, tulips. They will be made from ordinary colored paper.
- An original flower from a plastic bottle Sometimes, when we have free time, we want to make something original and beautiful. Then a little thing will appear in the house that will decorate the room and please the eye.
Refined spring vase
Crafts made from napkins are not limited to just flowers. From this wonderful material you can make or decorate almost anything, for example, a decorative flower vase. To make an unusual vase, you will need to stock up on the following materials:
- Napkins with elegant plant or animal patterns;
- Can – tin for coffee or juice;
- Acrylic white paint and putty;
- PVA glue;
- Stack;
- Brushes.
detailed instructions
The jar is coated with paint on both sides, and then dried in a well-ventilated area. The top thin layer, where the pattern is located, is carefully peeled off the napkin. Fragments of the picture necessary for the composition are cut off with your fingers
It is not advisable to cut them with scissors, as in this case the edge will be too smooth. The next one-color layer is glued to the outside of the prepared jar, tearing off small pieces according to the papier-mâché principle. Acrylic putty is applied in uneven strokes along the upper cut of the can, masking it. Next, on one side of the future vase, from top to bottom, a trunk and branches are formed using putty using a stack. The adhesive composition is diluted from one and a half parts PVA glue and one part water. Fragments with leaves, birds, butterflies, forest animals are placed on the surface of the jar in accordance with the compositional design and are carefully coated on top with a brush with an adhesive solution. During gluing, it is important to apply movements from the center of the fragment to the edges, carefully but carefully smoothing it, trying not to tear it. Having covered the entire surface of the vase, paint the neck to match the main background. To paint the branches and trunk, use brown paint to fill in all the irregularities. After the trunk has dried, decorative protrusions are highlighted with golden paint using a sponge. To do this, the sponge is lightly pressed onto the desired area of the improvised trunk without indentation. A slight golden effect can be created over the entire surface of the vase.
A DIY vase is a beautiful and affordable accessory that allows you to transform your interior.
To secure the decor, the dried surface is coated with colorless varnish. Bouquets of wild and garden flowers will look great in such a vase.
Step by step we make a three-dimensional applique from colored paper
Volumetric applications are always somewhat more difficult to make than flat ones. But they look more impressive and interesting. Today I’ll show you an interesting option for quickly creating a voluminous tulip bud with your own hands. Based on this technique, you can make a lot of interesting crafts that will not even be similar to each other.
Manufacturing process:
1. So, for this envelope you need to cut out five identical parts. Remember, we have already cut out these above in the article.
2. Find the middle of each part and run your finger along it well.
3. Now we fasten the two edges of two different parts with a stapler. And we will repeat this for the remaining three blanks. We have one bud ready.
4. Take a baking napkin, fold its edges and glue it to the base sheet.
5. We fix the leaves on it, which have an elongated shape and are also folded lengthwise in the middle.
6. And attach the bud to the leaves.
You can use the same technology to make a very simple application.
Or a bud like this with a twist. Due to its structure, it can easily fit into any fold. It can also curl up if you decide to close the applique.
Or it can become a self-sufficient element in a Valentine card or.
You can even create several buds of different sizes and colors.
For all voluminous crafts, it is better to take double-sided paper. This way the white edge won’t be visible if your edges suddenly don’t match.
This paper is available in all office supply stores and creative departments.
My daughter will love this low-growing tulip. I think it won't be difficult to make it.
By the way, it is subtly noted here that from below, most of the leaves of these flowers, regardless of color, have a pale yellow base.