Children at any age are tireless dreamers and designers, and creating toys and models is a rather complex process that requires certain skills, but is very exciting. Colored paper and cardboard are indispensable materials for the development of children's creative thinking, their imagination, and aesthetic education.
Making moving toys should not be an end in itself for children.
The main thing is to find and understand the principles of their implementation, to master the entire technical process.
DIY mobile frog
The jumping frog is very common in origami. It is best to make such a craft from dense material. The ideal option is thin cardboard. If folded from thin colored paper, the frog will not jump, since the material is not springy.
The classic color is green, but it is acceptable to make a more cheerful or even exotic pink (or any other) frog.
The process of making a moving frog consists of the following steps.
- You need to take a rectangular-shaped cardboard and place one of the short sides towards you. Next, on the top you need to fold the classic model of a water bomb.
- Both sharp corners need to be bent outward and upward. In this case, there should not be even a minimal gap between the “spouts”.
- Bend the outer vertical edges to a line in the same direction so that they meet at the point where the front legs of the future frog begin.
- Then you need to bend the bottom edge of the structure. And the top edge must be bent down and back. At this stage, that very important spring element should be formed, which will replace the frog’s hind legs.
- The final version of the animal should be the same as shown in the figure.
In order to set the structure in motion, you need to place your finger on the back, press it to the surface and slide back. From such actions the frog will jump up and forward.
Simple crafts machines
When doing joint creativity with your child, it is important that the technological process does not last very long. Otherwise, the child will simply get tired and lose interest. Therefore, a little time should pass from the start of work to the appearance of a new machine.
Read also: The psychology of goal setting
In this case, a toilet paper roll can help out. A racing car model can be made from it in a few steps.
- You need to cut an oval-shaped hole in the cardboard sleeve. This is the driver's cabin.
- The sleeve must be painted, covered with colored paper and stickers. A racing car must be bright!
- The wheels must be attached to the hub. They can be made from cardboard or plastic bottle caps. You can take an axle with wheels from a toy car.
- Place a pilot in a racing car. This can be any small figurine.
Another version of the simplest truck model is also simple and can be made from scrap materials in a few minutes.
Making a Jumping Bunny
In the same way, you can easily and simply make another moving toy using the origami technique - a jumping hare. Before you start creating a composition, you need to prepare all the necessary materials. There are few of them:
- a square sheet of double-sided colored cardboard (you can choose the color yellow, grey, orange or any color you like);
- black marker or felt-tip pen.
The manufacturing process consists of several stages.
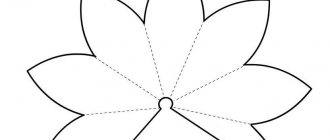
- First you need to put a sheet of cardboard on the table. It is better if its size is 12 by 12 cm. A center line should be marked on it. Next, you need to direct the two sides of the square towards it so that you get a rectangle. And then the same rectangle must be bent to make a square shutter. This is clearly shown.
- The previous fold can now be unfolded, and on this surface, by raising the corners, you need to select isosceles triangles.
- Next you need to create two isosceles triangles. The corners must be lowered down and the resulting workpiece smoothed out.
- At this stage, the corner should be returned to the opposite direction again.
- The upper corner of this corner needs to be lifted and bent back, and only then unfolded the entire structure.
- To highlight the ears of the future bunny, you need to bend the paper.
- At the final stage, you need to lift the structure and unfold the side bends. Make another bend and lift the ears up.
- Lower the tips of your ears back.
Now you can move on to the decorative part of the work. So, you will need to use a prepared marker or felt-tip pen. Using it you need to draw the animal’s face. The structure is ready.
What materials and tools will be needed
Home craftsmen approach the process of making twitchers with imagination, trying to create an interesting product that will occupy the children’s time for a long time. Before making a movable toy out of cardboard, you need to stock up on:
- pieces of fabric;
- colored cardboard;
- colored and wrapping paper;
- foil;
- beads;
- templates of all parts of the toy;
- scissors;
- sparkles;
- paints;
- pencils;
- PVA construction glue;
- buttons and threads;
- rubber band and thin sticks;
- wire or special fastenings;
- colored tape, feathers, etc.
You might be interested in Paper children's toys - ideas, diagrams and templates
The main advantage of a moving toy is its environmental friendliness and affordable cost.
How to make a twitch toy from cardboard: master class
It’s quite easy to make a twitch doll with your own hands if you use the technology suggested below. When making moving toys, it is important to take the advice of professionals who recommend:
- Perform piercing of parts with an awl.
- Use brads as fasteners.
- During the manufacturing process, use only PVA construction adhesive, which is characterized by increased thickness and quick drying.
- Cover the cardboard with a layer of colored paper and press down the parts to be glued while they dry, which will make it possible to avoid deformation of the product.
Below you can find a step-by-step master class on how to make a twitch using the example of constructing a cardboard Puss in Boots. To work you will need:
- sheets of white paper;
- packaging micro-corrugated cardboard or ordinary cardboard;
- stationery knife;
- scissors;
- fastening material;
- awl;
- double sided tape;
- nylon thread;
- glue stick;
- glue "Moment".
Stage 1
The first step is to start preparing the cardboard parts. To do this, templates are cut out and printed on white paper. Double-sided tape is glued to the back of the parts, and the templates are then glued to the cardboard from its reverse side.
Sketch details must be cut with an allowance
Stage 2
Carefully cut out the details of the craft using a stationery knife. Holes for fasteners are made in them with an awl. Depending on which fastener will be used, you can calculate the required hole diameter.
The animal's paws overlap. Using an awl, you will need to poke holes in the upper edges. They will be used to control the limbs. A lightweight polymer cord is threaded into the area of the openings of the torso and limbs. The ends of the cord are melted with a lighter.
To create a movable mount you can use:
- buttons;
- wire;
- threads;
- brads, etc.
Stage 3
To create a mechanism for controlling the limbs, it is important to tie the cat’s paws in pairs with nylon threads, which will need to be threaded through small holes. By pulling the threads, the paws can be moved to the lower position. A long thread is tied to the horizontal, upper and lower ones. On the reverse side of the puller, knots are tied on a light polymer cord. Now you need to test the product for free rotation of the limbs. If everything is in order, the ends of the paracord (cord) melt.
Stage 4
A pair of circles are cut out of cardboard, the diameter of which does not exceed 25 mm. The circles are glued together with “Moment”. This part is glued to the animal’s head from the wrong side (on a loop of narrow tape). The cardboard craft is ready. Primary school students can make it themselves. DIY dynamic toys will delight any child.
To create a movable mount, it is best to use brads
“Cardboard pots” or art objects? Mechanisms made of corrugated cardboard
One of the new trends in the DIY world is the growing interest in mechanisms made of wood and even corrugated cardboard. Readers are well aware of Nintendo Labo and Ugears, but it’s one thing to assemble a “semi-finished” construction set, and another thing to manufacture the parts.
Some of these models overlap in theme with the brands listed above. Like, for example, a “motor manipulator” - similar to what will be included in the Variety Kit, but requiring not a Switch, but a regular smartphone.
“Organ”, instead of the same console, is content with... a balloon.
The “safe” cannot resist even bare hands, but sometimes tamper evidence is enough.
The “two-level safe” requires first a one-digit code, then a three-digit one.
Or maybe you prefer a “safe” with a keypad?
“Safe” without a code at all is a visual aid on the topic of “security through ambiguity.”
In the mechanical version of the Duck Hunt game there is only one “duck”, but it is reusable. A light ball of foil is enough to make her faint, but she will definitely “come to her senses.”
You can recreate other games this way, for example, Mario, Flappy Bird and the hitherto unknown to me Ouchy Bird.
The skeeball machine will return a two-ruble coin, and for a five-ruble coin it will give the player three balls. He also returns the balls thrown into the upper slot, where it is more difficult to get into, and takes those that fall into the lower slot until the next game.
Where there are arcade machines, there are vending machines. One of them sells iPhones in boxes, and quite successfully - until one of the buyers spreads a rumor that it does not have a back wall.
The seed distributor takes into account modern trends such as flat tariffs and conditional access.
Some cardboard models tap into nostalgia. The replica of the game “Behind the Wheel” is brutal: the engine in it is networked.
And this analogue of the Armatron robotic arm will give chills to anyone who is afraid of vaccinations.
Bear
A simple bear can be made using the origami technique using the same principle as a cat.
All you need for this is a square piece of paper. For this craft, it is better to use single-sided paper. But double-sided is also suitable.
Bend the sheet diagonally.
Fold the resulting figure in half.
Now, along the marked lines (see photo), bend the two corners towards each other.
Bend two corners slightly to the sides.
Bend the two edges of the corners inward.
Turn the workpiece over.
Fold the top layer of paper up.
Fold the top and bottom corners inward.
It turns out this is the face of a bear. All that remains is to paint it with a black marker. Add eyes, nose and mouth. Ready!
Paper cutting machine templates and stencils
Contents Machine stencils may be needed to create various crafts or used as an independent template for cutting. They will be useful for decorating holiday areas, decorating a children's room, creating soft toys or appliqués. In this case, a variety of images are used.
We have made for you a large selection of machine stencils that are great for printing and cutting out of paper. In it you will find classic cars and funny cartoon images. Templates of sports or racing cars are in great demand - there are several of them. The selection includes recognizable models and simple silhouettes.
Read also: Fabric softener
Some machine templates can be used to create cakes. Others can be applied to fabric and cut out to make a patch. Almost every image is suitable for designing postcards or paintings. Using car stencils, the parts of which are slightly rounded, you can make patterns to sew children's pillows or toys for boys. In short, the range of applications is very wide.
You may need to print one large stencil or multiple machines on one sheet of paper. To do this, use any graphic editor. Pictures are easy to move by changing their sizes. If necessary, you can color them on your computer and print them out on a color printer. Some things can be simply copied from the screen.
We hope that you were able to find the necessary stencils, and the presented car models were useful to you. If you make cards, take a look at our selection of number and letter templates to see what you might need. We wish you success!
Views: 4,175
Dog
Another figure, similar to a cat and a bear, is made from a square sheet of paper. It is very simple and uncomplicated, but at the same time even preschoolers can learn the origami technique.
Take a square piece of paper.
Fold a square piece of paper diagonally.
Bend the upper corners down along the pre-drawn lines.
Fold the two bottom corners up.
Draw eyes and nose on the figure with a black marker. It turns out to be a dog's head!
Racing car
In just an hour, you can easily fill the entire toy car park by making cars from paper of different shapes and brands.
In order to make a model of a paper racing car with your own hands, you need to take a standard A4 sheet.
- Fold the sheet in half lengthwise. Fold the corners inward on both sides, forming arrows.
- Fold the longitudinal sides towards the middle under the arrows.
- On one side, fold the arrow towards the middle, making it even sharper.
- Lift the other side and place it on top of the folded arrow, tucking it in between the layers of paper.
- Bend the tail of the car. You can draw headlights on it.
- To make it clearer how to make a paper machine, you can give another drawing diagram.