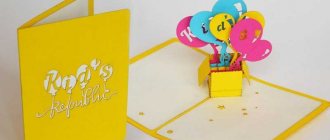
When it comes to an origami tree, the first thing that both children and adults remember is the New Year tree. However, there are many other, no less interesting models that are suitable for literally all occasions: you can use them to make a postcard, a decoration for a home performance, or a garland for a holiday. The tree is a recognized symbol of motherhood. It shelters, protects, warms and feeds. A tree card would make a great Mother's Day gift. For the crown, it is recommended to choose paper with a themed print: flowers, fruits or birds and butterflies. Origami will look more elegant and, at the same time, more realistic.
How to easily and simply make a Christmas tree from colored paper and cardboard for kindergarten
For various holidays, kindergartens often organize craft competitions. And children, of course, ask their parents for help with this. You can make a simple paper Christmas tree with your child for kindergarten.
We will need:
- A sheet of thin white cardboard
- Several sheets of green paper
- Scissors
- Stapler
- Ruler
- Pencil
- Double-sided tape - 2 cm wide
- PVA glue
Stages:
Fold a white sheet of cardboard into a cone. We secure it with a stapler. We cut off the excess at the bottom.
We will need many strips of green paper (6 cm long, 1 cm wide). Line the green sheets with a pencil along a ruler and then cut into strips.
Let's glue the opposite ends of the strips together - we will get “legs” for our future Christmas tree.
We attach double-sided tape around the entire circle to the base of the cone.
We stick the green “legs” in two rows, since both rows of Christmas tree “legs” fit on each strip of tape.
We do this until the very top of the cone, until the small Christmas tree becomes fluffy. You can attach a bow or a small star in a bright color to the very top.
You can use bright wrapping paper of two or more colors for this craft. Then the Christmas tree will turn out to be elegant in itself and all that remains is to place a five-pointed star with a cute bow on the top of the head.
Case with dried flowers
You will need the following materials:
- case;
- dried flowers and leaves;
- epoxy resin;
- acetone;
- glue;
- wooden stick;
- glitter;
- cotton swab;
- parchment paper;
- scissors.
Before we get started, let's think about the design of the case. To do this, we lay out the elements on the surface and try different combinations.
DIY greeting cards
Crafts for the New Year in the form of handmade cards for family and friends are a very pleasant sign of attention. You can come up with a special greeting card design for each family member.
Appliques in the form of calves, cows and bulls will help you decorate your postcard for 2022. There are a lot of original ideas for holiday greeting cards; in addition, using your imagination, you can glue together a completely exclusive applique.
New Year's cards can be made in interesting shapes, for example, in the form of mittens. They will look very wintery.
If you weren’t lazy and dried a few fern leaves in the fall, which on paper look very much like small Christmas trees, this will be an excellent and quick solution for an original New Year’s card. By gluing small pieces of fern to cardboard, you can decorate them in an original way as you wish. To decorate the craft, you can use glitter, miniature buttons or plasticine.
Using dried fern, you can imitate spruce branches; the plant is ideal for decorating New Year's cards
The postcard can be decorated with a herbarium, various plants dried from the summer, similar to a Christmas tree.
Another option for a New Year's card is to use multi-colored paper (not only colored paper from the stationery store, but also various newspapers, magazines, or just wrapping material), the strips of which are placed on top of each other in a chaotic style. You can complete the original New Year's card by covering it with lace, ribbons or beads. This DIY craft for the new year 2021 will look like an old vintage applique.
You can make a multi-colored Christmas tree from tubes of colored wrapping paper and magazines, and decorate a postcard with such an applique
Postcards with lots of decorative elements and vintage cards look very nice
RPCS3 (PlayStation 3)
An incredible emulator that stagnated for a long time due to the development team, but when Nekotekina took control of the project, progress went by leaps and bounds, almost every month the developers are improving their brainchild and rewarding patient players with improved performance and unique features, I think for many this is one of the most well-known emulators, because it has already repeatedly launched console exclusives, which were previously an unfathomable dream for some PC players, although the emulator requires incredible hardware, but now you can play many games on it more or less reliably on average PCs.
Snowman on the Christmas tree
Such an original DIY craft for the New Year, like a snowman, is the same symbol of the holiday as the fabulous Father Frost and Snow Maiden. Therefore, we suggest using flour, water and salt to make a cute snowman for the New Year tree. To do this you will need the following materials:
- salt;
- flour;
- warm water;
- multi-colored paints (preferably gouache);
- several toothpicks;
- foil.
First of all, from three ingredients - flour, water and salt - you need to knead the dough (take equal parts flour and salt). Form two balls from the foil, one of which will be slightly larger than the second. Next, form two balls from the dough and roll them out into flat cakes, in which you wrap the foil balls.
Using a toothpick, connect two balls: the large one will become the body of the snowman, the smaller one will become the head. From the remaining dough you need to make hands, a scarf, a hat and buttons, a nose, and eyes for a snowman. Add all this to the craft. And don’t forget to dry your snowman thoroughly in the oven!
Finally, use a brush, paints and, of course, your imagination to paint the resulting craft. In order for the snowman to show off on the New Year tree, you need to stick a pin with a ribbon into the hat (even before the snowman is dried). This will be an original do-it-yourself New Year's toy that will definitely stand out against the backdrop of store-bought balls and tinsel.
Salt dough snowmen can be hung on a Christmas tree using thread, ribbon and wire
Memorable crafts for the New Year from salt dough can be made using prints of children's hands and feet
Xenia (Xbox 360)
Now users can see the incredible, because console emulators of previous generations are already gaining momentum, and Xenia has become popular due to the fact that it won the progress race against RPCS (PS3 emulator) and was able to run Red Dead Redemption 1 with better performance, unfortunately, but not I can call the emulator completely playable at this stage, but you will still be able to play some games, which is undoubtedly good. Let's see where this leads next.
Large Christmas tree made of tinsel and toys
The finished New Year's beauty from the master class looks impressive, is suitable for most interiors, and most importantly, its maintenance is kept to a minimum. The Christmas tree will not need to be decorated every year and taken back down; it already has a garland and toys. It will take no more than an hour to create.
To work you need:
- a sheet of thin cardboard;
- double sided tape;
- scissors;
- garland;
- tinsel;
- Christmas tree decorations (for small Christmas trees you can use candies).
Manufacturing process:
- We make a cone of the required size from thin cardboard. We glue the garland to it with double-sided tape. We work from the bottom up in a circle, the fork of the garland should be at the bottom.
- We take out the Christmas tree decorations and stick them on the cone, between the loops of the garland. We try to distribute them evenly.
- In the empty spaces we glue more tape in strips in a circle. Remove the top layer from all the tape.
Here are a couple more ideas for creating a Christmas tree:
Redream (Dreamcast)
Perhaps one of the most little-known emulators for reasons unknown to me, and the most popular Dreamcast emulator is NULLDC, however, Redream is a cut above, because it is easy to use even for a beginner, and also has an optimal list of basic settings that can be edited intuitively a clear program interface that somewhat resembles another emulator - PPSSPP, with the help of Redream you can run classic Dreamcast games in 4K resolution, although you will have to pay the developers for such luxury, but if you just want to play the classics without raising the level of the picture , then you can simply use the free version of the emulator on the official website. And the emulator itself receives various updates and fixes every day, and is also compatible with almost all games of that same console.
How to decorate different rooms of the house for the New Year 2022
We create a fabulous mood, starting from the hallway and living room
It’s nice to come from the street into a festively decorated hallway, so New Year’s decor needs to start from the corridor. First of all, these are garlands of Christmas tree decorations, tinsel, snowflakes and LED strip, the flickering lights of which make any room simply fabulous
It is important that decorations do not interfere with the passage, so they should be secured around the perimeter of the room or on short ribbons
If a mirror with a shelf is installed in the hallway, you can place a Christmas composition of fir legs and candles on it. Additionally, a garland with Christmas tree decorations should be attached around the perimeter of the furniture.
Living room
The living room is the center of the celebration, so its design must be approached as thoughtfully as possible; here you should not overdo it with the decor. In addition to the Christmas tree, a Christmas composition is placed on or above the fireplace, and the walls and ceiling are also decorated with garlands. Candles, which should be present everywhere in the New Year's interior, add a special mood.
In addition to the general design, you can make a plot composition on the windowsill with your own hands using the multi-layer applique technique. With LED lighting in the evening, it will look simply magical.
Classic office design
The design of a work office depends on its design; often a small Christmas tree on the tabletop, made with your own hands from unusual materials, a wreath of pine needles on the door and LED garlands on the windows are enough. You can place a winter composition decorated with natural elements on the windowsill.
Features of decorating a children's room and a romantic bedroom
When thinking about the New Year's decoration of a children's room, first of all, you need to proceed from safety. There are several rules that will help you do everything correctly and without consequences:
- for preschool children, all decorations should be placed at a height so that children cannot reach them;
- small details cannot be used in decoration;
- glass toys should not be used;
- It is not recommended to put candles in the nursery;
- All decorations must be well secured so that during children’s outdoor games they do not injure them if they fall.
As decoration, you can put up an artificial Christmas tree, soft crafts made of fabric and felt, and also make bed linen with New Year's scenes.
Bedroom
In the bedroom it is necessary to create a romantic mood; for this purpose LED garlands are used. They can be placed above the head of the bed, on the windows, around the perimeter of the mirror on the dressing table. A mandatory attribute is candles; they should be decorated with satin ribbons and lace. If the room has a false fireplace, this is a great place to create a fairy-tale atmosphere.
An interesting solution is transparent glass containers filled with small Christmas tree decorations. You can also make vertical garlands of airy snowflakes, beads and angels with your own hands; all this will give a fabulous and cozy look to the bedroom.
Classic kitchen and veranda decoration
New Year's decoration of the kitchen depends on the free space; nothing should interfere with cooking, and we must not forget about safety. Traditionally, these can be Christmas tree decorations, candles, winter-themed napkins and Christmas compositions.
Open veranda
For an open veranda, luminous figures of the main characters of the year have recently been used, as well as LED strip around the perimeter of the site and on the porch
It is important that it is frost-resistant, so you need to buy a winter version of the decoration
You can decorate the doors with a decorative wreath of pine needles or Christmas balls, and also attach decorations to ribbons. Lanterns of different shapes and sizes in a retro style look beautiful on the steps in the evening.
Dolphin (Wii)
An emulator of the Wii console (not to be confused with Wii U), which also gave players the opportunity to enjoy many games of the previous generation, the emulator has an intuitive interface, as well as a small functionality of settings that will allow you to customize the game the way the player wants. I didn’t really use it, although I know about its existence, so there’s nothing really to say about it, but for many it became what they were waiting for. Friends, that’s all, and yes, I know that I didn’t mention the emulator for PlayStation 1 and other consoles, but I was only consecrating the list of emulators that I myself used and followed their development.
Console emulators for PC have been around for 14 years, but running Sonic the Hedgehog CD, Heart of Darkness or Shadow of the Colossus on a computer is still quite a story. We have selected for you the best (or the only possible) emulators of various platforms available at home - from the Nintendo Entertainment System to the PlayStation 2. All consoles. Best games. Native controls, original picture - and minimum energy consumption. Shall we shake off the old days?
The world's first Nintendo Entertainment System emulator, the NESticle project, appeared in April 1997. Since then, convex monitors and TVs have been replaced by wide-screen models; instead of crookedly soldered gamepads from Dandy, a universal pad from the Xbox 360 is now used (it is equally convenient to play games from any platform - with the possible exception of the Wii). Instead of 486s, two or more core processors are in use, making it possible to emulate sixth (aka 128-bit) generation consoles.
Console manufacturers, who fought with the manufacturers of the first commercial PlayStation emulators in the late nineties, are now engaged in official emulation of Xbox on Xbox 360, PS2 on PS3 and all older platforms in online stores like Virtual Console, a special department of the Nintendo Wii Shop Channel. Emulation is big, serious business these days.
In theory, free emulation of anything on anything is still legal, as long as you have a box of the original copy of the game sitting on your shelf. In practice, finding a disk image for a second PlayStation is now a little easier than for a third. At the same time, emulator lovers are of the opinion that old games get a second life on emulators and improve the population of young developers - which, of course, cannot be argued with.
New Year's decorations made from natural material
Interesting compositions using natural materials coated with silver paint quickly transform the room, bringing a winter festive mood to it. Place the branches in transparent vases, decorating them with additional mesh ribbons. You can add dry leaves, berries, stylized flowers.
On a note! Improvised Christmas trees made from branches look very beautiful. It will take very little time to create them, and the end result will definitely please you.
Simple but tasteful
You can use such Christmas trees as New Year's decor for more than one year.
Christmas trees under the snow
Tabletop miniature
If you have mastered the skills of modeling, you can create a fabulous landscape on a regular cardboard or plywood base. You can use salt dough. For it you will need to combine a glass of fine salt and wheat flour. Add water and knead into a homogeneous elastic dough. It is convenient to work with it, creating the necessary figures for the composition. After drying, paint the created miracle with gouache.
Cookies in the form of various shapes
New Year's decorations can be not only beautiful, but also delicious.
New Year's crafts from branches
An unusual decoration will be the intricately curved branches that you can collect in the park during a walk. They must be carefully painted, dried and fixed on a block of wood or placed in a tall vase. Adding original bright decorations enhances the overall perception. You can glue miniature cubes from thick white paper and paint them, creating the image of charming houses.
Unusual use of branches and cones as decoration
Chandelier decoration
Light pendants made of stars, which are cut out of shiny foil, strung on a thin cord and attached to a chandelier, enhance the pre-holiday charm of the room. The dynamism is complemented by the different lengths of the garlands, as well as the alternation of golden and silver shades.
A New Year's style chandelier is a beautiful decorative element
A chandelier decorated with pine legs looks very stylish and unusual
New Year's crafts from pine cones
Large cones collected during a walk will help you quickly decorate your room. They need to be placed in a colander and poured with boiling water.
- After cooling, the cones are dried on a napkin.
- Carefully open the scales, glue balls and a star cut out of colored cardboard or painted foam rubber and place them in a small pot.
- If desired, the cones can be painted, giving them silver, gold or any other shade.
Advice! Painted pine cones will serve as an excellent Christmas tree decoration. They are turned into birds, hedgehogs, or even simply given a solid, rich color. Any variation produces original toys.
Multi-colored felt balls can be glued to the open petals of a pine cone, thereby you will get an original decoration for the New Year tree
Cute miniature Christmas trees made from colored paper, pompoms and pine cones.
An easy option for making the main New Year's attribute
You can diversify your Christmas tree decor with the help of figurines of forest animals.
Having collected a sufficient number of cones, you can easily assemble them yourself into a New Year’s wreath, complemented by bright inclusions of leaves, berries, and ribbons. When decorating a table, shelves of pine cones become the central decor when creating compositions with transparent vessels and a candle inside.
The easiest way to make a wreath from spruce branches and pine cones is to connect them with a pre-prepared round frame made of metal wire
Beautiful wreath for the front door
Cemu (Wii U)
An emulator whose progress is increasing every month, but it all started with the fact that after the release of The Legend Of Zelda: Breath Of The Wild, players received a rather clumsy emulator on which the game physics did not work at all, but thanks to incredible financial support and enthusiasts from all over in the world now Cemu is one of the most stable emulators that allows you to play games from the Wii U console without unnecessary problems and problems; the emulator already supports the ability to modify game files, thereby generating many mods for popular console games that were not previously available from the original source, and Zelda was able to gain great popularity in Russia thanks to the emulator.
DIY origami Christmas tree
It doesn’t always matter what is given, it is important that it is done from the heart, and if the gift is made with one’s own hands, then it is valued even more, because the person who gave it spent his time
A Christmas tree is a New Year's attribute, and New Year's origami - a small paper tree looks original and very attractive. In general, you can come up with different New Year’s origami, the main thing is not to be afraid to create and remember, everything will work out.
To know how to make a Christmas tree origami, you need the following:
- Take a cut out square of green paper. Size 20x20 or larger;
- Bend the square diagonally, unfold it and create a second diagonal, so that you get two fold lines;
- Fold the sheet in half, turn it ninety degrees, open it, turn it and fold it in half again;
- After all these operations, you should get a square with folds marked crosswise;
- Next, it’s just a matter of assembling the tree;
- The square again needs to be bent in half, its side corners need to be bent inward. The result is a triangle;
- After this operation, a trunk with four lower corners is formed;
- The corners need to be raised up in order, while working on the table;
- By raising the corners, a rhombus is formed;
- The rhombus needs to be folded in half;
- The remaining corners need to be folded, similarly forming three more rhombuses;
- The corners of the rhombus are further bent inward.
- The output is a voluminous spruce.
https://youtube.com/watch?v=o_JstP3bVyo
There is another technique for creating New Year's crafts, which is called kirigimi. This technique is used to make snowflakes and other New Year's paraphernalia cut out of paper. Jewelry made from this technique looks original and is fundamentally different from the origami technique, although they are very similar in appearance.
The main difference is that when making jewelry using the kirigimi technique, you need to use scissors and glue. When cutting kirigimi, the tool must be sharp and of different sizes. This is necessary so that a product of any size looks original and of high quality. Practicing this technique is very useful, as it develops thinking, imagination and creativity in general. Both adults and children find this activity fascinating. Kirigimi is a great alternative to computer entertainment.
"Children's" option
For young and beginning origamists, very simple diagrams of paper trees have been developed. Models will be used for cards, garlands or as tags for gifts. You can make deciduous trees:
Step-by-step instruction:
- We use a 15x15 cm square. We start from the front side. Draw a diagonal fold.
- We bend the right and left sides towards it.
- We bend the inner points along the dotted line.
- Turn the workpiece over.
- We raise the sharp lower corner until it intersects with the vertex.
- And, stepping back about 1 cm, bend it back.
- Fold the corners as shown in the picture.
- Open the “pockets” from the inside and flatten them.
- Raise the bottom point to the nearest fold line.
- We lower the top.
- Turn the figure over to the front side.
- Fold the product in half and open it. This will give it a little volume.
Coniferous wood is no less quickly and easily made, which will be appropriate all year round, and not just during the winter holidays.
Step-by-step instruction:
- This time we start from the inside out. Otherwise, the first three steps repeat the previous algorithm. We outline the diagonal.
- Fold the side corners towards the center.
- Turn the figure over to the reverse side.
- Fold the sides again towards the middle line.
- We also turn the figure over to the reverse side.
- Fold in half.
- We bend the top layer down with an offset.
- Combine the red dots.
- Turn the tree over to the front side.
Unusual Christmas toys
You can use the most unexpected items to create an exclusive decoration for your Christmas tree. Creative imagination will allow you to transform them into original Christmas tree decorations.
Painted spoons. It is more convenient to use aluminum spoons. They are painted with white acrylic paint. After drying, a New Year's drawing is applied. If you don't have drawing skills, you can use stickers. The handle of the spoon is bent and the decoration is hung on a tree branch.
Luxurious painted spoons for Christmas tree decoration
New Year's motifs on an old spoon
Original cutlery. Disposable cutlery, complemented with braid with New Year's paraphernalia, looks great against the backdrop of snow-covered greenery.
New Year's beauty
Updated balls. You should not throw away Christmas balls that have lost their splendor over the years. They can be updated with lace details, which can be easily crocheted if desired. The use of beads and decorative braid in the design gives an interesting sound.
You can use absolutely any decoration to decorate New Year's balls.
Festive balls can be used to decorate not only the Christmas tree, but also decorate the interior of the room with them.
Use special needles to secure the glitter to the foam piece.
Step-by-step master class on making a New Year's ball using felt pom-poms
Light bulb toys. Old light bulbs can serve as the basis for original Christmas tree decorations. They are painted, creating a variety of bright images. After drying, it is recommended to coat the surface with varnish to stabilize the tone. Beads, tinsel, braid, beads, etc. act as additional decor.
Interesting idea for using a regular light bulb
Handmade New Year's toys will add a special atmosphere to the holiday.
Beautiful and original decoration for the Christmas tree
Memorial balls. The Christmas tree balls, inside of which there is a photograph of your favorite pet, will not leave you indifferent. If you wish, you can place images of household members, memorable trips, and interesting landscapes there.
Manufacturing algorithm:
Select transparent, fairly voluminous balls, houses, and pine cones from the assortment of Christmas tree decorations available at home.
Carefully remove the fasteners. Coarse salt and beads are poured inside the ball. Using tweezers, carefully place miniature spruce legs, pieces of tinsel, snow-white cotton wool and other suitable decor. Cut out a fragment from a photograph, making it smaller than the diameter of the ball
Roll it into a tube and place it inside. Then you need to straighten the photo using tweezers. All that remains is to return the fasteners to their place and hang the updated Christmas tree decoration in the designated place.
Family archive on the New Year tree
Master class on making wood
Let's make a tree in bonsai style. To do this, you need to follow a certain method, prepare wire, beads, and glue.
Master Class:
- You need a thin wire 45 cm long.
- Beads are strung on it and twisted into a loop. 8 beads are enough for one loop.
- Prepare a bud from 10 loops, leave 10 cm of wire, cut the rest.
- You need to make 150 blanks.
- We begin to form a branch, for which we take three branches and twist them together with a thread.
- After making a few turns, add two more simple branches. All blanks must be applied.
- This way you get a DIY wire bonsai , top and branches.
- During winding, a thick wire is inserted into the barrel, which will stabilize the entire structure.
- The base is prepared, the trunk is inserted into it and secured.
- The entire surface of the branch is covered with a layer of glue and alabaster.
- After drying, the base will need to be painted brown with a special durable paint. You can add another, light shade on top for decoration and decoration.
- Cover the base with pebbles, gluing them to this surface.
We buy everything you need to assemble a retro console
- single-board computer Raspberry Pi – from RUB 2,588.
- microSD memory card 8 GB or more – from 254 rub.
- HDMI cable – from 66 rub.
- gaming gamepads USB or Bluetooth – from 200 rubles.
- you can buy a separate stylish case for 1,517 rubles.
Of course, much of this can already be found in the bins of any gadget lover. For those who will buy missing goods, I will give some advice.
Buy the latest model (Pi 3 B+), it has a more powerful quad-core processor that can even run 3D games from the first generation PlayStation, 1 GB of RAM, Wi-Fi and Bluetooth.
Such a box will not have to be connected to the network via wire or bother with “USB whistles”, and gamepads can be connected both via wire and Bluetooth. It’s better to get a computer with a case and a suitable power supply right away.
I recommend purchasing a memory card separately so as not to get a cheap, slow card that will quickly fail. Don’t take cards that are too large; 8 or 16 GB is enough.
It is preferable to buy game controllers from trusted brands. If you have old Xbox or PlayStation remotes, they will work great, or you can take replicas of the original input devices from Sony or Microsoft.
You should not take radio joysticks or completely unknown gamepads, they may simply not connect to our console.
Minimum strength, maximum truth
First, a note: the most complete picture of modern emulators is given by the website Emulator-zone.com, and for small software accessories you need to go to the forums Forums.ngemu.com.
There are only three general requirements for any emulator. Firstly, it must support any screen resolution, so that old games can be played on new monitors and TVs without image distortion (there is nothing worse than a Super Nintendo game that is forcibly stretched onto a huge wide screen). Secondly, it must support at least two gamepads with all the subtleties of control (there is no point in playing Crazy Taxi without support for analog shifts or Ico without vibration motors). Thirdly, the game must run at a speed of at least thirty frames per second.
As you will soon learn, among the emulators of any platform (including consoles from twenty years ago), it is not so easy to find at least one that satisfies these basic requirements. What can we say about such luxury items as a user-friendly interface, sane documentation or the ability to play together via the Internet...
We will not dwell on the internal intricacies of emulation: you can read about how painful it is to synchronize PS2 cores and how much work it cost developers to support all add-ons for the Super Nintendo or the Yamaha YM2612 sound chip with Genesis on specialized sites. What is important to us now is the external effect - the most faithful reproduction of the original game as possible with minimal effort on the part of the user.
Useful tips
First of all, you should prepare the paper.
- The most ideal and simplest option is white office paper, it is moderately thick and affordable.
- Many beginners also start with regular newsprint, craft paper, and even foil.
- The paper must fold well and keep its shape, otherwise it will be difficult to work with.
There is a special origami paper that has a back and front side, it is intended for craftsmen and is great for making more complex modular figures.
All origami technology is based on bends, folds and turns. Wet origami involves folding paper while wet.
Origami paper crafts can be of any shape and complexity; you need to start with the simplest models, gradually moving on to complex patterns.
Experienced origami artists create their own designs, but this level of skill comes with more experience.

