Decoupage of candles using geographical maps - a luxurious idea for an interior in boho, rustic and eco style
Decoupage is a great way to transform even such an ordinary piece of furniture as a candle. You can give the craft to a friend or leave it at home for the enjoyment of yourself and your household. Your efforts will be rewarded with a completely unique home accessory. Every year new ideas for decoupage techniques . Christmas drawings look especially fabulous on candles. In this article you will find simple and easy-to-follow decoupage master classes, as well as ideas for more experienced needlewomen!
Types of decoupage techniques (photos and examples)
Several methods are currently used. You can make decoupage using any of the following techniques:
- Cold way.
- Using a spoon.
- Using a hairdryer.
Each technique has its own subtleties and secrets
On the Internet you can find a large amount of video material on how to make such candles, but first we will provide step-by-step instructions and consider each technique step by step. Looking ahead, let's say that in each of these methods you do not need glue at all.
1
7
Required Items
- We will need the candle itself. Now there are a lot of different ones on sale, there are round and square, triangular and so on. Therefore, you can choose any one.
- Next you will need a napkin.
- You need some kind of rag, preferably a waffle towel.
- You also need contour and glitter.
- If you want three-dimensional details, you will also need a 3D gel.
- In addition, you will need acrylic varnish to glue the glitter.
"Cold" decoupage
This technique can be used to transform thin-walled candles. In this case, the pattern will fit almost perfectly to the surface. This type of decoupage is suitable even for beginners. Below is a master class on making.
Decoupage is a great way to make a decorative candle with your own hands without putting a lot of effort into it.
To decorate using decoupage technique you will need the following materials:
- candle;
- napkin;
- sharp scissors (can be manicure scissors);
- stick (preferably glass, but you can use any stick with a smooth surface).
- First, measure the length of the napkin. Leave a small allowance (about one centimeter in length and width).
- Attach the design to the candle and align it with the top edge. Iron gently.
- This is best done with a glass rod, moving carefully from the center.
- Press the tool lightly for better adhesion to the napkin.
Candle decor idea with animal images
Candles of any size and thickness can be used in decoupage
Advice! If you glued the design to the entire surface of the candle, then the resulting seam must be carefully processed. First glue one side of the picture, then the other, after cutting off the extra piece (if there was one, of course).
Delicate floral ornament and butterflies. This can be found on ready-made decoupage sheets
Advice! Do not overlap the seam, otherwise the final result will look sloppy.
- Finish the top and bottom edges and carefully trim off any excess paper. The design will stick to the candle even without using glue.
- Apply decorative elements on top, for example, glitter, depending on your idea. And you will get a small masterpiece, as in the photo. If you still do not understand the details of decoupage, watch the detailed video at the end of the text.
In this type of creativity you can use a variety of motifs.
First things first
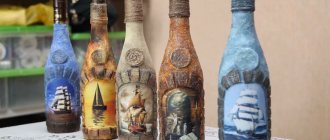
In general, the first thing to do is to figure out in which direction the drawing of your candle will be. Let’s say it’s something nautical, which means you’ll need a white or blue candle, napkins with anchors, ships, and so on. Or, for example, something floral - a green candle with sunflowers. And so on.
That is, you need to think in advance what color the candle itself is needed, what pattern to choose. Well, then you can decoupage the candle. You need to try the napkin on the candle, maybe there is something extra, if you find it, you need to cut it off or tear it off.
Execution Rules
Regardless of the theme and material used, when decoupage it is necessary to pay attention to every step of the technology.
- Sand the surface of the uneven candle and apply a primer to it (2-3 layers). For smooth ones, only priming is enough.
- Prepare the drawing by removing the top layer with the image from the napkin and cutting out the desired fragment.
- Small elements are not cut out, but drawn with special paints directly on the work surface.
- When gluing a paper picture to the working base, take a brush and straighten out all the air bubbles, leveling the picture.
- The straightening of the pattern begins from the center to the edges. After fixing it, it must be dried.
- After drying, they begin to decorate the candle, painting on the missing elements with a brush and paints.
- If necessary, the product is decorated with rhinestones, beads, and beautiful packaging.
Wax paper
There is another interesting way to decoupage candles. To do this you will need:
- A candle, preferably one color.
- Scotch.
- You also need tracing paper.
- You will also need wax paper.
It is worth keeping in mind that tracing paper is very thin, it breaks in the blink of an eye, so you need to tape it to the printing sheet and print out a photo or picture.
Important! The printer must be a laser printer, otherwise unsightly spots will appear on your image. If you don't want to print, you can just draw (on tracing paper).
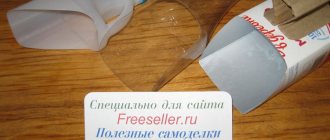
All excess around the image needs to be cut off. Next you will need wax paper to wrap your candle. Now take a hair dryer, hold it at a distance of 10-15 cm from the candle and move it very slowly. You should see the wax paper melt and the ink will be visible. The paper must be held very tightly, otherwise your entire structure will collapse.
Now just peel off the paper and enjoy your beautiful original candle.
Solutions for different holidays
Decoupage candles are a great idea for any holiday. If you approach the choice of pictures creatively and tastefully, you can create a unique product that will be appreciated by those for whom it is intended. Today, decoupage napkins can convey the atmosphere of any holiday. For example,
- for the New Year,
you can purchase decorative material depicting Santa Claus, Christmas sketches, all kinds of plot pictures with fluffy bunnies, Christmas trees, animals and snowmen against the backdrop of fir branches, kids with gifts and other New Year's paraphernalia; - for March 8
, it is not difficult to choose napkins with birds, colorful flowers and various inscriptions, floral patterns located at the bottom, or completely covering the entire surface of the napkins; - for Valentine's Day
you can find decorative napkins with a variety of hearts, bears, bunnies or even butterflies, letters and inscriptions about love; - for your birthday,
you can choose any pictures, which will depend on the time of year (for example, flowers, cakes, gifts); - on your wedding day
you can give beautiful candles decorated with napkins with a picture of the bride and groom, be it babies, bears or angels dressed in matching outfits; - For Halloween
you can find decoupage paper with bats, pumpkins, and witch hats; - On Angel's Day,
you can give a candle decorated with a picture of angels and decorated with silver acrylic paint.
Additional decoration
If you are satisfied with the result of the work you have done, you can leave everything as is and put your creation in a place of honor, or go to your friends and present it as a gift. But this is not the end of the candle decoupage. The master class you are studying will introduce you to other ways to decorate your work.
For example, you can paint a candle the color you like best, or the color that best matches the design. You can also use stencils to apply ornaments or use your artistic skills. It is best to use acrylic paint. It is the least toxic and does not dissolve in water after drying.
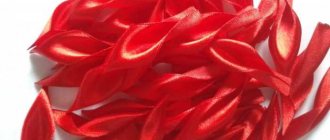
You can also use other materials for decoration: ribbons, rhinestones, dry leaves, flowers, lace, spices, beads, fabrics, and indeed anything that your imagination suggests. Such decorations will make your creation even more unique and inimitable.
In order to consolidate the result, you can coat the candle with a special varnish. But check with the seller and make sure that this varnish does not release toxic substances during combustion.
That's it, you have made a decoupage candle. We hope that the MK you just got acquainted with helped you simplify this process and make it as enjoyable as possible. In conclusion, I would just like to add that although using this master class it is not at all difficult to make works of art, it would be a good idea to practice on a smaller candle, grasp all the subtleties of the process, and then start creating a masterpiece.
Secrets
Decoupage can be called a craft, when something ready can be simply stunning. But there are several secrets that not everyone knows.
- Regarding the image, it is best to use decoupage napkins. However, it doesn't stop there. You can take the image from postcards, calendars, or even print it yourself. Cut out your projects and store them in a folder somewhere. Also in any city you can find a store that sells all kinds of things for decoupage. In a pinch, there are probably a couple of cute napkins in hardware stores.
- It is best to take a regular candle rather than a scented one, since the glue will not stick to the latter properly; it is too greasy for that.
- If decoupage involves several levels, you should keep in mind that one level must dry for at least an hour.
- If you are performing decoupage on a colored candle, that is, one that has not one color, but two or three, then it is very important that the napkin is brighter than the tone of the candle.
- Also, if you have any stripes, marks, or roughness from the spoon, everything needs to be smoothed out. It is best to use a new double-sided sponge. The rough part will give smoothness, and the soft part will be polished.
Now you know how to perform decoupage, and the article contains several ready-made proposals, as well as ideas from which you can start in search of your own ideas.
Method one - using a teaspoon
You will also need another additional candle to heat the spoon.
So, we need to wrap our candle in a napkin, make sure that the joints match, and hold it with your hand. If there are separate elements, then each of them must also be held.
The spoon needs to be heated, but the inside gets hot.
The movement starts from the center of the napkin, ends with the edges, and the same applies to the elements. You need to move the spoon so that the napkin seems to sink in.
Once the napkin is dry, you need to carefully inspect it, especially pay attention to the stains if they look white and dry. This fact suggests that the wax did not completely saturate the napkin. The spoon is warmed up again and carefully held on those places.
It’s clear that you can see where the spoon went. To do this, you will need any rag that does not have lint. The surface is smoothed, this is done up, then down, very quickly. Thawed wax will correct the surface, but you need to do it very carefully so as not to spoil anything.
Now you need to pay attention to the drawing - draw some outlines somewhere, for example, if these are stamens, then you can outline them in red. Some elements can be made voluminous using 3D gel. For example, stars or the moon, or seagulls, and so on. If you use 3D gel, then it must dry, at first it is white, but as it dries it will become transparent.
Next you need to look at where you apply the glitter. Having chosen a place, apply varnish and sprinkle glitter.
Hairdryer
Candle decoupage can also be done using a hair dryer.
- You also need a candle.
- You will need a napkin.
- You will need parchment paper and a hair dryer.
Just as in the first case, the layers of the napkin need to be separated. Plug in the hairdryer, and place the picture on the candle, smoothing it out very well. Parchment paper is placed over the design, wrapping the candle, but you need to look carefully, creases are unacceptable. Now you need to turn on the hairdryer and point it exactly at the picture.
The candle will slowly begin to melt, and you need to turn it so that it warms up evenly. Then leave it for a while to cool down.
This candle decoupage is simple and quick to do, especially if you practice. Take a cloth and wipe the candle to remove excess wax or paraffin. The candle will level out a little. Next, take wax markers, stained glass paints, acrylic paints, glitter, and so on.