New Year's gifts and handmade toys are a popular area of home creativity, because before the holidays you really want to prepare at least small memorable gifts for all your friends, colleagues and relatives. It is unlikely that you will be able to buy so many ready-made gifts - not every budget can support such expenses. But home creativity allows you to make many pleasant surprises with minimal financial investment.
Today, craft stores offer a wide selection of materials - you can buy sets of polymer clay, blanks for scrapbooking, Christmas tree decorations and cards, templates for embroidery or painting. However, you can make unusual toys for the New Year from scrap materials - to do this, it is enough to master the technique of testoplasty or bioceramics. This line of creativity is truly exciting and, what’s nice, requires virtually no additional financial costs.
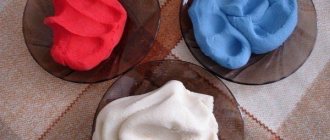
Salted dough is just a godsend for creative people! This material is suitable for a wide range of works, from appliqué to three-dimensional modeling.
These master classes are devoted to how to make a dog from salt dough. The article will discuss different options for crafts, so anyone can choose what they like best - and do it with their own hands.
The basis of a strong and durable craft is properly prepared dough.
Ingredients:
2 cups “Extra” salt; 2 cups wheat flour; 10 tbsp. spoons of sunflower oil; 0.5 cups of water. This is a classic recipe, but it can be varied. Macro can replace hand cream or pharmacy glycerin. You can add 2-4 tbsp to the mixture for viscosity. spoons of wallpaper glue.
After kneading, the dough must be wrapped in plastic (bag, cling film) and put in the refrigerator for an hour or two.
Please note: the dough prepared in this way is not intended for consumption! It is completely inedible and can harm the human body. If you are crafting with a child, you should explain this rule to him before starting work.
The resulting dough should:
- Do not stick to hands or work surface.
- Have a uniform consistency.
- Be tight.
- Strictly keep the form devoted to him.
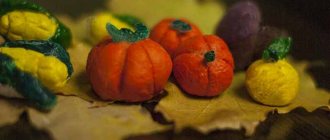
In order for the dough to acquire the desired color, you can use vegetable juice instead of ordinary water (carrots are orange, beets are pink). Instant coffee gives the material a soft brown tint.
Please note: with this dyeing, the colors will not be bright, and after drying they will turn pale.
Any violation of the recipe or storage conditions of the finished material can lead to the following unpleasant consequences:
- As you work, the dough will stick to your hands, table, and tools. It’s simply not possible to fashion a neat figure out of it.
- After drying, the craft made from dough will begin to crumble and crumble.
- The product will not bake or will not be able to harden properly. It often happens that the top layer of salt dough forms a hard crust, without allowing air into the middle. Because of this, the craft will become vulnerable and break at the first fall.
Possible problems when making the dough
If you didn’t get the perfect dough or figure the first time, you will need to solve one of the possible problems:
- bubbles or cracks that appear after drying the figurine indicate that you dried it too quickly by setting the oven temperature to the wrong temperature. Dry the figures naturally or in a preheated oven, but with the doors slightly open. It is possible that your cabinet heats too intensely or unevenly;
- the paint on the figurine is cracked - most likely, you began to apply colors to the figurine, which did not have time to dry completely. Do not throw away the craft - let it dry in the air, and then remove the paint with fine sandpaper and paint it again;
- It’s impossible to make a massive figurine (for example, a panel) without cracks - the thickness of the dough prevents it from drying. Remember to turn the item over while it is drying in the oven or air;
- a piece of the figurine has broken off - do not rush to throw the craft in the trash. Glue the element using PVA, let it dry, go over the joint with sandpaper and varnish.
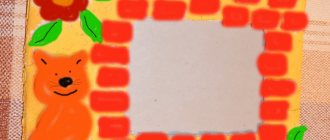
Modeling a puppy
First you need to draw a stencil or, more simply put, a drawing of the required size. If you do not have outstanding artistic talent, then you can print the picture. It is more convenient if the stencil is on cardboard rather than paper.
Roll out the dough into a flat cake 1-1.5 cm thick. Place a stencil on top and cut out a shape along the contour. We remove all excess dough and smooth out the sections of the dog’s body with our fingers.
From the remaining dough we make a sausage, which will be thinner in the middle than at the edges. Place the sausage down and connect the edges of the figure with the sausage. Use a sharp stick to make dents along the edges to form the edges of the bone.
. In the same way we make the ponytail more voluminous.
Form a ball from a small piece of dough, then slightly stretch it into the shape of an egg. We stick the head
puppy, so that the bottom of the head extends slightly onto the bone.
Now take 2 identical pieces of dough, roll them into balls, then pull them into the shape of a pointed droplet. Flatten it slightly and stick on the ears.
up onto the head, bending them down onto
the muzzle
.
Take a piece of dough about 1/3 the size of the entire head and form a ball as well. Stick the ball down onto the muzzle and make a vertical dent at the bottom with a sharp stick.
nose from a small ball
dog. On the lower part of the nose we make 2 holes in the form of commas.
The dog needs to hold his bone tightly, which means we make paws
. From 6 identical pieces we form small neat sausages. Place 3 sausages on top of the bone on both sides. Then add a small piece of dough on the sides from the paws to the head and smooth the dough well with a wet brush.
Dry salt dough
It’s better to do it the natural way, but if you need to do it quickly, then we use the oven. Place the figurine in a cold oven and set the temperature to minimum. Bake for 30 minutes on each side. If you do not follow these recommendations, be prepared that your work may crack when drying.
Tools and items for creativity
In the process of creating salt dough figures you will need:
- rolling pin or bottle of water (needed for rolling out the dough mass);
- board for sculpting figures;
- toothpicks (needed to make patterns and holes);
- brushes;
- black marker for drawing lines;
- gouache or acrylic paints;
- universal varnish;
- paper and pencil (to make figure templates);
- scissors;
- foam sponge (for painting a large surface);
- glue;
- strings (for hanging figures);
- buttons and beads (for making textured prints);
- cereals and pasta for making rustic-style panels.
Universal recipes
You can find a great variety of salt dough recipes. Each master adds his own additives to them, selecting the desired consistency. The main ingredients for kneading dough are salt, flour and water.
Depending on its purpose, its thickness may vary:
- dense dough - for large parts and creating massive panels;
- universal dough of medium consistency - it is convenient to make small pictures and figures from it;
- soft dough - tender and pliable, it is suitable for small elements, exquisite flowers and figurines.
Some needlewomen measure ingredients in grams, others prefer to use proportions in parts.
Thick dough
To work you will need:
- wheat flour - 1 part;
- table salt - 1 part;
- water - 0.7 parts.
Combine the dry ingredients in a deep bowl and add cold water little by little. The dough should be homogeneous and very dense. There will be grains of salt in it - this is normal, don’t worry. Depending on the humidity and quality of the flour and salt, you may need a little more or less water. Therefore, you can’t pour it into the dough all at once.
Medium consistency dough (all-purpose)
To work you will need:
- wheat flour - 1 part;
- water - 1 part;
- table salt - ½ part;
- finely ground salt (extra) - ½ part.
By replacing half of the coarse salt with fine salt, this type of dough becomes more plastic and pliable. It is convenient even for a child to sculpt from such an obedient mass. But this dough is also not suitable for the smallest details and realistic crafts.
Soft dough
To work you will need:
- wheat flour - 1 part;
- hot water - 1/4 part;
- finely ground salt (extra) - 1 part;
- PVA glue - ¾ parts.
Combine salt and flour, then add thick PVA glue and mix. Add hot water little by little and knead into a soft dough. It needs to be wrapped in cling film, allowed to rest and cool.
This dough is ideal for complex work. It holds its shape perfectly, preserving the prints and texture created on it. Its quality directly depends on the quality of the chosen glue.
Figures made from salt dough with glue are particularly durable.
They will delight their owner for many years.
Drying figurines
Proper drying provides strength to the product. You can use one of the following methods:
- drying in a warm oven
- the figures are placed on a baking sheet covered with parchment, and then in an oven at a temperature of 60-80 degrees. You need to keep the craft for 1-2 hours (it all depends on its size and thickness); - natural drying
- the figures are placed on a wooden or plastic board and kept in a warm place (without direct sunlight and not on a radiator!). The process is long (4-5 days), but ensures uniform drying, making the figurine strong; - drying with heating and cooling in the oven
- the figures should be placed in the oven on a baking sheet lined with parchment, and the oven should be heated (up to 150 degrees). When the set temperature is reached, the cabinet must be turned off and the figures left in it until they cool completely.
Coloring the puppy
We paint with brown gouache everything except 1 ear, protruding muzzle with nose, bones and paws. In order for the paint to adhere well and not crack during varnishing, the brush must be very wet.
We make an interesting coloring on the face. Dip a brush with brown paint a little into black and draw an oval where the eye will be. Near the second eye, on the contrary, the fur will be lighter; to do this, lightly dip the brush in white paint. We also paint part of the paws.
We paint the remaining parts of the dog white, except for the nose. We make the paws in different shades. When the white muzzle is dry, make the nose black, and then add a small highlight of white paint to it. To make the bone different from the fur color, add a drop of orange or pink paint.
Ready puppy
you need to varnish and, if desired, glue the lace on the back side.
Now you have a well-fed and kind defender and a symbol of the coming year
.
Did you like the product and want to order the same from the author? Write to us.
More interesting:
See also:
Warmer for a mug “Dog”, crocheted
2018 will be held under the auspices of wonderful and loyal animals - dogs! That's why today we...
Dogs made of plasticine, 6 options, step by step
Dogs made of plasticine Modeling from plasticine is a very exciting and interesting activity! Especially his l...
Salt dough house
House made of salted dough Probably everyone already knows that there is such a material for creativity as salted dough...
Dog in a New Year's cap
Many are preparing in advance for 2022. Let's knit a funny symbol of the year of the Dog in a New Year's cap. ...
New knitted dog-mitten. Miniature