New generation lighting devices are radically different from older models. They are economical, demonstrate high power and require virtually no maintenance.
The steady demand for high-quality light sources has caused the appearance on the market of a large number of products from Southeast Asian countries that are neither reliable nor durable.
A DIY LED spotlight will allow you to get a fairly high-quality product. Let's look at how to make a cheap and fully functional spotlight from improvised materials.
Design Features
Spotlights equipped with LEDs consume less electrical energy. Their maintenance is minimal and low-cost. Their service life is up to 90 thousand hours. They can be installed not only in the room, but also outside. Such devices do not deteriorate due to unfavorable negative conditions. The design of floodlights allows them to emit a lot of light.
You can make a homemade LED spotlight. If any breakdowns occur, they will not be difficult to fix.
The LED spotlight consists of several parts:
- Case boxes;
- Staple;
- Matrices. The diodes are attached to the board and protected from damage by special polymers;
- Drivers.
LED replacement
When performing work related to replacing LEDs, it is necessary to pay special attention to the parameters of this element; they must exactly correspond to those specified for the faulty elements. This will help to correctly replace and ensure stable operation of the spotlight for a long period of time. It is recommended to purchase these parts from reputable manufacturers, because the quality of cheap LEDs is not the best.
The LED spotlight is faulty, the power supply does not turn on.
If prompt equipment repair is required, then you can purchase the necessary elements at any store that sells LEDs. When people are engaged in repairing modern systems on an ongoing basis, then there is an excellent opportunity to purchase the necessary elements for replacement using stores located on the Internet, which is convenient and practical
Electrical and technical specifications
If you are making a homemade spotlight, first check the features of its electronics. This way you can get the job done efficiently and eliminate the influence of high temperatures on the device.
Solid-state semiconductors respond negatively to temperature changes. This leads to their degradation and reduction of alloying additives.
If the active panel of the device heats up to a critical temperature of +60°C, the intensity of the emitted light will decrease or a complete breakdown will occur. Remember, the higher the power of the LED, the less time it will take to fail because it will overheat.
When you make a device at home, take care to create a high-quality heat removal system. Divide the emitter into a thoughtful number of parts and arrange them correctly. The choice is up to you: parallel or serial. If a simple type of spotlight is being manufactured, only one radiation element can be installed.
Checking the LED matrix
To check the operation of the matrix, it is recommended to use laboratory power supplies. In this case, it is necessary to supply less voltage than is required for the operation of this unit. After this, it will be necessary to measure the current indicators, that is, find out how much of it our device is currently consuming. If there are no malfunctions in this case, the matrix should light up. Upon completion of this procedure, it is necessary to gradually increase the voltage supplied to the matrix to nominal values. When the matrix flares up to full power, then we can assume that this piece of equipment is working. Many people involved in such work miss important points that are associated with the correct installation of various parts, which over time leads to breakdown.
Connection diagram of the LED matrix.
Fastening components
Before you start assembling a powerful spotlight, stock up on parts and components. If you have a car, some of the components will be found at home. The remaining part can be purchased, or borrowed from friends.
To make a lantern with your own hands you will need:
- LED matrix equipped with a driver. Such parts are installed on poles with lamps that have stopped working. All you have to do is replace the lamps that have failed. You can buy a new part at an electrical goods store.
- Frame. It can be made from metal parts and plywood. A halogen flashlight is suitable for the housing. You can find an old one that you use for fishing or hunting, or you can buy a new one.
- Wires for connecting parts and connecting the device to the electrical network.
- Foil for reflector. You can purchase this material at your nearest store. Choose tapes with high density.
- Tough glue.
- Sealant.
- Radiator for cooling.
You can see the entire tool here. The tools that are useful for making a flashlight include:
- grinder;
- welding machine;
- a drill equipped with a drill;
- soldering iron;
- solder.
We order the components and assemble a simple 50W floodlight with our own hands.
This simple LED spotlight took 5 minutes to make.
The peculiarity of this powerful matrix is that it does not require an LED driver. 220 volts is connected directly to it. At the same time, the price is very low, consider it a gift.
And so we choose a more powerful one at 50 watts
.
Warm White
- warm white (closer to incandescent in tone) or
Cold White
- cold white.
Let me tell you that 50 W is decent for LEDs.
The reverse side of the module is an aluminum substrate.
I took it without a lens. But for the next homemade spotlight I will definitely order with a lens. The fact is that the price will hardly change. The difference is about 20 rubles. A reflector is included with the lens.
Plus, contacts 220 need to be somehow isolated and covered, otherwise the lens will cover them.
This photo shows the matrix along with the lens and reflector.
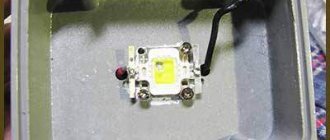
This LED module definitely requires a heatsink. I just took a scrap of aluminum sheet (I had it in my bins). I drilled four 3mm holes in it for fastening the LED module and two more holes for fastening the wire with a tie (self-tightening strap).
On the reverse side of the LED module I applied a thin layer of thermal paste (residues from replacing the processor in the laptop).
Actually, everything is very primitive and can be seen in the photographs. Of course, it doesn’t look very civilized; you can’t hang one like that on a façade, but it’s just right for a construction site.
Don't forget that the 220V contacts are open! We will definitely isolate!
I filled it with varnish and stuck a film on top.
This is a type of mounting the LED matrix on the reverse side.
And here is a homemade spotlight in action. I don’t know if it shines at 50W, but it shines quite brightly. I tried to work at night, pointing the spotlight at the facade, everything was visible normally. The light spot covered the entire two-story facade.
Step by step process
To make a mini anti-aircraft searchlight with your own hands, follow the step-by-step instructions. The assembly technology will be discussed in more detail below.
Drawing and diagram
You need to study the LED connection diagram. The power of one radiating element will not be enough. So prepare a few pieces.
Most often, the circuit provides only one circuit, consisting of several or one LED. Most circuits work on the same principle: LEDs are connected to a matrix where a current-limiting resistor is installed. Instead of an electronic current stabilizer, you can use a driver.
Frame
If you choose a case, this can be done in several ways:
- First, select a “box”, and then select all the necessary parts based on its size. Use this option if the dimensions of the spotlight and mounting are more important.
- If the priority is the power of the device and the flow of light, choose the housing last.
There are several methods for selecting a shell for a spotlight:
- Use an old unnecessary spotlight - from a headlight or a long-range flashlight. It can be either halogen or incandescent. Take it apart and get rid of the old filling.
- Shop body. Despite the costs, this method is more advantageous in technical and aesthetic terms. You can also make a spotlight on a tripod with your own hands, so it will be higher.
- Make your own body. To do this, use available materials.
When choosing a case, keep in mind that it must be multifunctional: protect the internals and serve as a radiator to remove heat from the LEDs. If the spotlights will have a power of more than 50 W, choose aluminum structures. They have greater thermal conductivity.
Lamp selection
To select a lamp, use the following parameters:
- Power of the finished device. If the spotlight is less than 30 W, then there is no point in creating a lighting device. Popular options are with a power of 50 W or more. The maximum amount of light is provided by spotlights with a power of 100 W or more.
- Voltage. In order not to look for a power source, set the voltage to 220 V. If desired, you can install LEDs at 12 V to recharge from the car network. You can make a battery-powered spotlight by inserting batteries into it.
When choosing LEDs, consider the following parameters:
- LED voltage;
- operating current.
Collection
- You need to start assembling the spotlight from the matrix. It is formed from LEDs to which a resistor is attached. Assembly is carried out on foil or a canopy. Consider the heat dissipation design in advance.
- You need to form a reflector. To do this, cover the compartment with LEDs with foil.
- When the matrix is ready, it is attached to the body. To do this, use a soldering iron and solder. Don't forget to remove the power cable or install batteries. If everything is calculated correctly, after turning on the device, it will light up brightly.
Rays of Vengeance
Night. Silence. Suddenly an air raid alarm sounds. Hundreds of rays rush into the night sky. Suddenly one of them stops at the silhouette of a German bomber. Flashes immediately appear around the plane - explosions of anti-aircraft shells. A bomber, engulfed in flames, rushes down... This is not the plot of a feature film, but just one of many episodes of the night bombing of Moscow on July 22, 1941, an important role in repelling which was played by the searchlight units of the Red Army.
Creation of Soviet air defense searchlight units
They started thinking about creating air defense systems in the Soviet Union in the 30s. On October 4, 1932, the Council of People's Commissars of the USSR approved the “Regulations on the air defense of the territory of the USSR.” Particular attention was paid to the protection of four large cities - Moscow, Leningrad, Baku and Kyiv. Air defense corps and divisions were created, which included units of anti-aircraft artillery, anti-aircraft machine guns, air surveillance, communications and, among other things, anti-aircraft searchlights. Searchlight installations were part of searchlight regiments, and they, in turn, were divided into companies. Each searchlight company consisted of 9 searchlights and 3 sound detectors. The front line of searchlights was located at such a distance from the line of anti-aircraft artillery fire that anti-aircraft batteries had enough time to prepare to open fire on an illuminated target at maximum range.
The functions of anti-aircraft searchlight units were defined in a special manual published in 1941. According to this document, searchlight installations were to be located at a distance of 3–4 km from each other, and their main tasks during enemy night air raids were to search and catch enemy aircraft with a beam. After capture, the searchlight crew had to continuously illuminate the target until it was shot down by anti-aircraft artillery or fighter aircraft. The tasks of the searchlight units also included creating landmarks for night fighters, light signaling and communications. To ensure effective operations by night fighter aircraft, searchlights created light fields in the directions where the enemy was likely to appear. Each such field was 21–28 km wide and 10–15 km deep. In the center of the field there was a waiting area for fighter aircraft. When the spotlights were placed closely together, the individual light fields closed in flanks, forming a continuous light front. In total, by the beginning of the Great Patriotic War, the air defense of the Red Army included 182,000 military personnel, over 3,600 anti-aircraft guns, 650 anti-aircraft machine guns, 1,500 anti-aircraft searchlights, 850 barrage balloons, 45 detection radar stations and 1,500 fighters.
Anti-aircraft searchlights
In 1927, domestic searchlights began to enter service with Soviet anti-aircraft searchlight units. The most popular model was the O-15-2 - an open searchlight with a reflector diameter of 150 cm and a target illumination range of 5-6 km. In the pre-war years, air defense units were also equipped with Z-15-4B searchlights with an increased target illumination range of 7-9 km.
The searchlight installation was serviced by a crew of five people - an azimuth gunner, an elevation gunner, an azimuth corrector, an elevation corrector and a sound detector chief. In 1930–1931, the USSR began producing Prozhzvuk-1 search stations, in which the searchlight was synchronously connected to a sound collector, and four years later, improved Prozhzvuk-4 stations, which included a sound collector, began to arrive in searchlight shelves ZP-5 and the associated searchlight installation. “In order for the searchlight to illuminate the plane, it is necessary to determine where and what course it is flying from, the listeners point, give the course and elevation, the station chief says “Beam!” - here we catch it and then transmit it further along the chain to the zones of action of fighter aircraft and anti-aircraft troops,”
– this is how Fyodor Ivanovich Meshchanov, a participant in the defense of Moscow, described the work of the searchlight installation. Searching for enemy aircraft in the sky took a lot of time from searchlight operators and required a high level of training. In addition, the operation of the searchlight parts was influenced by weather conditions - wind speed and direction, as well as air temperature and humidity.
Moscow air defense
On the very first day of the war, the territory of the Soviet Union was subjected to massive attacks from German aircraft. One of the main targets of the Luftwaffe pilots was Moscow, which was defended by the 1st Air Defense Corps. The corps also included a searchlight regiment, numbering 72 accompanying searchlights. The main problem of the searchlight regiment was that its personnel had no combat experience, as well as experience in interacting with night fighter aircraft.
On July 9, 1941, the State Defense Committee adopted a resolution “On the air defense of Moscow,” according to which a continuous light strip 35–40 km deep was created around the city. In general, the air defense of the Soviet capital consisted of about 620 searchlight installations.
The first raid on Moscow
As of July 1941, the troops of the Moscow air defense zone under the command of Major General Mikhail Gromadin numbered 1,044 anti-aircraft guns and 585 fighters, which was more than twice the number of air defense troops in London. Knowing that Moscow's air defense was quite strong, the Luftwaffe command decided to attack the Soviet capital at night. The first massive raid was carried out by German aviation on the night of July 21-22, 1941. The attack lasted from 22:25 to 03:25 and involved 220 bombers (mostly He 111s, with smaller numbers of Ju 88s and Do 17s) flying in four echelons at intervals of 30–40 minutes.
German planes tried to break through to targets from different directions. Searchlight operators had to do a very difficult job in order to detect aircraft that managed to break through anti-aircraft artillery fire or escape from Soviet fighters. An eyewitness to those events, Daniil Zhuravlev, recalled:
“On the way of the German planes, searchlight beams kept rising into the sky, and our fighters immediately attacked them. Some bombers had to prematurely release their deadly cargo and turn back. But many of them continued to move forward, firing back from the advancing fighters.”
The raid on July 21–22 was a severe test for the Soviet searchlight pilots, as they had to engage experienced pilots who knew where their targets were. The main of these targets were railway stations, the Kremlin, aircraft factories and airfields in the inner zone of Moscow. However, German pilots did not expect to encounter organized night fighter aircraft and a whole network of light fields in the skies over Moscow. “Soon we saw 10-20 spotlights creating a light field. Attempts to get around it failed: there were a lot of searchlights on the left and right. “I ordered the flight altitude to be raised to 4,500 meters and the crew to put on oxygen masks,”
– recalled the German pilot Sergeant Major L. Havighorst.
According to various sources, Soviet anti-aircraft gunners and fighters managed to destroy from 15 to 22 German bombers (up to 10% of the aircraft that took part in the attack). Here's what the book by Lev Teleshev and Evgeny Safronov, “In the Beams of the Searchlights,” based on the memoirs of Moscow air defense servicemen, says about this:
“On the approaches to Moscow, enemy aircraft were met by our night fighters and organized anti-aircraft artillery fire. The floodlighters worked well. As a result of this, more than 200 enemy aircraft traveling in trains to Moscow were frustrated, and only a few broke through to the capital.”
Raids on Moscow in July, August and November 1941
The last major raid of German bombers on Moscow took place on the night of August 10-11, 1941 - about 100 aircraft took part in it. During November 17–19, German planes also tried to break through to Moscow, but their small groups were scattered by anti-aircraft fire and fighter aircraft.
Searchlight units made a special contribution to repelling night air raids on the capital of the Soviet Union, since it was thanks to searchlights that anti-aircraft gunners could fire more or less accurately, and if they did not shoot down an enemy aircraft, then force it to change course. On some nights in 1941, Soviet pilots and anti-aircraft gunners shot down up to 30–40 German aircraft. If the searchlight operators managed to catch an enemy aircraft with two searchlights at once, then it became practically blind and defenseless against anti-aircraft fire. In turn, the German pilots tried to suppress the searchlight installations with machine-gun and cannon fire and bombs, focusing on their rays. Thus, in the three searchlight fields of the 1st Air Defense Corps during 1941, more than 110 attacks on searchlight installations by Luftwaffe aircraft were recorded.
German pilots who participated in the raids on Moscow argued that the actions of Soviet air defense were very effective and threatened them with mortal danger. “Of all the flights I made in the East, the most difficult were the night raids on Moscow. The anti-aircraft fire was very intense and was conducted with frightening accuracy,”
– recalled bomber pilot Hans Bötcher. However, the work of the Moscow air defense units also had its drawbacks - the fire of anti-aircraft guns was too dispersed and entailed a large consumption of ammunition, and the searchlight beams were distributed unevenly (sometimes ten beams were aimed at one enemy aircraft at once, while another aircraft remained unlit) . And yet, the air defense units fulfilled their main task - preventing mass destruction and thousands of casualties among the population of the Soviet capital.
Source
How to use a spotlight
Most often, homemade LED spotlights are used to illuminate the yard, garage or other local areas.
You can use your imagination and make a more advanced model - make a portable device (on a tripod, which was mentioned earlier), which can be used for studio photo or video shooting.
Small spotlights with a power of up to 24 W can be used to illuminate car interiors. You can take them with you on picnics and create additional standard lighting. Before the New Year holidays, you can decorate the building with homemade spotlights.
Knowing how to make a reflector for your home, you understand that it is not difficult. This will require simple materials and tools, and the assembly process will take 2-3 days. If everything is done correctly, you can create original lighting fixtures that will decorate your home area.
Useful tips
- Do not overheat the surface. Soldering time is 2 seconds. Overheating the matrix will destroy the LED crystals.
- The temperature of the soldering iron tip should be optimal. A cold tip will not allow you to quickly solder, but its temperature will destroy the matrix crystals in the same way as an overheated one.
- Use an antistatic wrist strap when disassembling electronic devices.
- Degrease and wash with alcohol.
- Pay attention to the polarity of semiconductor elements and electrolytic capacitors. The wires are “ringed” to see if there is contact from the socket to the board.
- Repairing floodlights of any power requires the same knowledge.
- Read the floodlight instructions before use.
To repair a spotlight, you need basic knowledge in the field of electrical engineering, skills in handling a soldering iron, and measuring equipment. Requires the ability to read electrical diagrams and a certain level of accuracy.
To extend the life of the spotlight you need to:
- create a mode of high-quality heat removal (gaps between the housing and the wall, absence of heating elements near the spotlight);
- periodically wipe the spotlight's optics (dirt will degrade the light output and, when heated, will overheat the spotlight);
- monitor the tightness of the spotlight (moisture that gets inside the device will invariably oxidize the elements, create unnecessary contacts and destroy the necessary ones).
