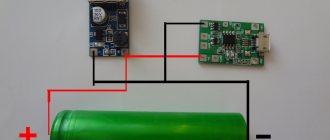
According to its main characteristics, innovative water cooling for PCs is much more effective than air systems using conventional coolers. The liquid absorbs thermal energy better, helping to ensure stable operation of the electronic device under severe loads, even in the heat.
What is computer water cooling?
Any electronic device requires protection against overheating. Older devices initially used fans, but gradually the power of processors increased to such limits that coolers in many cases no longer cope with the problem. The water cooling system uses liquid as a coolant to remove heat from the CPU to the outside. Due to better thermal conductivity, liquid installations solve the problem relatively better.
What does water cooling consist of?
In terms of the set of components, this installation resembles the systems that are installed on car engines. Liquid cooling consists of the following main components:
- Block with air fans.
- Water radiator.
- Water pump.
- Expansion tank.
- A set of water blocks - designed to transfer thermal energy from a heated PC component to the coolant.
- Hoses.
- Pipes.
How does computer water cooling work?
Liquid coolers remove heat according to a slightly different principle than conventional air coolers. Understanding how they work is relatively simple. Let's look at a brief description of how a water cooling system for a processor functions:
- The pump ensures continuous circulation of the coolant.
- Through a system of tubes, the liquid flows to the hot PC units, onto which the water blocks are screwed, where thermal energy is continuously extracted.
- Next, the heated coolant enters the radiator.
- With the help of fans, the radiator fins are blown through, and the liquid cooling system releases heat to the environment.
Introduction
From the editor (ALT-F13): It just so happened that we were able to publish the article just two months after it was written. During this time, the author did not sit idly by, but moved further towards more extreme cooling. Now Steff is engaged in assembling homemade phase-change direct-die systems, in common parlance - “freonok”. At the time of writing these lines, he has already demonstrated the second version of his system. However, the first one also worked great. So the lines with which the text of this article begins - “I became interested in extreme methods of cooling a computer quite recently, so this is a description of my first experiment in this area” can be considered invalid :)
I became interested in extreme computer cooling methods quite recently, so this is a description of my first experiment in this area.
I used water cooling for several years, but the moment came when I wanted more. You could, of course, buy a ready-made Asetek VapoChill or nVentiv Mach II (ex-Prometeia) system, but freons have their drawbacks. Firstly, this is the price, and secondly, the ability to cool only one element of the system. To cool, for example, a video card, you would have to buy another device and seriously bother with installation. Starting my acquaintance with extreme cooling by building a homemade direct-die system seemed to me quite a difficult task, so I chose a different path. An alternative to direct-die cooling are water chillers, that is, water-cooling systems with efficient cooling of the refrigerant, allowing to achieve temperatures below ambient temperatures. Today there is only one serial water chiller; it is a rather inefficient (about 0 degrees at 50-70W load) and expensive ($330) system from Swiftech. The Dutch OC-Shop.com promise to start selling their chiller, but over the past six months they have not made much progress towards the goal. Only the price of the product is known - 600 euros, which is even more than the Swifttech product. Due to the lack of effective mass-produced chillers, there are two options left - make it yourself or buy a chiller designed for another application. There are two main types of water chillers: based on phase-change or using Peltier modules. The first are a dual-circuit system, where the freon evaporator cools the refrigerant in the liquid cooling circuit. In the second case, water or other refrigerant passes through a water block cooled by Peltier modules. This type of chiller is more compact and easier to manufacture, but suffers greatly in terms of temperatures and the efficiency/energy consumption ratio. Thus, 500 W of the total power of the modules gives a liquid temperature just below zero degrees at a load of about 100 W. So, it’s decided - we’ll make a phase-change waterchiller with three cooled elements (processor, northbridge, video card core).
Water cooling for PC - pros and cons
Disputes about the advisability of purchasing liquid-based installations do not subside. First, let's look at the benefits of water cooling for PCs:
- A water-cooled computer makes less noise.
- Water coolers are much more efficient.
- Water cooling takes up relatively little space.
- The water cooling system can be used simultaneously to remove heat from several critical components of the device (video card, CPU, hard drive).
Disadvantages of PC water cooling:
- The device is relatively more complex; installation requires your own special skills or the involvement of a specialist.
- There is a potential risk of coolant fluid leaking onto PC components.
- A special liquid is used to operate the system.
- High price.
- Water cooling for PCs periodically requires preventative maintenance - cleaning microchannels and replacing the coolant.
Which cooling is better, water or air?
It is advisable to consider all options in specific conditions, based on the power of your own computer. For simple tasks, several standard coolers are enough, but relatively powerful devices require effective heat removal. Let's try to study whether water or air cooling of the processor is better, based on the following criteria:
- Ease of installation – air coolers are easier and faster to install.
- Cost – installation of the SVO will cost the user more.
- The use of liquid coolers allows for more fine-tuning, including many additional components in the circuit.
- Dimensions – more space is required in the computer case to install the radiator and pipes.
- Noise level – A water-cooled computer is quieter due to lower fan speeds.
- Efficiency - coolant fluid moves heat better, allowing you to increase the power of appliances.
Types of water cooling
There are many models of liquid coolers for CPUs, differing in power and size. Depending on the design features, the following types of these installations are distinguished:
- Water cooling of the processor is of an external type
- the water blocks are located in the PC case, but the installation itself is moved outside, representing a separate module. The advantages of this choice are that there is no need for large-scale modifications and the purchase of a new, more spacious case. The disadvantages of an external SVO are low computer mobility. - Internal SVO
- most system components are mounted inside system units. The advantages of this option are the high mobility of the computer, the appearance does not suffer. The disadvantages of this option are that installation requires mandatory modification of the PC case.
How to choose water cooling?
The existence of different SVO models allows you to purchase an installation in accordance with the specified parameters, which is optimal for a specific computer. It is advisable to select water cooling for the processor taking into account the following nuances:
- More fans help increase system efficiency and reduce rotation speed.
- The case should have enough space for the radiator, hoses and coolers.
- The length of the hoses must correspond to the dimensions of the housing.
- Select the power of the cooling system in accordance with the requirements for heat dissipation (TDP value of the computer).
- It is better to purchase a water block made of copper.
- It is desirable to have adjustable cooler rotation speed.
- Fans and water pumps that produce noise of more than 40 dB will cause discomfort.
- Design - lighting, coolant with fluorescent components and transparent tubes are important only if there is a transparent housing cover.
Water cooling fluid
Using plain water as a coolant is impractical and dangerous. The tubes quickly become contaminated with impurities, and in case of leaks there is an extremely high risk of short circuiting. Antifreeze is toxic and conducts electricity. The cheapest option is to fill the PC water cooling with distilled water. Experts advise not to experiment, but to switch to using ready-made coolant from trusted brands.
Examples of high-quality coolant for water cooling on PCs:
- Fluid XP+ Ultra
. - Feser One
. - Mayhems Pastel Coolant
.
Water-cooled case
The largest component of the air cooler is the radiator. When taking it outside, the user loses mobility, so it is advisable to carefully select a water-cooled PC case. The best option is models with seats in the top cover for radiator sizes of 360-420 mm. It is desirable that there is enough free space under the top panel to install a 3-section heat exchanger with a thickness of 45 mm or more.
Air conditioner chiller.
How to make a chiller from an air conditioner? — the question is actually the title of this thread.
The idea is quite simple. In our business, water is usually used to cool all kinds of moonshine iron. If the cooling system is closed (autonomous), then the water, after passing through the reflux condenser (distiller), is heated. You can cool it, for example, by passing it through a radiator blown with air. What if the air in the room is hot? Or you want to get the water colder, say 5-10 degrees, but in the room it’s still 25.
So I think the scheme is something like this. A storage tank, where there is a reserve volume of water, a supply pump, a heat exchanger-chiller, where freon cools the water by evaporation, our cooled piece of hardware, return with an additional air cooling radiator (optional) and back to the storage tank.
The question is the following: how to make a chiller (freon-liquid) from an air conditioner evaporator (freon-air)? I just don’t want to stick a standard evaporator into a jar of water. Maybe someone has experience of this kind or at least a link to the Internet with practical recommendations?
Last ed. 12 Apr. 10, 13:36 from igor223
Last ed. 12 Apr. 10, 14:04 from master24rus
master24rus
, there is an even simpler option - a coil in a container of water, from which the autonomous system pumps. The expansion valve (capillary) is placed at the inlet of this copper coil, which is the evaporator. Only this container needs to be thermally insulated from the external environment. I decided to do this in the morning, but suddenly there is a more elegant method.
TOP CPU water cooling
Purchasing budget SVO models from an unknown brand is a risky undertaking. Low-quality components lead to leaks, oxidation of parts and PC breakdowns. We offer a selection of good cooling systems from trusted manufacturers:
- Water cooling NZXT Kraken X62
– multi-color backlight, black body, aluminum radiator, copper water block, 140x140 mm fans, noise level up to 38 dB. - Thermaltake Water 3.0 120 ARGB Sync
– multi-color backlight, one fan 120x120 mm, copper water block, aluminum radiator, noise level 25.8 dB. - Corsair Hydro H60
– white backlight, TDP power 95 W, aluminum radiator, copper water block, noise level 28.3 dB, 120x120 mm fans. - Deepcool Gammaxx L240
– multi-color backlight, 120x120 mm fans, TDP 240 W, 2-section aluminum radiator, copper water block, noise level up to 30 dB. - Deepcool Maelstrom 240T
– blue backlight, 120x120 mm fans, TDP 150 W, noise level 34.1 dB, aluminum radiator, copper water block.
How to install water cooling on a processor?
Independent installation of a ready-made SVO on a household computer is a real task for the average user. The installation process follows the following procedure:
- Unpack the water cooling.
- Check components for defects.
- It is advisable to first connect the pump and check the SVO for leaks before installing it in the housing.
- Try on the hoses and water block in place.
- The hoses must be fastened without kinks, and the fittings must be installed with a gap from the PC components,
- It is better to place the radiator on the top or front panel.
- Prepare fasteners in accordance with the instructions.
- Mount the fans on the CBO radiator.
- The direction of the air flow must correspond to the marking.
- Install the radiator.
- Apply thermal paste and attach the water block.
- Connect the pump and lighting in accordance with the diagram, taking into account the variety of available connectors.
- Connect fans.
- Pump models with a USB connection have software that helps fine-tune the operation of the unit. In simple models, control is carried out by changing the voltage at the connectors.
- Fans can be configured using the utility or through the BIOS.
- Test the operation of the SVO and eliminate any defects that may arise.
Assembly
Here photographs will help more than a lengthy description in words.
I started by insulating the water blocks. The block was filled with foam, after drying, insulation was placed on the tubes and the whole thing was covered with electrical tape.
This way I insulated all three water blocks.
All that remains is to isolate the motherboard. I smeared the entire space around the socket and chipset with dielectric grease, did the same with the blocks, then made gaskets from foam rubber. I treated the back side of the motherboard and video card in the same way, then installed foam rubber and secured it with acrylic plates.
When the blocks were ready, I started working on the air conditioning. I completely disassembled it, being careful not to break anything.
To easily and painlessly bend the tubes in the right places, I recommend using a tool called “pipe bender” (I don’t know the exact Russian name).
The air conditioner evaporator is installed in the tank.
The same foam was used for insulation; I attached the temperature sensor to the pump installed inside.
Then I insulated the pipes near the compressor and installed a fan to cool the condenser.
After that I added methanol. The first check in a couple of hours showed the following results:
The water chiller freezes the refrigerant rather slowly, but the reverse process occurs in a well-insulated tank for quite a long time. After 12 hours of inactivity, the temperature rose to just -12C. And now - the final stage, installation into the system. Be sure to make every effort to insulate both the water blocks and the circuit boards. As you can see, the goal has been achieved - the processor is pleasantly cool at -9C.
DIY water cooling for PC
If they want to experiment a little and save money, many people try to create homemade liquid coolers from improvised materials. Let's look at an example of how to assemble an SVO at home:
- It is better to purchase a factory-made water block; homemade ones leak more often and dissipate heat worse.
- Hoses can use clear vinyl or oxygen tubing.
- It is advisable to take a pump with a capacity of 600 l/h or more.
- The radiator is suitable for a car or another old model of suitable sizes.
- Additionally, purchase a pair of fans with dimensions of 120 mm or 140 mm.
- To ensure that the water cooling system operates without leaks, select the clamps according to the size of the hose and clamp them as tightly as possible.
- After assembly, fill the PC water cooling with water and turn on the pump for several hours to detect leaks.
- Install the SVO on your computer and check its performance in test mode.
Manufacturing process
A small homemade chiller will require about 10-15 m. Create turns. To do this, you can use a strong stick or other suitable object. The tube is bent to obtain the required number of spirals so that the overall size allows the structure to be placed in a container.
A hose is attached to one end of the tube. We connect one end of the hose to a faucet or pump, and lower the other end into a sink or other available drainage device. Chiller is ready.
Using a copper chiller when brewing beer
The principle of operation of a do-it-yourself chiller:
- The device is immersed in the container.
- The hose is connected to the tap. The second end is lowered into the sink.
- Cold water turns on.
- Hot liquid is placed in the container.
- There will be a rapid loss of temperature in the liquid.
Using a homemade chiller
A self-made chiller may be required for the following purposes:
- cooling malt when making homemade beer;
- reducing the water temperature in the aquarium;
- creating optimal conditions in a small pool.
Brewing beer with a chiller
Having a homemade chiller will allow you to quickly cool any liquid at a convenient time.