In every family, over time there are many things that have become unusable. This includes children's clothing with stubborn stains, old T-shirts that have served their purpose, and jeans. But many thrifty housewives have found a way to breathe a second life into this rag. Crocheting rugs from leftover threads and rags, weaving them from various cords and ribbons, and making them using carpet-based techniques has become increasingly popular among them. Some methods for making such a home attribute are given later in the article.
Yarn preparation
Crocheting rugs from rags involves preliminary preparation of yarn from them.
It consists in:
- Choosing old things based on fabric structure that match each other.
- Cutting sorted raw materials into strips.
- Selecting ribbons by color (if necessary).
- Final preparation of yarn for knitting.
In order to correctly select the necessary material for making floor mats from rags, the first step is to sort it out and sort it by type of material. That is, put knitted items in one pile, denim in another, cotton in a third, synthetic in a fourth, and so on.
- After sorting the rags by fabric quality, you should prepare them for cutting. To do this, you need to trim all the seams, that is, along the bottom of the product and the sleeves.
- Next, lay the item on a hard surface and cut it into strips from one side seam to the parallel one, but not reaching it by 2-3 cm. This is necessary in order to create one continuous strip in the future.
- When performing this operation, you should know that it is recommended to cut dense fabric into narrow strips, and thin fabric into wider ones.
- After such a cut, in place of a continuous section of material, oblique cuts are made from one strip to the next, that is, the result should be a spiral-shaped continuous strip.
- If it breaks, it is advisable to sew the ends together by placing them on top of each other. Tying knots is not recommended. This will create inconvenience during further work and spoil the appearance of the finished product.
- After cutting the tape from very frayed fabrics, before winding it into a ball, it is advisable to treat its sections with fire. This technique will secure the cut threads and extend the life of the rug.
- The resulting yarn is wound into balls.
Simple patchwork for beginners
At first, to master the techniques, it is better to perform a simple example. Usually the question does not arise of how to sew a rug from scraps if they are cut into identical rectangles or squares. Such parts are sewn into strips, which are then easily combined into a fabric if they are arranged in parallel or in a more complex order.
A popular technique is to form an ornament of long and short colored ribbons on the sides of a rectangle located in the center. A bright, motley picture is obtained from triangles. It is not difficult to simplify their shape for further work: if you connect them with long sides, you get a square, and if you connect them with short sides, then a strip.
Having learned to make simple rugs from scraps of fabric with their own hands, and over time, having gained experience, many passionate craftswomen create luxurious original works, real works of art.
Simple round crochet rug
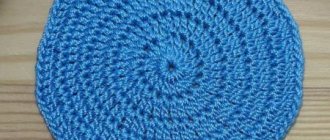
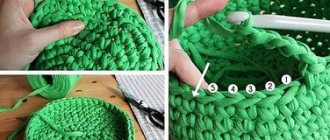
Crocheting rugs from round rags is not difficult if a person knows how to hold a hook in his hand and knows how to make two loops - a chain stitch and a single crochet stitch or just one stitch.
In order to avoid a hole in the center of the rug, experienced craftswomen recommend starting work with a ring of yarn formed by twisting it twice around the index finger. With this method, after knitting the first row of loops, it is convenient to eliminate the gap in the ring by tightening the end of the yarn remaining from the entanglement. Next, this remainder is hidden inside the knitted posts and cut off.
- After knitting the first row, it is closed by connecting the outer column to the first, pulling the captured working thread under the two arcs of the initial loop through the loop on the hook.
- Next, to complete the second row, you need to knit 2 lifting air loops. This technique prevents the canvas from skewing and also maintains its flat shape.
- Then knit the second row with the same single crochets. But in order to create the correct round, rather than domed, shape of the rug, you need to make 2 stitches in each subsequent loop of the previous row. Finish the row in the same way as the first.
Each subsequent circular row is knitted similarly to the one below, but to maintain the flat shape of the rug, additions must be made. Their number and frequency are calculated individually. This depends on the number of stitches in the first row, the thickness of the material used and the knitting density. With existing experience and skills, the need for additional loops is determined visually.
After reaching the desired diameter of the product, the outer row is closed, secured and the end of the yarn is hidden inside the knitted loops.
Round rug with braid
Another option for making a round rug is a combination of crocheting and sewing. This combined technique is used if the yarn is thick. It creates inconvenience during circular knitting. Therefore, to make such a rug, first a very long chain of air loops is knitted from prepared yarn. Then it is laid out evenly in a spiral, securing each subsequent turn with the previous one with a needle and thread. The result is a not too rough, but dense rug.
Floor rug made of round motifs
One of the interesting solutions for making floor mats is various combinations of round fragments. They can be done:
- from the same material in structure, but different in color range;
- from fabrics of different composition and color;
- from several types of patterns.
The motifs can be connected to each other both when knitting the outermost row of each fragment, and after they are completely knitted. It depends on whether there is a preliminary layout of the elements or whether it is drawn up during the knitting process, how many and what sizes the parts are prepared.
Openwork rug
Crocheting rugs from rags using openwork hems has become quite a popular phenomenon in the interior of many homes. This is due to the fact that the “gaps” formed between the rows can be designed in a variety of ways. For example:
- You can stretch contrasting yarn or ribbon through the vertical constrictions;
- used to introduce finishing details in the form of leaves, flowers, ruffles, etc. into a standard pattern;
- During knitting, an LED cord can be inserted into some circular openwork rows. This will not only create coziness in the room, but will become an original addition to the interior.
For openwork rugs, it is recommended to use yarn of thin and medium thickness, since the finished product made from thick material will look awkward and rough.
Any pattern, as well as a diagram for its implementation, can be applied to floor mats. A wide variety of them can be found on the Internet. Round napkin patterns are also suitable for this. But too complex and ornate openwork should not be used.
Firstly, performing operations with a large number of loops will be difficult due to the thickness of the yarn.
Secondly, in places with a large number of posts or their combinations, compactions will be created, which will adversely affect the appearance of the finished product and will cause discomfort during direct use.
Below are some patterns for floor mats:
A fun and useful hobby
There are many ways to make them; accordingly, these items are infinitely varied and can take their rightful place in any part of the apartment, in the hallway or in the kitchen, in the nursery, bedroom, living room. Beginners should not be embarrassed by the lack of skills; many of the techniques are quite simple, the work is fascinating, and step-by-step instructions and many ideas suggested by the masters will help overcome difficulties.
The peculiarity of homemade rugs is that, as a rule, “waste” material is used to create them, thus, savings and recycling of unnecessary things become by-products of creativity.
In the form of a scarf
Crocheting rugs in the form of a scarf from rags can be done in 2 options:
- longitudinal,
- transverse
The difference between these methods is that when knitting longitudinally, you must immediately set the desired length, since it will not be possible to increase it later. With cross knitting this possibility exists. The same applies to the width of the product. It can be changed in the longitudinal direction, but not in the transverse direction.
Since the production of rectangular rugs involves straight and reverse rows, it is recommended to choose double-sided patterns for them, that is, so that they look the same on the front and back sides.
If knitting is carried out using the most common method, single crochets, then in order to avoid compactions between the rows, with each subsequent knitting, the working thread should be grabbed not under the two arcs of the lower loop, but only at the back one. Thus, smooth horizontal or transverse stripes (depending on the direction of knitting) are formed on the front and back sides, created by the remaining front arcs.
Rectangular rugs with square motifs
You can also create a beautiful floor rug using numerous multi-colored elements or fragments that differ in the structure of the material used.
Their knitting pattern can be either circular rows or straight or reverse. This depends on the thickness of the yarn used. For thinner source material, openwork patterns will be acceptable. Motifs from straight and reverse rows are better suited to dense raw materials. The size of the fragments is determined individually and depends on the required parameters of the finished product.
The coupling of motifs with each other can also be done in two ways: when knitting the outermost row and after making a complete set of parts. The connection of separately connected motifs is done by crocheting or sewing with a needle and thread.
Patchwork - a classic of patchwork creativity
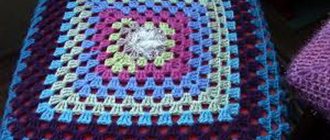
Making a patchwork rug requires a more careful selection of materials, and if a complex item is conceived, then considerable skill. This is the same technique used to make the famous “granny” quilts.
Since the product is intended for the floor, the fabric chosen is dense: denim, gabardine, drape or tweed from an old coat. You will need a lining made of solid fabric, also strong. If you have worn-out carpet, it will make an excellent base.
The design of the item needs to be thought out in advance, a combination of colors should be carefully selected, preferably bright ones, and one of the many designs developed in this area should be taken as a model. It is useful to familiarize yourself with what has been created by experienced craftsmen.
Many of the author's mosaic items are complex, exquisite, practically a master class. You will have to sew both by hand and by machine, because the amount of work is large.
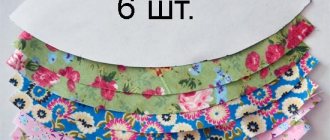
To assemble a kind of mosaic, which is a rug made from scraps of fabric using the patchwork technique, first take into account all types of elements that make up the selected ornament. A paper template is made for each of them. To make and work with them, use:
- scissors;
- paper or cardboard;
- pencils;
- fabric chalk;
- pins.
Using templates, cut out the required number of parts, leaving seam allowances. Referring to the image of the finished product or your own conceived pattern, the ornament is laid out, sewn by hand, then by machine, ironing each seam.
Pentagonal rug
A simple, but at the same time original solution is to make a pentagonal rug from an ordinary round rug. It is enough to make some calculations at the beginning of knitting. Before you begin making the first row around the starting ring, you should decide on the required number of loops, a multiple of 5. Depending on the thickness of the yarn, there can be 10, 15, and so on.
When knitting the second row, you should make constrictions from a certain number of air loops between the resulting five groups of loops. Their length is determined individually, based on the thickness of the material used.
When performing each subsequent circular row, do not forget about additionally adding loops in each first and final loop of a separate group. Their frequency is determined visually to avoid both the formation of a dome-shaped mat and the presence of tails.
After reaching the required diameter of the rug, the outer row is closed with a connecting post, the loop is secured, and the end of the yarn is hidden in the previously knitted rows.
Based
Crocheting rugs from rags can also be done on a base. This technique for making rugs is called carpeting. It consists of filling the warp cells with pieces of yarn or strips of fabric. The result is a fluffy, soft rug with a pile of a certain length.
In order to knit such a rug, you need a special base. Due to the repeated use of the finished product, it must be strong and wear-resistant, so Stramin is used for such purposes. But due to its high cost and difficulty in acquiring, experienced craftswomen have found an excellent way out of this situation.
They suggest making the base for the rug yourself. For this you will need strong cotton threads. Next, depending on the shape of the intended rug, as well as the thickness of the material used, you should knit a mesh with identical cells. This can be a fabric of regular alternation of single crochets and 1 chain stitch, or a single crochet stitch and 2 chain loops.
In the case of knitting round rugs, it is necessary to introduce additional cells into the mesh so that the base maintains an even horizontal position. The size of the mesh base must be equal to the final parameters of the product.
After making the frame, it should be carefully treated with waterproof glue. In this case, you need to ensure that all the cells inside are not covered with adhesive film. Then let the base dry and you can start making the mat itself.
It should be noted that a special hook is designed for knitting products in carpet technology, which is a slightly curved tool with a closing head and a thick wooden handle. This hook structure is necessary for the convenience of gripping yarn or material under the warp and forming a fastening loop.
In addition to knitting the base for the rug, you should also pre-prepare the yarn. This process involves cutting identical pieces of leftover thread or strips of fabric. The length should not be less than 6-8 cm, since in addition to the pile, its consumption is used to make a fastening loop. There must be many of them, because one unit is used to cover one cell of the base grid.
The color scheme in this technique can be varied. By using multi-colored pieces of fabric, you will get a bright rug with an abstract pattern. If a more clear pattern or ornament is provided, then it is necessary to prepare material of the appropriate color scheme. To make a rug with a pattern, the preliminary preparation also includes a diagram of the pattern in boxes for the convenience of translating it into reality.
To get started, you need to take the hook and place it under the broach of the first cell. Fold the prepared strip of fabric in half and grab the resulting loop with a crochet hook. Pull it over the base, holding the ends. Pull the connected ends of the strip through the loop formed. Use your hand to pull up the resulting pile, while securing the loop to the base. Exactly the same operation should be performed with each subsequent cell. For convenience, it is recommended to knit from right to left.
By filling one row of cells after another in this way, you get a continuous, fluffy and very soft floor rug.
Rugs for children's rooms
One of the most original products of this kind is assembled from pompoms. Be sure to use filler - centipon or foam rubber, so the carpet turns out soft and warm, very cozy. The most suitable material is natural knitwear.
This is a good choice for those who are interested in how to make a rug with their own hands for a child. The base should be dense; we recommend using an old bedspread. Pompoms are made the same size, they can be quite large, more than 10 cm in diameter. The blanks for them are cut out according to one round template.
Each piece is stitched around the circumference by hand using a simple stitch. Place a lump of filler in the center, pull the fabric into a ball, and secure it with stitching. It is better not to sew the balls to the lining, but to attach them with a glue gun.
A fluffy rug resembles a small lawn, especially if done in green colors. The work is painstaking, but not complicated, it is performed on a mesh intended for carpet weaving, or construction mesh can be used.Cut strips of the same length (up to 12 cm), fold them in two, thread them into the meshes using a crochet hook so that the ends form “grass” and tie them in a knot. In this way, fill the entire prepared mesh.
Made from denim
Due to the fact that denim fabric is quite dense and rough, it is recommended to make strips of it for knitting floor rugs as thin as possible. But the problem is that this material is very friable. During cutting, as well as twisting into balls, its structure quickly collapses and the strength of the prepared yarn is lost. To avoid such troubles, after cutting denim products into strips, it is advisable to treat their cuts with fire. The threads sintered along the edges for a long time prevent the yarn from shedding and create more comfortable conditions for working with it.
Due to its density, denim yarn is difficult to crochet. The best option for making a rug from this material would be to prepare a chain of air loops, crocheted, which will subsequently be assembled into a spiral and secured in layers.
Made from knitted fabric
Products made from knitted fabric are the most common and high-quality material for the manufacture of knitted floor rugs. It can be cut into strips of any width. The resulting yarn is soft, elastic, and durable. It does not crumble, but, when stretched, creates an even, twisted thread. When knitting from such yarn, very aesthetic and beautiful products are obtained.
Crocheting floor rugs from rags you don’t need in your wardrobe will help you not only gain handicraft skills, but also create additional comfort without financial expenses.
It's easy to make a loom with your own hands - Metalworker's Guide
A loom is a piece of equipment that makes it possible to handcraft beautiful and unique things. These can be rugs, special runners, tapestries, as well as bedspreads for furniture, scarves, bags, and even fabric for coats. It is quite possible to create a weaving loom on your own.
Among the Slavs, the creation of floor carpets, paths, and bedspreads is one of the “grassroots” techniques. At first, this craft was practiced only for the needs of ordinary people. These things did not require a serious level of skill, as required by weaving lace and weaving thin fabrics. And the tools used to create them were the simplest.
- In most cases, they wove ordinary paths from unnecessary fabric items that had served their purpose. Strong, dense threads were used as the base, but the transverse ones were strips of fabric. Homespun paths were popular in our country in the nineteenth century.
- Sometimes they took flax waste and straw to create rugs. Such things were usually laid out at the very entrance to the huts. To create both, in most cases an old loom made of wood was used.
- The workflow is quite easy. Transverse threads are pulled between the stretched threads of the base using the interlacing method. From time to time they will need to be compacted with some reeds, which are similar to combs. They used them to assemble transverse rows into a large canvas.
