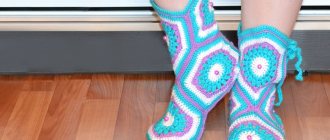
Handmade products are very popular nowadays. Standard gifts no longer surprise anyone, so presenting the hero of the occasion with an original soft toy, made in accordance with his tastes, is always more interesting. All that remains is to choose what a person might like.
Can you crochet? Publish your work on kru4ok.ru
Crochet cat
Among soft crocheted toys, one of the first places is occupied by cats, cats and kittens of different sizes and shapes. It's a comfortable look that everyone loves. Crocheted cats can be decorated according to the occasion, complemented with accessories, and original surprises can be created based on this image.
If you want to knit a cat, here you can find:
- Various descriptions of knitting.
- Step-by-step diagrams for creating nice accessories.
- Instructions for making keychains and knitted jewelry.
Knitted cats and cats can be given as the main gift, and can be added to another one. Children are always happy to receive a kitten as a gift. This is also pleasant for many adults, regardless of status and social status.
Fat cat crochet, lesson for beginners
The video should load here, please wait or refresh the page.
Pros of crocheted toys
Crocheting helps to achieve a textured surface of the product. This is very valuable if the gift is intended for a child. For kids, you can create toys from textured yarn with tactile details. They will be able to massage their fingers and palm during games, which has a beneficial effect on fine motor skills responsible for thinking and speech development.
A soft knitted toy can be squeezed as you like - it will not break and will help train your hands. A variety of hypoallergenic knitting materials allows you to choose something that will not cause harm to the owner.
Crochet cat - amigurumi toy, video tutorial part 1
The video should load here, please wait or refresh the page.
Crochet cat - amigurumi toy, video tutorial part 2
The video should load here, please wait or refresh the page.
There are many original gift ideas for adults. A cute soft crocheted cat can have the features of the future owner and symbolize his hobby. Great pleasure can be gained from contemplating frame toys that are intended for use as interior decoration.
Decide what the future toy should look like. Then choose any of the schemes presented on our website and start creating.
Scops owl cat
First, 4 master classes from Anna on crocheting adorable toys.
In this master class we will crochet a cute scops owl cat. This cat is perfect for a child. The cat turns out to be small. You can knit it in any color.
To knit a cat we will need:
- Yarn “Children's Novelty” in pink, white and raspberry colors;
- “Iris” threads for embroidering the face;
- Needle;
- Hook;
- Sintepon;
- Scissors.
We start knitting with white yarn. Let's make 2 ch in order to start knitting the first row.
1p: 6 sc in the 2nd loop from the hook. 2p: 2 sc in the loop. At the end of the row there are 12 columns. 3p: 1 RLS, 2 RLS in a loop - continue alternating like this until the end of this row. 4p: 2 RLS, 2 RLS in a loop - alternate further until the end of the row. 5p: 3 RLS, 2 RLS in a loop - we will continue to alternate like this. 6p: 4 sc, 2 sc in the loop - we will continue to alternate like this until the end. 7-10r: 1 sc per loop (30 sc). 11p: 4 RLS, decrease - continue this alternation until the end of the row. 12p: 3 RLS, decrease - we will continue to alternate like this until the end of this row. 13r: 2 RLS, decrease - we knit like this until the end of the row.
Stuff the part with padding polyester. And then the white yarn can be torn off. photo 1
14r: raspberry yarn. 2 sc, increase - continue to alternate along the row. 15r: pink yarn. 3 RLS, increase - knit like this until the end of the row. 16r: raspberry yarn. 4 RLS, increase - we will continue to alternate until the end of this row. 17r: no increases in pink yarn. 18r: no increases in raspberry yarn. 19r: no increases in pink yarn. 20 rubles: no increases in raspberry yarn. 21r: pink yarn. 4 RLS, decrease - continue alternating until the end of the row. 22r: raspberry yarn. 3 RLS, decrease – we knit like this until the end of this row. 23r: pink yarn. 2 sc, decrease - alternate further along the row like this. 24r: raspberry yarn. 1 sc, decrease - continue to alternate until the end of this row and fill with padding polyester. 25r: pink yarn. 2 columns together. photo 2
We knit handles.
1p: 6 RLS in a loop. 2p: 6 RLS. 3-9r: raspberry yarn, 6 sc in a row.
We knit the legs with white yarn.
1p: 6 RLS in a loop. 2-8r: 6 sc in a row.
We knit a white tail.
1p: 6 sc in the loop. 2-11r: 6 sc in each row. photo 3
We knit the ears with white yarn.
1p: 6 sc in the loop. 2p: 2 sc in each loop. 3p: 12 RLS. And sew the eye with sc. photo 4
We knit a cap with crimson yarn.
1p: 6 sc in the loop. 2p: 1 RLS, increase - and so we knit increases along this row. 3-5r: no increases. 6p: 2 RLS, increase - continue alternating until the end of this row. 7-9r: no increases. 10r: 1 RLS, increase – alternate until the end of the row. 11-13r: no increases. 14r: 2 RLS, increase - continue alternating like this until the end of the row. 15-17r: no increase. 18r: 3 RLS, increase - we will continue to alternate like this until the end. 19-20r: no increases. 21r: we knit with a crawfish step. And from pink yarn we form a pompom and attach it to the cap. photo 5
We knit a cat pillow with pink yarn.
We cast on 10 VP and then 3 more loops instead of the first stitch. Next we knit 4 rows of dc. We knit 2 squares like this. Photo 6
We sew the squares together with RLS, filling the pillow with padding polyester. photo 7
We sew all the parts into place. We also use “Iris” thread to embroider the cat’s sleeping face. photo 8
The crocheted Scops Owl cat is ready!
Multicolored kittens
An adorable cat family is looking for a mother. These crumbs are knitted from monochromatic leftover balls.
You need to knit a kitten in the round on 5 regular or circular knitting needles. Let's start working from the bottom, casting on only 12 loops. In the second row we will double the number of loops, and in the third we will bring them to 30
Then we knit monotonously, without changing anything, 32 rows. Now attention! Cut out a circle from felt or any other dense fabric and sew it to the beginning of the knitting, to the kitten’s butt. We put a small bag with a weighting agent inside at the very bottom. The rest of the space is filled with filler. Fold the crown in half and sew it together
We sew the corners diagonally, thereby highlighting the ears. First we sew the neck with a thread, tightening it a little, and then we tie a thin ribbon with a bow on it. For the tail and limbs we cast on 6 loops. For the paws we knit 12 rows, for the tail, as many as you want. We sew the tubes and attach them to the kitten’s body. All we have to do is design the face, embroider the navel and give it a poster. Decide for yourself what to write on a piece of paper.
See similar master classes: How to knit a snowman.
Red cat
Bright red cats! How beautiful and sweet they are. They are soft and affectionate. And in this master class we will tie one of these cats with a hook. It will also be very bright and unusual.
To knit a red cat we will need:
- orange, lilac yarn;
- hook;
- padding polyester;
- pink felt;
- needle;
- thread;
- eyes (beads).
So, let's start knitting toys. We will start knitting the cat from the hind legs . We will then connect them so that it will not be visible that they are connected separately.
Let's crochet the first two loops. In the second from the hook we need to knit six simple single crochets. Let's make six increments. And in the third row we will also make increases. But only here there will be only two of them. We knit seven rows.
Then we knit the second one. That is, in total you need to knit two legs with a thickness of fourteen columns.
Now we will connect them with a single crochet. Simply insert the hook under the loop of the second leg and knit both legs together.
Now we will knit in the round, not paying attention to these paws. We will knit two rows and make four increases. Let's knit ten more rows. And we will make four decreases in each of the next four rows.
And then we’ll make some additions for the head . We make six increments in two rows. And we knit only seven rows. Then we make four decreases in two rows. We stuff the toy tightly.
Now we will connect both sides of the head. We knit like this: we put both sides together and then we have three half double crochets. The hook needs to be inserted into the loop of the front and back sides, that is, we sew the hole.
Next we knit single crochets, and in the last three loops we again knit half double crochets. We got these ears.
Now let's tie the front legs.
We knit six stitches into an amigurumi ring. We make six increments. We make increases again, but only two. We knit five rows. In the sixth we make two decreases and knit eight rows. You only need to stuff the bottom of the paws.
the tail in the same way as the hind legs. That is, it will be fourteen columns thick. But you will need to knit twenty rows.
Now we will tie the handbag and bow. We will have a postman cat.
The bow is knitted like this: we make four loops and the fourth from the hook we knit three double crochets. But we don’t need to knit them all the way through. We will knit only one loop and yarn over.
And then we’ll make four chain stitches and knit a single crochet to the same point where all the stitches come from. And let's make one more such element.
And the handbag is even easier to knit. We make ten to twelve loops and knit seven rows in the round without decreases or increases. We make the strap from a chain of air loops.
Cut out a heart from pink felt.
And we will sew this heart on the cat’s tummy.
We embroider the nose with lilac yarn and make a few stitches on the ears.
Sew or glue the eyes. Sew on the bow.
This is the red cat we got!
Tips from needlewomen
Crocheting a Cat hat is not a quick process, but the result is worth the time and effort. To make the product neat and practical, experienced needlewomen advise:
- Choose high-quality yarn that is pleasant to the touch. This will make wearing the hat comfortable.
- Try to knit tightly enough so that no holes form between the stitches, otherwise the hat will look sloppy.
- Fleece is the best lining for a winter Cat hat.
- For decorative elements, it is better to choose yarn with excellent texture, this will enhance the accents.
- The design of the product should be thought out in advance.
By following these tips, you can crochet a beautiful, high-quality Cat hat.
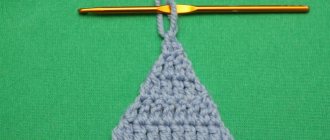
Green cat
Bright crocheted toys always look unusual and colorful. And in this master class we will knit a small cat that will decorate the house and bring a great mood!
To knit a cat we will need:
- Yarn (two colors);
- Hook;
- Needle;
- Filler.
Description
We will knit the body of the toy and the head together, inseparably.
You can choose any yarn colors you like. In this case it is green and lilac.
We will start knitting from the body of the main (green) color.
We make an initial ring and knit six single crochets into it.
Next we will have incremental rows. In them we make six additions and we will have four such rows in total.
Now we’ll just knit three rows.
Then knitting should be gradually reduced. In two rows in a row we will make three decreases. We'll just knit one row.
Again two rows and three decreases in each of them. And we’ll just knit two rows.
And then we alternate a row with two decreases and a row without decreases. We repeat this alternation twice.
And now we will add on the contrary to knit head . First we add to each column, and in the second row we make increases to every third stitch.
We simply knit five rows.
And in four rows we will further make six decreases, after which we will pull them together and get the finished part.
We will tie only two paws . They will be in the back.
We make an amigurumi ring and knit six columns there. In two rows we will make six additions. We’ll just knit two rows. Let's make six decreases and knit a row. Let's make two decreases and knit a row. We sew the piece together using single crochets or connecting loops.
We knit the second leg in the same way, but here we start with lilac yarn. And we knit four rows with it. And then comes green.
the tail very simply. In the amigurumi ring we make six columns and in the second row we make three additions. We knit four rows. We knit it all with lilac threads. And then twenty rows of green.
All that remains is to tie the ears .
First there are six columns. The second row also consists of six columns. And then we’ll make three additions in two of them. Let's knit the second ear.
Now we sew on the details. First the paws. First, use a needle and thread to mark the fingers.
Next we sew on the tail and ears.
We will also tie a lilac bow around the cat’s neck.
We make five loops and knit an unfinished stitch with three crochets into the starting loop. We also make two such columns. And now we knit everything at once. We make four chain stitches and a connecting stitch into the initial chain. We repeat our element again.
Sew a bow on the cat. We embroider the nose and glue on the eyes.
This is what a cat looks like!
How to knit a graceful cat with 4 legs, watch in this video:
Cat hat option for women
Many women like a hat with cat ears. However, children's models with separately made ears or muzzles are not suitable for their age. In this case, you can knit a hat, the ears of which are created only by the style of the product.
A hat with ears without unnecessary decoration is a great option for women
This hat is very easy to make. It can be simply a knitted rectangle, the length of which is equal to the circumference of the head, and the height is equal to the depth of the hat. The finished rectangle is sewn on the side, and a seam is placed on the top of the resulting cylinder. In this case, the side seam should be located on the back wall of the product, dividing it in half.
Love cats-hearts
On Valentine's Day, the main gifts will be hearts. Of course, you can buy a gift for your loved ones in the store. But what could be better than a gift made with your own hands? And this master class will help you knit little cats in love in the shape of hearts.
To knit cats we will need:
- Yarn of two colors;
- Hook;
- Sintepon;
- Beads;
- White felt;
- Needle;
- Hot glue.
We will start knitting with a cat. And then we’ll knit him a cat.
We need to knit the heart first. To do this, we will make a sliding loop and knit the first six single crochets into it. Next, the knitting needs to be expanded and the number of loops increased. And in the second row we will increase each stitch.
In the third row we increase every second stitch, and in the fourth row we increase every third stitch of the previous row.
We have formed twenty-four columns and now we knit two rows without adding.
We knit another half exactly the same.
And now we connect them by knitting together three loops of one half and the second half of the heart using single crochets.
And we knit two rows in a circle.
Now we will make decreases. First we will make six decreases in a row.
Then we knit two rows without them.
Again we make six decreases and knit two rows without them.
And again the same thing. We stuff it with padding polyester.
And then we will make six decreases in each row until the hole is closed.
Now we move on to the cat's ears.
We need to knit the first six stitches into a sliding loop. Now we make three increases, that is, through one loop. And we knit two rows without increases.
All that remains is to tie the tail. Here we will knit five stitches in a sliding stitch and in the second row we will make five increases, that is, in each stitch.
And we will knit twelve rows in a circle. Let's fill it with padding polyester.
All the details for the cat-heart are ready.
Sew them on using a needle.
Now let’s cut out circles from white felt and glue them in place of the eyes with hot glue.
Glue beads on top. These are the eyes you get.
Using pink yarn we embroider a nose and a smile for our cat.
And you can make a butterfly from a grosgrain ribbon and decorate the toy with this accessory.
We are knitting another similar toy, only a girl.
A girl can have her eyelashes embroidered. And we make the nose to match the cat. Ours is black.
This is such a loving couple of cats ! This is a great gift for Valentine's Day.
Cardboard ears
The most inexpensive way in terms of money and time to get ears like a cat’s is to make them out of cardboard.
For cardboard ears you will need the following:
- cardboard of two colors (outer and inner ear);
- paper glue;
- scotch;
- scissors;
- hair band.
In general, ears made of any material are attached to the headband, so this accessory will be considered in the manufacture of cat ears of different compositions.
Using the template presented below, we cut out 6 parts from cardboard: 4 outer ears, 2 inner ones.
We glue the parts of the inner ear to the two parts of the outer ear, after which we glue the two large parts at their top with glue. After drying, attach the ears to the headband. To do this, bend the sharp corners at the base of the parts inward, and then attach them to the top of the rim with a thin strip of tape.
If there is no headband available, the ears can be attached to a cardboard hoop from a strip of cardboard, as shown in the diagram:
Cardboard parts can be covered with satin or other fabric, just like the headband itself, and you can also use patterns made from faux or real fur, which are also set with glue or silicone.
Kitty Kitty
Let's talk today about how to knit a Kitty cat for a girl using threads, a crochet hook and your own imagination. Master class by Lyudmila Alexandrovna.
To work we will need:
- white and pink threads,
- eyes,
- glue,
- regular thread with a needle,
- wires for hands
- and filler.
The time to make a toy is approximately 3 hours (for beginner craftswomen, perhaps about 4.5 hours). Level of preparation for knitting: slightly above elementary.
Act one. Let's start with the head.
In any business you need to start from the head. At the same time, we do not need a circle for knitting, but an oval, because the head will have an unusual oval shape.
Photo 1 shows the beginning of knitting the head.
When about 7 cm is knitted, we close the knitting and get a head like this (photo 2).
Act two. We make the ears and muzzle.
What a cat without ears! Our beauty needs them too. In order to knit the ears, we knit two loops together and start knitting in the round, gradually increasing them to form a hemisphere. We repeat everything again and get ears like this.
Now we have both ears and a head. We sew the parts to each other. Also, don’t forget to glue on the half-bead eyes.
Using black thread we embroider the mouth and mustache, and using pink thread we make a charming nose.
Act three. Making the body.
Our cat's body will be pink. It needs to be made 8 cm high. The shape of the body is a bit like a pear; at the bottom you need to knit the wider part, gradually decreasing the loops towards the top.
When the part is ready, you need to fill it with filler and sew the body to the head. Also, for beauty, you can knit a small pink flower, sew a bead inside, also pink, and decorate the cat with it.
In order to give Kitty the look of a real cat, you need to knit a skirt for her from pink threads and sew it to the body.
Act four. Kitty's hands.
Now you need to make the front legs for Kitty.
First we thread the wire through the places of the hands. Then we start knitting the paws. To do this, you need to knit a chain of 8 loops, called air loops, and then knit a height of 6 cm.
Repeat everything with the other hand. Here they are, Kitty's hands.
Next, you should fill the arms, thread them through the wire places and sew them to the body.
This is how our kitty Kitty looks now. However, she lacks hind limbs, which we will call legs.
Act five. Legs.
In order to tie the feet, you need to make pink Kitty boots. To do this, knit in a circle using a pink thread, and then knit a sock. We repeat everything again, and we get the following.
Now using white thread we knit the shin and knees. Their height should not exceed 4 cm.
Now in Kitty’s body we insert wires into the places of future legs.
We sew pink shoes and feet together and stuff them with stuffing. Sew the legs to the body. And now our Kitty is completely ready.
Look how it turned out. A beautiful and cute toy, isn't it?! Her paws are bending.
May you also get the same cute cat!
Kitty knitting video:
Tools and accessories
The main tools in the work are knitting needles (the size must be selected in accordance with the plan of a particular product). Next you will need threads of one or more colors.
There are different types of needles such as straight knitting needles which come in aluminum, wood or plastic. Plastic needles can become brittle if not used for a period of time. Straight knitting needles come in different lengths and sizes. It's helpful to have a range of needle sizes so you can change them to get the right tension for a running project. You need to choose a length that will hold the stitches needed for a particular product and that will be comfortable to work with.
You might be interested in How you can replace sodium tetraborate in slime: other thickeners
Attention! You can use a full set of knitting needles so that you always have the right accessory at hand. Another type of knitting needle is a round needle
Round needles are long, flexible needles with a point at each end. These round needles are becoming increasingly popular because they eliminate seams and the need to constantly turn your knitting over at the end of a row.
Another type of knitting needle is the round needle. Round needles are long, flexible needles with a point at each end. These round needles are becoming increasingly popular because they eliminate seams and the need to constantly turn your knitting over at the end of a row.
Knitting yarn is a long, continuous strand of interwoven fibers. This yarn can be made from any number of synthetic or natural fibers. Due to differences in characteristics, the type of project will determine the variety of knitting yarn. There are different types available in the market such as wool, angora, silk, cashmere and vicuna.
The hook has a notch at one end for catching loops of yarn and pulling them through the stitches. The row counter is used to count the number of rows that have been linked. This is a cylinder with a numbered dial that fits over the needle and turns at the end of each row. This is especially useful when working with long, patterned repeats.
Additional materials may be required:
- Scissors.
- Transparent waterproof adhesive.
- Textile.
- Metal pins.
- Safe acrylic paints.
- Ruler.
- Clips or pins.
- Hook.
Important! Experts recommend using only tools and auxiliary parts that are indicated in specific diagrams or instructions (MK). When using metal or plastic elements, the child may be injured
Beginners must follow safety precautions when knitting, and also use only high-quality and proven equipment and decorations.
If metal or plastic elements are used, the child may be injured. Beginners need to follow safety precautions when knitting, and also use only high-quality and proven equipment and decorations.
Cat in a vest
Master class by Dina Kiseleva on crocheting toys .
Are you wondering what to give your loved one on Defenders of the Fatherland Day ? Are you already tired of socks, mugs and shampoos year after year? Surprise your man - give him a cat! We offer an original gift for February 23rd for men to make with their own hands.
Boots
Let's start knitting from the bottom, here is the pattern of the sole:
1 row. 8 VP (air loop), 1 VP (air lifting loop).
(photo 01) 2nd row . 7 sbn (single crochet), 5 sbn to the outermost - so we will turn to the other side of the row, (photo 02)
7 sbn and to the extreme again 3 sbn (turn to the next row). (photo 03)
3rd row. 8 sbn, three times two in one column, 8 sbn, again three times two in one sbn. (photo 04)
4 row . 9 sc, 2 in 1 sc, 2 sc, 2 in 1 sc, 9 sc, 2 in 1 sc, 2 sc, 2 in 1 sc, 2 in 1 sc, (photo 05)
5 row . 12 sc, 2 in 1 sc, 2 in 1 sc, 2 in 1 sc, 13 sc, 2 in 1 sc, 2 in 1 sc, 2 in 1 sc, 1 connecting post. (photo 06)
6th row. 37 sc, but we make stitches into the inner thread of the loop of the previous row. (photo 07)
7 - 8 rows . 37 sc. (photo 08)
9 row. 9 sbn, 1 skip, 1 sn (double crochet), 1 skip, 1 sbn, 1 skip, 1 sbn, 1 skip, 1 sbn, 1 skip, 19 sbn. 10 row . 6 sbn, 1 skip, 1 sbn, 1 skip, 1, sbn, 1 skip, 1 sbn, 1 skip, 1 sbn, 1 skip, 16 sbn. (photo 09)
11 row . 5 sbn, 1 skip, 1 sbn, 1 skip, 1 sbn, 1 skip, 15 sbn. (photo 10)
12 row. 4 sbn, 1 skip, 1 sbn, 1 skip, 1 sbn, 1 skip, 13 sbn. (photo 11)
13 - 20 rows . 20 sc. (photo 12)
Let's make a second boot and fill both with padding polyester or holofiber (whatever synthetic fillers you have). It is necessary to fill it so that the sole does not bulge, but the figurine’s legs are not too soft. (photo 13)
Trousers
For the pants we take green yarn and continue to knit with it above the boots. In our case, the yarn is melange with shades of camouflage).
1 row. 20 sc. 2nd row. 20 + 6 = 26sc. Let's add every fifth column. 3rd row. 26 + 4 = 30sc. We will distribute the increases evenly. 4 row. 30 - 6 = 24sc. Decrease every fourth column. Rows 5-18 . 24 sc, turn and make 6 sc and 1 runway (lifting aerial loop) three times. We knit such protrusions from the inside on both legs. (photo 14, 15)
Let's fold both parts with protrusions and connect them with connecting posts (ss) (photo 16)
19 row. Let's combine everything in one circular row 42 sc. 20 -25 rows .
42sbn. Straight knitting. (photo 17) Row 26. 42 - 3 = 39 sc. We skip 2 sc from the back, and 1 sc from the front. 27 row. 39 - 3 = 36 sc. Let's repeat the decreases in the same way.
Body
28 - 29 rows. 36 sc. I recommend moving the beginning of the row to the side line so that the steps are less noticeable when changing colors. Change the thread from green to brown color of the belt. (photo 18)
30 - 34 rows. 36 sc. Let's start with the vest. One row is blue, one is white. (photo 19)
35 row . 36 + 6 = 42 sc. Increases every sixth. 36 - 38 rows. 42 sc. Row 39 . 42 rows. Here we will take gray yarn and continue knitting, but we will not hook the entire column, but only its inner half. (photo 20)
40 - 41 rows . 42 sc. 43 row . 42 + 2 = 44 sc. Let's add on the chest side. 44 row. 44 sc. 45 row. 44 - 2 = 42 sc. Let's reduce it at chest level where we added it. 46 row . 42 - 6 = 36 sc. 47 row . 36 sc. (photo 21)
48 row. 36 - 4 = 32 sc. We make decreases strictly on the shoulders: 2 on the left, 2 on the right. 49 row. 32 - 4 = 28 sc. Decrease in the same way as row 48. 50 row. 28 - 4 = 24 sc. We also place reductions. You can fill the shoulders and chest with sitepon. (photo 22)
51 row. 24 - 2 = 22 sc. Let’s also decrease left and right, this is where the neck begins. 52 - 53 rows. 22 sc. 54 row . 22 - 2 = 20 sc. (photo 23)
Head
55 row . 20 + 4 = 24 sc. Let's start with the head. 56 row. 24 + 6 = 30 sc. Two in every fourth column. 57 row . 30 + 6 = 36 sc. Two in every fifth. 58 row. 36 + 6 = 42 sc. Two in every sixth. 59 - 62 row. 42 sc. (photo 24)
63 row. 42 - 6 = 36 sc. 64 row. 36 - 6 = 30 sc. Row 65 30 - 6 = 24 sc. Row 66 24 - 6 = 18 sc. 67 row. 18 - 6 = 12 sc. 68 row. 12 - 6 = 6 sc. Let’s close the knitting using the “through the column” method, i.e. we knit through the post until the hole closes, cut off the thread and hide it inside. (photo 25)
Vest
We still have an unfinished vest. When on the 39th row we switched to a gray thread, we left the outer side of the column free. Let's continue knitting 42 sc on the outer thread in white. (photo 26)
1 row. 42 sc. White all round. 2nd row . We knit in blue until the middle of 16 sc, tying a white thread inside the row. (photo 27)
3rd row . 15 sc. Turn and change the thread to white, knit the blue one inside the row. 4 row . 15 sc. Blue row, white is tied in. 5 row . 15 sc. White row, hide the blue one inside. 6th row. 15 sc. Blue row, white - inside. 7th row. 15 sc. White row, blue - inside. 8 row. 7 sc. Blue row, white - inside. 9 row . 6 sc. White. 10 row .4 sbn. Blue. 11 row . 3 sc. White. 12 row. 2 sc. Blue, cut both threads and repeat the same operation with the second front strap. Now let's do the same from the back. 1 row . It was all-round white. 2nd row. 14 sc We knit with a blue thread, departing from the front blue row of 5 columns. (photo 28)
3 - 7 row. 14 sbn. We alternate white and blue rows. 8 row. 4 sc. Blue. 9 row. 3 sc. White. 10 row . 2 sc. Blue. It is necessary to repeat the second shoulder part of the backrest. (photo 29)
Hands
For the hands, take a gray thread. Let's make an amicable ring again. 1 row. 6 sc. (photo 30)
2nd row. 6 + 6 = 12 sc. 3rd row . 12 + 6 = 18 sc. 4 row. 18 + 6 = 24 sc. 5 - 8 row . 24 sc. (photo 31)
9 row. 24 - 6 = 18 sc. 10 row. 18 - 6 = 12 sc. (photo 32)
11 - 16 row. 12 sc. 17th row. 12 + 4 = 16 sc. 18 - 19 rows. 16 sc. 20 row. 16 + 2 = 18 sc. 21 row. 18 sc. (photo 33)
22 row . 18 - 6 = 12 sc. 23 row. 12 sc. Let's make an elbow: turn, 3 sc, (photo 34) turn, 2 sc, 24 row . 12 sc. 25 row. 12 + 6 = 18 sc. 26 - 28 rows. 18 sc. (photo 35)
29 row. 18 + 2 = 20 sc. 30 - 32 rows. 20 sc. 33 row. 20 - 4 = 16 sc. 34 row. 16 - 4 = 12 sc. Row 35 12 - 6 = 6 sc. And then we’ll close our knitting. Let's sew the arms to the body, sew the shoulder seams of the vest, embroider a buckle on the strap with orange thread, and make “fingers” on the paw. (photo 36)
Ears
For the ears we take the same thread that was used for the arms and head. 1 row . 6 sc. 2nd row. 6 + 3 = 9 sc. 3rd row. 9 + 3 = 12 sc. 4 row. 12 + 3 = 15 sc. 5 row. 15 sc. Cut the thread and make a second ear. (photo 37) Sew it on.
Tail
We knit the tail with gray thread. 1 row . 6 sc. 2nd row. 6 + 6 = 12 sc. 3rd row. 12 + 3 = 15 sc. 4 - 35 rows. 15 sc. Add just a little bit of filler. (photo 38) Sew it in place.
Nose to muzzle
For the nose we use a thread of white wool. In our case, the thread is thinner than all those used, therefore, we will make 4 rows and 24 columns, if you have a thicker thread, look at the area of the fabric, it may be better to stop at 3 rows and 18 or 20 columns. 1 row . 6 sc. 2nd row. 6 + 6 = 12 sc. 3rd row. 12 + 6 = 18 sc. 4 row. 18 + 6 = 24 sc. (photo 39)
Now we will use the same thread to tie the part along the entire edge and sew it to the muzzle, putting the filler inside. (photo 40)
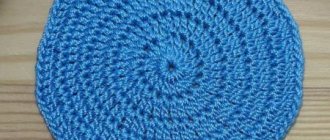
Blue beret
The same yarn was used in the vest. 1 row. 6 sc. 2nd row . 6 + 6 = 12 sc. 3rd row . 12 + 6 = 18 sc. 4 row . 18 + 6 = 24 sc. 5 row. 24 + 6 = 30 sc. 6th row. 30 sc. (photo 41)
7th row. 30 - 3 = 27 sc. On one side, make 3 decreases and finish the row. (photo 42)
We will embroider a “cockade”, “put it” on the head with a characteristic crease so that the beret does not get crushed by a pancake, and put a lump of padding polyester under the convex part. Using threads of a darker tone, we will model the cat’s nose. (photo 44)
Eyes can be sewn on ready-made, purchased at a crafts store, or you can also make them using threads. We tied a green backing under the bead and inserted a bead pin into the middle of the backing and folded the pin over. (photo 43)
Sew on the eyes. (photo 45)
Our paratrooper cat is ready to serve the Fatherland!