Best crafts for elementary school
Primary school students enjoy creating various crafts with their own hands. Children are especially interested in working with non-traditional materials.
Lush flowers made from napkins
To do this, take two-layer napkins. Next, fold the napkin to form a square. This square must be cut around the edges to obtain a circle.
If desired, you can make the edges wavy. You need to put a stapler in the center of the circle.
To increase the volume of such a flower, it is good to use two or three napkins at once instead of one.
This multi-layered circle is the template for the flower. The volume of the flower depends on the number of layers. Now gradually lift each layer up, pressing towards the middle.
After this, straighten the resulting structure. You will get a lush flower. You will need quite a large number of such flowers.
Village of gnomes
An excellent craft option for elementary school would be making a fairytale village from toilet paper rolls.
To work you need to prepare:
- 6 toilet paper rolls,
- PVA glue,
- colored and white paper,
- paints,
- scissors,
- brush.
Operating procedure.
- The bushings must be cut in half; this is the basis of the house.
- Cut out 6 rectangular blanks for wall decoration from white paper, draw colored windows and doors on them.
- Glue the halves of the bushings with the resulting parts, carefully bending the edges inside the cylinders.
- Cut out and glue roof cones from colored paper.
- Glue the roofs.
- Attach the houses to a cardboard base and add a spruce cone to the village.
The original gnome village is ready.
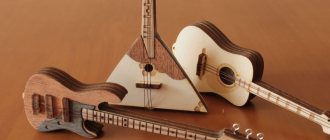
Wood decor
When walking in the park or through the forest, you can see many intricately curved sticks of different shapes and sizes. If you take a beautifully intricate piece of wood, it can successfully act as a wooden craft in craft lessons.
You can create a stylish home decoration by painting the stick white with occasional red stripes. You also need to tie a strong rope with which you can hang the decoration on the wall.
- Crafts for kids: ideas on how to make cool crafts with your own hands (125 photos and videos)
- Crafts for boys: 130 photos of original and beautiful options for creating stylish and beautiful crafts
- Plasticine crafts for children - video + 135 photos of beautiful options for creating original crafts
Then tie a few red hanging threads. And already on them - whatever your imagination desires: cardboard leaves, painted cones, beads and others. The main thing to remember is that a lot is not always good.
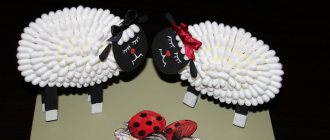
Snowmen made from cotton pads
Winter crafts for school can be made from various available materials. Cotton pads are convenient for children's creativity; they are easy to glue and easy to color.
To create a cute snowman you will need:
- three cotton pads,
- large ice cream stick,
- glue,
- a piece of felt for a headdress,
- beads for decoration,
- colored yarn or scrap for a scarf.
Operating procedure.
- Cut out three cardboard circles and stick cotton pads on them. Glue the blanks onto the stick one by one, starting from the bottom.
- Decorate the character's face using beads, plasticine or colored paper.
- Cut and glue a hat or stylized felt bucket.
- Tie a bright scarf to the snowman.
A funny snowman will serve as an excellent decoration for a classroom or school Christmas tree. Using cotton pads as a basis, you can make a voluminous Christmas tree or a festive cupcake from them.
Volumetric figures
If there is still time before the name day, then you can make a three-dimensional birthday figure with your own hands, which the baby can play with and move around the room.
The same cardboard is used as the basis, only this time you will need two identical parts. In addition to them, you need to prepare several cardboard strips of the desired width - these are the sides of future beauty.
You can assemble the number using masking tape or tape: to do this, glue the parts to each other one by one.
Christmas toys made from old CDs
Shiny discs that have fallen into disrepair can also be taken to school as the basis for New Year's crafts.
There are many options for designing a New Year's toy based on a disk.
Using the rounded shape of the disk, it’s easy to make figures of different animals or funny characters from the cartoon “Smeshariki”. Templates for making parts are easy to copy on the Internet.
You can glue small elements made of white paper using the quilling technique onto the surface of the disk. To make parts, you need to cut the paper into narrow ribbons and twist it into a spiral.
Using a similar technique, you can create unusual panels depicting a Christmas tree or a winter picture.
Preparation of natural materials for their further use
Nature is the best artist; she creates natural materials that, in skillful hands, turn into works of art!
Plant materials
Chestnuts
Chestnut fruits have a bright brown color and a shiny surface, so they make excellent DIY crafts from natural materials. The shell of a fresh chestnut is thin and can be easily pierced with an awl. Chestnuts are a fertile material for working with young children themselves. You can make many different pupae, animals and insects.
It is better to store in a cool place in boxes.
Acorns
Oak fruits ripen in autumn, in September-October. Acorns are collected in various shapes and sizes.
At the same time, their cups (pluses) on which they rest are collected. Pluski are very often used separately from acorns, as an independent natural material for various crafts.
Acorn pluses and balls felted from wool
How to felt even balls of wool, see Olga Skibina’s :
Acorn tops and Christmas bells
Photo frame made from plush acorns
Photo frame made from whole acorns
In addition to acorns, this topiary contains nuts, chestnuts and cones:
Acorns are stored in a damp and cool place. To make toys, it is better to use fresh acorns (overdried acorns quickly split during work).
Cones and needles
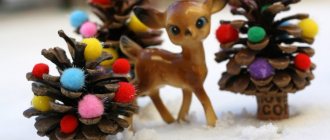
Cones are often used to imitate the torso of animals or birds, people or fictional characters. For work, it is best to use unopened cones, because they are much easier to work with.
In Nika Shvetsova’s you will see how to make these deer from twigs and cones together with your children:
And here’s how to make the cutest hedgehog from pine cones from the ChameleonArtStudio :
Penguins made of cones and wooden beads
Gnomes made of cones, wooden beads and felt
Pine cones should be collected on moist soil (this way they are better preserved), and then arranged in boxes according to type, shape, and size.
See how to make a bouquet of roses from pine cones on the channel Crafts for kindergarten and school :
MASTER CLASS ON THE TOPIC DIY autumn crafts from pine cones
Needles can be collected at any time of the year in coniferous forests near pines, spruces, and cedar. It is very often used as an addition to the making of toys: butterfly antennae, hedgehog needles, doll skirts, etc. It is better to use green pine needles in your work.
Nuts
In your work you can use walnuts, hazelnuts, pine nuts, groundnuts, pistachios .
Pistachio artichoke
Pistachio topiary
mature hazelnuts together with the cap (plush), which can then be used in making toys. The nuts are dried and stored in boxes.
Hazelnut shells are hard. It is difficult to cut with a knife or pierced with an awl. Overdried nuts are difficult to work with.
Wreath of pine cones
Pine nuts are indispensable for making animal paws; they stick together well and are easily pierced.
Whole walnuts make delicious berries and fruits:
Strawberries made from walnuts
Pineapple with walnuts
And also magical New Year's decor:
the walnut shells into two halves using a knife, inserting its tip into the hole between the shells. Walnut shells are durable, they are quite easily transformed into turtles, bugs, small rodents, spiders and are even suitable for creating cute little boats!
Leaves and seeds
It is better to collect leaves in the fall, when they are especially beautiful. Leaves of oak, maple, and chestnut can be used to create all kinds of applications:
Birds made from leaves
Insects from leaves
Elephant made of leaves
The shells of these snails are made according to the principle of assembling a rose from leaves:
Examples of other leaf applications:
Wreaths made of bright leaves are the most atmospheric autumn decor!
This option for assembling a wreath is much simpler than the previous one - even children can handle it:
For long-term storage, the collected leaves are placed between paper sheets and ironed with a warm iron. Then they are laid out with old newspapers, thin cardboard and pressed down on top with a small weight.
Grass, moss, poplar fluff
Dried grass is used to connect the parts of the craft, but it is worth considering that when it dries, it becomes brittle and sometimes very sharp.
Moss is used to convey the background and image of vegetation. It sticks perfectly with any glue.
YOU WILL NEED Crafts made from poplar fluff and paintings made from plants
Bark
Tree bark varies in color, thickness, and surface structure. It can be used as a stand for making scenes, as an additional material or as the basis for a craft.
Attention! When collecting natural materials, you need to teach children to respect nature and follow the main rule of behavior: “Do no harm!”
Birch bark is birch bark, very beautiful toys and decorations are made from it.
It is advisable to collect it in spring and summer, but only from birch trees and branches that have been cut down or fallen by a storm. The removed birch bark 20-25 cm wide is cleaned of dirt, moss, and the outside is also cleaned with sandpaper. It needs to be steamed in hot water and placed under a board with a weight.
The bark should be stored in a dry and cool place.
Twigs, sticks, wooden cuts
It is best to collect twigs of pine, spruce, lilac, and dogwood. They are elastic and do not break easily when dry. They are often used in the manufacture of little animals and men as legs, necks, arms, horns, etc. (examples are given above in this article).
However, ordinary branches and sticks can also be used as an independent decorative element, while the crafts look very stylish and are incredibly easy to make:
Painted wooden sticks
Garland of wooden sticks
Dream catchers made of feathers and branches
Garland of feathers and branches
A little more patience and dexterity will be needed to make marine-themed crafts from branches and other available materials:
Branch raft
Ship made of boards and branches
Beach house and lighthouse made from painted wooden sticks
Wooden saw cuts are also often used for DIY crafts and interior decoration.
Minimalistic drawings look very interesting!
New Year's crafts from wooden cuts
The little ones can draw Santa Clauses)
And this is the work of a real master!
Photo frame or mirror frame? You decide. Channel One shares a video lesson with us :
Mineral materials
Pebbles
Stones of all shapes, colors and sizes are used to create crafts. Children especially love to collect pebbles near a river or sea, and then with the help of their parents, as well as brushes, paints and varnish, they can create various images on the pebbles.
You can store them for a very long time, after thoroughly washing and drying them. But why just store stones when the whole family can have fun playing with them?)
YOU WILL NEED IT
Miracle painting: turning a sea pebble into a cactus
For another way to apply images to river or sea stones, see the video from You Can Do It Craft . You'll be surprised how easy it is!
Shells
You can collect shells on the banks of rivers, seas, and lakes while relaxing with your children. Many of them are original in appearance, shape - oval, scallop-shaped, elongated, etc.
Boil them for a few minutes to free them from living organisms. The shells are washed with a small brush (or a toothbrush), after which they are dried and sorted by type and size. Stored at any temperature.
You can also clean shells in a solution of bleach and water at a ratio of 1:1. The top layer will disappear after a while, leaving the shell with a beautiful shiny top.
Animal figures are made from large shells.
Small shells make wonderful applications, photo frames, garlands:
Shells can be used not only as the main material, but also as additional decoration (bird wings, dog ears, flower petals, etc.)
Sand
Very accessible material that can be collected in any sandbox. It varies in structure. Before use, it must be rinsed and dried thoroughly. And then you can use it as decoration in your works:
Rules for storing natural materials
DIY crafts made from natural materials will be flawless if, after collecting, drying, and pre-processing, you properly store these natural gifts. To do this, you must adhere to certain rules.
- A dark, cool and well-ventilated area is the best place to store natural materials.
- You can buy plastic containers to store each type of material; use cardboard boxes for shoes, tea, sweets; take ordinary glass jars with a screw cap. For seeds, as for beads, it is better to have a container with many compartments.
- Dried flowers are fragile and break easily, so they are placed in a tight box or container. Petals are stored separately from flowers. Flowers with stems can be stored in a vase.
- Prepared leaves are also brittle. You can store them in large books. Also, for safety, put them in labeled candy boxes, secure them with a little tape so that they don’t accidentally open.
- The shells are placed in glass jars or plastic containers with a wide mouth to prevent them from crumbling.
Additional tools for crafts made from natural materials
To create a beautiful craft from natural materials, you will need additional tools and materials.
It can be:
- colored paper;
- cardboard;
- leather scraps;
- scraps of fabric;
- bird feathers;
- Styrofoam;
- plasticine;
- wire;
- PVA glue, “Moment”;
- gouache;
- stain;
- varnish, etc.
Paper is very often used as a complement to natural materials. Children, bending and gluing it, make the work much more interesting.
Plasticine is used to hold together individual parts of simple toys at the initial stage of work. It is not very durable, but as an addition it is often used in kindergarten and elementary school.
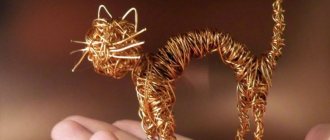
The frame of a toy and the connection of its parts are most often made from wire Copper wire with a diameter of 0.29-0.35 mm - soft, flexible and durable - is most convenient. And for the frame, wire of a larger diameter is used - 1-1.5 mm.
It is better to take thick, multi-colored threads
glue . However, in kindergarten it is better to use PVA glue.
They also use foil, pebbles, cherry pits, and bristles.
It is better to store additional material in a small box with compartments for each type of material.
The use of additional material depends on the plan, the skill of the children, and the degree of development of imagination! Offer your options, but rely more on children's intuition and desire.
It is also additionally necessary to have certain tools for making crafts from natural materials:
- knife;
- art scissors;
- awl;
- jigsaw;
- tweezers;
- pliers and wire cutters;
- sewing needles;
- brushes for glue and paints;
- a cotton cloth for wiping off glue residue.
Scissors for children should have blunt ends, small, and have rings that are comfortable for a child's hand.
The awl should be made of durable material with a handle length of about 6 cm, a diameter of about 2 cm, and the piercing part is 3.5 cm.
needle . Be sure to store it in a pincushion with a thread threaded into it.
Attention! Only adults use pliers, pliers, and drills!
To draw the outline of the cut part, you need a simple pencil . For example, a dress, hats for a doll, etc. It is better to take a soft pencil (2M).
paints in special sets.
Brushes (soft for painting, harder for glue). It is better to buy squirrel tassels (No. 4 and 6). For glue, use brushes with hard bristles.
A stack is a tool necessary for processing a surface made of clay or plasticine. The length of the stack for children is about 12 cm. You can make the stack yourself from a worn-out brush: round it on one side and sharpen it on the other.
Crafts made from salt dough
New Year's crafts for school are easy to make from salt dough.
In order to make the dough, you need to mix salt and flour in equal proportions, adding 1/2 part of water.
The result is a plastic mass, ideal for modeling.
Having rolled out the dough into an even layer, it is easy to cut out any figure from it according to the template. It could be Santa Claus, a snowman, a Christmas tree, a gnome.
The dough is dried in the open air or in the oven, then the workpiece is painted with gouache. For durability, the craft can be coated with colorless varnish.
If you roll the dough into neat sausages, then these parts will make an openwork snowflake.
Such crafts can be hung on a string and used to decorate a school Christmas tree.
It’s easy to make three-dimensional crafts from salt dough: a Christmas tree, a hedgehog, Santa Claus.
Cup "Best Dad in the World"
For such a cup you will need to print out several templates - this is the template of the cup itself and the template of the box that will play the role of a pedestal.
Next, follow the step-by-step instructions.
- First, assemble the pedestal box. Cut out the template, trace it on cardboard and cut it out. You bend the sides and, after gluing them, connect them, forming a box.
- Glue a light brown rectangle onto the finished box - this is a plate for the inscription.
- Using templates (in the form of a flower or a sun) for the cup, we draw and cut out details from thick cardboard in yellow or gold colors. We bend and glue along the fold, forming cups that we glue together with the bases. It turns out to be a cup.
- Making handles for the cup. Tightly wrap a thin strip (30x1.5 cm in size) of cardboard around the pencil, and then unfold it. You will get curled handles that need to be glued to the cup on both sides.
- All that remains is to glue the cup to the pedestal and make the inscription “To the best dad in the world.” Various sweets or something that dad will need for work or leisure are placed in the cup: an office stationery or a set of fishing hooks.
Crafts made from glue and threads
Taking bright yarn or linen cord and PVA glue, it’s easy to make interesting options for Christmas tree decorations.
In order to create a ball of thread, you will need a balloon, on which a thread soaked in glue will be wound.
After the thread has dried, the ball is pierced, and its remains are carefully removed from the craft. The ball can be decorated with beads, beads or ribbons.
A Christmas tree craft made from thread and glue for school can have any shape.
To give the desired shape, threads soaked in glue are fixed with pins on the flat surface of a disposable plastic tray. After drying, the product can be further decorated. Using this technique, you can make a snowflake or a star.
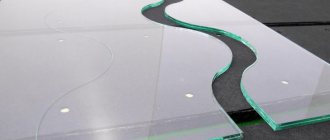
Variations of crafts on a wooden base
The cutting procedure is accompanied by the use of a standard drill, which is present in school labor rooms.
We recommend reading:
- Easter crafts: the best ideas for DIY gifts and decorations (90 photos + video)
- Autumn crafts - 100 photos of themed crafts for children's creativity. Review of the best ideas and new products to create at home
- Military crafts: 135 photos and video instructions for step-by-step implementation of military-themed crafts
The student should carefully hold the handle while moving the device along the lines of the intended pattern. The smallest details of the composition can be cut out using a thin drill.
Wood, as a natural material, gives crafts a solid appearance, so such products can become interior decoration or a gift for a loved one.
A favorite among schoolchildren are the so-called “puff” crafts, which are skillfully constructed from several layers of sawn wood, artfully stacked on top of each other. You can assemble a wooden cow or bear.
House made of paper tubes
An interesting house is made using paper tubes. To make the tubes themselves, paper or newspaper is cut into long strips, from which the tubes are twisted by winding them on a knitting needle or pencil. The edges are fixed with glue.
The log hut is formed from the resulting blanks. The roof is easy to make from cardboard.
The door and windows are cut out of paper and glued to the blank.
The house made from newspaper tubes must be painted with acrylic paint.
It’s easy to weave a basket or vase from the tubes, using a glass or jar as a basis for work.
Postcard for February 23rd in the form of a suit
A greeting card is perhaps the simplest thing that is suitable for display at school, and for congratulating dad, grandfather or older brother on Defender of the Fatherland Day. Why do we propose to design it as a men's suit? Because such a card will look unusual for such a holiday, elegant and emphasize gender. We think that all men, regardless of age, will be pleased to receive (especially from a daughter or granddaughter) just such a postcard.
You choose the color of the shirt and jacket yourself, but remember that with light jackets, the shirt should be darker and vice versa. As for the tie, mothers should tell their children that its color should match both the shirt and the jacket and not be flashy, but fashionable.
For a postcard like the one in the photo, we will need:
- colored cardboard in black and red and a sheet of white office paper;
- scissors, glue stick and hot glue;
- a simple pencil;
- 6 small black buttons and a thin ribbon for tying the card.
Bend a black sheet of cardboard on both sides - these will be the sides of the jacket.
Fold a sheet of office paper in half and inside write wishes and congratulations on the holiday to the person to whom the card is intended (it is quite possible that it is a labor or physical education teacher). Glue the piece of congratulations to the “jacket” so that the message can then be easily opened and read.
We make a collar for the shirt. Cut out a rectangle with sides 15x4 cm from white paper, bend the edges of the rectangle towards its middle to form a trapezoid and glue the collar to the middle of a large sheet so that part of it protrudes beyond the edges of the sheet.
Cut out a tie from red cardstock. Its length should be approximately 20 cm. Glue the tie to the collar and glue the collar so that the folded sides cover part of the tie, forming the corners of the collar.
Next, decorate the jacket with buttons, which you glue to it using a glue gun or Moment glue. Cut it out of black cardboard and glue a pocket and a handkerchief made of red cardboard (two triangles) onto the jacket. Don't forget to fold back the top corners of the jacket sides.
All that remains is to tie the buttons with a ribbon (braid) to close the card.
Another very interesting version of a postcard with a moving airplane, which is suitable for a school exhibition, look at the video.
Origami
Easy-to-work paper serves as a traditional material for children's crafts. It makes excellent Christmas tree garlands and original toys.
Depending on the age of the child, you can use different techniques for working with paper.
Primary school students will enjoy making simple chains from colored paper and lanterns to decorate the school Christmas tree.
Middle school students can make crafts using the origami technique, for example, a star or an animal figurine.
You can create interesting holiday cards using the quilling technique with your own hands using glue and colored paper.
From play to new discoveries
Often, collections of outdated or non-working radio components are kept by professionals and radio electronics enthusiasts and are passed down through generations, along with passion. They can be a source of inspiration when making DIY crafts from recycled materials for school.
Multi-colored resistors, capacitors, radio tubes, wire parts of non-working computer boards, shiny holders, switches and circuit breakers - all this can become a decoration in the form of a bracelet made of resistors or a pendant from a piece of a sound card, beautifully cut and sealed at the edges. You can add technical equipment to this electronic composition in the form of sound design or LED lighting.
The habit of working with parts, the ability to handle a soldering iron and other tools can, over time, develop into a serious passion for assembling working devices, and then it’s not far from new scientific discoveries.
Crafts from waste material
Using waste material as a basis for children's creativity will help draw children's attention to the problem of environmental pollution.
Used light bulbs can be used as feedstock. You can make interesting Christmas tree decorations from them by coloring and additional decor.
Basic materials for manufacturing
Hand-made numbers corresponding to the age of the birthday person will help you decorate a children's or teenager's party.
Every child will be happy with such a decoration, if it is made in accordance with his taste and will help add an interesting atmosphere to the holiday.
Volumetric and flat numbers that decorate a room, an open gazebo or even a cake can be made from different materials.
For crafts, you can choose wire, from which you can easily make a durable frame, wool yarn for elegant crafts, or small balloons.
But the simplest and most convenient material to process is cardboard; it is easy to cut and glue, holding all the elements together.
Before implementing the project, you can prepare several sheets of thick beer cardboard and use unnecessary packaging from various purchases.
It is best to work with corrugated material; for this, you can stock up boxes in advance or purchase them at the post office and in stores.
The cardboard should be thick, with several main layers and small inserts of corrugated paper, then the numbers will retain their shape for a long time.
Santa Claus from a light bulb
It’s easy to use a regular incandescent lamp to create a New Year’s craft.
To work you need to prepare:
- salt dough or plasticine,
- light bulb
- paints,
- brush,
- lace,
- glue.
Operating procedure.
- Form the head and hands of Santa Claus from the modeling mixture and glue to the base light bulb.
- Make a hole in the top for the lace.
- Paint the workpiece with gouache or acrylic paint.
- After drying, hang it on a string.
Binoculars
You will need: yellow cellophane, scissors, tape, black paint, brush, green and black paper, glue, rubber band, wine cork, string or elastic band.
Master Class
- Cut out 2 circles of yellow cellophane and tape them to the circumference of the sleeves as binocular lenses.
- Paint the circumference of the wine cork with black paint and cover it with green paper.
- Cover the bushings with green paper and glue the black stripes as shown in the image.
- Glue the bushings together and secure with a rubber band. After a while, remove the rubber band.
- Glue the taped cork between the bushings.
- Prepare an elastic band or rope of the required length, make a hole in the side of the bushings and secure the elastic band.
The binoculars are ready!
Crafts for school anniversary
A school holiday dedicated to the anniversary of an educational institution cannot do without themed crafts.
As a gift to your favorite school, you can make a beautiful postcard with your own hands, using the quilling technique.
Do-it-yourself school day crafts can also be a group effort. For example, a colorful collage reflecting the theme of school everyday life or a large A3 calendar in a beautiful frame.
A memorable gift will be an album or wall newspaper with a selection of poems and photographs of students, as well as a bright congratulatory poster.
Crafts for school involve a lot of creative ideas and the use of different techniques to make them. The active participation of children in the creative process will serve as a good basis for their diversified development.
Do it yourself or buy it?
Choose the suggested decoration or create it yourself? It depends on financial capabilities, free time, desire and imagination.
People who specialize in making birthday numbers usually have catalogs of their work. Sometimes you can order something new by discussing your idea with the master. Finished products are most often made from inflatable balloons, toys and sweets. In this case, not only the materials are paid, but also the work of the craftsman.
If you want to make numbers for a children's party yourself, you just need to purchase the necessary materials or select from what you have at home.
Photos of the best crafts for school
Attaching decor based on numbers
All that remains is to carefully glue the three-dimensional elements onto the front part of the number. You need to carefully fluff the petals so that there are no voids.
- The sides of the figure can also be decorated like the front side. Or you can simply cover it with paper of a suitable shade. Or choose a contrasting color. The decoration of the entire number looks very aesthetically pleasing.
- Sometimes someone prefers to leave the reverse side just smooth. Some people prefer to add a loop for ease of transportation; perhaps it will also be useful for attaching the number to the wall. The whole figure is in the decor or not completely, everyone decides for themselves at their own discretion.
In any case, you should try to create as much uniform volume as possible on the front surface of the holiday number.
The approach is always individual when making such jewelry. You can attach butterflies on top of the finished volumetric figure. Or apply glitter in places. Some people like to add beads.
Bows and crowns for girls are also relevant. And for boys, small figures of cars, perhaps even a character from their favorite cartoon.
Complete freedom of choice for craftswomen, this is the beauty of creative needlework.
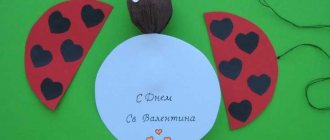
Making crafts for kindergarten with children
With the kids, first of all, you can make all kinds of drawings for this international day. Use something unusual, like drawing with crumpled paper or a cotton ball.
Well, for joint activities, you can give such a gift to mothers and grandmothers and place it near the group at the booths with congratulations.
We will need:
Stages of work:
1. Take a regular paper napkin, look at the diagrams from left to right. Fold it in half, then again, connect it in the center with a stapler. Then cut out a shape resembling a circle. Make small cuts along the entire diameter, and then fluff the product.
2. Cut out the shape of a bouquet from cardboard and wrap it with corrugated paper, tie a bow.
3. Make leaves and let the children glue the resulting flowers in any order.
4. This is such a wonderful and magical creation, it just looks amazing, like a real bouquet of roses.