Materials and equipment:
- Textile
- Sewing threads
- CD-DVD disc
- Cardboard
- Filler (halofiber, padding polyester)
- Ribbons
- Scissors
- Needle
- Stapler (optional)
Important! Safety instructions when working with a needle are required before work.
Step 1
Cut 2 circles from the fabric: for the bottom of the hat with a diameter of about 21-22 cm, for the top - with a diameter of 17 cm.
Step 2
We work with a large circle. Using a “forward needle” stitch, retreating 1 cm from the edge, sew. Insert the disk, tighten the thread, fasten. The bottom of the hat is ready.
Step 3
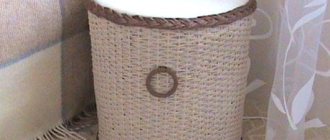
Exquisite mini beret
To make your own pincushion (hat) quickly, make it borderless. In this case, you will need to cut two circles of the same diameter from cardboard. One will be used as the base-frame of the beret hat itself, and the second is used to close the assembly (thread tie) of the upper part. The principle of operation will correspond to the one used to make a hat with a brim, only here the lower part will be the same diameter as the upper one. The decorative “bottom” is easier and faster to sew on than the brim.
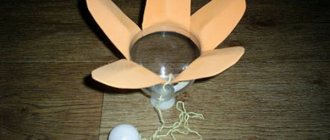
Napkin holder made from discs
You will need: three discs, a glue gun, scissors, decorative elements (beads, beads, ribbons) ...
Master Class
- Take two disks, cut off 25% of each disk in a straight line.
- Take a whole disk that will serve as the base of the napkin holder.
- Glue the cut disks on both sides to the base so that they act as holders.
- Wait until completely dry.
- Decorate to your taste.
I recommend watching the video master class!
DIY / DIY CD napkin holder
Varieties of pincushion hats
The hat that is described in the master class has a crown and brim, that is, this is the most traditional shape. It looks original if decorated with ribbons or flowers. This hat looks more like a cylinder, because... the crown is limited by the smooth edges of a plastic jar. You can make the top of the cap flatter. You don't need a plastic box for this. We baste the prepared circle of fabric along the edge and do not pull the thread all the way. Through the hole we fill it tightly with holofiber or padding polyester. We tighten the thread, but not all the way. Next we sew it to the base - the brim of the hat.
But you can make a version of a hat with a visor, a kind of baseball cap. You can get such a pincushion cap by moving the crown to the edge of the field. It will look very original if made from denim, canvas or linen. It's a good idea to decorate it with labels. Experiment, find new ideas.
A more complex version of the pincushion hat suggests making the upper part of the crown from a different number of wedges. For example, you can make 6 wedges, three in different colors. Can be made from four wedges. In this case, a plastic jar is not needed. And the wedges should be somewhat elongated downwards. Having stitched them together, we assemble the bottom of the upper part, as in the master class, with a thread and a needle and fill it with filler. Next we decorate.
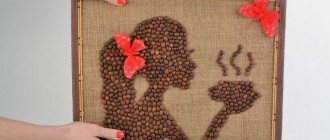
Photo frame from disk
You will need: disk, photo, threads, glue, decorative elements (beads, beads, ribbons) ...
Master Class
- Make a decoration from threads or ribbons, folding them several times.
- Glue the decoration to the disk.
- Cut the photo into a disk shape.
- Glue it to the disk.
- Decorate to your taste and hang it in the right place.
Let's consider another option for creating a photo frame from disks!
Decorating the product
We looked at several options for making a do-it-yourself pincushion hat. The product will look beautiful if it is sewn carefully, but the whole effect lies in the decoration. One of the simple decoration options that can be used is a satin ribbon, which just needs to be sewn at the junction of the crown and the brim. The ribbon can be a contrasting color or in the same tone, slightly shading the top and bottom. You can add braid or lace on top of the satin ribbon.
If the top and brim are made of fabrics of different colors or different textures, the ribbon can play with one of the colors or be contrasting. It all depends on your taste, and it would be important to know the character of the person for whom the gift is being prepared, taking into account his color preferences.
A pincushion hat will look beautiful if you make a decorative bow. It can be made from satin ribbon, or you can use all kinds of decorative flowers, twigs, and beads. If a pincushion hat or miniature beret is made of a single-color fabric, they can be decorated with bead embroidery or appliqué on the sides of the crown and along the brim (if we are talking about a hat). Every needlewoman who knows how to work with a needle and scissors, choosing original material and decorative finishing, will make a wonderful gift with her own hands - a pincushion hat.
We sew a pincushion hat
This master class is for those who love to sew. For those who like cute little things on their desktop, and who love the combination of beauty and practicality.
At the Crafts Fair there are many different master classes on making needle beds. I want to make my contribution. I’ll say right away that the idea is not mine, I saw such a pincushion on the vastness of the World Wide Web and fell in love. For the Spring Festival I made several such souvenirs as a gift for my beloved girls. Shall we begin?
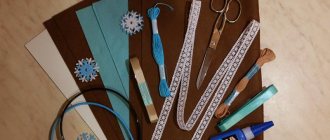
For work you need basic and auxiliary materials. The main ones are fabric, cardboard (any cardboard, I took the cover of a regular notebook), padding polyester or padding polyester, Moment Crystal or Gel transparent glue, scissors, thread, compass, lace or ribbon for finishing.
Let's start with the finishing. From organza we cut out circles for the flowers that we will use to decorate the hat. In my version there will be three flowers with five layers of organza. I cut out 9 larger circles and 6 smaller circles. From a satin ribbon (ribbon from a gift box of chocolates - don’t throw away a good thing, everything goes into use) I randomly cut out three diamond shapes for future leaves.
We process the edges of the blanks over a candle or lighter and collect flowers in five layers each. We sew the middle with threads, decorate with beads and a larger central bead.
I decided to tint the central bead green and lightly brushed white acrylic over the stamens.
Now that we're done with the decor, let's move on to the actual pincushion.
Cut out a circle from cardboard for the brim of the hat. I simply outlined a coffee saucer 11cm in diameter. From the same cardboard I cut out a strip 3.5 cm wide and 20 cm long for the crown of the hat.
We cut out a circle of fabric twice as large in diameter as the cardboard blank. We assemble the edges into an assembly and cover the cardboard circle, securing it with a drop of glue or a piece of double-sided tape. Glue a strip of cardboard into a ring. We cut out a circle of fabric with a diameter larger than the top of the resulting ring by 2 cm. We make radial cuts and fix the fabric top of the crown with glue.
Now the crown itself, that is, the ring. Cut out a strip of fabric equal to the circumference of the crown and 2 cm wider than the height. I got 5.5 cm. Fold the top edge 1 cm with a simple basting. We fix it around the ring with invisible stitches at the very top, and bend the bottom and glue the fabric inside.
We fill the improvised “box” with padding polyester quite tightly.
We turn the workpiece over onto a circle, holding the padding polyester with our hand, and secure it with pins to the brim of the hat.
We sew the crown to the brim of the hat with invisible stitches, decorate with satin ribbon and previously prepared flowers. All! Our pincushion is ready.
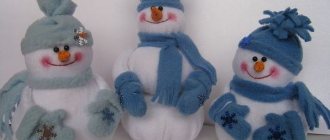
And I made these pincushions for the Spring Festival for my needlecraft girls:
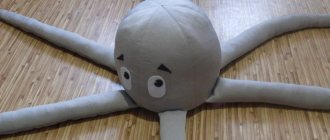
Disc fish
You will need: disk, colored cardboard, scissors, glue, markers, plasticine.
Master Class
- Draw a mouth, fins and tail of a fish on a piece of cardboard.
- Cut out the pieces.
- Glue the fish parts onto the disk.
- Cover the disk with plasticine using the pressing method.
- Draw the eye of the fish on white cardboard.
- Cut it out.
- Attach it to plasticine.
- Make eyelashes from plasticine.
Gift idea
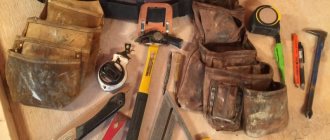
Every housewife (she is a seamstress, a knitter, or just a needlewoman who loves to make things with her own hands) has all kinds of tools at home. And it consists of all sorts of little things and accessories that are so necessary in work. There are all kinds of organizers for handicrafts with drawers, pockets, and compartments on sale. A very convenient thing, but not for needles and pins. It is better for them to have pincushions that will always be at hand. Typically, you can make a hat pincushion with your own hands quite quickly. With some imagination and creative thinking, you can get a unique result. It takes a maximum of an hour and a half to make a needle bed, if, of course, all the necessary material is available.
Candlestick made of disk and shells
You will need: a disk, shells, pebbles, a glue gun or instant glue.
Master Class
- Take the disc.
- Glue shells and pebbles to the shiny side of the disk.
- Leave room for a candle in the center.
I recommend watching the video master class!
5 IDEAS for DIY CD crafts
DIY pincushion: patterns
A hat is the simplest and safest option for such a functional item. It’s easy to sew this souvenir without a template at all. It is enough to simply cut out a circle according to the shape of a blank, for example an CD, from which a three-dimensional object will be formed in the future due to assembly. This option was discussed step by step above.
If you want to sew the brim and crown from several multi-colored parts, it is better to first draw the patterns on paper. The basis will again be circles, and then divide them into the required number of elements of any size and shape.
The third option, when you definitely can’t do without a pattern, is to form the volumetric part of the hat not by assembling it with a thread, but using several elements (from two, to six or eight).
Each detail will look like a petal cut off from one edge. For this option, it is better to take a ready-made pattern, although you can build it yourself if you haven’t found a sample with the appropriate number of parts or their proportions.
Hot stand made from a disk using decoupage technique
Decoupage is a method of decorating objects.
You will need: a disk, a napkin with a pattern, scissors, PVA glue, varnish, a sheet of flexi (so that the stand does not slide on the table).
Master Class
- Peel off the top layer of the napkin.
- Apply PVA glue to the surface of the disc.
- Glue the napkin. (If wrinkles have formed, smooth them out with a cotton pad).
- Cut a disc-shaped circle from a sheet of flexi paper.
- Glue the circle of flexi on the other side of the disk.
- Apply varnish and wait until completely dry.
I recommend watching the video master class!
Decoupage discs
How to make a donut pincushion?
- Of course, it can be made from any material, but it is from felt that this pincushion will look very realistic!
- Take a disk and cut out an outer and inner circle on it in 3 parts (2 for the base and 1 for the glaze).
- Make pink frosting with a slightly larger inner cutout and rounded edges.
- We went over all the details with an overcast stitch. Although the felt does not fray, it will look much more attractive.
- Using multi-colored threads, we run wide stitches across the pink felt, creating shavings.
- We pass a connecting seam between the stitches to sweep the parts together.
- Fill with padding polyester and close the circle completely!
Complex option
When you have enough time and you know how to sew, you can make a beautiful pincushion with your own hands if you make a hat whose crown is made of separate parts resembling petals in shape.
Typically, the upper part of the product is made of six elements. They can be cut from the same material, but alternating contrasting tones or simply different in shade looks much more impressive.
The operating principle in this case will be as follows:
- Cut out the crown piece from paper.
- Cut out three petals from two types of fabric.
- You begin to sew sequentially adjacent ones on the wrong side. Use machine stitching or hand stitching.
- Turn the product inside out and put in the filler.
- The fields or just the base (lower part) are done in any way described above.