We decide on the design and construction of the product
Anyone can make an ottoman with their own hands, regardless of skill level. Some of the available ones will be models made from plastic bottles or tires. With a little more effort, you can make a pouf from boards. And if you have carpentry skills, you can easily make a wooden pouf with drawers. Having experience in cutting and sewing, you can create a unique product of any shape and model.
According to the instructions, you will receive a high-quality, original piece of furniture that will serve you for a long time.
Ball segment pattern generator.
Very useful program!
Enter the desired radius of the ball and the number of segments and press the Generate button. You paste the resulting image into Word, for example, and print it.
Program here
Balls provide a huge scope for creativity! You can sew multi-colored balls for your baby and fill them with different materials - rustling or beads, and the balls themselves can be sewn from materials of different textures. You can make educational toys for kids by sewing beads, loops and laces to the balls.
Various soft toys are sewn based on the “ball” shape.
Balls are also decorated with embroidery, braid and other materials when making Christmas tree decorations.
Have fun creating!!!
hobby-country.ru
Photos of crafts from scrap materials for the garden
In conclusion, we can say that from such simple materials as a bottle, wood or old tires, you can make real works of art. The main thing is that this does not require a lot of money, only our imagination and a couple of unnecessary things. Let's see a photo of what else can be made for a dacha from various scrap materials - you can use not only the most popular ones, but also polystyrene foam, metal, old dishes, shoes and clothes, unnecessary furniture, records and CDs and other unnecessary things.
Garden figurines from scrap materials
Well, here you can have a blast, because there are no limits to your imagination. You can make entire sketches on the theme of your favorite animals or cartoon characters.
To implement the idea we will need one of the materials. It could be plaster, foam, clay, or something like that. We choose our favorite animal and begin to sculpt it from the material. When the character is ready, you can paint it and secure it with clear varnish.
Such figures actually cost very well in specialized stores. And this way we will not only save money, but also get real pleasure from work. The work may seem quite complicated, but when you take on it, believe that everything is far from what it seems at first glance.
Baby signets
You can make stamps and seals from a kitchen sponge. They cut out a certain shape, dip it in a plate with gouache and apply it to the product. For example, for coloring eggs for Easter.
Another option: draw a tree with branches and leaves on a sheet of paper. In order not to waste time drawing fruits, you can make a template, seal or stamp. Cut out an apple or pear from a foam sponge, dip it in paint, and in a few minutes the tree will be covered with growing fruits.
By turning on your imagination, your child will be able, with the help of adults, to come up with a lot of options for using stamps. These could be shrubs with raspberries, watermelons growing in a melon patch, mushrooms in the forest.
Made from silicone sealant
Making squishies with your own hands from silicone sealant, you can feel like a real sculptor.
Wear rubber gloves. Take a tube of silicone sealant. Squeeze some of the contents onto a flat surface. Sprinkle the silicone with dry starch. Now you will need to knead the dough from these two ingredients. When it reaches the desired consistency, mold it into a figure.
Color your squishy with markers. Let it sit for a day to dry completely.
Advantages of crafts from scrap materials
Before we proceed directly to making our crafts, think about what advantages they have.
- A fun time for the whole family. It is not without reason that they say that a common cause unites people. That’s how it is here, having some kind of idea, you can all implement it together, and at the same time get even closer.
- Development of imagination and creative ideas. Undoubtedly, when you come up with or design something, creative thinking begins to work, which brings a lot of pleasure and useful time.
- Saving on materials, because we can use things that we already have, rather than buying new ones. It could be:
- Tree.
- Styrofoam.
- Old tires.
- Barrels.
- Plastic bottles.
- Pebbles.
- DIY crafts will make you proud of your work, and you can show them off to your friends.
This is not the entire list and it can be continued for a very long time. The main thing is to have an idea, and the materials for its implementation will definitely be found.
Door mats
Rugs are placed at the entrance to a house or apartment so that they trap dust, dirt and water, which spoil floor coverings. Therefore, they must be made of durable materials that are not afraid of moisture and are easy to clean. Of course, the previous options are not suitable for this purpose. Therefore, we will consider other options.
Leather
You can make a door mat from old leather belts. They are quite thick and strong, so they will last a long time.
There are two manufacturing methods: stitching and gluing to the base. Let us first describe the second method.
Step 1. We collect all the old belts, lay them out next to each other and figure out what size fabric can be made from them.
Old belts
Step 2. Prepare the base for the rug. This can be thick fabric, a ready-made synthetic rug, a piece of rubber or even thin plywood. We cut off the buckles from the belts.
Cut off buckle
Step 3. Come up with a composition. The belts can be glued in even rows or cut into pieces to create an ornament, a mosaic canvas.
Laying out the belts
Step 4. Having previously degreased the underside of each leather element, apply superglue to it and press it to the base according to the composition diagram. If excess glue appears, it must be removed immediately with a cloth.
Applying glue
We wait for the glue to dry and begin to use the new rug.
Rug made of belts
Another manufacturing method is more labor-intensive, but it does not require a base, and the rug will be lighter and more flexible.
After aligning the straps along the length, holes are made at the edges of each with an awl every 1.5-2 cm. The straps are sewn along them with strong twine.
Another option for a rug made from belts
Alternatively, instead of firmware, you can use fastening with metal brackets.
Rug made of straps connected by staples
Instead of belts or together with them, other leather products can also take part in creating the rug. For example, labels from jeans.
Leather label rug
From the rope
For those who have mastered making a rug from a fabric braid, this job will be even easier to handle. Because you don’t need to weave anything - you just need to twist a thick rope or rope into a spiral.
Rope rug
The spiral turns can be stitched or glued with silicone glue using a mounting gun. Then all that remains is to cut out the base from felt to the size of the resulting circle and glue them together.
Rope mat base
From the hoses
Old cracked watering hoses are a real scourge for summer residents. They cannot be burned or thrown into compost, and they take up a lot of space. So why not use them for cleaning dirty shoes by making a ribbed mat and placing it in front of the entrance to the house?
Garden hose mat
The manufacturing principle is still the same: sections of hoses are simply glued to the base. True, it will take a long time to glue, since after gluing each part needs to be fixed with something heavy and wait for the glue to harden.
Such a rug can be easily cleaned of dirt with a stream of water from a whole hose.
Advice. It is not necessary to bend the hoses in an arc. They can be cut into pieces of equal length and made into a rectangular ribbed sheet.
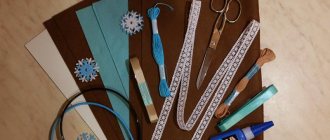
How to make a soft bunny with your own hands
Shot: @Isa's World / YouTube
What do you need
- Thick cardboard;
- compass;
- ruler;
- scissors;
- brown, gray, white or black thick yarn;
- gray, beige or white felt;
- pink felt;
- glue gun;
- white pompom;
- black beads;
- fishing line;
- pink bead.
How to make a toy
From cardboard, cut out two circles with a diameter of 10 cm with a round hole in the middle with a diameter of 3.5 cm. And two more circles with a diameter of 8 cm with the same hole in the center.
Shot: @Isa's World / YouTube
Place identical pieces together. Make a cut and remove a small piece of cardboard as shown in the photo.
Shot: @Isa's World / YouTube
Wrap the workpiece with yarn, slightly short of the edges of the cut.
Shot: @Isa's World / YouTube
Cut the thread and hide it. Cut the yarn in a circle between the two cardboard pieces.
Shot: @Isa's World / YouTube
Pass a new piece of yarn between the same parts and tie the threads in the center. Remove the cardboard and trim the pom pom with scissors. Using another piece, make a second pompom.
Shot: @Isa's World / YouTube
Fold gray, white or beige felt in half and cut out two identical pieces in the shape of long ears. Cut out two smaller pieces of the same size from pink felt. Glue the small pieces onto the larger ones.
Shot: @Isa's World / YouTube
Coat the bottom of the ears with glue and fold them in half. Glue the pompoms together. Glue a small white pompom to the body. You can buy ready-made or make it yourself. Glue the ears to the top of the head.
Shot: @Isa's World / YouTube
Make eyes from black beads. Wrap the fishing line several times around a small long piece of paper. Carefully remove the line and trim it along the edges. Thread into a pink bead and tie. Glue the resulting nose with a mustache to the hare's head.
Children's applications
Making applications gives the child a lot of positive emotions, develops fine motor skills and thinking, and promotes emotional development.
"Chicken on the Lawn"
To create creative work, first take cardboard and draw a chicken on it. At the same time, you can ask the baby a question about what he knows about chicks. Grass, flowers, a flying dragonfly and a butterfly are drawn nearby.
To work you need to prepare:
- Floral sponges;
- sharp scissors;
- black marker;
- PVA glue.
Preparation method:
- Cut the sponges into small pieces. More complex elements imitating butterfly wings and a chicken's nose are recommended for parents. The child can make light elements independently. From the prepared pieces a craft from a floral sponge will be created.
- The painted surface of the chicken is coated with PVA glue.
- First, glue the nose, then paste over its silhouette lines on paper. After this, you can fill the chicken figure with the remaining pieces of yellow foam rubber.
- Glue the chick's paws and eyes.
- The dragonfly and grass with flowers are decorated in the same way.
- When gluing a butterfly figure, first glue the wings and then the body.
The application is ready. It does not take much time, but it develops perseverance and accuracy in the child.
Damage to a foam mattress
Is such a mattress harmful to human health? Foam rubber is made from synthetic components and has low orthopedic characteristics. The foam rubber of the mattress is uncomfortable for sleeping and night rest. This filler releases chemicals in small quantities. They are dangerous and harmful to health.
The filler does not withstand direct sunlight, its structure is susceptible to moisture
Silicone squishies (silicone sealant)
First way
Necessary materials:
- silicone sealant;
- sunflower oil;
- yellow, orange and brown paint;
- sponge.
How to do:
- We will make our own squishies in the form of a fried egg. Pour about 150-200 ml of oil into a deep plate. Squeeze out a little silicone there and knead the sealant with your hands until it becomes like plasticine. We repeat the procedure. You should get two silicone balls.
- We lay one of them out in a layer, imitating the white of a scrambled egg, and press a hole in the middle for the yolk. Let the silicone dry a little. After a couple of hours, use a sponge to paint the future yolk and give the edges of the white a brown tint. It will be more realistic.
- All that remains is to place the yolk in the recess and let the sealant dry completely.
Second way
Necessary materials:
- silicone sealant;
- starch;
- markers.
How to do:
- Let's make a unicorn head. Pour starch into a plate. We put the required amount of sealant on top and make a head - give the figure a round shape, use our fingers to form a horn, ears and nose.
- Let the head dry for about an hour. Then you can color the unicorn with markers. Allow the sealant to dry completely - and the squishy is ready!
Doll furniture
Little princesses love to play with dolls. Every girl probably has a big house for them with all the attributes.
As an addition, you can make furniture from kitchen sponges. The shape of the ornamental material is ideal for creating toy sofas, tables, armchairs, and cribs.
They can be connected to each other even without special support made of cardboard or wood. It will be enough to sew a furniture cover.
Cushions in the form of rolls are created by cutting out the shape of an elongated oval on a sponge and cutting it out. The furniture will last a long time, and the costs, unlike the purchased version of children's furniture, will be minimal.
Economical option
Polyurethane foam from the standard line with a density of 25 kg/m3 (st25) is rightfully considered the most economical and most suitable for handmade creativity. This is both soft and elastic material with a fairly high load-bearing capacity, from which you can make anything: from life-size dolls to soft toys. The main thing is to choose sheets of suitable thickness. And since the line of standard foams of the st25 brand includes foam rubber with a thickness of 10 to 200 mm, buying the necessary material will not be difficult.
Colored balls
To create balls, you need to prepare several multi-colored foam sponges and nylon threads for tying together the parts. Foam rubber products are cut into many strips.
Then, having mixed them into a colorful assortment, they begin to form balls. Lay out 5 strips in two rows, mark the center and connect with threads.
The good thing about balls is that a child can swim with them and play in the room without fear of breaking a window.